Love this? Save it for later!
Share the inspiration with your friends
“I was halfway through unwrapping a bag of strawberries when my phone buzzed—it was a last-minute text from my niece, reminding me about her graduation party in just two days,” I remember thinking. Honestly, I hadn’t planned ahead for a fancy treat, and running to the store felt like a hassle. But then, as I stared at those fresh, ruby-red strawberries, an idea hit me: why not turn them into little graduation hats? It sounded quirky, a bit ambitious, and honestly, a fun challenge to pull off in a pinch.
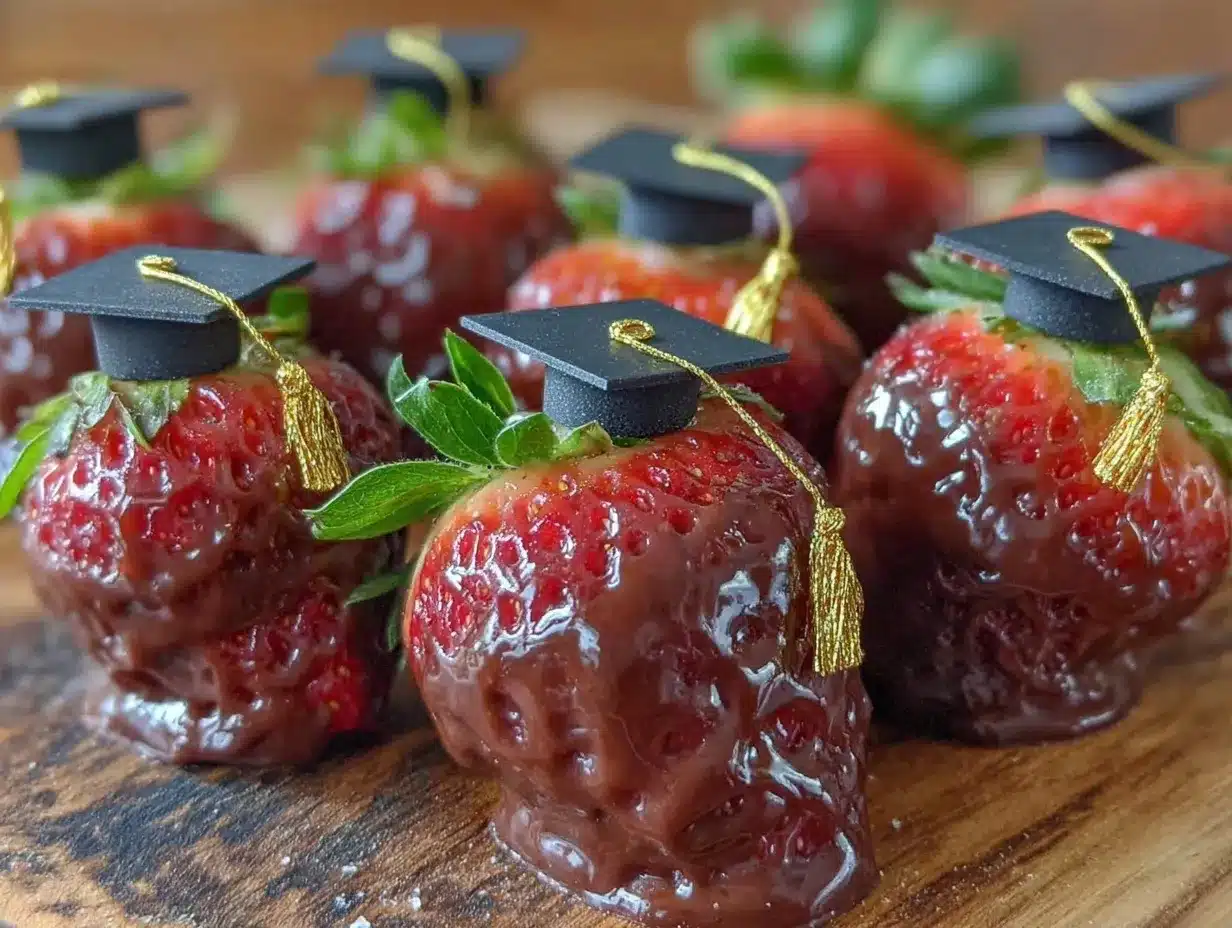
The kitchen quickly became a flurry of melted chocolate, careful assembly, and a few giggles when a cap slipped off mid-drying. You know that feeling when something you’re making looks a little messy at first but turns out way cuter than expected? That’s exactly how these Perfect Graduation Cap Chocolate Covered Strawberries came to be—a last-minute, sweet surprise that stole the show.
Maybe you’ve been there, scrambling to create a memorable dish for a celebration without the luxury of time. Let me tell you, these charming treats are as delightful to make as they are to eat. They bring just the right amount of festive flair without needing a degree in baking. Plus, they’re a great way to celebrate the graduate in style, with a personal touch that’s way better than anything store-bought.
Why You’ll Love This Recipe
After making these Perfect Graduation Cap Chocolate Covered Strawberries a handful of times, I can honestly say they’re a total crowd-pleaser. Whether you’re a seasoned baker or just someone who loves a simple kitchen project, this recipe has something for everyone:
- Quick & Easy: The whole process takes under 45 minutes, making it perfect for last-minute party prep or spontaneous celebrations.
- Simple Ingredients: No fancy or hard-to-find items here—just fresh strawberries, chocolate, and a few small decorations like candy melts or sprinkles.
- Perfect for Graduation Parties: These treats scream celebration with their clever cap design—great for impressing friends, family, and especially the graduate.
- Crowd-Pleaser: I’ve seen kids and adults alike go back for seconds, drawn in by the combination of sweet chocolate and juicy strawberry.
- Unbelievably Delicious: The silky chocolate coating perfectly complements the fresh, tart strawberry inside—comfort food meets festive fun.
This recipe isn’t just about slapping chocolate on fruit; it’s about creating a playful, personalized gift that makes any graduation party feel extra special. The trick is in the little details, like the perfectly cut square “cap” and the tiny tassel made from a simple candy piece. It’s those touches that make these strawberries more than just a snack—they’re a celebration you can hold in your hand.
What Ingredients You Will Need
This recipe uses simple, wholesome ingredients to deliver bold flavor and satisfying texture without the fuss. Most of these are pantry staples or fresh produce you can grab easily. Here’s the breakdown:
- Fresh Strawberries – about 24 medium-sized, firm and ripe (look for bright red with fresh green caps). I recommend picking strawberries from your local farmers market if possible—they tend to be juicier and sweeter than grocery store ones.
- Dark or Semi-Sweet Chocolate – 8 oz (225 g), chopped or chocolate chips (I like Ghirardelli for smooth melting)
- White Chocolate or Candy Melts – 4 oz (115 g), for decorating the tassel and details (Wilton candy melts work great)
- Black Fondant or Licorice Strips – small amount for the graduation cap band (optional, but adds a nice touch)
- Edible Gold or Colored Sprinkles – for the tassel decoration (choose a small, fine sprinkle for the best effect)
- Toothpicks or Small Skewers – for assembling and decorating
- Wax Paper or Parchment Paper – to place the strawberries on while they set
If you want to make dairy-free versions, swap the chocolate for a high-quality dairy-free brand like Enjoy Life. For a gluten-free party, rest assured all these ingredients are naturally gluten-free (just double-check your sprinkles). In summer, you could swap strawberries for fresh cherries or blackberries for a different look.
Equipment Needed
- Double Boiler or Heatproof Bowl: Ideal for melting chocolate gently without burning. If you don’t have one, a microwave-safe bowl works fine—just melt in short bursts and stir.
- Baking Sheet: Lined with wax paper or parchment to place dipped strawberries while chocolate sets.
- Small Sharp Knife: For cutting the chocolate squares that become the graduation caps.
- Toothpicks or Tweezers: Helpful for placing tiny decorations like tassels or bands precisely.
- Cooling Rack (Optional): Useful if you want to let excess chocolate drip off before placing strawberries on the paper.
Honestly, I’ve made these with just a microwave and a knife on a cutting board when I needed to, so no fancy tools are absolutely necessary. If you plan on making these often, investing in a good silicone spatula and a set of candy decorating tools can be a game-changer.
Preparation Method
- Wash and Dry Strawberries (10 minutes): Gently rinse strawberries under cold water and pat dry thoroughly with paper towels. Any moisture left can cause chocolate to seize up, so make sure they’re completely dry.
- Melt Dark or Semi-Sweet Chocolate (5-7 minutes): Use a double boiler or microwave in 30-second intervals, stirring between each until smooth. The chocolate should be silky and glossy with no lumps.
- Dip Strawberries (10 minutes): Hold each strawberry by the stem or use a toothpick, dip into melted chocolate covering about two-thirds of the berry, and gently shake off excess. Place on the lined baking sheet.
- Prepare the Graduation Caps (10 minutes): While dipped strawberries start to set, melt white chocolate or candy melts in a separate bowl. Pour melted dark chocolate onto parchment and quickly spread into thin, even squares about 1.5 inches (4 cm) wide using an offset spatula or back of a spoon. Let these harden completely, then carefully cut or break into neat squares if not already.
- Assemble Caps and Tassels (15 minutes): Using a dab of melted chocolate as “glue,” attach one chocolate square flat on top of each dipped strawberry to mimic the graduation cap. For tassels, use a small dot of melted white chocolate and sprinkle edible gold or colored sprinkles on one corner of the cap. If you have black fondant or candy licorice, cut thin strips to place around the edge of the cap as the band.
- Final Setting (15-20 minutes): Place the assembled strawberries in the refrigerator for about 15-20 minutes to let the chocolate fully harden and decorations set firmly.
Keep an eye on the chocolate squares while spreading—they set fast, so move quickly! If you find the chocolate caps cracking, try melting and tempering the chocolate a little slower next time. Also, don’t rush drying; the chocolate needs to be fully firm before moving the strawberries, or the caps might slip off.
Cooking Tips & Techniques
Making chocolate-covered strawberries sounds easy, but a few tricks save you from frustration. Here’s what I’ve learned after a few messy tries:
- Dry Strawberries Thoroughly: Honestly, wet berries are the #1 reason chocolate seizes or won’t stick properly. Pat each berry dry—sometimes twice if needed.
- Use Room Temperature Strawberries: Cold berries straight from the fridge cause chocolate to harden unevenly. Let them sit out for about 10 minutes before dipping.
- Chocolate Temperature Matters: Chocolate melts best between 110°F and 115°F (43°C – 46°C). If it’s too hot, it can burn; too cool and it won’t coat smoothly.
- Work Quickly With Caps: The chocolate squares set fast. Spread thinly and cut before it fully hardens or you’ll break them.
- Practice Patience: Let each stage set completely—rushing means caps might slide off or decorations won’t hold.
- Multitask Wisely: Melt your chocolate while washing and drying berries to save time.
One time, I forgot to dry the strawberries well enough and ended up with a chocolate puddle instead of a coating. Learned my lesson the hard way! Also, using toothpicks to hold berries while dipping helps keep your fingers clean and chocolate smooth.
Variations & Adaptations
These graduation cap strawberries are versatile and easy to tweak for different tastes and occasions:
- Flavor Variations: Swap dark chocolate for milk or white chocolate for a sweeter, creamier taste. You can also drizzle contrasting chocolate over the caps for a marbled look.
- Dietary Adaptations: Use vegan or dairy-free chocolate to keep it plant-based. Opt for gluten-free sprinkles or edible glitter to keep it allergen-friendly.
- Seasonal Twists: For spring or summer graduations, add a tiny edible flower on the cap’s corner or use fresh mint leaves as a garnish.
- Alternate Fruit: Try blackberries or large grapes for a different texture and color combo.
- Personalized Touch: I once made a batch with the graduate’s school colors by coloring white chocolate with food-safe gel dyes and matching sprinkles—super fun to customize!
Serving & Storage Suggestions
Serve these Perfect Graduation Cap Chocolate Covered Strawberries slightly chilled but not cold—about 60-65°F (15-18°C) brings out the best flavor and texture. Arrange them on a festive platter with a sprinkle of confetti or edible glitter for extra party vibes.
They pair wonderfully with sparkling lemonade, iced tea, or even a glass of bubbly for the adults. For a full graduation party spread, consider mixing these with crispy garlic chicken sliders or fresh garden salads.
Store leftovers in an airtight container in the refrigerator for up to 2 days. Avoid stacking them to prevent the chocolate caps from cracking. When ready to serve again, let them sit at room temperature for 10 minutes to soften slightly.
Reheat? Not really—these are best enjoyed fresh. Over time, the strawberry juice may soften the chocolate slightly, but that can add a nice melt-in-your-mouth quality if you’re not in a rush.
Nutritional Information & Benefits
Each chocolate-covered strawberry delivers a modest calorie count—about 70-90 calories depending on chocolate choice. Strawberries add a boost of vitamin C, fiber, and antioxidants, making this treat a smarter indulgence compared to heavier desserts.
Using dark chocolate adds heart-healthy flavonoids and a slightly lower sugar content, which I personally appreciate. This recipe is naturally gluten-free and can be made dairy-free with the right chocolate.
From a wellness standpoint, I enjoy these as a sweet reward that still feels light and fresh, perfect for celebrations when you want something special but not overly rich.
Conclusion
These Perfect Graduation Cap Chocolate Covered Strawberries aren’t just cute—they’re a fun, simple way to honor a big milestone. Whether you’re rushing to throw together something last minute or planning ahead to impress, this recipe offers an easy, delicious solution that feels thoughtful and festive.
Feel free to tweak the colors, chocolate types, or decorations to match your graduate’s personality or party theme. I love that every time I make these, they bring a little extra joy—both in the kitchen and at the table.
Give them a try, and don’t forget to share your own creative twists or questions in the comments below. Here’s to sweet celebrations and tasty traditions!
FAQs
How long can I store these chocolate-covered strawberries?
Store them in the refrigerator in an airtight container for up to 2 days. For best taste, enjoy within 24 hours.
Can I make these ahead of time?
Yes, but avoid making them more than a day in advance to keep strawberries fresh and chocolate crispy.
What if I don’t have fondant or licorice for the cap band?
Don’t worry! You can skip the band or use a thin strip of melted chocolate piped on instead.
Can I use frozen strawberries?
It’s best to use fresh strawberries because frozen ones release too much moisture and can make the chocolate soggy.
How do I prevent chocolate from cracking on the caps?
Make sure to spread the chocolate thinly and let it set at room temperature before cutting. Avoid rapid temperature changes like refrigerating too quickly.
Pin This Recipe!
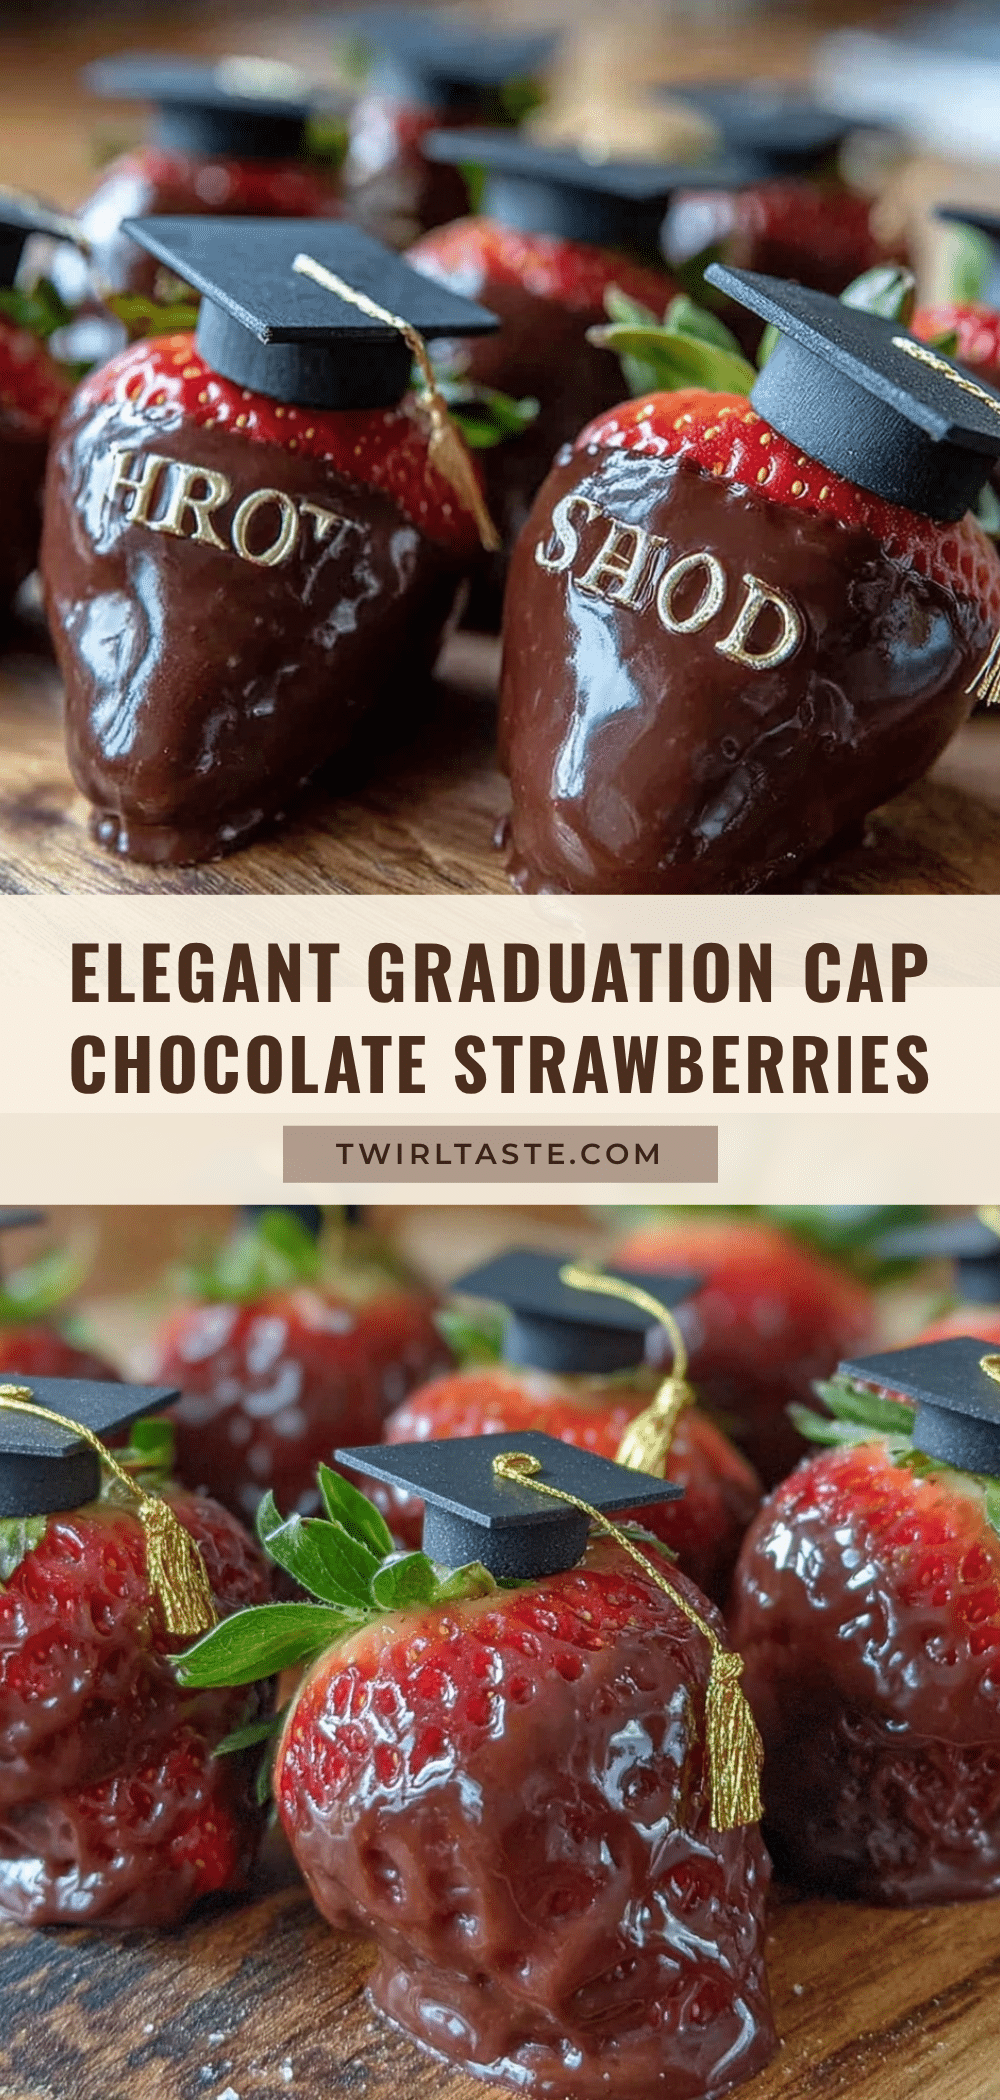
Perfect Graduation Cap Chocolate Covered Strawberries

A quick and easy recipe to create charming chocolate-covered strawberries decorated as graduation caps, perfect for last-minute party treats.
- Prep Time: 10 minutes
- Cook Time: 30 minutes
- Total Time: 40 minutes
- Yield: 24 servings 1x
- Category: Dessert
- Cuisine: American
Ingredients
- 24 medium-sized fresh strawberries, firm and ripe
- 8 oz (225 g) dark or semi-sweet chocolate, chopped or chips
- 4 oz (115 g) white chocolate or candy melts for decorating
- Black fondant or licorice strips (optional, for cap band)
- Edible gold or colored sprinkles for tassel decoration
- Toothpicks or small skewers for assembling and decorating
- Wax paper or parchment paper for setting strawberries
Instructions
- Wash and dry strawberries thoroughly, patting dry with paper towels to remove all moisture (about 10 minutes).
- Melt dark or semi-sweet chocolate using a double boiler or microwave in 30-second intervals, stirring until smooth (5-7 minutes).
- Dip each strawberry by the stem or using a toothpick into the melted chocolate, covering about two-thirds of the berry. Shake off excess chocolate and place on a lined baking sheet (10 minutes).
- Melt white chocolate or candy melts in a separate bowl. Pour melted dark chocolate onto parchment paper and spread into thin, even squares about 1.5 inches wide. Let harden completely, then cut into neat squares if needed (10 minutes).
- Attach one chocolate square on top of each dipped strawberry using a dab of melted chocolate as glue to mimic a graduation cap. Add a small dot of melted white chocolate on one corner and sprinkle edible sprinkles as tassels. Optionally, add a black fondant or licorice strip around the cap edge as a band (15 minutes).
- Place assembled strawberries in the refrigerator for 15-20 minutes to let chocolate harden and decorations set.
Notes
Dry strawberries thoroughly to prevent chocolate from seizing. Use room temperature strawberries for even coating. Work quickly when spreading chocolate squares as they set fast. Let each stage set completely to avoid caps slipping off. Store in an airtight container in the refrigerator for up to 2 days and serve slightly chilled at 60-65°F.
Nutrition
- Serving Size: 1 chocolate-covered
- Calories: 80
- Sugar: 7
- Fat: 5
- Saturated Fat: 3
- Carbohydrates: 9
- Fiber: 1
- Protein: 1
Keywords: graduation, chocolate covered strawberries, party treats, easy dessert, homemade, festive, chocolate, strawberries