Love this? Save it for later!
Share the inspiration with your friends
“I wasn’t planning on becoming a cheesecake whisperer that July Fourth,” I admitted to my friend while wiping flour off my hands one sweltering Saturday morning. The idea of making a red white and blue striped cheesecake came out of nowhere—actually, it started with a spilled bottle of blueberry syrup and a stubborn craving for something festive but not fussy. You know that feeling when you’re juggling last-minute plans and someone asks if you can bring dessert? Yeah, that was me, standing in my cluttered kitchen, staring at a half-used box of cream cheese and wondering how I could pull off something impressive without turning the oven into a war zone.
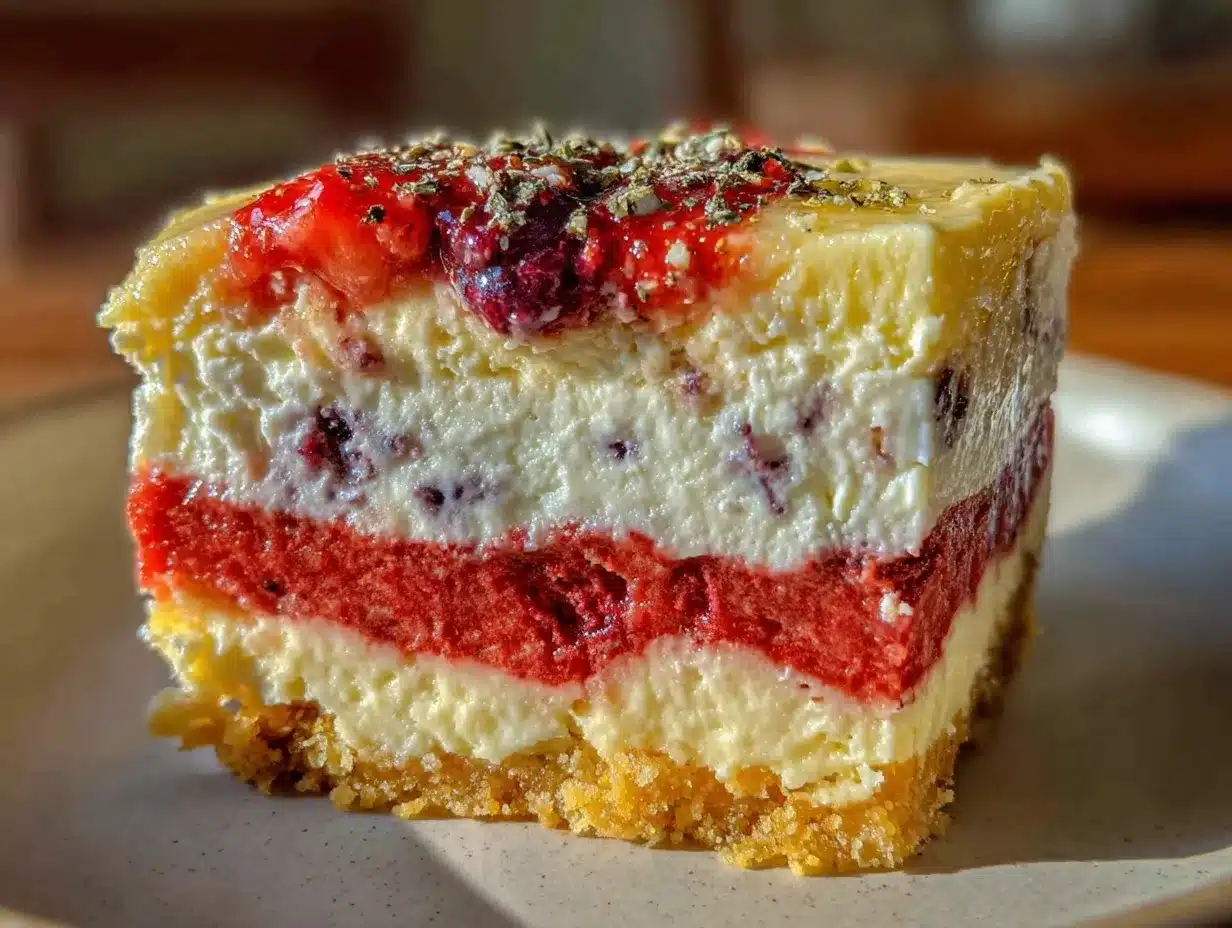
The recipe was inspired by a late-night scroll through an old recipe book I found tucked behind the spice rack in a local thrift store. It had a faded, handwritten note about celebrating the “red white and blue” in a way that felt fun and fresh. Honestly, I was skeptical at first—how do you get those perfect stripes without the whole thing turning into a messy swirl? But after a few goofy trial runs involving a cracked mixing bowl and a very patient neighbor named Jill, I nailed it. Every layer stood proud and distinct, bursting with berry flavor and creaminess.
Maybe you’ve been there—wanting a dessert that screams celebration but also tastes like a dream. This red white and blue striped cheesecake is exactly that kind of recipe. It’s bright, it’s festive, and it’s surprisingly simple once you know the tricks. Let me tell you, it’s the kind of dessert that makes you pause, close your eyes, and savor that first bite while feeling like you’re part of something special. And between you and me, it’s become my go-to patriotic treat for every summer party since that chaotic morning.
Why You’ll Love This Recipe
- Quick & Easy: Comes together in under 45 minutes, perfect for last-minute celebrations or spontaneous get-togethers.
- Simple Ingredients: Uses pantry staples and fresh berries—no need for complicated shopping trips or exotic items.
- Perfect for Patriotic Occasions: Whether it’s July Fourth, Memorial Day, or any summer BBQ, this cheesecake adds the perfect festive touch.
- Crowd-Pleaser: Kids and adults alike love the creamy texture combined with the fresh fruit flavors and vibrant colors.
- Unbelievably Delicious: The smooth, velvety layers combined with the tartness of blueberries and strawberries make every bite a delight.
This isn’t just another cheesecake recipe. The secret is in how the layers are poured carefully to keep those iconic stripes crisp and clean—no swirling or muddling of colors. Plus, I’ve tweaked the balance of sweetness and tang to make sure it’s rich but never overpowering. Honestly, it’s the kind of dessert that’ll have your guests asking for seconds without you even needing to ask.
It’s also a recipe that makes you feel good about dessert—fresh berries, creamy cheese, and a light, crumbly crust that holds everything together without being too heavy. Whether you’re impressing at a potluck or just making a cozy dinner feel special, this cheesecake brings that sense of holiday fun to your table without the fuss.
What Ingredients You Will Need
This recipe uses simple, wholesome ingredients to deliver bold flavor and satisfying texture without the fuss. Most items are pantry staples, and the fresh berries add that seasonal pop of color and taste.
- For the Crust:
- 1 ½ cups graham cracker crumbs (about 12 full sheets)
- 5 tablespoons unsalted butter, melted (I like using Kerrygold for richness)
- 2 tablespoons granulated sugar
- For the Cheesecake Filling:
- 24 ounces (680g) cream cheese, softened (Philadelphia brand is my go-to for smooth texture)
- 1 cup granulated sugar
- 1 teaspoon vanilla extract
- 3 large eggs, room temperature
- ½ cup sour cream (adds creaminess and slight tang)
- ¼ cup heavy cream (for extra silkiness)
- For the Red and Blue Layers:
- ½ cup fresh strawberries, pureed and strained for smoothness (or frozen, thawed)
- ½ cup fresh blueberries, pureed and strained (you can lightly cook them to soften)
- 2 teaspoons lemon juice (to brighten the berry purees)
- Optional: a few drops of red and blue natural food coloring if you want extra vivid stripes
If you prefer a gluten-free crust, swap graham crackers for almond flour or gluten-free cookie crumbs. And if dairy is an issue, cream cheese alternatives like vegan cream cheese work surprisingly well here, though the texture will vary a bit.
Equipment Needed
- 9-inch (23cm) springform pan – makes releasing the cheesecake a breeze
- Mixing bowls – at least three to separate the plain, red, and blue batter layers
- Electric mixer or stand mixer – essential for smooth, lump-free batter
- Fine mesh strainer or sieve – for smooth berry purees
- Spoons or small ladles – for carefully layering the batter
- Measuring cups and spoons – for precise measurements
- Rubber spatula – to scrape down the bowl and fold ingredients gently
If you don’t have a springform pan, a regular 9-inch cake pan lined with parchment works, but be extra careful when removing the cheesecake. I’ve learned the hard way that a springform pan is worth the investment—makes life so much easier! Also, a good electric mixer saves time and effort. I started with a hand mixer, but once I got a stand mixer, my cheesecake game seriously improved.
Preparation Method
- Prepare the Crust: Preheat your oven to 325°F (160°C). In a medium bowl, combine the graham cracker crumbs, melted butter, and sugar. Stir until evenly moistened. Press the mixture firmly into the bottom of your springform pan. Use the back of a spoon or a flat measuring cup to compact it well. Bake for 10 minutes, then set aside to cool while you prepare the filling.
- Make the Berry Purees: While the crust bakes, puree strawberries and blueberries separately in a blender or food processor. Strain each puree through a fine mesh sieve to remove seeds. Add 1 teaspoon lemon juice to each for brightness. If desired, add a drop or two of red or blue natural food coloring to intensify the colors. Chill the purees until ready to use.
- Prepare the Base Cheesecake Batter: In a large mixing bowl, beat the softened cream cheese until smooth and creamy (about 2-3 minutes). Gradually add sugar, continuing to beat until fully combined. Mix in vanilla extract.
- Add Eggs: Add eggs one at a time, beating on low speed after each addition until just combined—don’t overmix! Overmixing can incorporate air and cause cracks later.
- Incorporate Sour Cream and Heavy Cream: Add sour cream and heavy cream to the batter, mixing gently until smooth and silky. The batter should be thick but pourable.
- Divide the Batter: Split the batter evenly into three separate bowls. Leave one plain (white), fold the strawberry puree into the second, and the blueberry puree into the third. Fold gently to avoid deflating the batter, keeping the colors vibrant.
- Layer the Cheesecake: Pour the red batter carefully over the baked crust in the springform pan, spreading it evenly. Next, gently layer the white batter on top of the red, then finish with the blue batter on top. To get sharp stripes, pour slowly and spread lightly with a spatula if needed. Resist the urge to swirl!
- Bake the Cheesecake: Place the pan in the oven and bake at 325°F (160°C) for 50 to 60 minutes. The edges will be set, but the center should still have a slight wobble when you gently shake the pan.
- Cool and Chill: Turn off the oven, crack the door open, and let the cheesecake cool inside for 1 hour to prevent cracks. Then transfer to the fridge to chill for at least 4 hours, preferably overnight, for the best texture and flavor.
- Release and Serve: Run a thin knife around the edges before unlocking the springform pan to avoid sticking. Slice with a sharp, warm knife for clean cuts. Enjoy the stunning red white and blue stripes and the delightful creamy texture!
Cooking Tips & Techniques
Getting those perfect red white and blue stripes is all about patience and gentle handling. Pour each colored batter slowly and evenly to avoid mixing the layers. Honestly, I learned this the hard way after a few messy early attempts where colors blurred together. Use a small ladle or measuring cup for more control.
Don’t overbeat your cream cheese mixture. Overmixing adds air, which can cause cracking when baked. I always stop as soon as the batter is smooth and combined. Room temperature eggs are a must—they incorporate better and keep the texture silky.
Baking at a moderate temperature and cooling the cheesecake gradually helps prevent cracking. Leaving the cheesecake in the oven with the door slightly open after baking is a game-changer—it lets it cool gently instead of shocking it with a temperature drop.
For easy slicing, warm your knife under hot water and wipe it dry before each cut. This simple trick keeps slices clean and neat, especially important when showing off those stripes.
If you find your berry purees too thick, stir in a teaspoon of water or lemon juice to loosen them just enough to mix smoothly into the batter.
Variations & Adaptations
- Dietary Variation: For a gluten-free version, swap the graham cracker crust with almond meal or gluten-free cookie crumbs. Coconut oil can replace butter for a dairy-free crust alternative.
- Seasonal Twist: Instead of strawberries and blueberries, try raspberry and blackberry purees for a different berry flavor combo that still keeps the patriotic vibe with deep reds and purples.
- Flavor Boost: Add a teaspoon of lemon zest to the batter for a fresh citrus kick that brightens the creaminess. Vanilla bean paste can substitute extract for a richer vanilla flavor.
- Baking Method: Try a water bath (bain-marie) for ultra-smooth cheesecake texture. Wrap the pan bottom in foil and place it in a roasting pan filled with hot water halfway up the sides before baking.
- Personal Favorite: I once made a mini version of this cheesecake in a muffin tin for a picnic. Same layering technique but smaller, portable, and perfect for outdoor celebrations.
Serving & Storage Suggestions
Serve this red white and blue striped cheesecake chilled or at room temperature, depending on your preference. The colors really pop when chilled, but letting it sit out for 15-20 minutes before slicing enhances the creamy texture.
Pair it with fresh whipped cream or a drizzle of berry coulis for extra flair. It goes wonderfully with a light sparkling rosé or a classic lemonade for those summer gatherings.
Store leftovers covered tightly in the fridge for up to 4 days. If you want to freeze slices, wrap each piece individually in plastic wrap and place in an airtight container. Thaw overnight in the fridge before serving.
Fun fact: the flavors meld beautifully over a day or two, so if you can wait, the cheesecake tastes even better the next day!
Nutritional Information & Benefits
Each serving of this red white and blue striped cheesecake contains approximately 350 calories, 25g fat, 22g carbohydrates, and 7g protein. The fresh berries provide antioxidants and vitamins, bringing a bit of nutritional goodness to a rich dessert.
The cream cheese and sour cream offer a good amount of calcium and protein, making this dessert feel indulgent but not totally guilty. For those mindful of gluten, swapping to gluten-free crust options keeps this dessert accessible.
It’s a festive treat that balances creamy richness with fresh fruit flavors, making it a satisfying choice for your patriotic celebrations.
Conclusion
This perfect red white and blue striped cheesecake is not just a dessert—it’s a celebration on a plate. It’s simple enough to make without stress, yet impressive enough to steal the show at any patriotic gathering. Whether you’re a seasoned baker or trying your hand at layered cheesecakes for the first time, this recipe guides you every step of the way.
I love this cheesecake because it combines the best of creamy, fruity, and festive all in one slice. Every time I make it, I remember that chaotic morning when it all came together—proof that sometimes the best recipes come from happy accidents and a little kitchen mess.
Give it a try, and don’t hesitate to make it your own by tweaking the berries or crust. When you do, I’d love to hear how it turned out—leave a comment below or share your version!
Here’s to tasty celebrations and memorable bites!
FAQs
Can I make this cheesecake ahead of time?
Yes! Making it a day ahead actually helps the flavors meld and the texture set perfectly. Just keep it tightly wrapped in the fridge until serving.
What if I don’t have fresh berries?
Frozen berries work just fine—just thaw and strain them well to remove excess liquid before using in the purees.
How do I prevent cracks in my cheesecake?
Mix gently, avoid overbeating, bake at a moderate temperature, and let it cool gradually with the oven door cracked open to prevent cracks.
Can I use other types of berries for the stripes?
Absolutely! Raspberries, blackberries, or even cherries can be great alternatives. Just puree and strain as you would with strawberries and blueberries.
Is it possible to make this cheesecake dairy-free?
Yes, you can substitute dairy-free cream cheese and sour cream alternatives. The texture may vary slightly but it will still be delicious and festive.
Pin This Recipe!
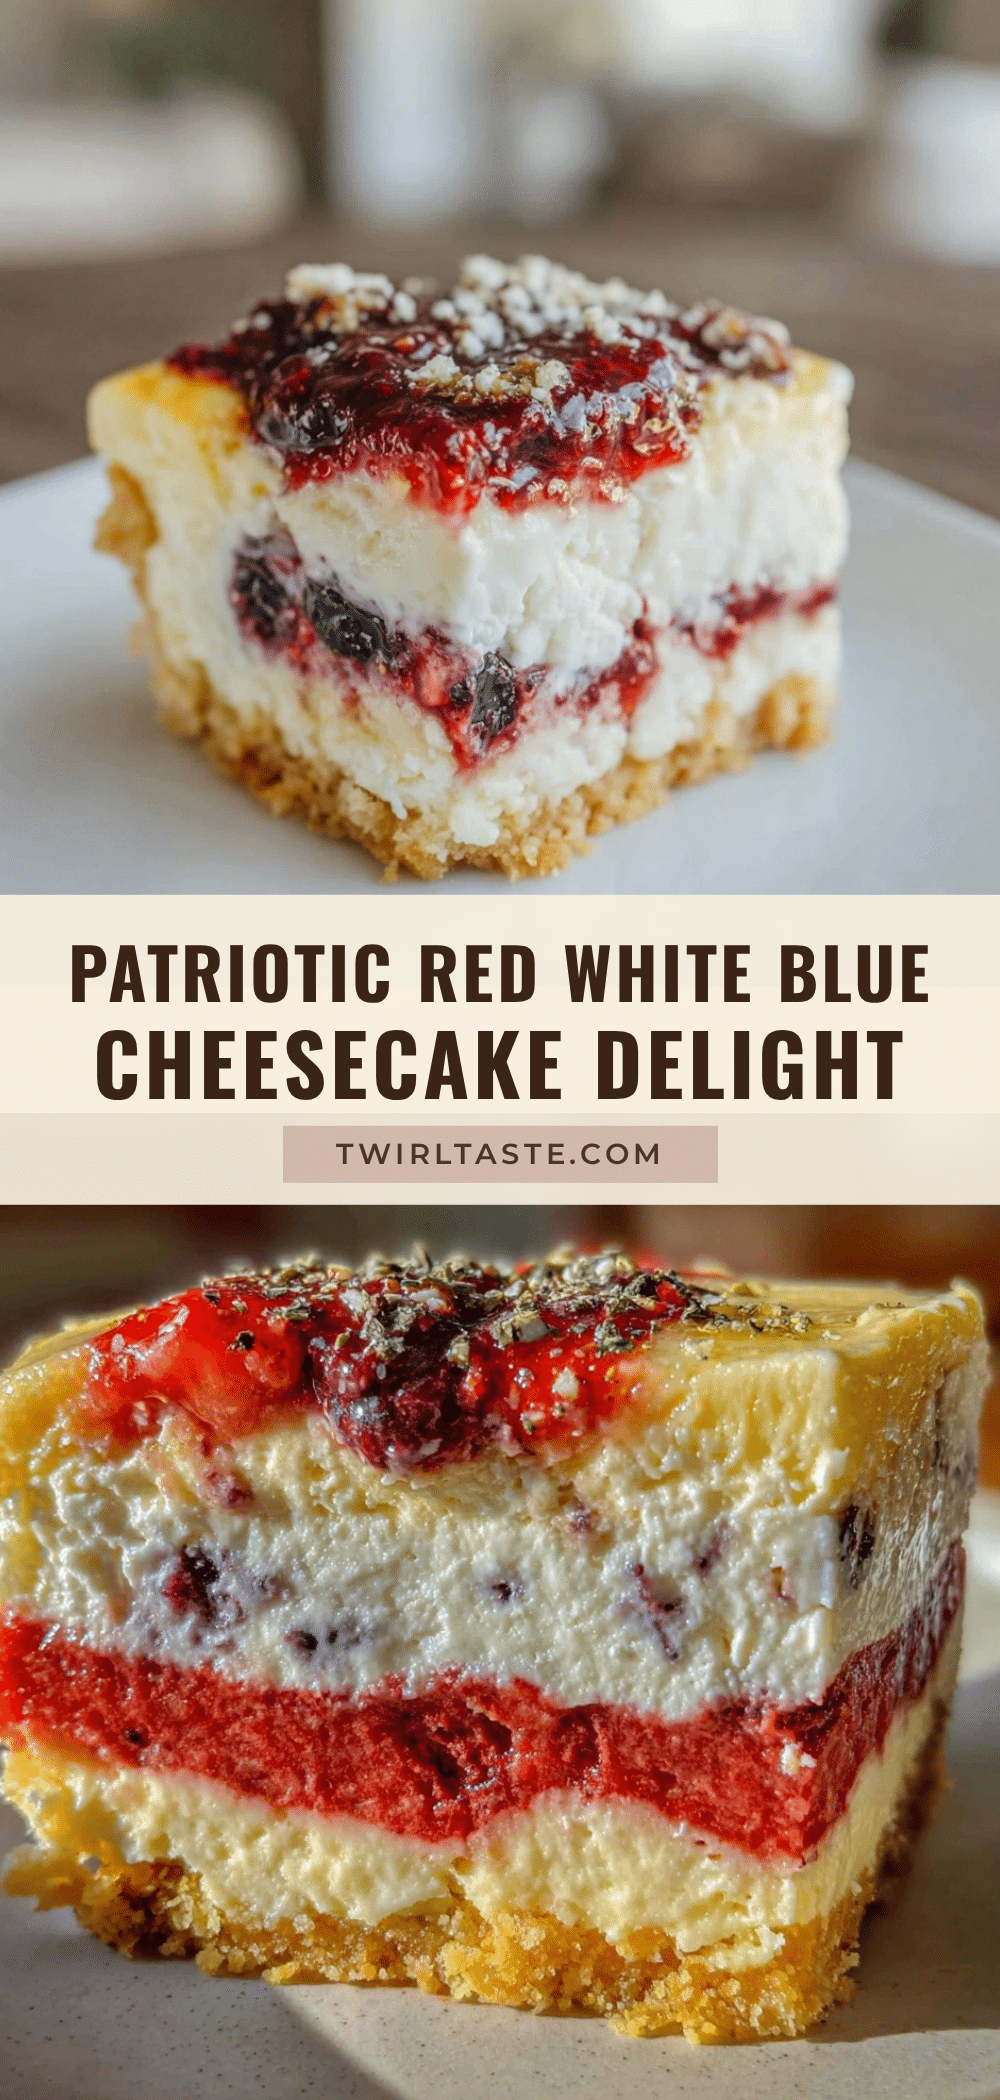
Perfect Red White & Blue Striped Cheesecake Recipe for Easy Patriotic Celebrations
A festive and creamy red, white, and blue striped cheesecake perfect for patriotic occasions like July Fourth. This recipe is simple, quick, and uses fresh berries to create vibrant, distinct layers.
- Prep Time: 15 minutes
- Cook Time: 1 hour
- Total Time: 5 hours 15 minutes
- Yield: 12 servings 1x
- Category: Dessert
- Cuisine: American
Ingredients
- 1 ½ cups graham cracker crumbs (about 12 full sheets)
- 5 tablespoons unsalted butter, melted
- 2 tablespoons granulated sugar
- 24 ounces (680g) cream cheese, softened
- 1 cup granulated sugar
- 1 teaspoon vanilla extract
- 3 large eggs, room temperature
- ½ cup sour cream
- ¼ cup heavy cream
- ½ cup fresh strawberries, pureed and strained
- ½ cup fresh blueberries, pureed and strained
- 2 teaspoons lemon juice
- Optional: a few drops of red and blue natural food coloring
Instructions
- Preheat your oven to 325°F (160°C). In a medium bowl, combine the graham cracker crumbs, melted butter, and sugar. Stir until evenly moistened. Press the mixture firmly into the bottom of your springform pan. Use the back of a spoon or a flat measuring cup to compact it well. Bake for 10 minutes, then set aside to cool while you prepare the filling.
- While the crust bakes, puree strawberries and blueberries separately in a blender or food processor. Strain each puree through a fine mesh sieve to remove seeds. Add 1 teaspoon lemon juice to each for brightness. If desired, add a drop or two of red or blue natural food coloring to intensify the colors. Chill the purees until ready to use.
- In a large mixing bowl, beat the softened cream cheese until smooth and creamy (about 2-3 minutes). Gradually add sugar, continuing to beat until fully combined. Mix in vanilla extract.
- Add eggs one at a time, beating on low speed after each addition until just combined—don’t overmix!
- Add sour cream and heavy cream to the batter, mixing gently until smooth and silky. The batter should be thick but pourable.
- Split the batter evenly into three separate bowls. Leave one plain (white), fold the strawberry puree into the second, and the blueberry puree into the third. Fold gently to avoid deflating the batter, keeping the colors vibrant.
- Pour the red batter carefully over the baked crust in the springform pan, spreading it evenly. Next, gently layer the white batter on top of the red, then finish with the blue batter on top. Pour slowly and spread lightly with a spatula if needed to get sharp stripes. Resist the urge to swirl!
- Place the pan in the oven and bake at 325°F (160°C) for 50 to 60 minutes. The edges will be set, but the center should still have a slight wobble when you gently shake the pan.
- Turn off the oven, crack the door open, and let the cheesecake cool inside for 1 hour to prevent cracks. Then transfer to the fridge to chill for at least 4 hours, preferably overnight.
- Run a thin knife around the edges before unlocking the springform pan to avoid sticking. Slice with a sharp, warm knife for clean cuts. Serve and enjoy!
Notes
Pour each colored batter slowly and evenly to avoid mixing the layers. Avoid overmixing the cream cheese mixture to prevent cracks. Use room temperature eggs for better texture. Cool cheesecake gradually with oven door cracked open to prevent cracks. Warm knife under hot water before slicing for clean cuts. If berry purees are too thick, stir in a teaspoon of water or lemon juice to loosen.
Nutrition
- Serving Size: 1 slice (1/12th of c
- Calories: 350
- Fat: 25
- Carbohydrates: 22
- Protein: 7
Keywords: cheesecake, patriotic dessert, red white and blue, July Fourth, berry cheesecake, layered cheesecake, easy cheesecake recipe