Love this? Save it for later!
Share the inspiration with your friends
“You won’t believe what I found scribbled on the back of a library receipt,” my friend Jenna said, waving a crumpled piece of paper as we settled in for our summer book club meeting. It was a recipe for Easy Dirt Cup Pudding with Gummy Worms, a no-bake summer treat that promised fun and simplicity. Honestly, I wasn’t expecting much—just another kids’ dessert—but that evening, with the windows open and cicadas buzzing outside, I gave it a try. Let me tell you, it was a total winner.
This recipe has that nostalgic charm—think childhood birthday parties and backyard picnics—but with a grown-up flair because it’s so simple and mess-free. You know that feeling when you want something sweet but don’t want to fire up the oven or spend hours in the kitchen? That’s exactly where this Easy Dirt Cup Pudding fits in perfectly.
Maybe you’ve been there—scrambling for a last-minute dessert or craving a snack that’s both playful and satisfying. This pudding with gummy worms is a quirky little delight that never fails to bring smiles, whether you’re serving it to kids or adults young at heart. Plus, it’s a breeze to make, even if you get interrupted halfway through (true story: I forgot the gummy worms in the fridge once and had to improvise with fruit snacks!).
Why does this recipe stick with me? Because it’s one of those rare treats that combines childhood whimsy with grown-up ease. It’s always in my back pocket for summer gatherings or when I want a sweet pick-me-up without the fuss.
Why You’ll Love This Recipe
After trying countless desserts over the years, this Easy Dirt Cup Pudding with Gummy Worms stands out for many reasons. I’ve tested it in my own kitchen dozens of times, tweaking just enough to get the texture and flavor just right. Here’s why it’s become a go-to:
- Quick & Easy: Comes together in under 15 minutes — perfect for busy summer days or when guests drop by unexpectedly.
- Simple Ingredients: You probably already have everything in your pantry and fridge, no special grocery runs needed.
- Perfect for Summer Fun: Ideal for pool parties, picnics, or just a casual afternoon treat.
- Crowd-Pleaser: Kids love digging in, and adults can’t resist the nostalgic charm of gummy worms crawling through chocolate pudding “dirt.”
- Unbelievably Delicious: The creamy pudding paired with crunchy cookie crumbs and chewy gummies creates a fun texture combo that’s oddly satisfying.
This isn’t just another dirt cup—it’s the version that nails the balance between creamy, crunchy, and chewy. The crushed chocolate cookies I recommend add just the right amount of “earthiness,” and the gummy worms aren’t just a garnish; they’re a playful surprise with every bite.
Honestly, this recipe is comfort food disguised as a whimsical treat. It brings back childhood memories while feeling fresh and fuss-free. Whether you’re aiming to impress a crowd or just want something fun for yourself, this recipe delivers every time.
What Ingredients You Will Need
This Easy Dirt Cup Pudding recipe uses straightforward, pantry-friendly ingredients to create a dessert that’s both playful and delicious. Here’s what you’ll want to have on hand:
- Instant Chocolate Pudding Mix: 2 packets (3.9 oz / 110 g each) – I prefer brands like Jell-O for their reliable texture and rich chocolate flavor.
- Milk: 3 cups (720 ml) – whole milk gives a creamier pudding, but 2% works fine too.
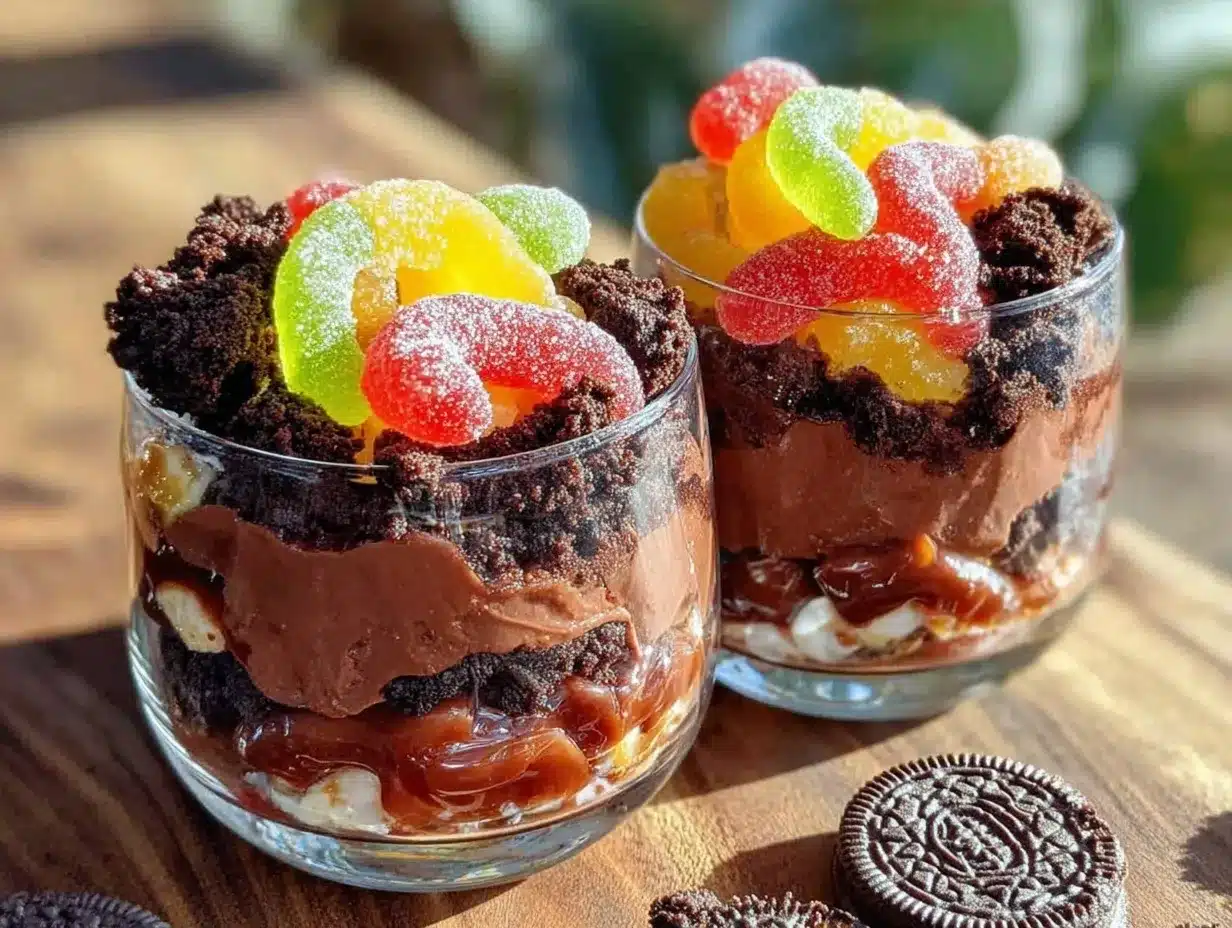
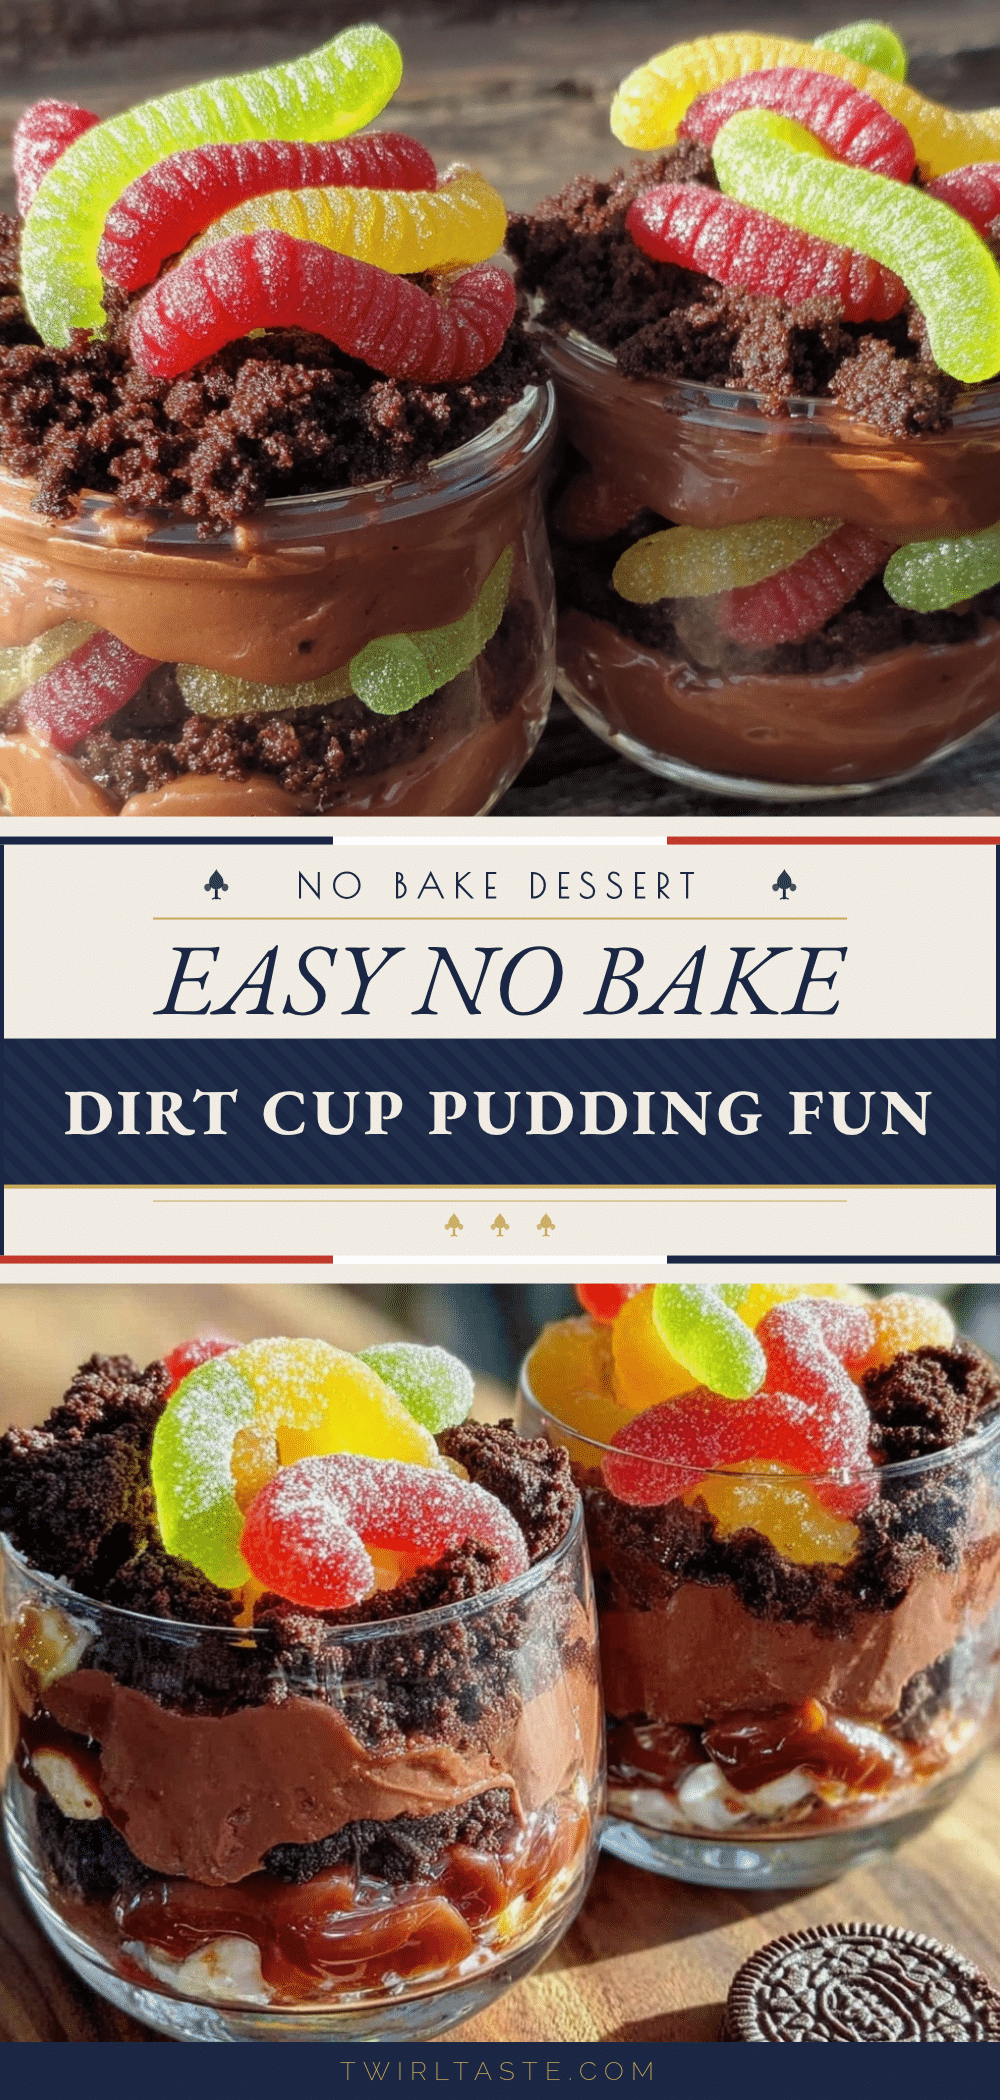
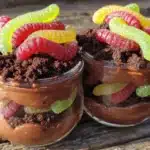
- Chocolate Sandwich Cookies: About 20 cookies (like Oreos or a store brand) – crushed finely to mimic dirt.
- Gummy Worms: 1 package (about 5 oz / 140 g) – classic candy worms add that fun, creepy-crawly vibe.
- Whipped Cream: Optional, for topping – homemade or store-bought, adds a light, fluffy finish.
All these ingredients come together to create distinct layers and textures. The pudding is silky smooth, the crushed cookies provide a crumbly, chocolatey “dirt” feel, and the gummy worms bring a chewy burst of sweetness. If you want to swap out ingredients, you can use dairy-free milk alternatives (like almond or oat milk) and dairy-free pudding mixes to make it vegan-friendly.
For a seasonal twist, try adding fresh berries on top or mixing in crushed pretzels for a salty kick. But honestly, the classic combination is what keeps me coming back every summer.
Equipment Needed
- Mixing Bowls: At least one large bowl for pudding preparation and another for crushing cookies. I prefer glass or stainless steel for easy cleanup.
- Whisk or Electric Mixer: To whip the pudding mix smoothly. A handheld whisk works fine, but an electric mixer speeds things up.
- Plastic Cups or Small Mason Jars: For serving the dirt cups individually. Clear containers showcase the layers beautifully.
- Food Processor or Plastic Bag & Rolling Pin: To crush the cookies finely. If you don’t have a food processor, just place cookies in a zip-top bag and gently crush with a rolling pin or the bottom of a heavy pan.
- Spoons: For layering pudding and cookie crumbs into cups.
Personally, I keep a set of small dessert cups just for treats like this. If you don’t have any, inexpensive plastic party cups work just as well and make cleanup a breeze. Also, having a sturdy whisk makes all the difference when mixing pudding to avoid lumps.
Preparation Method
- Prepare the Pudding: In a large mixing bowl, whisk together 2 packets of instant chocolate pudding mix with 3 cups (720 ml) of cold milk. Whisk vigorously for about 2 minutes until the mixture starts to thicken. For best results, use cold milk straight from the fridge. Set aside to let it firm up for 5 minutes.
- Crush the Cookies: Place 20 chocolate sandwich cookies into a large zip-top bag, seal it tightly, and gently crush them with a rolling pin or heavy pan until you get fine crumbs resembling dirt with a few slightly bigger chunks for texture. Alternatively, pulse in a food processor briefly.
- Assemble the Dirt Cups: Spoon a layer of cookie crumbs into the bottom of each cup (about 2 tablespoons). Next, add a generous layer of chocolate pudding (around 3-4 tablespoons). Repeat layering once more, finishing with a top layer of cookie crumbs.
- Add the Gummy Worms: Tuck 2-3 gummy worms into the top layer of cookie crumbs per cup. Feel free to let a worm trail over the edge for a playful effect.
- Optional Whipped Cream: Top each cup with a dollop of whipped cream for extra creaminess and garnish with a single gummy worm or a sprinkle of cookie crumbs.
- Chill Before Serving: Place the cups in the refrigerator for at least 30 minutes. This allows the pudding to set fully and the flavors to meld. If you’re in a hurry, you can serve right away, but chilling improves texture.
Pro tip: When layering, don’t rush. You want each “dirt” and pudding layer distinct so you get that satisfying visual and textural contrast. And if you accidentally spill cookie crumbs everywhere (don’t ask how I know), just brush them off and keep going!
Cooking Tips & Techniques
Since this is a no-bake dessert, the focus is on assembly and texture balance. Here are a few tips I picked up through trial and error:
- Whisk the pudding mix thoroughly: If you skim over this step, lumps can form and the texture won’t be as smooth. I sometimes switch to an electric mixer for a velvety finish.
- Cookie crumbs should be fine but not powdery: A few slightly bigger chunks add great crunch and mimic actual dirt better. Don’t pulverize the cookies too much.
- Keep gummy worms chilled: When warm, they get sticky and lose their chewy texture, which can be a bummer.
- Layer evenly: It’s tempting to dump all the pudding in at once, but spreading it out in layers creates that fun visual and flavor contrast.
- Multitask smartly: While the pudding sets, use that time to crush cookies and prep cups for faster assembly.
One lesson I learned the hard way: if you skip chilling the pudding for a few minutes before layering, it can be too runny and the layers won’t hold. Patience pays off here, even if you’re eager to dig in.
Variations & Adaptations
Want to switch things up? Here are some fun takes on the classic dirt cup:
- Peanut Butter Twist: Mix ½ cup (120 g) of creamy peanut butter into the pudding for a nutty flavor that pairs perfectly with chocolate cookie “dirt.”
- Fruit Dirt Cups: Swap gummy worms for fresh berries or sliced strawberries for a fresher, less sweet option.
- Gluten-Free Version: Use gluten-free chocolate sandwich cookies and a certified gluten-free pudding mix to keep it safe for sensitive diets.
- Healthy Swap: Try Greek yogurt mixed with cocoa powder and a touch of honey instead of pudding for a protein-packed version.
- Alcohol-Infused Adult Version: Add a splash of coffee liqueur or chocolate vodka to the pudding for a grown-up summer treat. (Proceed with caution and keep away from kids!)
One time, I made a version with crushed pretzels on top for a salty-sweet combo, which was surprisingly addictive. Feel free to get creative with your favorite flavors!
Serving & Storage Suggestions
This Easy Dirt Cup Pudding is best served chilled between 30 minutes to 2 hours after assembly. The pudding firms up nicely, and the cookie crumbs soak just enough moisture to stay soft but still crumbly.
Serve these cups with a small spoon and maybe a colorful straw for an extra playful touch. They’re great for summer parties, casual family dinners, or as a simple after-school treat.
To store, cover the cups tightly with plastic wrap or lids and refrigerate for up to 2 days. The gummy worms hold up well in the fridge, but if you add whipped cream, I recommend adding it fresh before serving to avoid sogginess.
If you want to prepare in advance, assemble everything except gummy worms and whipped cream, then add those just before serving. Reheating isn’t recommended—this dessert is best cold and refreshing.
Over time, the flavors meld and get even better, but watch out for cookie crumbs becoming too soft if stored too long.
Nutritional Information & Benefits
Each serving of this Easy Dirt Cup Pudding (about 1 cup or 240 ml) contains roughly:
| Nutrient | Amount |
|---|---|
| Calories | 250-300 kcal |
| Fat | 10-12 g |
| Carbohydrates | 38-42 g |
| Protein | 4-6 g |
| Sugar | 25-30 g |
The key ingredients like milk provide calcium and protein, while the chocolate pudding and cookies satisfy your sweet tooth. Since this is a treat, I recommend enjoying it in moderation, especially if you’re watching sugar intake.
For those with dietary restrictions, swapping to dairy-free milk and pudding options can make this dessert vegan and lactose-free. Gluten-free cookie alternatives make it safe for celiac diets.
Personally, I like to balance this indulgence by pairing it with a fresh fruit salad or serving smaller portions for a guilt-free summer snack.
Conclusion
In the end, this Easy Dirt Cup Pudding with Gummy Worms is a no-fuss, joyful dessert that brings out the kid in all of us. It’s quick, simple, and surprisingly satisfying—a combination that’s hard to beat during those hot summer months when you want something cool and fun without turning on the oven.
Feel free to make it your own: swap ingredients, play with toppings, or serve it at your next backyard gathering. Honestly, I keep coming back to this recipe because it’s a happy little escape—one that’s as entertaining to make as it is to eat.
Give it a shot, tell me how yours turns out, and don’t be shy about sharing your own twists or favorite gummy worm brands. After all, summer is for sweet, easy treats that bring people together!
FAQs About Easy Dirt Cup Pudding with Gummy Worms
Can I make this recipe ahead of time?
Yes! You can prepare the pudding and cookie layers up to 24 hours ahead. Just add gummy worms and whipped cream before serving to keep things fresh.
What if I don’t have instant pudding mix?
You can make homemade chocolate pudding from scratch, but it will take longer to set. Instant pudding is recommended for speed and ease.
Can I use other candies instead of gummy worms?
Absolutely! Fruit snacks, sour gummy candies, or even small chocolate chips work well as fun alternatives.
Is this recipe kid-friendly?
Definitely! It’s a favorite with kids because of the fun presentation and easy-to-eat layers. Just be mindful of any allergies.
How do I store leftovers?
Keep leftover dirt cups covered in the refrigerator for up to 2 days. The texture is best fresh, so try to enjoy them soon after making.
Pin This Recipe!
Easy Dirt Cup Pudding Recipe with Gummy Worms
A no-bake, nostalgic summer treat combining creamy chocolate pudding, crunchy cookie crumbs, and chewy gummy worms for a fun and simple dessert.
- Prep Time: 10 minutes
- Cook Time: 0 minutes
- Total Time: 40 minutes
- Yield: 6 servings 1x
- Category: Dessert
- Cuisine: American
Ingredients
- 2 packets (3.9 oz / 110 g each) instant chocolate pudding mix
- 3 cups (720 ml) milk (whole or 2%)
- About 20 chocolate sandwich cookies (like Oreos), crushed finely
- 1 package (about 5 oz / 140 g) gummy worms
- Whipped cream (optional, for topping)
Instructions
- In a large mixing bowl, whisk together 2 packets of instant chocolate pudding mix with 3 cups (720 ml) of cold milk. Whisk vigorously for about 2 minutes until the mixture starts to thicken. Set aside to let it firm up for 5 minutes.
- Place 20 chocolate sandwich cookies into a large zip-top bag, seal it tightly, and gently crush them with a rolling pin or heavy pan until you get fine crumbs resembling dirt with a few slightly bigger chunks for texture. Alternatively, pulse in a food processor briefly.
- Spoon a layer of cookie crumbs into the bottom of each cup (about 2 tablespoons). Next, add a generous layer of chocolate pudding (around 3-4 tablespoons). Repeat layering once more, finishing with a top layer of cookie crumbs.
- Tuck 2-3 gummy worms into the top layer of cookie crumbs per cup. Feel free to let a worm trail over the edge for a playful effect.
- Optionally, top each cup with a dollop of whipped cream and garnish with a single gummy worm or a sprinkle of cookie crumbs.
- Place the cups in the refrigerator for at least 30 minutes to allow the pudding to set fully and the flavors to meld. Serve chilled.
Notes
Use cold milk straight from the fridge for best pudding texture. Crush cookies to fine crumbs but keep some chunks for texture. Keep gummy worms chilled to maintain chewiness. Chill assembled cups at least 30 minutes before serving for best results. Add whipped cream just before serving to avoid sogginess. Variations include peanut butter mix-in, fruit toppings, gluten-free cookies, or dairy-free pudding for dietary needs.
Nutrition
- Serving Size: About 1 cup (240 ml)
- Calories: 275
- Sugar: 28
- Sodium: 150
- Fat: 11
- Saturated Fat: 6
- Carbohydrates: 40
- Fiber: 1
- Protein: 5
Keywords: dirt cup, pudding, gummy worms, no bake dessert, summer treat, kids dessert, chocolate pudding, easy dessert