Love this? Save it for later!
Share the inspiration with your friends
Introduction
My neighbor Betty watched me struggling with a jar of pickles one humid Saturday afternoon and didn’t say anything at first. Then she just walked over, took one look at my awkward attempt to pry the lid off, and said, “Why not make your own? It’s easier than you think.” That casual comment led to a conversation that unfolded over cups of iced tea on her porch, where she shared her simple, no-fuss recipe for quick refrigerator dill pickles. There was no pressure, no grand demonstration—just a natural exchange between two people who appreciate good food and honest flavors.
Honestly, I was skeptical at first. I’d always imagined pickling as this complicated, time-consuming task involving canning pots and hours of waiting. Betty’s recipe changed all that. It’s straightforward, fast, and the pickles come out delightfully crispy, tangy, and fresh-tasting every time. I mean, you know that feeling when you bite into a pickle that’s just right—crunchy but not too sour? Yeah, that.
One detail I love is how she uses simple ingredients you can find at any grocery store, no specialty items or fancy equipment needed. I remember the day I made my first batch, I forgot to label the jars and ended up nearly eating all the pickles before realizing they were meant to last weeks. That little mishap didn’t stop me; it just made me more eager to perfect the process. This recipe stuck with me because it feels like a genuine exchange between neighbors rather than a formal lesson, and it fits perfectly into my busy, sometimes chaotic kitchen life.
Why You’ll Love This Recipe
Having tested this recipe multiple times (and shared it with friends who keep coming back for more), I can say it’s a real winner. Here’s why this easy crispy quick refrigerator dill pickles recipe stands out:
- Quick & Easy: Ready to eat in as little as 24 hours, perfect for last-minute snack cravings or impromptu gatherings.
- Simple Ingredients: No complicated spices or exotic vinegars—just the basics you likely have on hand.
- No Canning Needed: Skip the hot water bath and pressure canner. Just mix, jar, and refrigerate.
- Perfect for Summer BBQs & Picnics: The crispness and tang brighten up burgers, sandwiches, and salads effortlessly.
- Crowd-Pleaser: Both kids and adults rave about the crunch and flavor balance.
- Unbelievably Delicious: The dill and garlic notes play beautifully with the vinegar’s tang and the cucumber’s freshness.
This isn’t just another pickle recipe; it’s the one I reach for when I want that satisfying crunch without fussing over equipment or timing. Betty’s trick of blanching the cucumbers briefly before pickling helps keep that snap, and the seasoning mix is just right—not overpowering, but definitely memorable. If you’ve tried quick pickles before and ended up with soggy results, give this a shot. I promise, it’s a game-changer, especially for folks who love making things from scratch but don’t want to spend all day doing it.
What Ingredients You Will Need
This recipe uses simple, wholesome ingredients to deliver bold flavor and satisfying texture without the fuss. Most are pantry staples, and the fresh produce is easy to source year-round.
- Fresh cucumbers: About 2 pounds (900 g) of small to medium pickling cucumbers or Kirby cucumbers, sliced into spears or rounds depending on your preference.
- Fresh dill: 4-5 sprigs of fresh dill or 2 tablespoons of dried dill weed (fresh is best for that authentic flavor).
- Garlic cloves: 3-4 large cloves, peeled and smashed (adds robust aroma).
- White vinegar: 1 ½ cups (360 ml) of distilled white vinegar, the key acid that gives pickles their tang.
- Water: 1 ½ cups (360 ml) of cold water to balance the vinegar’s sharpness.
- Pickling salt: 2 tablespoons (rather than table salt, pickling salt dissolves well and avoids cloudiness).
- Granulated sugar: 1 tablespoon (optional, balances acidity slightly).
- Black peppercorns: 1 teaspoon whole peppercorns for a subtle spice kick.
- Mustard seeds: 1 teaspoon for a hint of warmth and texture.
- Red pepper flakes: ¼ teaspoon (optional for a little heat).
If you want to swap ingredients, you can use apple cider vinegar instead of white vinegar for a fruitier note or use kosher salt if pickling salt isn’t available—just be sure to adjust quantities as kosher salt is less dense. For a dairy-free twist, no changes are needed since this recipe is naturally free of dairy. In summer, you might add fresh sliced jalapeños or swap the dill for tarragon for a different herbaceous profile.
Equipment Needed
Making these quick refrigerator dill pickles doesn’t require fancy gear, which is part of what makes this recipe so approachable.
- Sharp knife and cutting board: For slicing cucumbers evenly, which helps with consistent pickling.
- Large mixing bowl: To toss cucumbers with salt and rinse if needed.
- Measuring cups and spoons: Accurate measurement helps maintain the perfect brine balance.
- Medium saucepan: To bring the brine ingredients to a simmer.
- Glass jars or food-safe containers with lids: Quart-sized mason jars work well, but any clean, sealable container will do.
- Optional: Kitchen scale: For those who prefer weighing ingredients for precision.
I’ve tried making these pickles in a variety of containers, from vintage glass jars to BPA-free plastic tubs. Glass is my favorite because it doesn’t absorb flavors and looks nice sitting in the fridge. If you don’t have mason jars, just make sure your container seals tightly to keep the brine from spilling and to maintain crispness. Keeping your knives sharp is a good tip here—clean cuts mean better texture and appearance.
Preparation Method
- Prepare the cucumbers: Wash 2 pounds (900 g) of small pickling cucumbers thoroughly. Slice into spears about 3-4 inches (7.5-10 cm) long or rounds about ¼ inch (6 mm) thick, depending on your preference. This usually takes about 10 minutes.
- Salt the cucumbers: Place the sliced cucumbers in a large bowl and sprinkle 2 tablespoons of pickling salt over them. Toss gently to coat evenly. Let them sit for 1-2 hours to draw out excess moisture. This step helps keep pickles crisp.
- Rinse and drain: After the waiting period, rinse the salted cucumbers under cold water to remove excess salt. Drain them well using a colander or clean kitchen towel. This prevents the pickles from becoming too salty or mushy.
- Make the brine: In a medium saucepan, combine 1 ½ cups (360 ml) white vinegar, 1 ½ cups (360 ml) water, 1 tablespoon granulated sugar, 1 teaspoon black peppercorns, 1 teaspoon mustard seeds, and optional ¼ teaspoon red pepper flakes. Bring to a gentle simmer over medium heat, stirring until sugar and salt dissolve. Remove from heat and let cool slightly for 5 minutes.
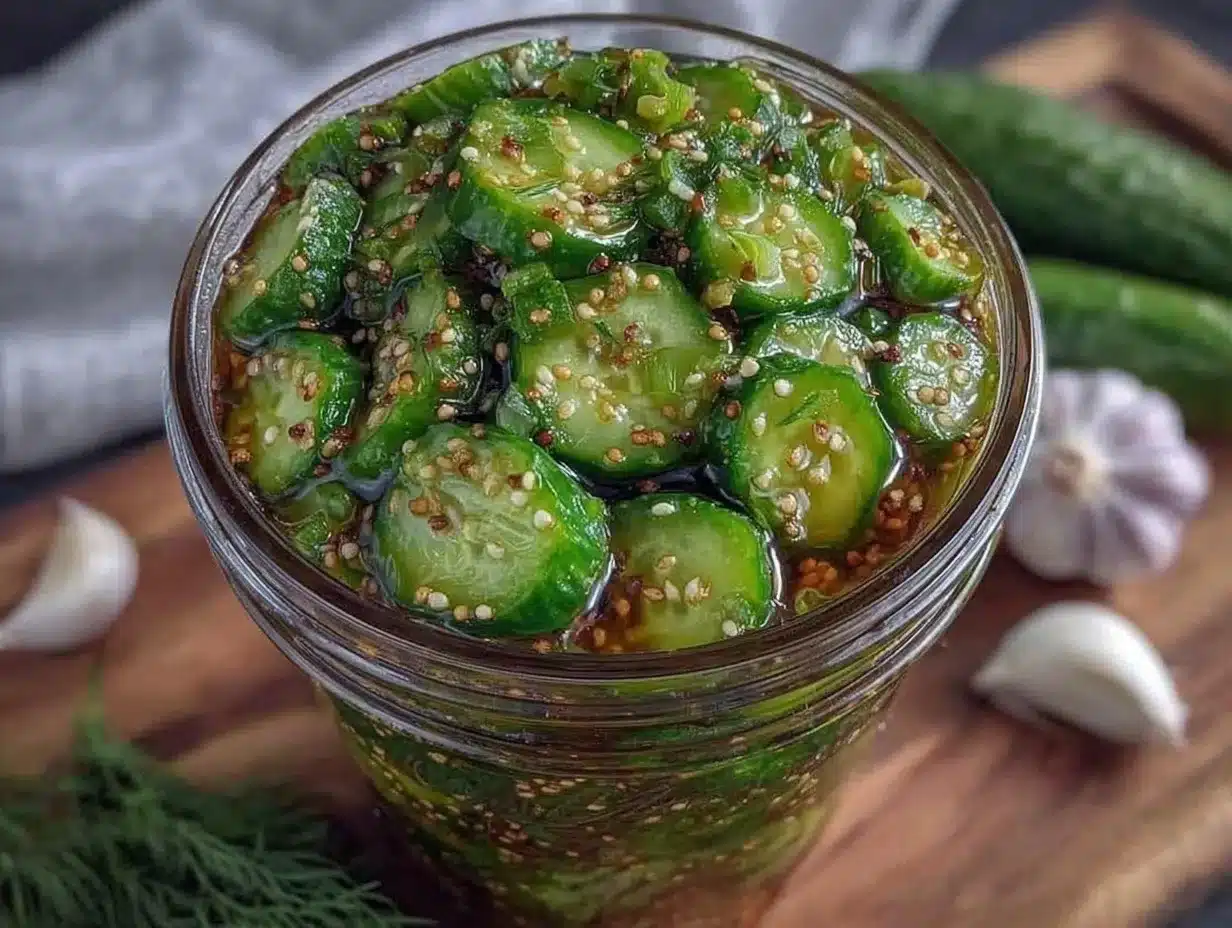
- Pack the jars: Place 4-5 sprigs of fresh dill and 3-4 smashed garlic cloves at the bottom of each clean jar. Pack the drained cucumber slices tightly but without crushing them.
- Pour the brine: Carefully pour the warm brine over the cucumbers until fully submerged. Leave about ½ inch (1.3 cm) of headspace at the top.
- Seal and refrigerate: Close the jars tightly with lids and place them in the refrigerator. The pickles will be ready to enjoy after 24 hours but taste even better after 2-3 days.
- Enjoy and store: These pickles keep well in the fridge for up to 3 weeks. Always use clean utensils to avoid contamination.
If you find the pickles too salty or too sour, adjust the salt or vinegar levels slightly next time. The key sensory cue is that cucumbers should remain firm and the brine pleasantly tangy but balanced. I find that stirring the jar gently once a day helps redistribute flavors. Oh, and don’t forget to label your jars with the date to keep track.
Cooking Tips & Techniques
Making refrigerator dill pickles is pretty straightforward, but a few tips from my kitchen experiences help make them consistently crisp and flavorful.
- Choose fresh cucumbers: Look for firm, unblemished cucumbers with bright skin. Soft or overripe cucumbers lead to soggy pickles.
- Salt soaking is crucial: This step pulls out excess water, helping maintain crunchiness. Don’t skip or shorten it.
- Don’t boil the vinegar excessively: Just heat enough to dissolve salt and sugar. Overheating can dull the flavor.
- Use clean utensils: Always use a clean fork or tongs when removing pickles to avoid introducing bacteria.
- Customize spice levels: Add more peppercorns or red pepper flakes if you like heat, but start small.
- Be patient: While these pickles are quick, letting them sit 48-72 hours improves flavor depth.
- Watch for cloudy brine: Sometimes a little cloudiness happens naturally, but if you see mold or off smells, discard immediately.
I once rushed this recipe by skipping the salt soaking and ended up with mushy pickles—not fun. Also, I learned that slicing cucumbers uniformly helps the brine penetrate evenly. Multitasking in the kitchen? Prepare the brine while the cucumbers soak to save time. Trust me, these small tweaks make the biggest difference.
Variations & Adaptations
This recipe is flexible enough to suit different tastes and dietary needs.
- Spicy Dill Pickles: Add 1-2 sliced jalapeños or a pinch of cayenne pepper along with the red pepper flakes for a fiery kick.
- Garlic Lovers’ Pickles: Double the garlic cloves for a more pungent flavor.
- Low-Sodium Version: Reduce the salt to 1 tablespoon, but expect a slightly less crisp texture.
- Herb Swap: Use fresh tarragon or basil instead of dill for a different herbal note.
- Fermented Version: Skip the vinegar and ferment cucumbers with salt and spices for several days to develop sourness naturally (requires more time and care).
One personal twist I enjoy is adding a few slices of fresh ginger to the jars for a subtle zing. It pairs amazingly with the dill and garlic. For those who want to try a different cooking method, these pickles can be made in larger batches and stored in airtight containers instead of jars, but I find jars help keep flavors concentrated better. If you or your family have allergies to mustard seeds or peppercorns, simply omit them and add extra garlic or dill instead.
Serving & Storage Suggestions
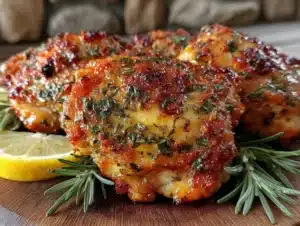
These refrigerator dill pickles are best served chilled straight from the fridge. They brighten up sandwiches, burgers, and charcuterie boards with their crispness and tang. Try them alongside crispy garlic chicken or a fresh garden salad for a satisfying meal.
Store the pickles in the fridge with lids tightly sealed. They keep well for up to 3 weeks, but I recommend consuming them within 2 weeks for peak texture and flavor. If you want to save some for later, these pickles freeze poorly due to their high water content, so refrigeration is best.
When reheating dishes that include these pickles, add them fresh at the end to keep their crunch. Over time, the flavors develop more depth, but the cucumbers may soften slightly—still delicious, just less snap. If you notice the brine level dropping, top off with a little vinegar and water mix to keep them submerged.
Nutritional Information & Benefits
One serving (about 2 spears or 3 slices) of these quick refrigerator dill pickles contains approximately:
| Calories | 10-15 kcal |
|---|---|
| Carbohydrates | 2-3 g |
| Fiber | 0.5 g |
| Sodium | 400-500 mg (varies by salt amount) |
| Fat | 0 g |
| Protein | 0.3 g |
Cucumbers are a low-calorie source of hydration and contain antioxidants. The vinegar in pickles can aid digestion and blood sugar control, while garlic adds immune-boosting compounds. Keep in mind the sodium content is higher, so enjoy in moderation if you’re watching salt intake. For a low-carb or gluten-free diet, these pickles fit perfectly. My nutritionist friend always appreciates having a savory, crunchy snack option that’s guilt-free and homemade.
Conclusion
Easy crispy quick refrigerator dill pickles are a fantastic way to bring fresh, crunchy flavor into your kitchen without the fuss of traditional canning. This recipe feels like a friendly chat over a porch swing—simple, honest, and satisfying every time. Whether you’re new to pickling or a seasoned pro, these pickles offer a delightful balance of tang, spice, and crunch that’s hard to beat.
Feel free to tweak the herbs, spices, or garlic amounts to suit your taste buds. I keep coming back to this recipe because it’s quick, forgiving, and always a hit with guests. If you give it a try, I’d love to hear how you made it your own. Leave a comment or share your variations—I’m all ears!
Happy pickling, and here’s to bringing more simple joys from the kitchen to the table.
Frequently Asked Questions
How long do quick refrigerator dill pickles last in the fridge?
They typically stay good for up to 3 weeks when stored in airtight jars and kept refrigerated.
Can I use regular cucumbers instead of pickling cucumbers?
You can, but pickling cucumbers have thinner skins and fewer seeds, which helps keep pickles crisper.
Is it necessary to boil the brine?
Boiling the brine helps dissolve salt and sugar and releases flavors from the spices, but don’t overheat it to avoid dulling the vinegar’s brightness.
Can I make these pickles vegan and gluten-free?
Yes! This recipe is naturally vegan and gluten-free, using only plant-based ingredients and no gluten-containing additives.
Why are my refrigerator pickles sometimes soggy?
Skipping or shortening the salt soaking step, overripe cucumbers, or using non-pickling cucumbers can cause soggy pickles. Also, make sure the cucumbers are fully submerged in brine.
Pin This Recipe!
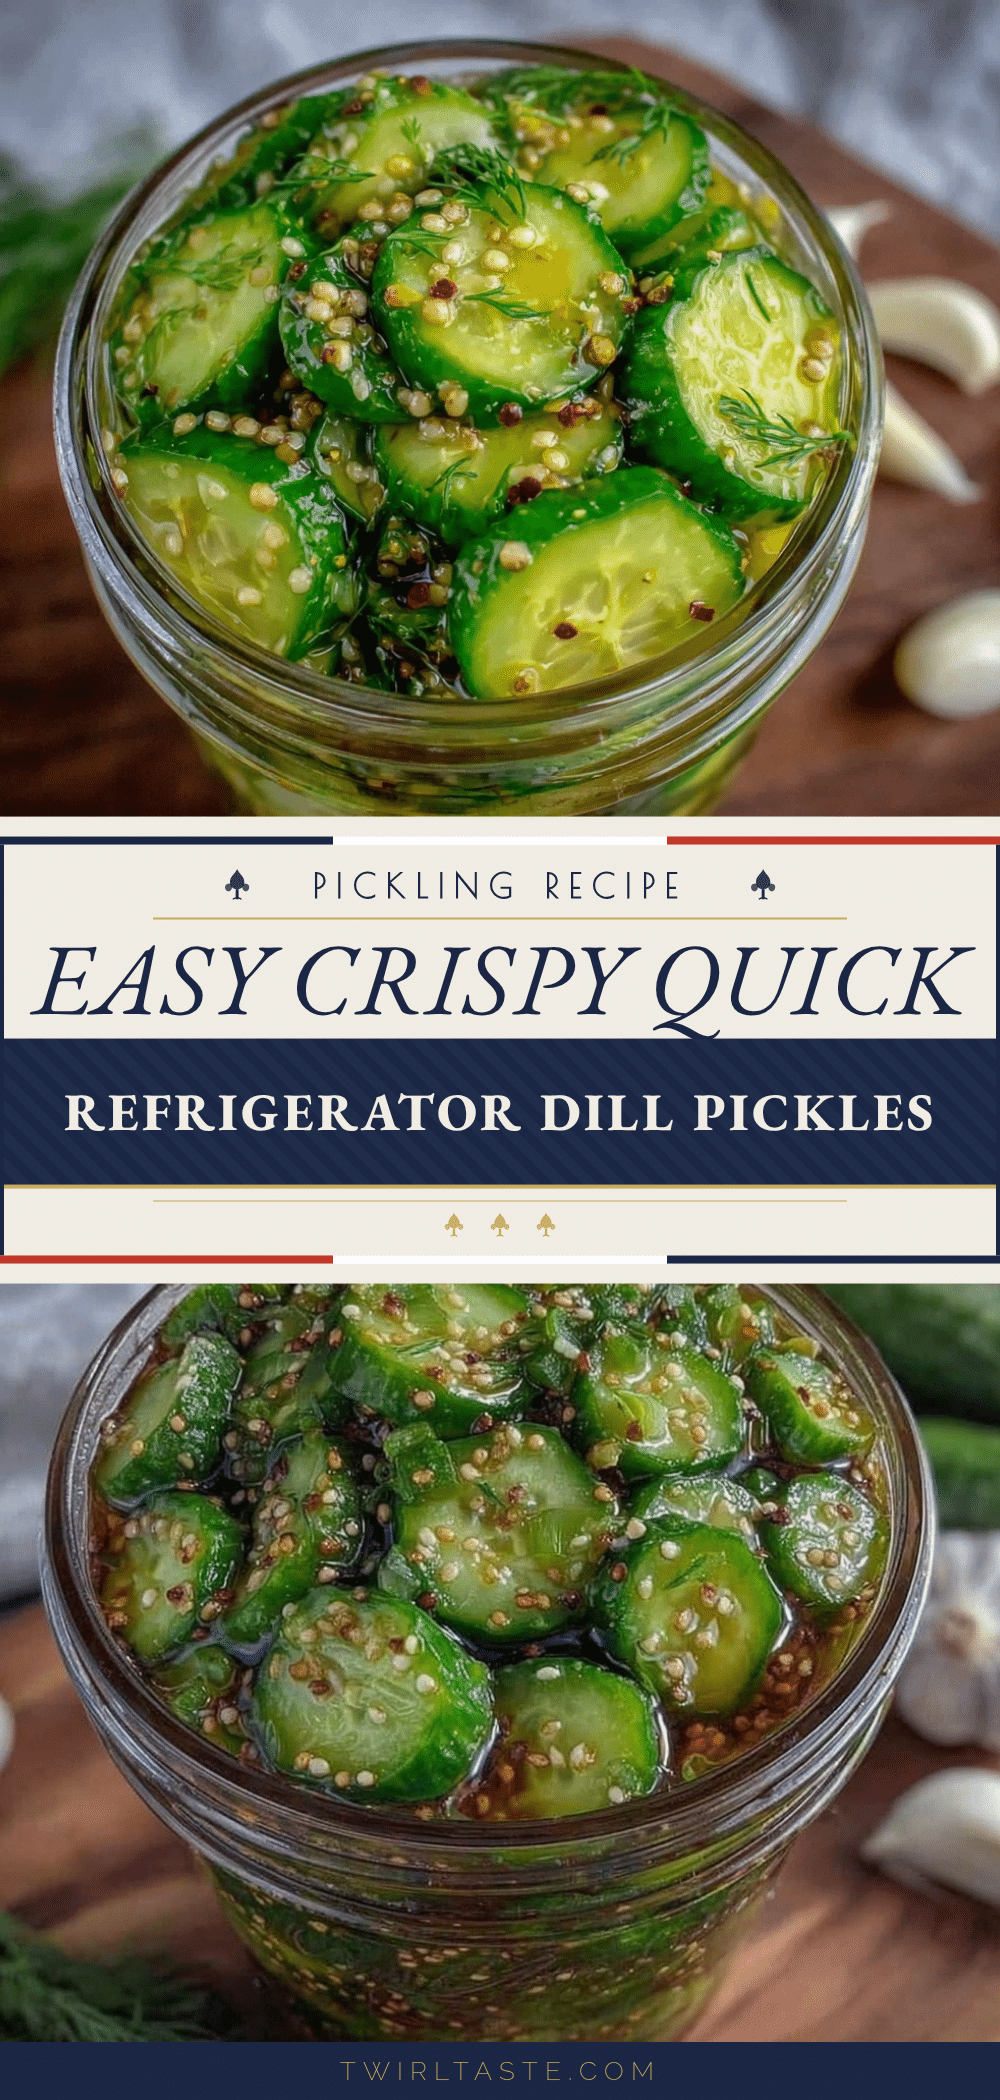
Easy Crispy Quick Refrigerator Dill Pickles Recipe No Canning Needed
A straightforward and fast recipe for making crispy, tangy refrigerator dill pickles without canning. Perfect for quick snacks and summer gatherings.
- Prep Time: 10 minutes
- Cook Time: 10 minutes
- Total Time: 1 hour 20 minutes to 2 hours 10 minutes (including 1-2 hours soaking time)
- Yield: 4-5 servings 1x
- Category: Condiment
- Cuisine: American
Ingredients
- 2 pounds (900 g) small to medium pickling cucumbers or Kirby cucumbers, sliced into spears or rounds
- 4–5 sprigs fresh dill or 2 tablespoons dried dill weed
- 3–4 large garlic cloves, peeled and smashed
- 1 ½ cups (360 ml) distilled white vinegar
- 1 ½ cups (360 ml) cold water
- 2 tablespoons pickling salt
- 1 tablespoon granulated sugar (optional)
- 1 teaspoon whole black peppercorns
- 1 teaspoon mustard seeds
- ¼ teaspoon red pepper flakes (optional)
Instructions
- Wash 2 pounds (900 g) of small pickling cucumbers thoroughly. Slice into spears about 3-4 inches (7.5-10 cm) long or rounds about ¼ inch (6 mm) thick.
- Place the sliced cucumbers in a large bowl and sprinkle 2 tablespoons of pickling salt over them. Toss gently to coat evenly. Let them sit for 1-2 hours to draw out excess moisture.
- Rinse the salted cucumbers under cold water to remove excess salt. Drain well using a colander or clean kitchen towel.
- In a medium saucepan, combine 1 ½ cups (360 ml) white vinegar, 1 ½ cups (360 ml) water, 1 tablespoon granulated sugar, 1 teaspoon black peppercorns, 1 teaspoon mustard seeds, and optional ¼ teaspoon red pepper flakes. Bring to a gentle simmer over medium heat, stirring until sugar and salt dissolve. Remove from heat and let cool slightly for 5 minutes.
- Place 4-5 sprigs of fresh dill and 3-4 smashed garlic cloves at the bottom of each clean jar. Pack the drained cucumber slices tightly but without crushing them.
- Carefully pour the warm brine over the cucumbers until fully submerged, leaving about ½ inch (1.3 cm) of headspace at the top.
- Close the jars tightly with lids and place them in the refrigerator. The pickles will be ready to enjoy after 24 hours but taste better after 2-3 days.
- Store pickles in the fridge for up to 3 weeks. Use clean utensils to avoid contamination.
Notes
Salt soaking cucumbers for 1-2 hours is crucial to maintain crispness. Do not overheat the vinegar brine to preserve flavor. Use clean utensils to avoid contamination. Label jars with date. Adjust salt and vinegar levels to taste. Stir jars gently once a day for better flavor distribution.
Nutrition
- Serving Size: About 2 spears or 3
- Calories: 1015
- Sodium: 400500
- Carbohydrates: 23
- Fiber: 0.5
- Protein: 0.3
Keywords: quick pickles, refrigerator pickles, dill pickles, no canning, easy pickles, crispy pickles, homemade pickles