Love this? Save it for later!
Share the inspiration with your friends
I figured a no-bake pumpkin pie would be a compromise—something you make when you want the flavor of Thanksgiving but can’t be bothered with the whole pastry routine. It took about one bite for that assumption to fall apart completely. This wasn’t a consolation pie. It was the pie I actually wanted, all along.
The first time I made it, I was testing desserts for a Friendsgiving potluck where the oven was already hostage to a massive casserole situation. I needed something that could sit in the fridge, look impressive, and not make me sweat. I grabbed a box of graham crackers, a can of pumpkin, and crossed my fingers. What came out of the fridge a few hours later was so absurdly creamy, so perfectly spiced, and so much easier than any baked pumpkin pie I’d ever made, that I genuinely felt a little cheated. Why had I been doing it the hard way for so long?
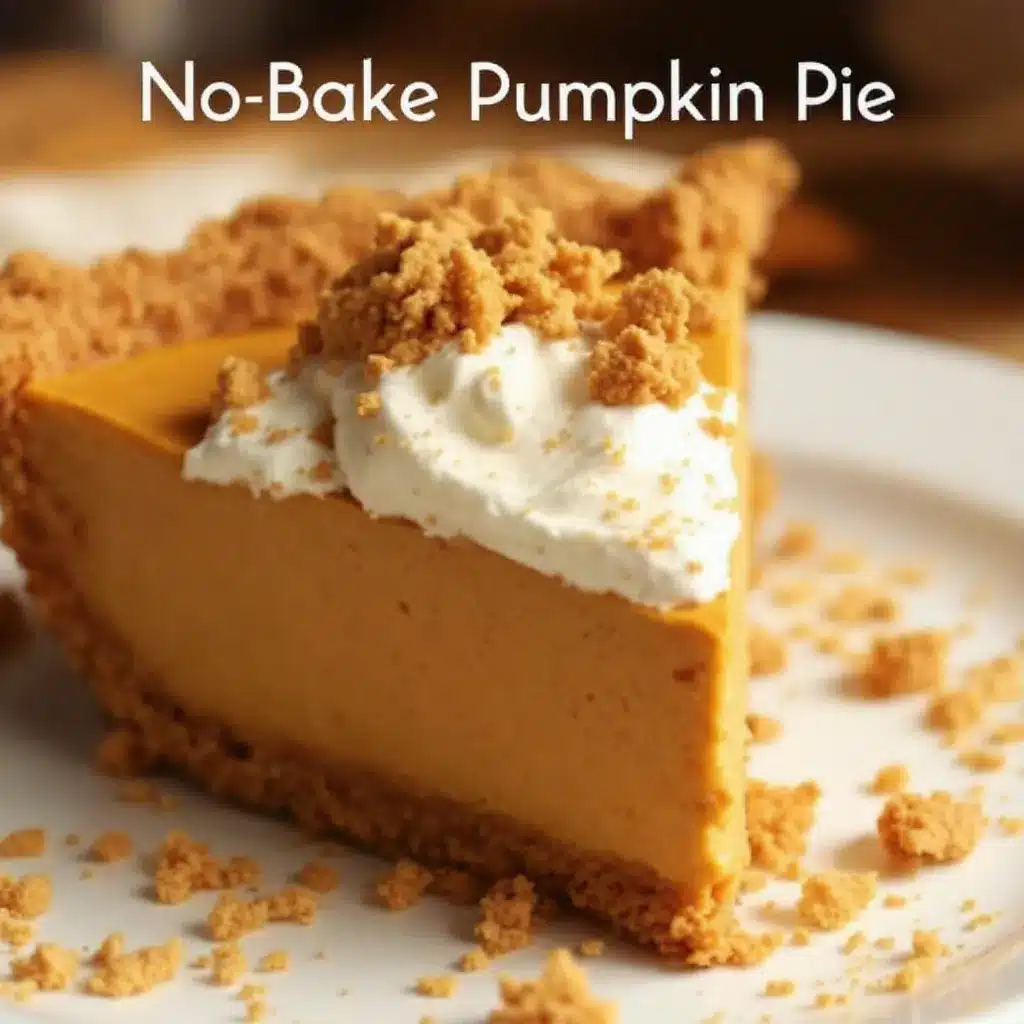
That’s the thing about this Easy No-Bake Pumpkin Pie with Graham Cracker Crust. It doesn’t ask you to prove your culinary worth through blind-baking or custard anxiety. It just asks for a little patience while it sets. And honestly? That patience pays off in the silkiest, most flavorful slice of fall you’ll have all season. No oven required, no stress allowed.
Why You’ll Love This Recipe
This isn’t just another pumpkin pie recipe. It’s the one that makes people say, “Wait, this is no-bake?” and then go back for seconds. Here’s why it works so well:
- No Oven Needed: Perfect for when your oven is full of roasted chicken thighs or a bubbling casserole. This pie chills out in the fridge while everything else cooks.
- Incredibly Creamy Texture: The filling is rich, smooth, and almost mousse-like. It’s a far cry from the sometimes-dense texture of baked pumpkin pie.
- Simple, Pantry-Friendly Ingredients: You probably have most of these on hand, especially if you’ve been doing any fall baking. No weird specialty items here.
- Make-Ahead Dream: This pie actually needs to chill for at least 4 hours, which means you can make it the day before and cross “dessert” off your list well in advance.
- Crowd-Pleaser Guaranteed: I’ve brought this to multiple gatherings, and it disappears every single time. Kids love it, adults love it, and no one misses the oven-baked version.
What makes this recipe different from the dozens of others out there is the method. We’re not just stirring pumpkin puree into pudding mix and calling it a day. The secret is in how we whip the cream cheese and stabilize the filling, giving it a structure that slices cleanly and tastes luxurious. It’s the kind of pie that makes you close your eyes after the first bite—not because it’s fancy, but because it’s just that good.
What Ingredients You Will Need
This recipe uses simple, wholesome ingredients to deliver that classic pumpkin pie flavor with a silky, no-bake texture. Most of these are fall pantry staples, which makes this an easy last-minute dessert.
For the Graham Cracker Crust
- Graham cracker crumbs (1 ½ cups / 180g): You can buy pre-crushed crumbs or pulse about 12 full-sheet graham crackers in a food processor. I prefer the texture of homemade crumbs—they’re more consistent.
- Granulated sugar (¼ cup / 50g): Just enough to sweeten the crust without making it cloying.
- Unsalted butter (6 tablespoons / 85g), melted: The binder. Use melted butter for the best press-in crust. Salted butter works too—just skip the added salt in the crust.
- Pinch of salt: Balances the sweetness and enhances the graham flavor.
For the No-Bake Pumpkin Filling
- Full-fat cream cheese (8 oz / 226g), softened: This is non-negotiable for that rich, creamy texture. Low-fat cream cheese has too much water and can make the filling runny. Let it sit out for at least 30 minutes before starting.
- Pumpkin puree (1 ½ cups / 340g): Not pumpkin pie filling—make sure you grab plain 100% pumpkin puree. Libby’s is my go-to brand for consistent results.
- Powdered sugar (¾ cup / 90g): Dissolves easily into the filling without any graininess. No granulated sugar substitutions here.
- Heavy whipping cream (1 cup / 240ml): We’ll whip this separately and fold it in for that light, airy texture. Don’t substitute with half-and-half or milk—you need the fat content for stability.
- Pumpkin pie spice (2 teaspoons): You can use store-bought or make your own blend of cinnamon, ginger, nutmeg, and allspice. I sometimes add an extra ½ teaspoon of cinnamon because I love it.
- Vanilla extract (1 teaspoon): Pure vanilla adds warmth and depth to the spices.
For Topping (Optional but Recommended)
- Whipped cream: Homemade is best, but store-bought works in a pinch.
- Crumbled graham crackers or gingersnaps: For a little crunch on top.
- Caramel drizzle: A pumpkin spice syrup drizzle would also be incredible here.
Equipment Needed
You don’t need a ton of fancy gear for this pie, which is part of its charm. Here’s what you’ll want to have ready:
- 9-inch pie dish: A standard metal or glass pie plate works perfectly. A ceramic dish will work too, but it might take a little longer to chill through.
- Food processor or rolling pin: For crushing graham crackers. A food processor is faster, but a sealed plastic bag and a rolling pin will get the job done just fine.
- Electric hand mixer or stand mixer: You’ll need this to whip the cream cheese mixture and the heavy cream. A whisk and some serious arm strength could work for the cream, but the cream cheese really needs the power.
- Mixing bowls: One large bowl for the filling, one medium bowl for the whipped cream.
- Rubber spatula: For folding the whipped cream into the pumpkin mixture gently.
Preparation Method
Step 1: Make the Graham Cracker Crust
In a medium bowl, combine the graham cracker crumbs, granulated sugar, and a pinch of salt. Pour the melted butter over the mixture and stir with a fork until every crumb is moistened. It should look like wet sand and hold together when you squeeze a handful.
Press the mixture firmly into the bottom and up the sides of your 9-inch pie dish. I use the bottom of a flat measuring cup to really pack it in—this prevents the crust from crumbling when you cut the pie later. Place the crust in the refrigerator to firm up while you make the filling, at least 15 minutes.
Step 2: Whip the Cream Cheese Base
In a large mixing bowl, beat the softened cream cheese with an electric mixer on medium speed until it’s completely smooth and fluffy, about 2 minutes. Scrape down the sides of the bowl with a spatula. Add the pumpkin puree, powdered sugar, pumpkin pie spice, and vanilla extract. Beat on medium-low until everything is well combined and silky, about 1 minute. Set aside.
Step 3: Whip the Heavy Cream
In a separate clean, cold bowl, pour the heavy whipping cream. Using clean beaters, whip the cream on medium-high speed until stiff peaks form. This takes about 3-4 minutes. You’ll know it’s ready when you lift the beaters and the cream holds its shape without drooping. Be careful not to over-whip, or you’ll end up with butter.
Step 4: Fold It All Together
Take about a third of the whipped cream and stir it into the pumpkin mixture. This lightens the batter and makes it easier to fold in the rest. Then, add the remaining whipped cream and gently fold it in with a rubber spatula. Use a cutting motion down through the center, then sweep up the sides. Repeat until no white streaks remain. The filling should be light, airy, and a uniform pale orange color.
Step 5: Assemble and Chill
Pour the filling into the chilled graham cracker crust. Spread it evenly with the spatula, smoothing the top. Cover the pie loosely with plastic wrap or a reusable cover and refrigerate for at least 4 hours, but overnight is even better. The filling needs this time to set up properly. Don’t rush it—I’ve made that mistake, and the slices were a bit too soft.
Cooking Tips & Techniques
I’ve made this pie more times than I can count, and I’ve learned a few things the hard way. Here are my best tips for perfect results every time:
- Room temperature cream cheese is crucial. If it’s cold, you’ll end up with lumps in your filling that no amount of beating can fully fix. Set it out on the counter at least 30 minutes before you start.
- Don’t skip the crust chilling. A warm crust will start to soften the filling as soon as you pour it in, which can lead to a soggy bottom. Give it a solid 15 minutes in the fridge.
- Fold gently. The secret to that light, mousse-like texture is the whipped cream. If you stir it in aggressively, you’ll deflate all those air bubbles. Be patient and use a gentle hand.
- Chill overnight for the best texture. Four hours is the minimum, but 8-12 hours gives the filling time to fully set into a sliceable, creamy perfection. The flavor also deepens as it sits.
- Use a hot knife for clean slices. Run your knife under hot water, wipe it dry, then slice. Wipe the blade clean between each cut for picture-perfect pieces.
One time, I was in a hurry and used cold cream cheese straight from the fridge. The filling had tiny lumps that never smoothed out. It still tasted fine, but the texture wasn’t nearly as luxurious. Learn from my mistake—patience pays off here.
Variations & Adaptations
This recipe is wonderfully flexible. Here are a few ways to make it your own:
- Gluten-Free Version: Use gluten-free graham crackers or crushed gluten-free gingersnaps for the crust. The filling is naturally gluten-free.
- Dairy-Free Adaptation: Substitute the cream cheese with a good-quality dairy-free cream cheese (I like Kite Hill) and use canned coconut cream (the solid part) instead of heavy whipping cream. The texture will be slightly different but still delicious.
- Spice It Up: Add a pinch of cayenne pepper or black pepper to the filling for a warm, unexpected kick. It plays beautifully with the sweetness of the pumpkin.
- Chocolate Twist: Swap the graham cracker crust for a chocolate cookie crust (like Oreo crumbs). The chocolate-pumpkin combo is surprisingly amazing.
- Mini Pies: Press the crust mixture into a muffin tin lined with paper liners and fill with the pumpkin mixture. These are perfect for parties or portion control. Chill for at least 3 hours.
I once made a version with a gingersnap crust and a drizzle of caramel on top. It was so good I couldn’t stop eating it. That’s the beauty of this recipe—it’s a perfect canvas for your own creative twists.
Serving & Storage Suggestions
This pie is best served cold, straight from the refrigerator. The filling is firm but creamy, and the crust stays perfectly crisp. Here’s how to serve and store it:
- Serving: Top each slice with a generous dollop of whipped cream and a sprinkle of cinnamon or crushed gingersnaps. A drizzle of caramel sauce is never a bad idea. Serve alongside a warm cup of coffee or a maple pumpkin cold foam iced coffee for the ultimate fall treat.
- Refrigeration: Cover the pie dish tightly with plastic wrap or a reusable cover. It will keep in the refrigerator for up to 4 days. The crust may soften slightly over time, but the flavor actually improves.
- Freezing: You can freeze this pie for up to 1 month. Wrap the entire pie (or individual slices) tightly in plastic wrap, then a layer of aluminum foil. Thaw overnight in the refrigerator before serving. The texture remains remarkably good after freezing.
- Flavor Development: Like many no-bake desserts, this pie tastes even better the next day. The spices meld together, and the filling becomes even more cohesive. If you can wait, make it a day ahead.
Nutritional Information & Benefits
While this is definitely a treat, it’s not without its redeeming qualities. Here’s a rough estimate per slice (based on 8 servings):
- Calories: Approximately 380-420
- Fat: 25-28g
- Carbohydrates: 35-40g
- Protein: 5-6g
- Fiber: 2-3g
- Sugar: 22-26g
Pumpkin is a fantastic source of vitamin A, which supports eye health and immune function. It’s also rich in fiber and antioxidants. The cream cheese and heavy cream add calcium and protein, making this a more balanced dessert than you might think. Of course, it’s still a dessert—but one that uses real, whole ingredients without any artificial flavors or preservatives. For a lighter option, you can pair a smaller slice with a pumpkin protein muffin for a satisfying fall snack plate.
Conclusion
This Easy No-Bake Pumpkin Pie with Graham Cracker Crust is the dessert you didn’t know you needed. It’s creamy, spiced perfectly, and requires zero oven time. Whether you’re a seasoned baker or someone who avoids pastry like the plague, this recipe is foolproof, forgiving, and genuinely delicious. It’s become my go-to for Thanksgiving, potlucks, and any fall gathering where I want to impress without the stress.
I love this pie because it feels like a warm hug on a plate—comforting, familiar, and just a little bit indulgent. And the best part? You can make it your own. Try it with a different crust, add your favorite spices, or pile on the toppings. Whatever you do, I promise it will disappear fast.
Have you tried this recipe? I’d love to hear how it turned out! Drop a comment below with your favorite variation, or share a photo of your pie. And if you loved it, don’t forget to pin it for later—your future self will thank you.
Frequently Asked Questions
Can I use pumpkin pie filling instead of pumpkin puree?
No, I wouldn’t recommend it. Pumpkin pie filling is already sweetened and spiced, which will throw off the balance of this recipe. Stick with plain 100% pumpkin puree for the best results.
How long does this pie need to set in the fridge?
At least 4 hours is the minimum, but overnight is ideal. The longer it chills, the firmer and more sliceable it becomes. Don’t rush this step—it’s crucial for the texture.
Can I make this pie ahead of time?
Absolutely! In fact, I recommend it. This pie tastes even better the next day after the flavors have had time to meld. You can make it up to 2 days in advance and keep it covered in the refrigerator.
My crust keeps crumbling. What am I doing wrong?
You might not have enough butter, or you might not be pressing it firmly enough. Make sure your crumbs are evenly moistened and pack them down hard with a flat-bottomed glass or measuring cup. Chilling the crust before adding the filling also helps it hold together.
Can I use a store-bought graham cracker crust?
You can, but the texture won’t be quite the same. Homemade crusts have a better buttery flavor and a firmer texture. If you’re in a pinch, a store-bought crust will work—just make sure it’s a 9-inch size.
Pin This Recipe!
Easy No-Bake Pumpkin Pie with Perfect Graham Cracker Crust

This no-bake pumpkin pie is incredibly creamy, perfectly spiced, and requires zero oven time. It’s the perfect make-ahead dessert for Thanksgiving or any fall gathering.
- Prep Time: 20 minutes
- Cook Time: 0 minutes
- Total Time: 4 hours 20 minutes (includes chilling)
- Yield: 8 servings 1x
- Category: Dessert
- Cuisine: American
Ingredients
- 1 ½ cups (180g) graham cracker crumbs
- ¼ cup (50g) granulated sugar
- 6 tablespoons (85g) unsalted butter, melted
- Pinch of salt
- 8 oz (226g) full-fat cream cheese, softened
- 1 ½ cups (340g) pumpkin puree (not pumpkin pie filling)
- ¾ cup (90g) powdered sugar
- 1 cup (240ml) heavy whipping cream
- 2 teaspoons pumpkin pie spice
- 1 teaspoon vanilla extract
- Whipped cream for topping (optional)
- Crumbled graham crackers or gingersnaps for topping (optional)
- Caramel drizzle for topping (optional)
Instructions
- In a medium bowl, combine graham cracker crumbs, granulated sugar, and a pinch of salt. Pour melted butter over the mixture and stir with a fork until every crumb is moistened. Press firmly into the bottom and up the sides of a 9-inch pie dish. Refrigerate for at least 15 minutes.
- In a large mixing bowl, beat softened cream cheese with an electric mixer on medium speed until smooth and fluffy, about 2 minutes. Add pumpkin puree, powdered sugar, pumpkin pie spice, and vanilla extract. Beat on medium-low until well combined and silky, about 1 minute. Set aside.
- In a separate clean, cold bowl, whip heavy whipping cream on medium-high speed until stiff peaks form, about 3-4 minutes.
- Fold about one-third of the whipped cream into the pumpkin mixture to lighten it. Then gently fold in the remaining whipped cream until no white streaks remain.
- Pour the filling into the chilled crust and spread evenly. Cover loosely with plastic wrap and refrigerate for at least 4 hours, preferably overnight.
Notes
Room temperature cream cheese is crucial for a smooth filling. Chill the pie overnight for the best texture. Use a hot knife for clean slices.
Nutrition
- Serving Size: 1 slice
- Calories: 400
- Sugar: 24
- Sodium: 280
- Fat: 26
- Saturated Fat: 15
- Carbohydrates: 38
- Fiber: 2
- Protein: 5
Keywords: no-bake pumpkin pie, easy pumpkin pie, graham cracker crust, Thanksgiving dessert, fall dessert, no-bake dessert


