Easy Halloween Rice Krispie Treat Pumpkins
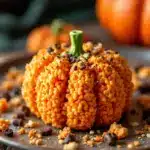
These cute and easy Halloween Rice Krispie Treat Pumpkins are made with simple ingredients and come together in about 20 minutes. Perfect for class parties, trunk-or-treat events, or a fun weekend project with kids.
- Prep Time: 20 minutes
- Cook Time: 5 minutes
- Total Time: 25 minutes
- Yield: 12 servings 1x
- Category: Dessert
- Cuisine: American
Ingredients
- 3 tablespoons unsalted butter
- 1 package (10 ounces) regular marshmallows
- 6 cups Rice Krispies cereal
- Orange gel food coloring
- Orange sanding sugar or sprinkles
- Pretzel sticks
- Green candy melts or green frosting
- Non-stick cooking spray
Instructions
- Prep your workspace: Line your 9×13-inch pan with parchment paper, leaving some overhang on the sides. Spray the parchment lightly with non-stick cooking spray. Set aside.
- Melt the butter: In your large saucepan, melt the 3 tablespoons of unsalted butter over medium-low heat. Do not rush this—medium-low is important. If the butter browns, it will change the flavor and make the treats taste nutty instead of sweet and buttery.
- Add the marshmallows: Once the butter is fully melted, add the entire package of marshmallows. Stir constantly with your rubber spatula until the marshmallows are completely melted and the mixture is smooth. This takes about 4-5 minutes. Keep the heat on low—do not turn it up. Patience here is everything.
- Add the orange color: Remove the saucepan from the heat. Add about 15-20 drops of orange gel food coloring (or more if you want a deeper shade). Stir until the color is evenly distributed. The mixture should look like a bright, vibrant orange—think Halloween pumpkin, not pastel.
- Fold in the cereal: Add the 6 cups of Rice Krispies cereal to the saucepan. Fold gently with your spatula until all the cereal is coated in the orange marshmallow mixture. Be careful not to crush the cereal—you want those puffs to stay intact for the best texture.
- Transfer to the pan: Scrape the mixture into your prepared 9×13 pan. Press it down gently with the back of your spatula (spray the spatula with non-stick spray first). Do not press too hard—you want a thick layer, not a compacted brick. Let it cool for about 5-10 minutes, just until it is cool enough to handle but still warm and pliable.
- Shape the pumpkins: Spray your hands generously with non-stick cooking spray. Scoop out about 2 tablespoons of the mixture and roll it into a ball. Then, gently pinch the top to create a slight point, and use your fingers to shape the bottom into a round pumpkin form. You want it to look like a mini pumpkin—rounded on the bottom, slightly tapered at the top. Place each shaped pumpkin on a piece of parchment paper.
- Add the orange coating: Pour some orange sanding sugar into a shallow bowl. Roll each shaped pumpkin in the sugar, coating it evenly. This gives them that beautiful sparkly orange look and adds a little crunch.
- Attach the stems: Break a pretzel stick into small pieces—about 1/2 inch each. Dip one end of the pretzel piece into melted green candy melts or green frosting, and press it gently into the top of the pumpkin. Hold for a few seconds until it stays in place. If you want to add a little leaf, pipe a small green leaf shape next to the stem using the same candy melts.
- Let them set: Place the finished pumpkins on a baking sheet lined with parchment paper. Let them sit at room temperature for about 15-20 minutes until the stems are secure and the treats are fully set.
Notes
Do not overwork the mixture when shaping; the more you handle it, the denser the treats get. Use low heat when melting marshmallows to avoid scorching. Keep hands greased with non-stick spray or water to prevent sticking. These treats are best made the same day you plan to serve them, but they stay fresh for about 2 days at room temperature. For freezing, place in a single layer on a baking sheet and freeze for 1 hour, then transfer to a freezer-safe bag for up to 1 month.
Nutrition
- Serving Size: 1 pumpkin
- Calories: 175
- Sugar: 18
- Sodium: 180
- Fat: 4
- Saturated Fat: 2
- Carbohydrates: 35
- Protein: 1
Keywords: Halloween, Rice Krispie treats, pumpkins, no-bake, easy, kid-friendly, fall, party treat