Love this? Save it for later!
Share the inspiration with your friends
“I swear, it was the faint sound of jazz drifting from my neighbor’s open window that led me to this recipe,” I remember telling my friend last summer. It was a quiet Thursday evening when I stopped by to borrow a cup of sugar, and instead, I was handed a tiny, cracked glass cup filled with what looked like a dessert masterpiece. The strawberry cheesecake cups with creamy layers were unassuming but utterly mesmerizing. Honestly, I was skeptical at first—cheesecake in a cup? But one spoonful and I was hooked.
That evening, I learned this dessert was a bit of an accidental creation from my neighbor’s last-minute preparations for a small dinner party. No fancy equipment, no fuss—just simple ingredients brought together with love and a touch of improvisation. I even accidentally knocked over the sugar jar mid-prep (classic me), but that didn’t stop her from whipping up these elegant treats that looked like they belonged in a boutique bakery.
Maybe you’ve been there—wanting something special but easy, that impresses without hours in the kitchen. These strawberry cheesecake cups are exactly that. The creamy layers, the fresh strawberry brightness, and the buttery crumble base come together in a way that feels indulgent yet approachable. Over the months, I’ve adapted and perfected the recipe, making it a staple for brunches, celebrations, or whenever I crave something sweet but not over the top. Let me tell you, it’s the kind of dessert that makes you close your eyes after the first bite and savor every spoonful.
Why You’ll Love This Elegant Strawberry Cheesecake Cups Recipe
Having tested this recipe countless times (and yes, occasionally eating more than my fair share), I can confidently say these strawberry cheesecake cups have a magic all their own.
- Quick & Easy: Ready in about 30 minutes plus chilling time—perfect for busy evenings or impromptu guests.
- Simple Ingredients: No need to hunt for exotic items; most are pantry staples or fresh fruit you can find year-round.
- Perfect for Special Occasions: Whether it’s a brunch, romantic dinner, or holiday gathering, these cups bring a touch of elegance without stress.
- Crowd-Pleaser: Kids and adults alike rave about the balance between creamy, tangy, and sweet flavors.
- Unbelievably Delicious: The texture combo—from the crunchy crust to the velvety cream and juicy strawberries—is next-level comfort food.
This isn’t just another cheesecake recipe. I blend the cream cheese with a hint of vanilla and fold in whipped cream to get that ultra-light, creamy layer that melts on your tongue. The strawberry layer isn’t just sliced fruit tossed on top—it’s a lightly macerated, slightly sweetened mix that adds freshness and brightness. Honestly, it’s the kind of dessert that feels fancy but is surprisingly easy to make at home.
Plus, it’s a great way to impress guests without spending hours in the kitchen. And if you’re someone who loves making desserts that look as good as they taste, these cups will quickly become your go-to.
What Ingredients You Will Need
This recipe uses simple, wholesome ingredients to deliver bold flavor and satisfying texture without the fuss. Most of these are pantry staples, and the fresh strawberries add a seasonal pop of color and taste.
- For the crust:
- 1 ½ cups graham cracker crumbs (about 10 full sheets) – I recommend Honey Maid for great texture
- 5 tablespoons unsalted butter, melted (adds richness and binds the crust)
- 2 tablespoons granulated sugar (balances the buttery flavor)
- For the creamy cheesecake layer:
- 16 ounces (450g) cream cheese, softened – use full-fat for best creaminess
- ⅔ cup powdered sugar – sifted to avoid lumps
- 1 teaspoon pure vanilla extract (Madagascar vanilla is my favorite)
- 1 cup heavy cream, chilled – for whipping into soft peaks
- For the strawberry layer:
- 2 cups fresh strawberries, hulled and sliced (use ripe, fragrant berries)
- 2 tablespoons granulated sugar (helps macerate the strawberries)
- 1 teaspoon fresh lemon juice (brightens the flavor)
Substitution Tips: For a gluten-free option, swap graham crackers with gluten-free cookies or almond flour crust. Use coconut cream instead of heavy cream for a dairy-free twist, though texture will be a bit different.
Equipment Needed
- Mixing bowls (medium and large)
- Electric mixer or stand mixer with whisk attachment – though you can hand whisk, it takes longer and arm workout!
- Measuring cups and spoons
- Spoon or spatula for folding the whipped cream
- Small dessert cups or glasses (about 6-8 ounces each) – clear ones show off the layers beautifully
- Fine mesh sieve (optional, for sifting powdered sugar)
- Knife and cutting board for slicing strawberries
If you don’t have a stand mixer, a hand mixer works just fine. I once whipped cream by hand when my mixer broke down mid-prep—let’s just say it was a tasty arm workout! For budget-friendly dessert cups, repurposed small mason jars or clean jelly jars work wonderfully and add charm.
Preparation Method
- Prepare the crust: In a medium bowl, combine graham cracker crumbs, sugar, and melted butter. Mix until the crumbs are evenly coated and resemble wet sand. (This should take about 2 minutes.)
- Divide the crust: Spoon the mixture evenly into your dessert cups, pressing gently with the back of a spoon to create a firm base layer. (This step takes about 5 minutes.) Place the cups in the fridge to chill while you prepare the filling.
- Macerate the strawberries: In a small bowl, toss the sliced strawberries with sugar and lemon juice. Let sit for 15-20 minutes, stirring occasionally. You’ll notice the strawberries release juice, forming a natural syrup—this adds a nice glaze and fresh flavor.
- Make the cheesecake layer: In a large mixing bowl, beat the softened cream cheese and powdered sugar on medium speed until smooth and creamy (about 3-4 minutes). Add vanilla extract and mix until combined.
- Whip the cream: In a separate chilled bowl, whip the heavy cream until soft peaks form (about 3-5 minutes). Be careful not to overwhip; you want it light and airy.
- Fold the cream into the cream cheese: Gently fold the whipped cream into the cream cheese mixture using a spatula. Take your time to preserve the airy texture—this step is key for creamy layers.
- Assemble the cups: Remove the cups from the fridge and add a generous layer of the creamy cheesecake mixture over the crust. Top with a spoonful of the macerated strawberries and a bit of their syrup for shine.
- Chill: Refrigerate the assembled cups for at least 2 hours (or overnight if possible) to let flavors meld and the cheesecake layer firm up.
- Serve: Just before serving, garnish with a fresh strawberry slice or a small mint leaf for an elegant touch.
Tips: If your cream cheese isn’t fully softened, it can cause lumps—let it sit at room temp for 30 minutes before starting. Also, don’t rush folding the whipped cream; it’s tempting, but gentle folding keeps the texture perfect.
Cooking Tips & Techniques
Making cheesecake cups might sound fancy, but honestly, it’s all about a few simple techniques done right. First, always soften your cream cheese well. I’ve had batches where I didn’t wait long enough, and the filling turned grainy. Not fun.
Whipping cream can be tricky—too little and it won’t hold, too much and it turns buttery. I like to stop when soft peaks form, meaning the cream holds its shape but still looks silky. Also, keep your mixing bowl chilled for faster whipping.
When folding the whipped cream into the cream cheese, think of it like folding in egg whites for a souffle. Use a spatula to gently cut down through the mixture, sweep across the bottom, and fold over the top. Repeat until mostly combined but still airy. This keeps your layers light and creamy instead of dense.
Chilling time is crucial. I learned the hard way that rushing this step leads to a runny dessert. Overnight chilling is ideal if you can plan ahead—it lets the crust absorb moisture and the flavors blend beautifully.
Lastly, the strawberries. Macerating them with sugar and lemon juice softens them slightly and brings out their natural sweetness. I once skipped this step, and the strawberries tasted a bit flat. Don’t skip it!
Variations & Adaptations
- Berry Mix: Swap strawberries with a mix of raspberries, blueberries, and blackberries for a colorful twist that’s still fresh and tangy.
- Chocolate Crust: Add 2 tablespoons of cocoa powder to the graham cracker crust for a chocolaty base that pairs wonderfully with the cream cheese.
- Dairy-Free Version: Use coconut cream instead of heavy cream and a dairy-free cream cheese alternative. The texture shifts slightly but the flavor remains delightful.
- Individual Flavor Layers: Try adding a thin layer of strawberry jam or lemon curd between the crust and cream cheese for a surprise burst of flavor.
- Personal Twist: I sometimes add a pinch of cinnamon to the crust mix for a warm undertone—a little secret that guests often ask about.
Serving & Storage Suggestions
These elegant strawberry cheesecake cups are best served chilled straight from the fridge. The creamy layers hold their shape beautifully, making them perfect for elegant presentation at dinner parties or casual get-togethers. Garnish simply with a fresh strawberry slice or a mint sprig for that extra touch.
They pair wonderfully with a light sparkling rosé, a cup of freshly brewed coffee, or even a sweet iced tea on warm days.
Store leftover cups covered tightly in the refrigerator for up to 3 days. If you want to prepare ahead, assemble the cups without the strawberry layer and add fresh fruit just before serving to keep the berries bright and fresh.
Reheating isn’t recommended—these are best cold. Flavors actually deepen and meld after a night in the fridge, so I always find they taste even better the next day.
Nutritional Information & Benefits
Each serving of these strawberry cheesecake cups offers about 350 calories, with a good balance of fats from cream cheese and heavy cream, some natural sugars from fresh strawberries, and a small amount of carbs from the crust.
Strawberries provide vitamin C and antioxidants, while the cream cheese offers a dose of calcium and protein. Using fresh fruit keeps this dessert on the lighter side compared to traditional, dense cheesecakes.
For those watching carbs, swapping the graham cracker crust for almond flour can lower the carb count and add a nutty flavor. This recipe naturally avoids gluten if you choose gluten-free crumbs. Just watch out for dairy if you have allergies—there are excellent substitutes to try.
From my wellness angle, this dessert feels like a treat but keeps things fresh and balanced—perfect for when you want indulgence without going overboard.
Conclusion
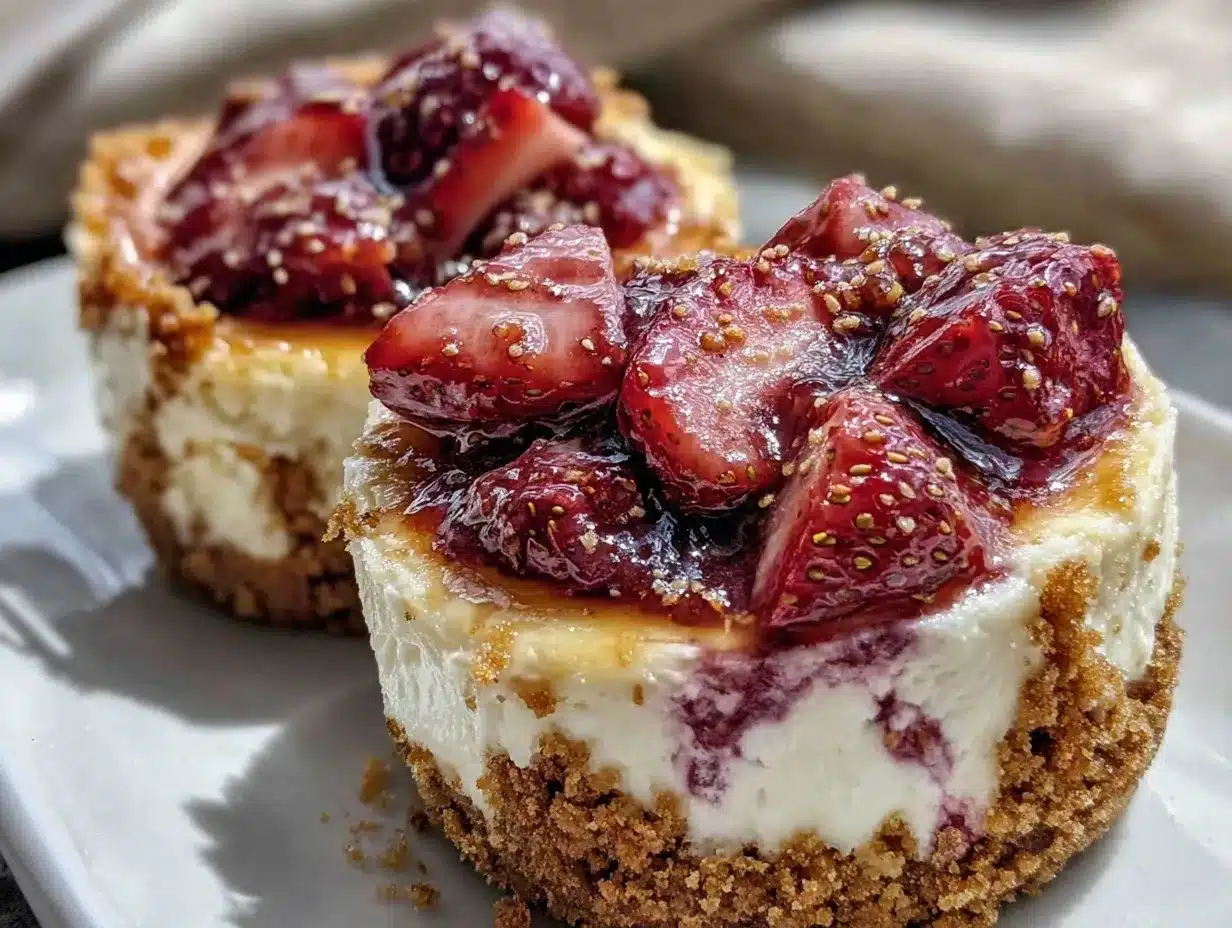
Elegant Strawberry Cheesecake Cups with Creamy Layers are a perfect blend of ease and sophistication—something that looks impressive but feels doable. I love how the layers come together: buttery crust, fluffy cream cheese filling, and juicy strawberries that brighten every bite. Honestly, it’s a recipe I keep coming back to, whether I’m hosting friends or just needing a little sweet comfort after a long day.
Feel free to tweak the layers, substitute ingredients, or add your own twist. That’s the beauty of these cups—they’re flexible and forgiving. If you try this recipe, I’d love to hear how you make it your own! Share your thoughts, questions, or favorite variations in the comments below. Let’s keep the conversation—and the desserts—flowing.
Here’s to many delicious spoons of creamy strawberry bliss!
Frequently Asked Questions
Can I make these strawberry cheesecake cups ahead of time?
Absolutely! You can prepare them up to 24 hours ahead. Just add the strawberry topping right before serving to keep the fruit fresh.
What can I use instead of graham cracker crumbs?
You can substitute with crushed digestive biscuits, gluten-free cookies, or almond flour for a low-carb option.
How long should I chill the cheesecake cups?
At least 2 hours is needed, but overnight chilling gives the best texture and flavor melding.
Can I freeze these cheesecake cups?
Freezing isn’t recommended as the texture can change and become watery when thawed. It’s best enjoyed fresh.
Is there a non-dairy alternative for the creamy layer?
Yes! Use coconut cream and vegan cream cheese substitutes. The texture will be slightly different but still delicious.
By the way, if you enjoy layered desserts, you might appreciate the classic vanilla pudding parfaits I shared recently, which also blend creamy layers with fresh fruit for a delightful treat.
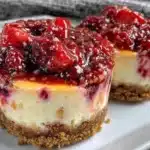
Pin This Recipe!

Elegant Strawberry Cheesecake Cups
A quick and easy layered dessert featuring a buttery graham cracker crust, creamy vanilla cheesecake filling, and fresh macerated strawberries. Perfect for brunches, celebrations, or any time you crave a sweet but light treat.
- Prep Time: 15 minutes
- Cook Time: 0 minutes
- Total Time: 2 hours 15 minutes
- Yield: 6 servings 1x
- Category: Dessert
- Cuisine: American
Ingredients
- 1 ½ cups graham cracker crumbs (about 10 full sheets)
- 5 tablespoons unsalted butter, melted
- 2 tablespoons granulated sugar
- 16 ounces (450g) cream cheese, softened
- ⅔ cup powdered sugar, sifted
- 1 teaspoon pure vanilla extract
- 1 cup heavy cream, chilled
- 2 cups fresh strawberries, hulled and sliced
- 2 tablespoons granulated sugar
- 1 teaspoon fresh lemon juice
Instructions
- In a medium bowl, combine graham cracker crumbs, sugar, and melted butter. Mix until the crumbs are evenly coated and resemble wet sand (about 2 minutes).
- Spoon the crust mixture evenly into dessert cups, pressing gently with the back of a spoon to create a firm base layer. Chill in the fridge while preparing the filling (about 5 minutes).
- In a small bowl, toss sliced strawberries with sugar and lemon juice. Let sit for 15-20 minutes, stirring occasionally to macerate.
- In a large mixing bowl, beat softened cream cheese and powdered sugar on medium speed until smooth and creamy (3-4 minutes). Add vanilla extract and mix until combined.
- In a separate chilled bowl, whip heavy cream until soft peaks form (3-5 minutes).
- Gently fold whipped cream into the cream cheese mixture using a spatula, preserving the airy texture.
- Remove cups from fridge and add a generous layer of cheesecake mixture over the crust. Top with a spoonful of macerated strawberries and some syrup.
- Refrigerate assembled cups for at least 2 hours or overnight to let flavors meld and cheesecake layer firm up.
- Before serving, garnish with a fresh strawberry slice or a small mint leaf.
Notes
Ensure cream cheese is fully softened to avoid lumps. Whip heavy cream to soft peaks only to maintain light texture. Gently fold whipped cream into cream cheese mixture to keep layers airy. Macerate strawberries to enhance flavor and natural syrup. Chill at least 2 hours or overnight for best results. For gluten-free, substitute graham crackers with gluten-free cookies or almond flour. For dairy-free, use coconut cream and dairy-free cream cheese alternatives.
Nutrition
- Serving Size: 1 dessert cup (about
- Calories: 350
- Sugar: 16
- Sodium: 210
- Fat: 26
- Saturated Fat: 15
- Carbohydrates: 22
- Fiber: 2
- Protein: 5
Keywords: strawberry cheesecake cups, layered dessert, easy cheesecake, no-bake dessert, creamy cheesecake, graham cracker crust, fresh strawberries