Love this? Save it for later!
Share the inspiration with your friends
Fourth time in two weeks and I finally stopped futzing with the bun-to-patty ratio. It sounds ridiculous to obsess over something so small—literally small—but there I was, staring at a slider that was all bread and no beef, wondering why I kept making the same mistake. The answer, as it turns out, was patience. Not just with the onions (which take forever, let’s be honest), but with the whole process of building something tiny that’s supposed to taste enormous.
These mini beef sliders with caramelized onions started as a weeknight experiment born from a bag of leftover dinner rolls and a pound of ground beef I needed to use. I figured I’d throw something together, feed the kids, and move on. Instead, I found myself standing at the stove, watching onions turn from white to gold to deep amber, thinking about how a simple pile of caramelized onions can make a basic burger feel like a real meal. By the third batch, I had stopped treating them like “little burgers” and started treating them like their own thing—a perfect little package of savory, sweet, and beefy that doesn’t need much else.
Honestly, the first few attempts were fine. Edible. But not memorable. The onions were too wet, the patties were too thick, and the whole thing fell apart after two bites. But by that fourth batch, something clicked. I had dialed in the onion technique, found the right bun, and realized that a smear of good mayo and a slice of melted cheese was all the decoration these sliders needed. They became the kind of thing you make when you want to feel like you’re eating something special, even if it’s just a Tuesday night.
These sliders are proof that small things can be seriously satisfying. And once you get the hang of those caramelized onions, you won’t go back.
Why You’ll Love This Recipe
I’ve tested this recipe more times than I care to admit, and here’s what I’ve learned: these mini beef sliders with caramelized onions hit every note you want from a comfort food dinner. They’re not fussy, but they taste like you spent way more time than you actually did.
- Quick & Easy: From start to finish, these sliders come together in about 35 minutes. The onions take the longest, but you can do other stuff while they cook.
- Simple Ingredients: Ground beef, onions, butter, buns, cheese, and a few pantry staples. That’s it. No fancy grocery store trips required.
- Perfect for Game Day or Weeknight Dinner: These sliders work for everything. I’ve served them during football Sundays alongside my easy football dip bites, and I’ve made them on random Wednesdays when I needed dinner in a hurry.
- Crowd-Pleaser: Kids love them because they’re small and fun. Adults love them because they taste like a real burger. Everyone wins.
- Unbelievably Delicious: The combination of juicy beef, sweet caramelized onions, and melted cheese on a soft bun is next-level comfort food. I’m not exaggerating when I say I’ve had three in one sitting.
The secret here is treating the caramelized onions with respect. Most recipes rush them, but taking the time to cook them low and slow makes all the difference. These sliders aren’t just another version of a mini burger—they’re the version you’ll come back to again and again. The kind that makes you close your eyes after the first bite, even if you’re just standing at the kitchen counter.
What Ingredients You Will Need
This recipe uses simple, everyday ingredients to deliver big flavor. Nothing weird, nothing hard to find—just good stuff that works together. Here’s what you need:
For the Caramelized Onions:
- 2 large yellow onions, thinly sliced (about 4 cups sliced) – Yellow onions caramelize beautifully and turn sweet. You can use white or sweet onions, but yellow gives the best depth of flavor.
- 2 tablespoons unsalted butter – Butter adds richness that oil just can’t match. I use Kerrygold, but any good-quality butter works.
- 1/4 teaspoon salt – Helps draw out moisture and speeds up the caramelization process.
- 1 tablespoon water – Added near the end to deglaze the pan and pick up all those stuck-on bits.
For the Beef Patties:
- 1 pound ground beef (80/20 blend) – The 20% fat content is key here. Leaner beef will make dry sliders, and nobody wants that. I prefer grass-fed beef when I can find it, but regular works great.
- 1 teaspoon salt – Season generously. Sliders need bold flavor since they’re small.
- 1/2 teaspoon black pepper, freshly ground – Freshly ground pepper makes a difference. Pre-ground is fine, but fresh has more punch.
- 1/2 teaspoon garlic powder – Adds savory depth without being overpowering. Don’t skip this.
- 1/2 teaspoon onion powder – Doubles down on the onion flavor. Trust me on this one.
- 1 tablespoon Worcestershire sauce – Adds umami and a little tang. This is my secret weapon for beef patties.
For Assembly:
- 12 slider buns – I recommend soft brioche or potato rolls. They hold up well and don’t overwhelm the filling. Martin’s potato rolls are my go-to.
- 6 slices cheddar cheese, cut in half – You want the cheese to cover the patty without hanging off too much. Sharp cheddar adds the most flavor.
- 3 tablespoons mayonnaise – Spread on the buns for moisture and tang. Duke’s is my favorite, but any brand works.
- Optional toppings: Pickle slices, lettuce, tomato slices – These are nice but totally optional. The caramelized onions are the star here.
One note on the beef: if you can, ask your butcher to grind it fresh. Pre-packaged ground beef works fine, but freshly ground has better texture and flavor. Also, let the patties rest at room temperature for about 10 minutes before cooking—they’ll cook more evenly.
Equipment Needed
You don’t need a lot of fancy equipment to make these mini beef sliders with caramelized onions. Here’s what I use:
- Large skillet or frying pan (12-inch is ideal) – You need enough surface area to cook the onions without crowding them. Cast iron works beautifully here.
- Medium skillet or griddle – For cooking the patties. A cast iron skillet or non-stick pan both work. I prefer cast iron for the best sear.
- Sharp knife and cutting board – For slicing onions thinly and evenly. A mandoline works too if you have one, but a sharp chef’s knife does the job.
- Spatula – A thin metal spatula works best for flipping delicate slider patties without breaking them.
- Mixing bowl – For combining the ground beef with seasonings.
- Baking sheet – For toasting the buns in the oven. You can skip this if you’re using a toaster or pan.
- Pastry brush or butter knife – For spreading mayo on the buns.
- Kitchen scale (optional) – If you want perfectly even patties, weighing them out to about 1.3 ounces each ensures consistency.
If you don’t have a griddle, don’t worry. A regular non-stick skillet works perfectly. And if you’re short on time, you can caramelize the onions in a slow cooker—it takes longer but requires less attention. Just set it on low for 4-5 hours and stir occasionally.
Preparation Method
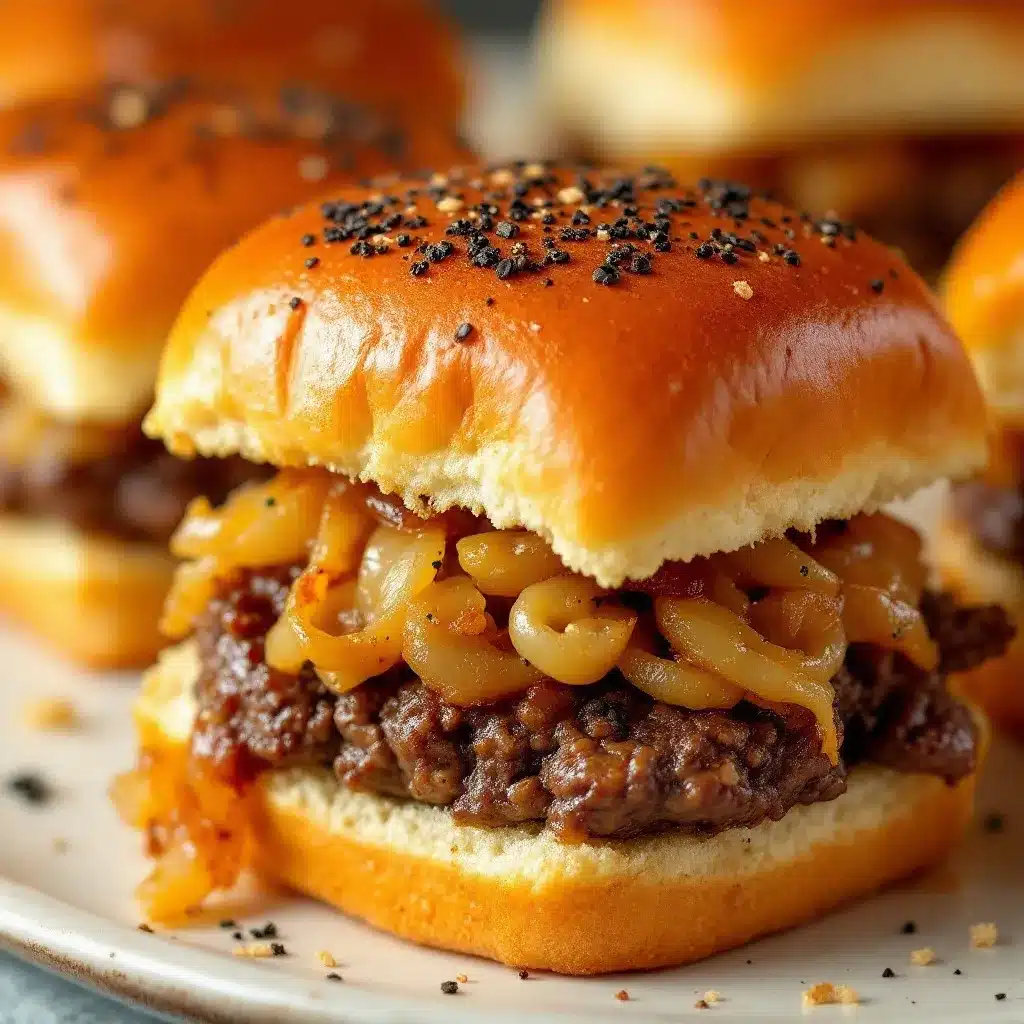
Let me walk you through this step by step. I’ve made these sliders enough times to know exactly where things can go wrong, so I’ll point out the tricky parts as we go.
- Start the caramelized onions first. Heat a large skillet over medium-low heat. Add the 2 tablespoons of butter and let it melt completely. Add the thinly sliced onions and the 1/4 teaspoon salt. Stir to coat the onions in butter. Cook for 25-30 minutes, stirring every 5 minutes or so. The onions should be deep golden brown and very soft. If they start to stick to the pan, add a tablespoon of water and scrape up the browned bits. This is where the magic happens—don’t rush it.
- While the onions cook, make the patties. In a mixing bowl, combine the ground beef, salt, pepper, garlic powder, onion powder, and Worcestershire sauce. Mix gently with your hands—don’t overwork the meat or the patties will be tough. Divide the mixture into 12 equal portions (about 1.3 ounces each if you’re weighing them). Roll each portion into a ball, then flatten into a thin patty about 2.5 inches wide. Make a small indent in the center of each patty with your thumb—this prevents them from puffing up into balls as they cook.
- Toast the buns. Preheat your oven to 350°F. Split the slider buns in half and place them cut-side up on a baking sheet. Bake for 3-4 minutes until lightly toasted. You can also toast them in a dry skillet over medium heat for 1-2 minutes. This step makes a huge difference—untoasted buns get soggy fast.
- Cook the patties. Heat a large skillet or griddle over medium-high heat. You don’t need oil since the beef has enough fat. Place the patties in the pan, working in batches if needed. Don’t overcrowd the pan. Cook for 2-3 minutes on the first side until a nice crust forms. Flip the patties and immediately place a half-slice of cheese on each one. Cook for another 2 minutes until the cheese is melted and the patties are cooked through (internal temperature of 160°F).
- Assemble the sliders. Spread a thin layer of mayonnaise on the bottom half of each toasted bun. Place a cheesy patty on top. Add a generous spoonful of caramelized onions. If you’re using pickles or other toppings, add them now. Place the top bun on and press down gently.
- Serve immediately. These sliders are best hot, when the cheese is still melty and the buns are warm. Arrange them on a platter and watch them disappear.
A few things I’ve learned the hard way: don’t press down on the patties while they’re cooking. I know it’s tempting, but you’re squeezing out all the juicy goodness. Also, if your onions are taking longer than 30 minutes, that’s totally normal. Some batches just need more time. And if you’re making these for a crowd, you can keep them warm in a 200°F oven on a baking sheet covered loosely with foil.
Cooking Tips & Techniques
After making these mini beef sliders with caramelized onions more times than I can count, I’ve picked up a few tricks that make a real difference. Here’s what I wish someone had told me:
Don’t rush the onions. I know I keep saying this, but it’s the most important tip. Caramelizing onions on high heat just burns them. Low and slow is the only way. If you’re in a hurry, add a pinch of baking soda—it speeds up the process by raising the pH. But honestly, the slow method tastes better.
Season the beef generously. Slider patties are small, so they need more seasoning per ounce than a full-size burger. Don’t be shy with the salt and Worcestershire sauce. I once forgot to season the beef and ended up with the blandest sliders of my life. Learn from my mistake.
Use a thermometer. Ground beef needs to reach 160°F internally. But here’s the thing: carryover cooking means the temperature will rise another 5 degrees after you take them off the heat. So pull them at about 155°F and let them rest for a minute. Perfect every time.
Toast the buns, always. I know it’s an extra step, but untoasted buns get soggy from the beef juices and the onions. Toasting creates a barrier that keeps everything intact. Plus, the texture contrast is amazing.
Work in batches. If you crowd the pan, the patties steam instead of searing. You want a nice brown crust, not gray meat. Cook them in two batches if your pan isn’t big enough.
Let the patties rest. After cooking, let the patties sit for a minute or two before assembling. This lets the juices redistribute so they don’t run all over your buns. I learned this one after a particularly soggy slider incident.
Variations & Adaptations
These sliders are flexible, and I’ve tried quite a few variations over the months. Here are some of my favorites:
Turkey Sliders: Swap the ground beef for ground turkey (93/7 blend works best). Add an extra tablespoon of Worcestershire sauce and a tablespoon of olive oil to keep them moist. Cook to 165°F internal temperature.
Spicy Jalapeño Sliders: Add 1-2 finely chopped jalapeños to the beef mixture. Top with pepper jack cheese instead of cheddar. The heat pairs beautifully with the sweet caramelized onions.
BBQ Bacon Sliders: Cook 4 slices of bacon until crispy, then crumble. Mix into the caramelized onions at the end. Brush the patties with your favorite BBQ sauce during the last minute of cooking. These are dangerously good.
Vegetarian Option: Use plant-based ground meat substitute. Season the same way, but cook for slightly less time since most plant-based options cook faster. The caramelized onions do a lot of heavy lifting here.
Mushroom Swiss Sliders: Sauté 8 ounces of sliced mushrooms with the onions during the last 10 minutes of cooking. Use Swiss cheese instead of cheddar. The earthy mushrooms and nutty Swiss are a perfect match.
Air Fryer Method: Cook the patties in an air fryer at 375°F for 6-8 minutes, flipping halfway through. Add cheese in the last minute. The air fryer gives a nice crust without the stovetop mess.
I personally love the spicy jalapeño version—it’s my go-to when I want something with a kick. But honestly, the original version with just the caramelized onions is hard to beat. Sometimes simple really is best.
Serving & Storage Suggestions
These mini beef sliders with caramelized onions are best served hot, right after assembly. But here’s how to handle leftovers and serving for a crowd:
Serving Temperature: Serve immediately while the cheese is still melty and the buns are warm. If you’re making a big batch, keep them warm in a 200°F oven on a baking sheet covered loosely with foil. They’ll stay good for about 30 minutes this way.
Presentation Ideas: Arrange the sliders on a large wooden board or platter. Add small bowls of pickles, sliced jalapeños, and extra caramelized onions on the side for people to customize. For game day, I serve them alongside loaded nachos and crispy baked chicken wings for a full spread.
Storage: Store leftover sliders in an airtight container in the refrigerator for up to 3 days. But here’s the thing—store the components separately if you can. Keep the patties, onions, and buns in separate containers. This prevents the buns from getting soggy.
Reheating: Reheat the patties and onions in a skillet over medium heat for 2-3 minutes, or in the microwave for 30-45 seconds. Toast the buns again before assembling. The texture won’t be quite as good as fresh, but it’s still pretty great.
Freezing: You can freeze the cooked patties (without buns) for up to 3 months. Wrap each patty individually in plastic wrap, then store in a freezer bag. Thaw in the refrigerator overnight and reheat in a skillet. The caramelized onions freeze well too—store them in a small freezer bag.
Flavor Development: The caramelized onions actually taste better the next day. The flavors meld and deepen overnight. So if you’re planning ahead, make the onions a day in advance and store them in the fridge. Just reheat them gently before serving.
Nutritional Information & Benefits
Here’s the nutritional breakdown for one slider (based on the recipe as written, using 80/20 ground beef, cheddar cheese, and brioche buns):
| Nutrient | Amount per Slider |
|---|---|
| Calories | 245 |
| Protein | 14g |
| Fat | 14g |
| Saturated Fat | 6g |
| Carbohydrates | 16g |
| Fiber | 1g |
| Sugar | 4g |
| Sodium | 420mg |
Health Benefits: Ground beef is an excellent source of high-quality protein, iron, and B vitamins (especially B12). The onions provide antioxidants and prebiotic fiber that supports gut health. If you use grass-fed beef, you’ll get more omega-3 fatty acids and conjugated linoleic acid (CLA).
Dietary Considerations: This recipe is naturally gluten-free if you use gluten-free buns. For a lower-carb option, serve the patties and onions in lettuce wraps instead of buns. For dairy-free, skip the cheese or use a dairy-free alternative.
Potential Allergens: This recipe contains dairy (butter, cheese) and gluten (buns). It also contains eggs if you use brioche buns. Adjust accordingly for your dietary needs.
I’m not a nutritionist, but I do believe in balance. These sliders are a treat, not an everyday meal. Pair them with a big salad or some roasted veggies, and you’ve got a well-rounded dinner that satisfies without going overboard.
Frequently Asked Questions
Can I make these sliders ahead of time?
Yes, but I recommend storing the components separately. Cook the patties and caramelize the onions up to 2 days in advance. Keep them in separate containers in the fridge. When you’re ready to serve, reheat the patties in a skillet, warm the onions, toast fresh buns, and assemble. It takes about 10 minutes and tastes just as good.
What’s the best bun for sliders?
Soft, slightly sweet buns work best. Martin’s potato rolls are my top pick—they’re sturdy enough to hold the filling but soft enough to bite through easily. Brioche buns are another great option. Avoid crusty rolls or anything too dense, as they’ll overwhelm the delicate slider ratio.
How do I keep the sliders from falling apart?
The key is the bun-to-patty ratio and not overloading them. Use a bun that’s proportionate to the patty. Toast the buns to create a barrier against moisture. And don’t pile on too many toppings—the caramelized onions and cheese are plenty. If you’re adding lettuce or tomato, pat them dry first.
Can I use pre-made caramelized onions?
You can, but I wouldn’t recommend it. Store-bought caramelized onions often have added sugar and preservatives, and they lack the deep, complex flavor you get from making them yourself. Plus, homemade caramelized onions are incredibly easy—just butter, onions, salt, and time. It’s worth the 30 minutes.
What can I serve with these sliders?
These sliders pair well with just about anything. For game day, serve them with slow cooker football chili and grilled corn elote skewers. For a weeknight dinner, a simple side salad or sweet potato fries does the trick. They’re also great with coleslaw or baked beans.
Conclusion
These mini beef sliders with caramelized onions have become a staple in my kitchen for good reason. They’re simple enough for a Tuesday night but impressive enough for a party. The caramelized onions add a sweetness that transforms a basic burger into something you’ll crave, and the whole thing comes together in under 40 minutes.
What I love most about this recipe is how forgiving it is. You can swap the cheese, change the meat, or add your favorite toppings, and it still works. The caramelized onions do all the heavy lifting—they make everything taste better. And honestly, that’s the kind of cooking I love: a few good ingredients, a little patience, and a recipe that delivers every single time.
I’d love to hear how these turn out for you. Leave a comment below and let me know if you tried any variations—I’m always looking for new ideas. And if you share them on social media, tag me so I can see your beautiful sliders. Happy cooking, friends!
Pin This Recipe!
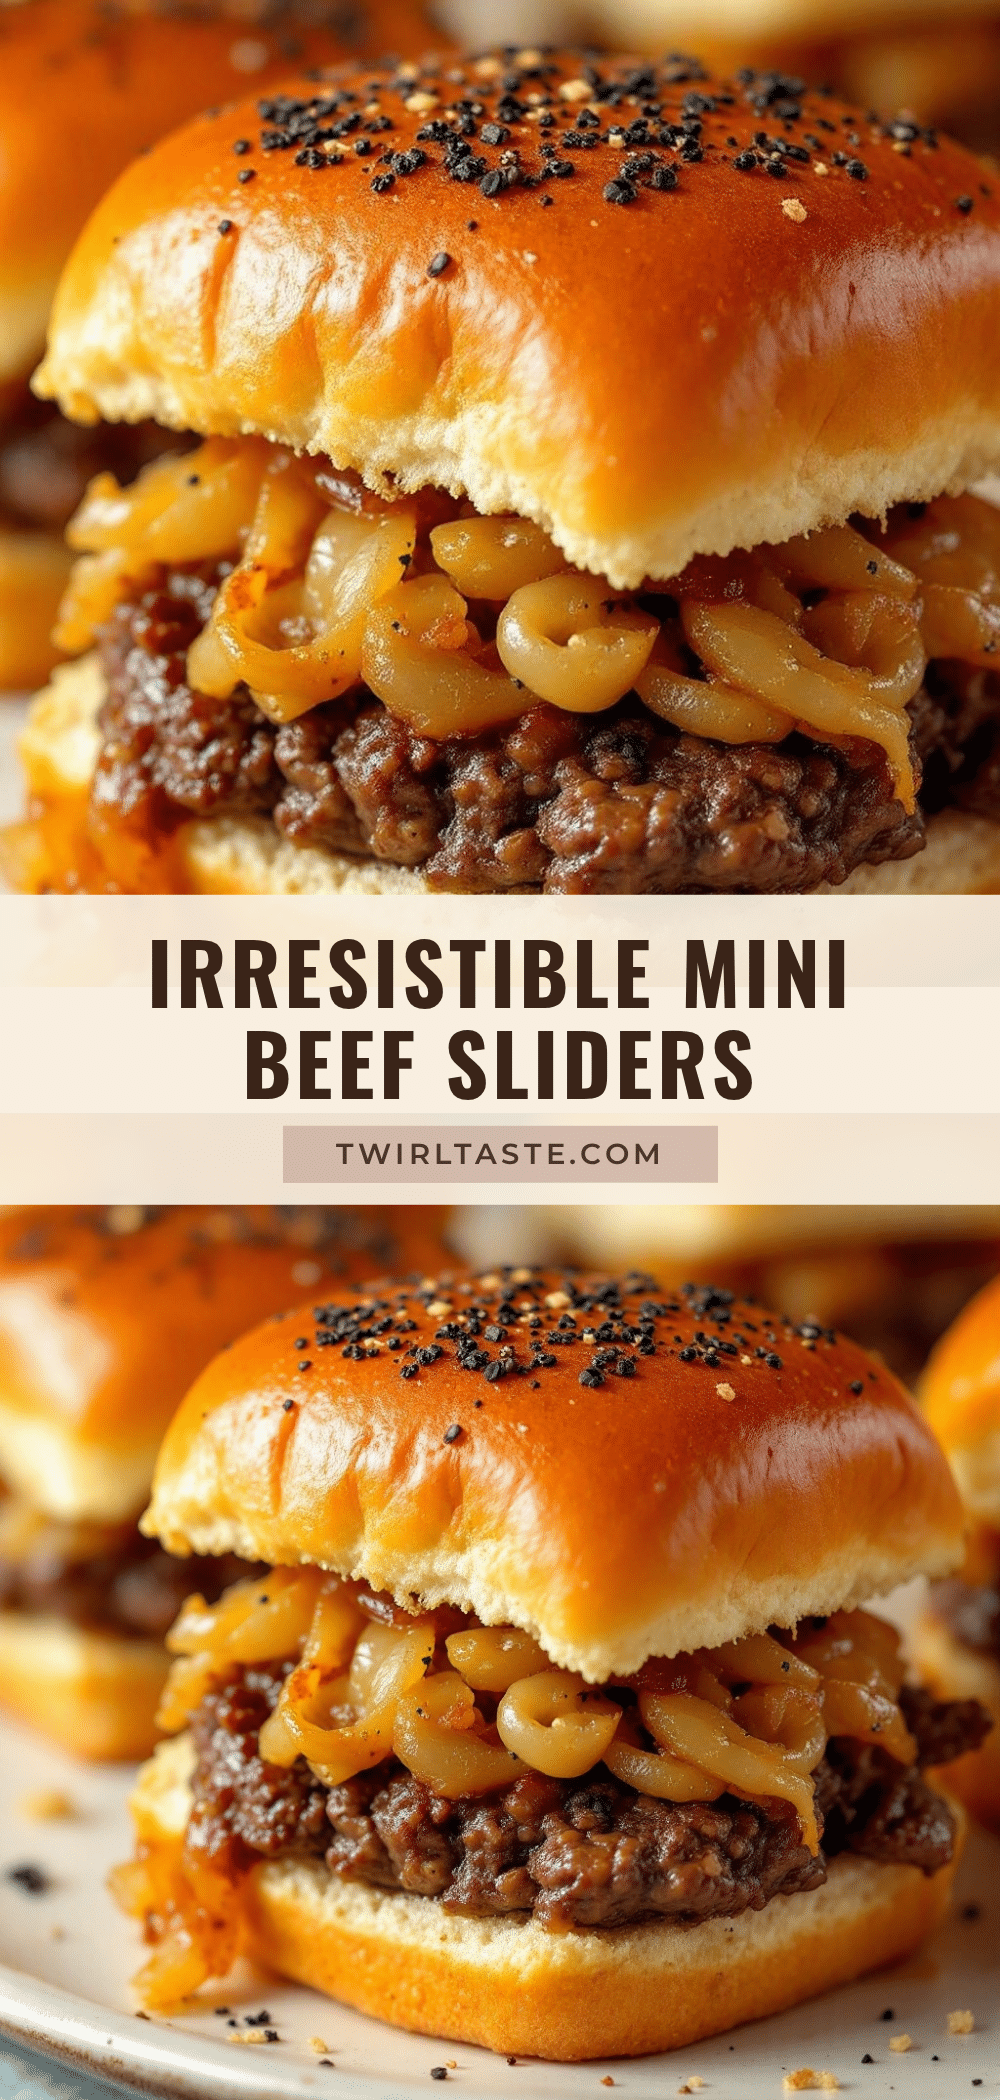
Mini Beef Sliders with Caramelized Onions
Juicy mini beef sliders topped with sweet caramelized onions and melted cheddar cheese on soft toasted buns. Perfect for game day or a quick weeknight dinner, these sliders deliver big flavor in a small package.
- Prep Time: 10 minutes
- Cook Time: 25 minutes
- Total Time: 35 minutes
- Yield: 12 sliders 1x
- Category: Main Course
- Cuisine: American
Ingredients
- 2 large yellow onions, thinly sliced (about 4 cups)
- 2 tablespoons unsalted butter
- 1/4 teaspoon salt
- 1 tablespoon water
- 1 pound ground beef (80/20 blend)
- 1 teaspoon salt
- 1/2 teaspoon black pepper, freshly ground
- 1/2 teaspoon garlic powder
- 1/2 teaspoon onion powder
- 1 tablespoon Worcestershire sauce
- 12 slider buns (brioche or potato rolls recommended)
- 6 slices cheddar cheese, cut in half
- 3 tablespoons mayonnaise
- Optional toppings: pickle slices, lettuce, tomato slices
Instructions
- Start the caramelized onions first. Heat a large skillet over medium-low heat. Add the 2 tablespoons of butter and let it melt completely. Add the thinly sliced onions and the 1/4 teaspoon salt. Stir to coat the onions in butter. Cook for 25-30 minutes, stirring every 5 minutes or so, until deep golden brown and very soft. If they start to stick, add a tablespoon of water and scrape up the browned bits.
- While the onions cook, make the patties. In a mixing bowl, combine the ground beef, salt, pepper, garlic powder, onion powder, and Worcestershire sauce. Mix gently with your hands. Divide the mixture into 12 equal portions (about 1.3 ounces each). Roll each into a ball, then flatten into a thin patty about 2.5 inches wide. Make a small indent in the center of each patty with your thumb.
- Toast the buns. Preheat oven to 350°F. Split the slider buns in half and place cut-side up on a baking sheet. Bake for 3-4 minutes until lightly toasted. Alternatively, toast in a dry skillet over medium heat for 1-2 minutes.
- Cook the patties. Heat a large skillet or griddle over medium-high heat. Place the patties in the pan, working in batches if needed. Cook for 2-3 minutes on the first side until a nice crust forms. Flip and immediately place a half-slice of cheese on each. Cook for another 2 minutes until cheese is melted and patties are cooked through (internal temperature of 160°F).
- Assemble the sliders. Spread a thin layer of mayonnaise on the bottom half of each toasted bun. Place a cheesy patty on top. Add a generous spoonful of caramelized onions. Add optional toppings if desired. Place the top bun on and press down gently.
- Serve immediately while hot and cheese is melty.
Notes
Don’t rush the onions—low and slow is key. Season the beef generously as slider patties need more seasoning per ounce. Toast the buns to prevent sogginess. Work in batches to avoid overcrowding the pan. Let patties rest for a minute after cooking before assembling. Caramelized onions taste even better the next day.
Nutrition
- Serving Size: 1 slider
- Calories: 245
- Sugar: 4
- Sodium: 420
- Fat: 14
- Saturated Fat: 6
- Carbohydrates: 16
- Fiber: 1
- Protein: 14
Keywords: mini beef sliders, caramelized onions, slider recipe, beef sliders, game day food, weeknight dinner, comfort food, mini burgers


