Love this? Save it for later!
Share the inspiration with your friends
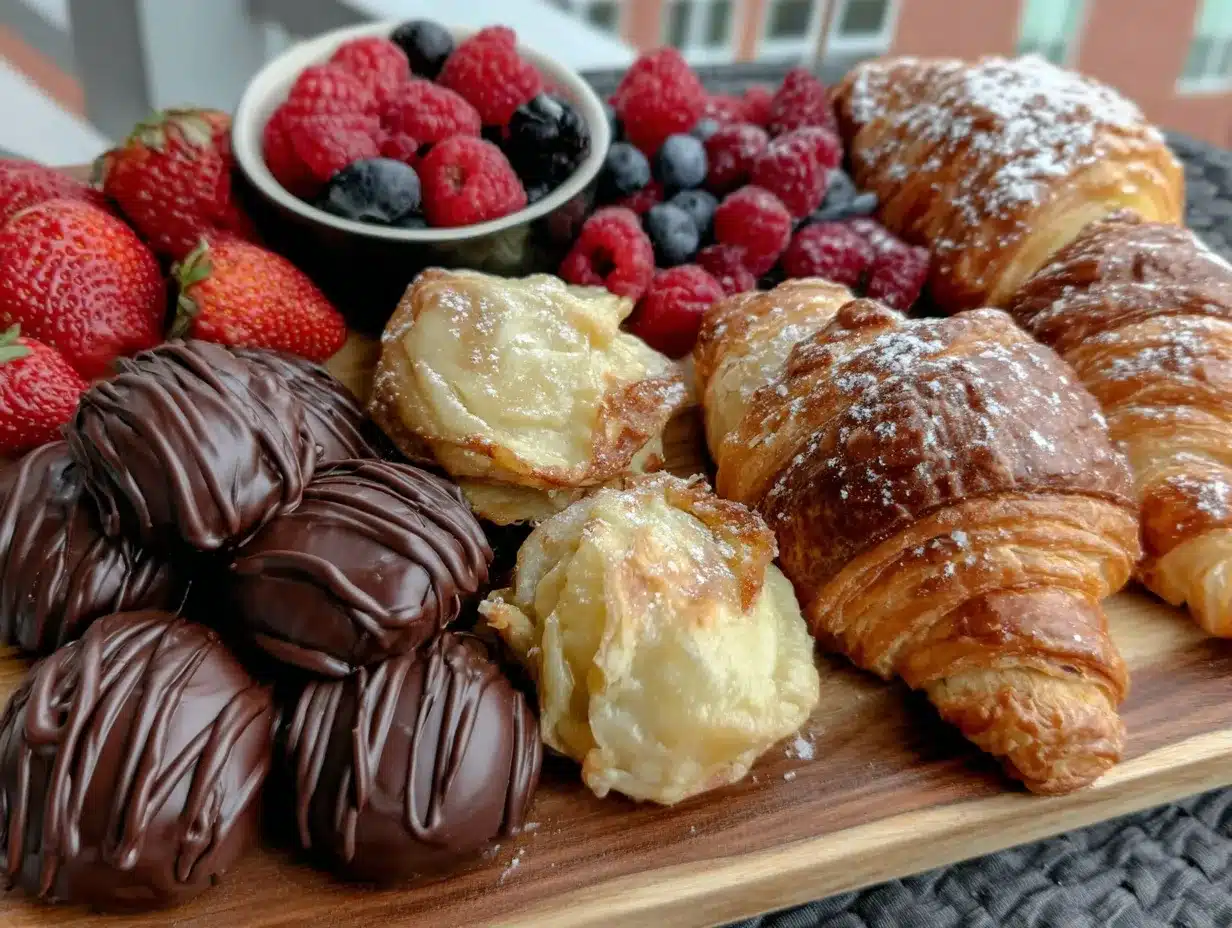
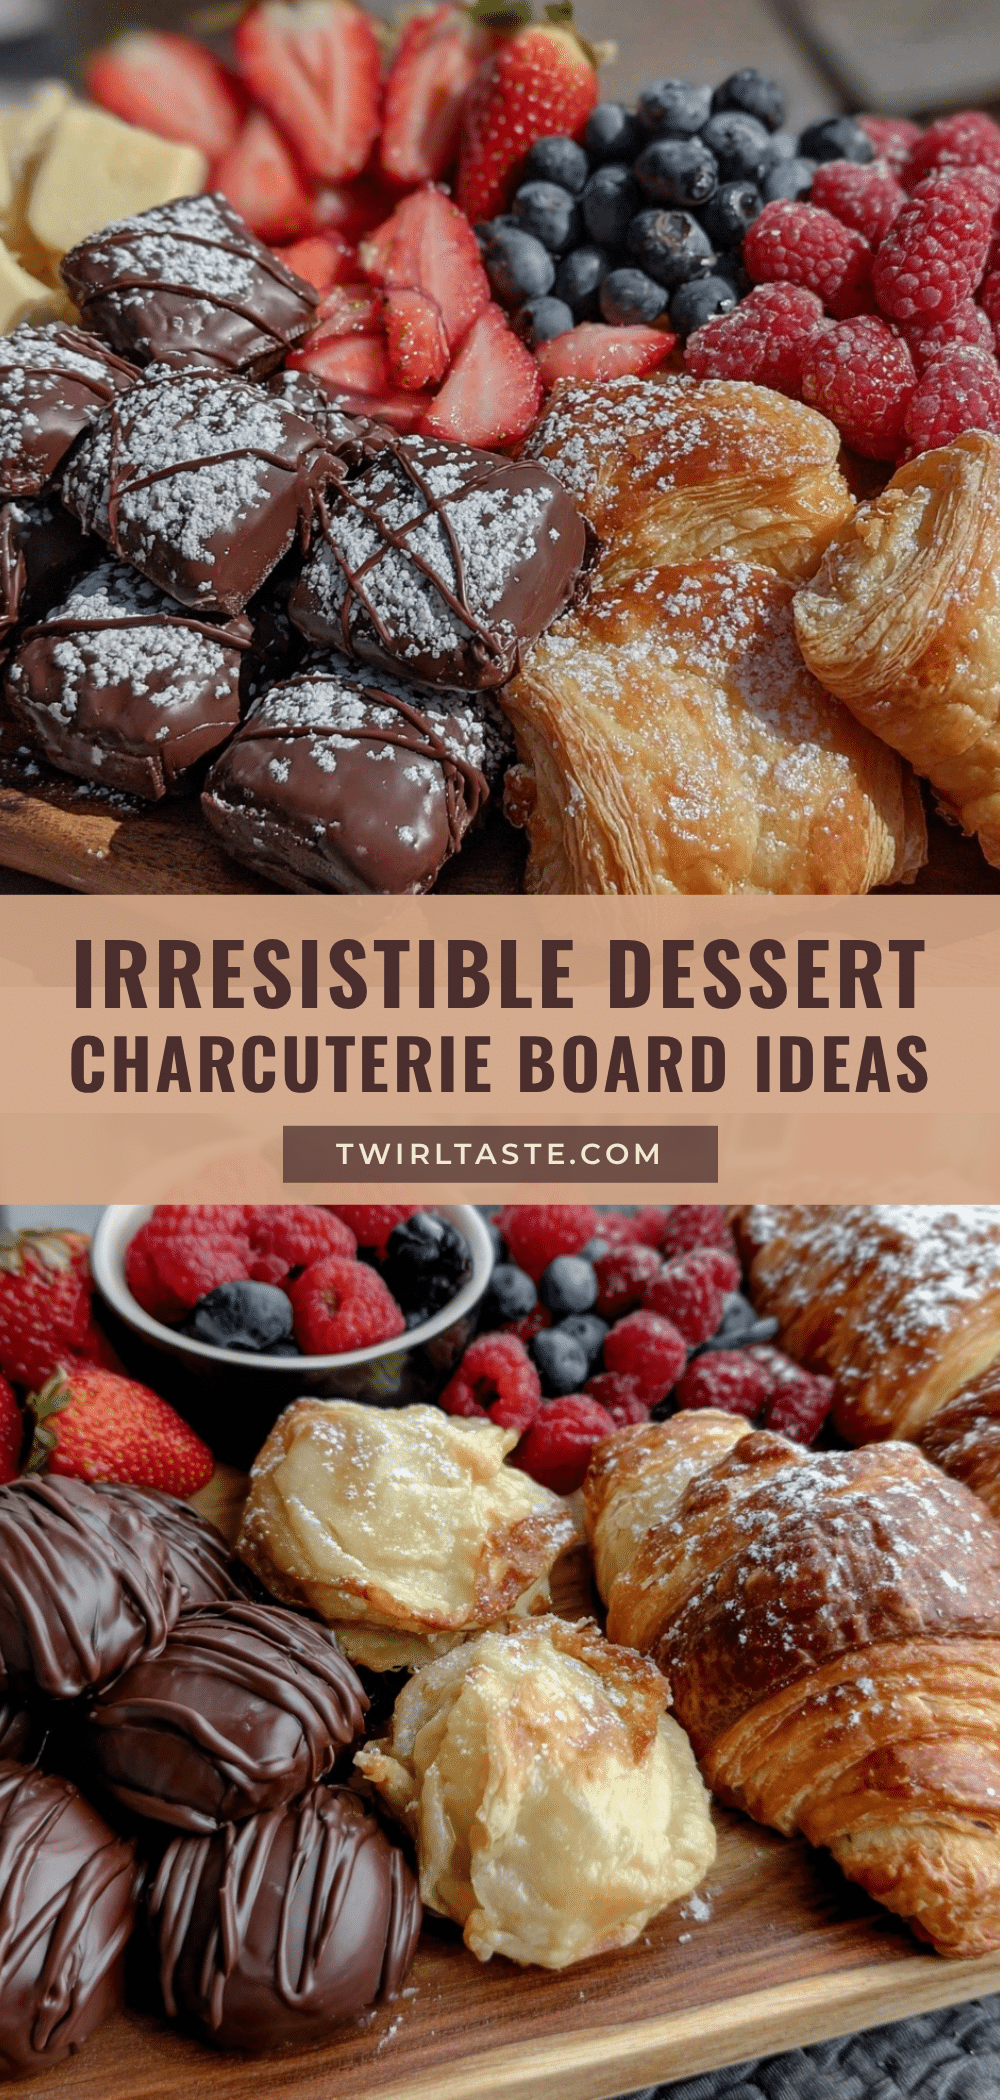
“You’ve got to see this,” my friend Mia whispered one Saturday afternoon, waving me over to her kitchen counter. I wasn’t expecting much—just another casual hangout. But there it was: a stunning dessert charcuterie board, artfully arranged with glossy dark chocolates, jewel-toned berries, flaky pastries, and a scattering of nuts. Honestly, I’d never thought of dessert as something to present like this before. There was something magical about the way each element contrasted and complemented the others, like a sweet symphony on a wooden board.
That day, while Mia was juggling a phone call and sneaking bites off her creation, I learned her secret was less about fancy ingredients and more about balance and simplicity. She confessed she’d thrown it together in about twenty minutes—between errands, no less! That imperfect moment when her cat knocked over a bowl of raspberries only made the board feel more real (and honestly, more charming). Maybe you’ve been there, trying to put together a dessert that wows without turning into a stressful kitchen marathon.
Since then, I keep coming back to this perfect dessert charcuterie board with chocolate, fruit & pastries whenever I want a quick, beautiful treat that feels special but isn’t complicated. It’s the kind of thing that turns an ordinary evening into a celebration and, if you ask me, it’s downright addictive. Let me tell you, once you get the hang of this, you’ll find yourself making it for everything from casual get-togethers to holiday parties. So let’s get into why this dessert charcuterie board is one you’ll want in your entertaining arsenal.
Why You’ll Love This Recipe
Having tested countless dessert spreads, I can confidently say this perfect dessert charcuterie board is a game-changer. It’s not just about looking pretty (though it definitely does!)—it’s about creating a fuss-free dessert experience that’s as delicious as it is easy. Here’s why this recipe stands out:
- Quick & Easy: Comes together in under 30 minutes, perfect for last-minute entertaining or spontaneous sweet cravings.
- Simple Ingredients: No need for specialty stores; most components are pantry staples or fresh market finds.
- Perfect for Any Occasion: Whether it’s a cozy date night, a weekend brunch, or a holiday party, this board fits right in.
- Crowd-Pleaser: The mix of rich chocolates, fresh fruit, and flaky pastries hits all the right notes for guests of all ages.
- Unbelievably Delicious: The contrast of textures and flavors—from creamy chocolate to crisp fruit—makes every bite exciting.
This isn’t just another dessert platter. I use a little trick with layering chocolates and introducing unexpected fruit pairings (think figs or pomegranate seeds) that bring a fresh twist. Plus, the pastries—whether store-bought croissants or homemade mini danishes—add that buttery, flaky element that everyone secretly craves.
Honestly, the best part is how approachable it is. You don’t have to be a pastry chef or chocolatier to pull this off. It’s comfort food that feels fancy without the fuss. Perfect for impressing guests without breaking a sweat.
What Ingredients You Will Need
This perfect dessert charcuterie board relies on simple, wholesome ingredients that combine for maximum flavor and visual appeal. Most are easy to find, and you can swap in alternatives based on your preferences or what’s in season.
- Chocolates:
- Assorted dark chocolates (70% cocoa or higher for rich flavor)
- Milk chocolate squares or truffles
- White chocolate bark with nuts or dried fruit (optional for color contrast)
- Fresh Fruit:
- Ripe strawberries, hulled and halved
- Seedless grapes, washed and left whole
- Pomegranate seeds (adds a pop of color and tartness)
- Fresh figs, quartered (seasonal, but highly recommended)
- Blueberries or raspberries for small bursts of sweetness
- Pastries:
- Mini croissants (store-bought or homemade, warmed slightly before serving)
- Buttery danishes or puff pastry twists (optional)
- Shortbread cookies or biscotti for crunch
- Extras:
- Assorted nuts (roasted almonds, pistachios, or walnuts)
- Dried fruit like apricots or cherries
- Honey or chocolate drizzle for garnish (optional)
- Fresh mint leaves for a fragrant touch
For the chocolates, I tend to go with brands like Ghirardelli or Lindt for their consistent quality and smooth textures. When selecting fruit, look for firm, ripe pieces without bruises—freshness makes all the difference here. If you want to switch things up, try swapping croissants for gluten-free pastries or adding a dairy-free chocolate option for guests with dietary restrictions.
Equipment Needed
- Wooden or Slate Serving Board: Provides a rustic, inviting base—mine’s a simple wooden board I picked up at a local market.
- Small Bowls or Ramekins: For holding nuts, drizzles, or small fruits like berries.
- Sharp Knife: Essential for cutting fruit neatly and slicing chocolate bars if needed.
- Tongs or Small Serving Spoons: Helpful for guests to pick up delicate items without mess.
- Optional: Pastry brush for warming or glazing pastries, and parchment paper for easier cleanup.
If you don’t have a fancy board, a large platter or even a clean cutting board works just fine. I’ve learned the hard way that a too-slick surface can cause items to slide around, so a board with a bit of texture is best.
Preparation Method
- Prepare the Board (5 minutes): Start with a clean wooden or slate board. If you like, place parchment paper underneath for easier cleaning later. Arrange small bowls or ramekins around the edges to hold nuts, honey, or any loose items.
- Wash and Prep Fruit (10 minutes): Rinse all fresh fruit gently under cool water, then pat dry. Hull and halve strawberries, quarter figs, and remove any stems from grapes. Arrange these in small clusters on the board, balancing colors and sizes for visual appeal.
- Warm Pastries (5 minutes): Slightly warm mini croissants and danishes in the oven at 350°F (175°C) for about 3-5 minutes to bring out that fresh-baked aroma. Let cool slightly before placing them on the board to avoid melting nearby chocolates.
- Arrange Chocolates (5 minutes): Break or cut chocolates into bite-sized pieces if needed. Scatter them in small piles or fan them out near the fruit sections. Include truffles or white chocolate bark for color variety.
- Add Nuts and Extras (5 minutes): Fill small bowls with roasted nuts, dried fruit, or honey. Place these strategically on the board to fill empty spots and add texture contrast.
- Final Touches (2 minutes): Garnish with fresh mint leaves or a light drizzle of honey or melted chocolate for a finishing flourish. Step back and adjust any crowded or sparse areas to maintain balance.
Quick tip: Try to keep similar colors apart to make the board pop visually. And if you accidentally drop a berry or two (I did that once while chatting and laughing), just tuck them in somewhere—it adds character!
Cooking Tips & Techniques
Putting together a dessert charcuterie board might seem straightforward, but a few tricks can make a big difference in presentation and flavor harmony.
- Balance Flavors and Textures: Pair sweet chocolates with tart fruits like pomegranate seeds or fresh figs. The contrast keeps your palate interested.
- Use Odd Numbers: Group items in threes or fives rather than even numbers to create a more organic, visually pleasing layout.
- Freshness Matters: Prepare your fruit as close to serving time as possible to avoid browning or sogginess.
- Pastry Warmth: Warm pastries just before serving to boost aroma and texture, but don’t overheat or they’ll become greasy.
- Don’t Overcrowd: Give each item space to shine—crowding leads to a messy board where flavors get muddled.
- Practice Makes Perfect: I’ve learned that prepping all ingredients first and then assembling quickly is less stressful than doing it piecemeal.
Once, I tried stacking too many different chocolates together, and the board looked cluttered. Lesson learned: sometimes, less is more. Also, having small tongs on hand saves you from using fingers and keeps things tidy.
Variations & Adaptations
This dessert charcuterie board is wonderfully flexible, so don’t hesitate to make it your own.
- Dietary Swaps: For gluten-free options, swap the pastries with gluten-free cookies or rice crackers. Use dairy-free chocolate to accommodate vegan guests.
- Seasonal Fruits: In autumn, swap berries for sliced apples or pears. During summer, include stone fruits like peaches or nectarines for a juicy pop.
- Flavor Twists: Add a splash of espresso powder to the chocolate for a mocha vibe or sprinkle sea salt flakes on dark chocolate pieces for contrast.
- Cooking Method: If you prefer, lightly toast nuts or warm dried fruits in a pan to intensify their flavor before adding them to the board.
- Personal Favorite Variation: I once added a small dish of mascarpone cheese with a drizzle of honey—it brought a creamy, luxurious element that changed the whole board.
Serving & Storage Suggestions
Serve your perfect dessert charcuterie board at room temperature. This allows chocolates to soften slightly and pastries to maintain their flakiness. Present it on a rustic wooden board or a decorative platter for maximum impact.
Pair it with a chilled glass of sparkling wine or a rich cup of coffee to complement the sweet and savory notes. For a non-alcoholic option, a fruity iced tea works beautifully.
To store leftovers, wrap the board tightly with plastic wrap or transfer items into airtight containers. Most components keep well in the refrigerator for up to two days, though pastries are best enjoyed fresh. Reheat pastries gently in the oven to regain crispness. Keep chocolates away from heat to avoid melting.
The flavors often develop even more after resting a few hours, especially if you add a honey drizzle or let the fruit juices mingle slightly. Just make sure to serve within a day or two to enjoy the best texture.
Nutritional Information & Benefits
This perfect dessert charcuterie board offers a balanced mix of indulgence and nutrition. While chocolates and pastries provide satisfying sweetness and richness, fresh fruits contribute essential vitamins, fiber, and antioxidants.
- Dark chocolate is known for its antioxidant properties and can support heart health when consumed in moderation.
- Fresh fruits like berries and pomegranate seeds supply vitamin C and boost immunity.
- Nuts offer healthy fats and protein, helping to keep you satiated.
- Depending on your pastry choice, you can opt for whole-grain or gluten-free options to suit your dietary needs.
Overall, this dessert board can fit into a balanced lifestyle when enjoyed mindfully. Plus, sharing it with friends or family adds a social wellness boost that’s hard to beat.
Conclusion
So there you have it—a perfect dessert charcuterie board with chocolate, fruit & pastries that’s as stunning as it is simple. This recipe brings together my favorite elements of sweet entertaining: minimal fuss, maximum flavor, and a touch of elegance without the stress. I keep coming back to it because it works every time and always gets those happy “wow” reactions.
Feel free to tweak it based on what you have at home or what you enjoy most. I’d love to hear your take on this one—did you try adding a surprise ingredient or swap something out? Leave a comment, share your photos, or suggest your own variations. Let’s make dessert entertaining easy and fun for everyone!
Remember, great food isn’t about perfection—it’s about the moments we create around it. So go on, grab a board, and start assembling your own sweet masterpiece.
FAQs
What’s the best chocolate to use on a dessert charcuterie board?
Go for a mix of dark, milk, and white chocolates to offer variety. Choose high-quality brands like Ghirardelli or Lindt for smooth texture and rich flavor.
Can I prepare the dessert charcuterie board ahead of time?
You can prep most ingredients a few hours ahead but assemble the board close to serving time to keep fruits fresh and pastries flaky.
How do I keep the pastries from getting soggy?
Warm pastries just before serving and avoid placing juicy fruits directly underneath them. If storing leftovers, reheat pastries in a warm oven to restore crispness.
Are there vegan options for this dessert board?
Absolutely! Use dairy-free chocolates, vegan pastries, and plenty of fresh fruits and nuts to keep it delicious and plant-based.
What beverages pair well with a dessert charcuterie board?
Sparkling wine, rich coffee, or fruity iced teas complement the sweet and savory elements wonderfully, but feel free to choose what you enjoy most.
Pin This Recipe!
Perfect Dessert Charcuterie Board Ideas with Chocolate Fruit and Pastries for Easy Entertaining

A quick and easy dessert charcuterie board featuring a balanced mix of dark, milk, and white chocolates, fresh fruits, flaky pastries, and nuts, perfect for any occasion and effortless entertaining.
- Prep Time: 15 minutes
- Cook Time: 10 minutes
- Total Time: 25 minutes
- Yield: 6-8 servings
- Category: Dessert
- Cuisine: American
Ingredients
- Assorted dark chocolates (70% cocoa or higher)
- Milk chocolate squares or truffles
- White chocolate bark with nuts or dried fruit (optional)
- Ripe strawberries, hulled and halved
- Seedless grapes, washed and left whole
- Pomegranate seeds
- Fresh figs, quartered (seasonal)
- Blueberries or raspberries
- Mini croissants (store-bought or homemade, warmed slightly before serving)
- Buttery danishes or puff pastry twists (optional)
- Shortbread cookies or biscotti
- Assorted nuts (roasted almonds, pistachios, or walnuts)
- Dried fruit like apricots or cherries
- Honey or chocolate drizzle for garnish (optional)
- Fresh mint leaves
Instructions
- Prepare the board by starting with a clean wooden or slate board. Optionally place parchment paper underneath for easier cleaning. Arrange small bowls or ramekins around the edges to hold nuts, honey, or any loose items.
- Wash all fresh fruit gently under cool water, then pat dry. Hull and halve strawberries, quarter figs, and remove any stems from grapes. Arrange these in small clusters on the board, balancing colors and sizes for visual appeal.
- Slightly warm mini croissants and danishes in the oven at 350°F (175°C) for about 3-5 minutes to bring out fresh-baked aroma. Let cool slightly before placing on the board to avoid melting nearby chocolates.
- Break or cut chocolates into bite-sized pieces if needed. Scatter them in small piles or fan them out near the fruit sections. Include truffles or white chocolate bark for color variety.
- Fill small bowls with roasted nuts, dried fruit, or honey. Place these strategically on the board to fill empty spots and add texture contrast.
- Garnish with fresh mint leaves or a light drizzle of honey or melted chocolate for a finishing flourish. Adjust any crowded or sparse areas to maintain balance.
Notes
Use odd numbers of items for a visually pleasing layout. Prepare fruit close to serving time to avoid browning. Warm pastries just before serving to maintain flakiness. Avoid overcrowding the board to keep flavors distinct. Small tongs help keep the board tidy. For gluten-free or vegan options, swap pastries and chocolates accordingly.
Nutrition
- Serving Size: Approximately 1/6 to
- Calories: 350
- Sugar: 18
- Sodium: 120
- Fat: 22
- Saturated Fat: 10
- Carbohydrates: 30
- Fiber: 5
- Protein: 5
Keywords: dessert charcuterie board, chocolate fruit pastries, easy entertaining, quick dessert, party dessert, chocolate board, fruit platter, pastries, nuts, holiday dessert