Love this? Save it for later!
Share the inspiration with your friends
Introduction
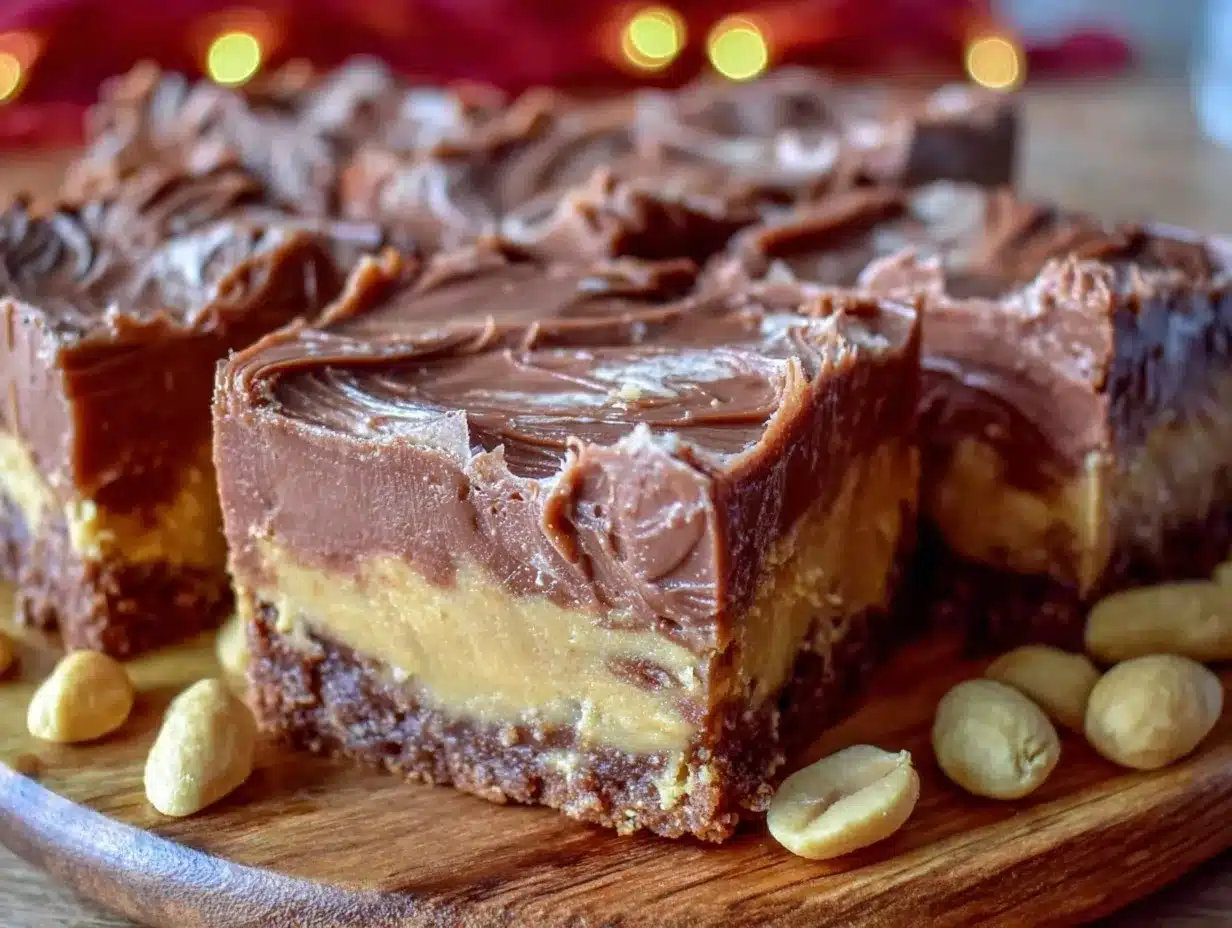
“You know that moment when all you want is something sweet, but the idea of pulling out a dozen ingredients feels like too much?” That was me last Friday night, staring blankly into my pantry after a long day. I had a sudden craving for chocolate peanut butter fudge but zero time or energy to make anything complicated. Funny enough, I stumbled upon this recipe almost by accident. I was rummaging through my kitchen, trying to find a snack to keep me going, when I found a nearly empty jar of peanut butter, some chocolate chips, and sweetened condensed milk. No fancy tools, no extra steps—just three simple ingredients.
Honestly, I wasn’t expecting much at first. I mean, fudge usually feels like a lengthy process, right? But I decided to give it a shot, mixing those three ingredients and hoping for the best. The result? A creamy, rich, melt-in-your-mouth fudge that disappeared faster than I could write the recipe down. Maybe you’ve been there too—needing a quick sweet fix that tastes like you spent hours in the kitchen but without any of the hassle.
This easy chocolate peanut butter fudge has become one of my go-to recipes whenever I want a no-fuss dessert that delivers on flavor. Plus, it’s beginner-friendly, which I can’t recommend enough if you’re new to candy-making or just want something reliable and delicious. Let me tell you, there’s something incredibly satisfying about whipping up a batch of fudge with just three pantry staples and ending up with something that feels indulgent and homemade.
So, whether you’re a seasoned baker or someone who just likes quick treats, stick around. I’ll walk you through why this fudge recipe is a keeper, what you’ll need, and some handy tips to make sure your fudge turns out perfect every time.
Why You’ll Love This Recipe
This easy chocolate peanut butter fudge recipe has genuinely become a favorite around here, and let me share why it might just become yours too.
- Quick & Easy: You can have this fudge ready in under 15 minutes of active prep time, making it perfect for busy weeknights or when you’re hit with last-minute sweet cravings.
- Simple Ingredients: No need to hunt down specialty items. The recipe calls for just three staples you probably already have—peanut butter, chocolate chips, and sweetened condensed milk.
- Perfect for Gifting or Parties: Whether you’re bringing a sweet treat to a potluck or prepping for a holiday, this fudge impresses without any stress.
- Crowd-Pleaser: Kids, adults, peanut butter lovers, and chocolate fans alike rave about this fudge’s creamy texture and balanced flavor.
- Unbelievably Delicious: The combination of smooth peanut butter and rich chocolate makes every bite feel like a little indulgence, but honestly, it’s so simple you’ll want to make it over and over.
What sets this recipe apart is its simplicity without sacrificing texture or taste. Unlike some fudge recipes that require candy thermometers or multiple cooking stages, this one blends everything in one pot. The sweetened condensed milk keeps it creamy and smooth, while the peanut butter adds that irresistible nutty depth. It’s the kind of fudge that makes you close your eyes after the first bite and just savor the moment.
Plus, if you want to customize it later on, the base is so forgiving that you can easily tweak it with mix-ins or toppings. Honestly, this recipe feels like a secret weapon for quick, delicious treats that don’t demand a lot of kitchen time or expertise.
What Ingredients You Will Need
This recipe uses simple, wholesome ingredients to deliver bold flavor and satisfying texture without the fuss. All are pantry staples, so you won’t need a special grocery run.
- Peanut Butter (1 cup / 240 g): Creamy peanut butter works best here for a smooth fudge texture. I usually go with natural peanut butter without added sugars or oils—makes the flavor more authentic. If you want a richer fudge, stick to the creamy kind rather than chunky.
- Chocolate Chips (2 cups / 340 g): Semi-sweet chocolate chips are my favorite for this fudge because they balance the sweetness of the peanut butter and sweetened condensed milk. I recommend Ghirardelli or Nestlé Toll House for consistent melt and flavor. You could also use dark chocolate chips for a slightly less sweet version.
- Sweetened Condensed Milk (1 can, 14 oz / 396 g): This is the magic ingredient that binds everything and gives the fudge its creamy, luscious texture. I prefer the regular version for that classic fudge sweetness. For a dairy-free alternative, you can try sweetened condensed coconut milk, but the texture might vary slightly.
Optional add-ins or toppings you might consider:
- Chopped nuts (like walnuts or peanuts) – adds crunch and texture.
- Sea salt flakes sprinkled on top – a little contrast to the sweet.
- Mini marshmallows or crushed pretzels – for a fun twist.
If you’re looking for gluten-free or vegan options, this recipe is naturally gluten-free. For a vegan spin, substitute the sweetened condensed milk with a plant-based alternative and use dairy-free chocolate chips.
Equipment Needed
One of the best things about this easy chocolate peanut butter fudge is that it requires minimal equipment. Here’s what you’ll want on hand:
- Medium-sized Saucepan: A non-stick or heavy-bottom pan works great for melting the ingredients together without scorching.
- Heatproof Spatula or Wooden Spoon: For stirring the mixture smoothly and scraping the sides of the pan.
- Square or Rectangular Baking Dish (8×8 inches / 20×20 cm): For setting the fudge. Line it with parchment paper for easy removal.
- Measuring Cups and Spoons: To get your ingredient amounts just right. Accuracy really helps with fudge texture!
If you don’t have a baking dish that size, a loaf pan or even a small casserole dish will do. Just keep in mind the fudge layer thickness might vary and adjust the setting time accordingly.
For cleanup, I recommend soaking your spatula and saucepan immediately after use—sweetened condensed milk can stick stubbornly if left to dry.
Preparation Method
- Line your baking dish: Start by lining an 8×8 inch (20×20 cm) baking dish with parchment paper, leaving some overhang on the sides. This makes it easy to lift out the fudge once it’s set. Set aside.
- Combine ingredients in saucepan: In a medium saucepan over low heat, add 2 cups (340 g) of semi-sweet chocolate chips, 1 cup (240 g) of creamy peanut butter, and one 14 oz (396 g) can of sweetened condensed milk.
- Gently melt and stir: Stir continuously with a heatproof spatula or wooden spoon until all the chocolate chips and peanut butter have melted and the mixture is smooth and glossy. This usually takes about 5-7 minutes. Be patient and keep the heat low to avoid burning or seizing the chocolate.
- Check consistency: The fudge mixture should be thick but pourable. If it looks grainy or lumpy, keep stirring gently until smooth. If it feels too thick, you can add a teaspoon of milk or cream to loosen it slightly.
- Pour into the prepared dish: Quickly transfer the fudge mixture into your lined baking dish. Use the spatula to smooth the top evenly. Don’t worry about getting it perfect—rustic is charming!
- Add optional toppings: If you want to sprinkle chopped nuts, sea salt, or other toppings, do it now while the fudge is still warm and soft.
- Chill to set: Place the baking dish in the refrigerator for at least 2 hours or until the fudge is firm to the touch. For best results, let it chill overnight.
- Slice and serve: Once set, use the parchment paper overhang to lift the fudge out. Cut into small squares with a sharp knife. For cleaner cuts, dip the knife in hot water and wipe dry between slices.
Pro tip: If your fudge sets too hard, let it sit at room temperature for 10 minutes before slicing to soften slightly. Also, stirring constantly while melting prevents the chocolate from scorching—a small kitchen dance I’ve learned through trial and error!
Cooking Tips & Techniques
Making fudge might sound intimidating, but this recipe keeps things straightforward. Here are some tips to keep your fudge silky and perfect every time.
- Low and slow melting: Chocolate and peanut butter are sensitive to heat. Keep your stove on low and stir continuously to prevent burning. I’ve burned more than my fair share by rushing this step!
- Use quality chocolate chips: The flavor and texture of your fudge depend heavily on the chocolate. Don’t skimp here. I always pick semi-sweet chocolate chips from trusted brands like Ghirardelli or Callebaut.
- Don’t skip the parchment paper: It’s worth the extra step for easy removal and clean edges. Trust me, fudge sticks hard to pans otherwise.
- Timing your servings: Fudge is best after chilling for at least 2 hours. If you’re in a rush, pop it in the freezer for 30 minutes, but avoid leaving it too long or it can become brittle.
- Watch out for humidity: Fudge can be sensitive to very humid environments, causing it to sweat or become sticky. Store it in an airtight container in the fridge if your kitchen feels muggy.
- Multitasking tip: While the fudge is chilling, it’s a great time to prep your next snack or tidy up the kitchen. I often use this window to make a quick cup of tea and relax before slicing.
Variations & Adaptations
One of the best parts about this fudge recipe is how easy it is to personalize. Here are some variations I’ve tried and loved:
- Nut-Free Version: Swap the peanut butter for sunflower seed butter if allergies are a concern. The flavor is a little different but still delicious.
- Crunchy Twist: Stir in ½ cup (60 g) of chopped roasted peanuts or walnuts before pouring the fudge into the pan. Adds a satisfying crunch that contrasts with the creamy base.
- Chocolate Layered: For a two-tone treat, melt half the chocolate chips and peanut butter mixture, pour half into the pan, chill for 15 minutes, then add the remaining mixture on top. It creates a pretty layered effect.
- Spiced Version: Add a pinch of cinnamon or cayenne pepper to the melted mixture for a surprising warmth that pairs beautifully with the chocolate and peanut butter.
- Vegan Adaptation: Use dairy-free chocolate chips and sweetened condensed coconut milk. The texture is a bit softer but still very tasty.
I once added a handful of mini marshmallows on top just before chilling, and it made the fudge feel like a cozy campfire dessert—definitely worth a try for a change of pace!
Serving & Storage Suggestions
This fudge is best served chilled or at room temperature. If you’ve just taken it out of the fridge, let it sit for 5-10 minutes to soften slightly for easier biting.
Presentation-wise, I like to cut it into small, bite-sized squares and arrange them on a simple plate or parchment-lined tray. It makes a great snack for parties, or just an indulgent afternoon treat with coffee or milk.
For storage, keep the fudge in an airtight container in the refrigerator. It will stay fresh for up to two weeks, though it rarely lasts that long in my house! You can also freeze fudge for up to 3 months—just thaw it in the fridge overnight before serving.
If you want to reheat slightly, pop a piece in the microwave for 5-8 seconds, but be careful not to melt it completely unless you want a dip instead of fudge.
Over time, the flavors meld and deepen, so leftovers actually taste even better after a day or two. Honestly, I sometimes make it ahead just so I can have that “aged” fudge experience.
Nutritional Information & Benefits
Each serving (about 1-inch square) of this fudge has roughly:
| Calories | 150-180 kcal |
|---|---|
| Fat | 10-12 g (mostly from peanut butter) |
| Protein | 3-4 g |
| Sugar | 15-18 g |
While fudge is definitely an indulgence, the peanut butter adds some protein and healthy fats, making it a bit more satisfying than your average candy. Using natural peanut butter boosts the nutrient content without added sugars or oils.
This recipe is naturally gluten-free, so it fits well into gluten-sensitive diets. Just be mindful of any allergies to peanuts or dairy.
From a wellness perspective, I find this fudge is a perfect treat that doesn’t overwhelm my sweet tooth but satisfies it enough to keep me from reaching for less nourishing snacks later.
Conclusion
So, why is this easy chocolate peanut butter fudge recipe a keeper? Because it’s simple, quick, and downright delicious. Whether you’re new to making fudge or just need a fast dessert fix, this recipe delivers the perfect balance of chocolate-y richness and peanut buttery goodness with minimal fuss.
Don’t hesitate to make it your own by trying the variations or adding your favorite toppings. I love how forgiving and adaptable it is—there’s room to experiment without risking a kitchen disaster.
Honestly, this fudge holds a special place in my recipe box because it reminds me that sometimes the best treats come from the simplest moments and ingredients. I’d love to hear how your batch turns out or what twist you add—leave a comment below and share your fudge stories!
Go ahead, treat yourself—you deserve it.
Frequently Asked Questions
Can I use crunchy peanut butter instead of creamy?
Yes, but the texture will be a bit chunkier. For smoothest fudge, creamy peanut butter is best, but crunchy adds a nice bite if you don’t mind.
How long does the fudge keep at room temperature?
Due to the sweetened condensed milk, it’s best stored in the fridge. At room temp, it might get too soft or sticky after a few hours.
Can I double the recipe?
Absolutely! Just use a larger pan and increase chilling time accordingly. The ingredients scale up nicely.
What if my fudge is too soft after chilling?
Try freezing it for 15-20 minutes to firm up before slicing. Also, make sure you used the right ratio of ingredients.
Is it possible to make this fudge without sweetened condensed milk?
Sweetened condensed milk is key for texture, but you could experiment with heavy cream and sugar, though it won’t be as foolproof or quick.
For a delightful change, you might enjoy pairing this fudge with a cup of rich creamy hot chocolate or alongside a fresh fruit salad like the one in my summer fruit salad recipe. The contrast is fantastic!
Pin This Recipe!
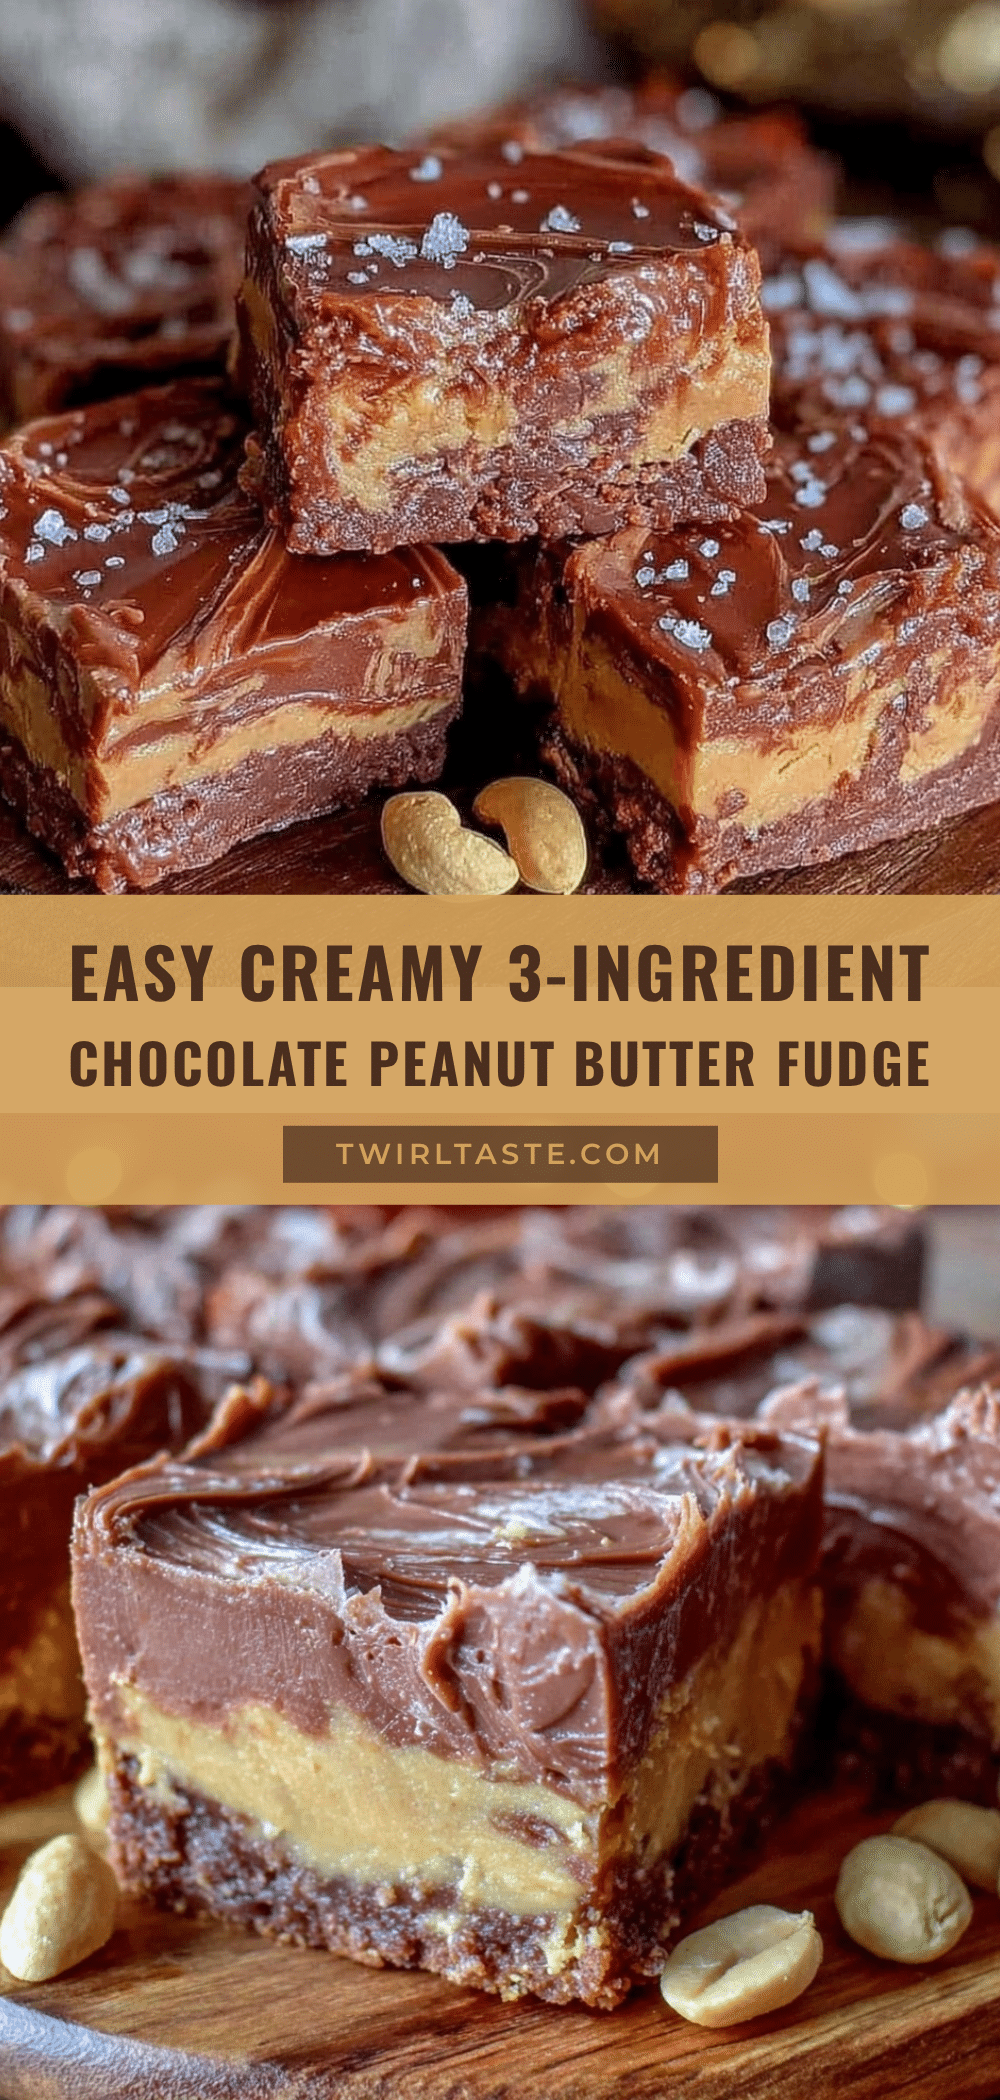
Easy Chocolate Peanut Butter Fudge Recipe with 3 Simple Ingredients Perfect for Beginners

A quick and simple fudge recipe using just three pantry staples: peanut butter, chocolate chips, and sweetened condensed milk. Perfect for beginners and ready in under 15 minutes of prep time.
- Prep Time: 10 minutes
- Cook Time: 7 minutes
- Total Time: 2 hours 17 minutes
- Yield: 16 servings 1x
- Category: Dessert
- Cuisine: American
Ingredients
- 1 cup (240 g) creamy peanut butter
- 2 cups (340 g) semi-sweet chocolate chips
- 1 can (14 oz / 396 g) sweetened condensed milk
- Optional: chopped nuts (walnuts or peanuts), sea salt flakes, mini marshmallows, crushed pretzels
Instructions
- Line an 8×8 inch (20×20 cm) baking dish with parchment paper, leaving some overhang on the sides.
- In a medium saucepan over low heat, combine 2 cups (340 g) semi-sweet chocolate chips, 1 cup (240 g) creamy peanut butter, and one 14 oz (396 g) can of sweetened condensed milk.
- Stir continuously with a heatproof spatula or wooden spoon until all ingredients melt and the mixture is smooth and glossy, about 5-7 minutes.
- Check the consistency; it should be thick but pourable. If too thick, add a teaspoon of milk or cream to loosen slightly.
- Pour the mixture into the prepared baking dish and smooth the top with a spatula.
- Add optional toppings like chopped nuts or sea salt flakes while the fudge is still warm.
- Chill in the refrigerator for at least 2 hours or until firm. For best results, chill overnight.
- Use the parchment paper overhang to lift the fudge out and cut into small squares. For cleaner cuts, dip the knife in hot water and wipe dry between slices.
Notes
Keep heat low and stir continuously to prevent burning. Use quality semi-sweet chocolate chips for best flavor. Line the baking dish with parchment paper for easy removal. Chill fudge for at least 2 hours or overnight for best texture. If fudge sets too hard, let it sit at room temperature for 10 minutes before slicing.
Nutrition
- Serving Size: 1-inch square piece
- Calories: 165
- Sugar: 16
- Sodium: 50
- Fat: 11
- Saturated Fat: 4
- Carbohydrates: 17
- Fiber: 1
- Protein: 3.5
Keywords: chocolate peanut butter fudge, easy fudge recipe, 3 ingredient fudge, beginner fudge recipe, quick dessert, no bake fudge