Love this? Save it for later!
Share the inspiration with your friends
I figured making cookies for two people was a waste of good butter. You know how it goes—you buy a bag of chocolate chips, mix a batch of dough, and then stare at the counter wondering why you baked twelve cookies when your appetite says three is plenty. The rest just sits there, tempting you, until they turn stale or you eat them all in a rage. It took about twenty minutes for that assumption to fall apart completely.
I was staring at a half-mixed bowl of dough, feeling like a bad host to my own kitchen. The recipe called for a standard cup of flour, which is clearly designed for a family of five or a bake sale. But I had a craving that was specific, urgent, and entirely selfish. I didn’t want a tray of six. I wanted four perfect, warm, gooey circles of joy.
So I scaled it down. I stopped thinking about portion sizes and started thinking about texture. What if I could keep the ratio of brown sugar to white sugar high enough to guarantee chewiness, but small enough to eat before they cooled too much? The result wasn’t just convenient; it was actually better than the big batch. The edges got crispier because the cookies were thinner, and the centers stayed soft because I could pull them out at the exact second they looked right.
Let’s face it, small-batch baking isn’t just about saving ingredients. It’s about control. You aren’t at the mercy of a large oven load that bakes unevenly. You get to watch every single cookie turn from pale dough to golden perfection. And honestly, there is a certain quiet satisfaction in knowing you made exactly what you wanted, with zero guilt about the leftovers.
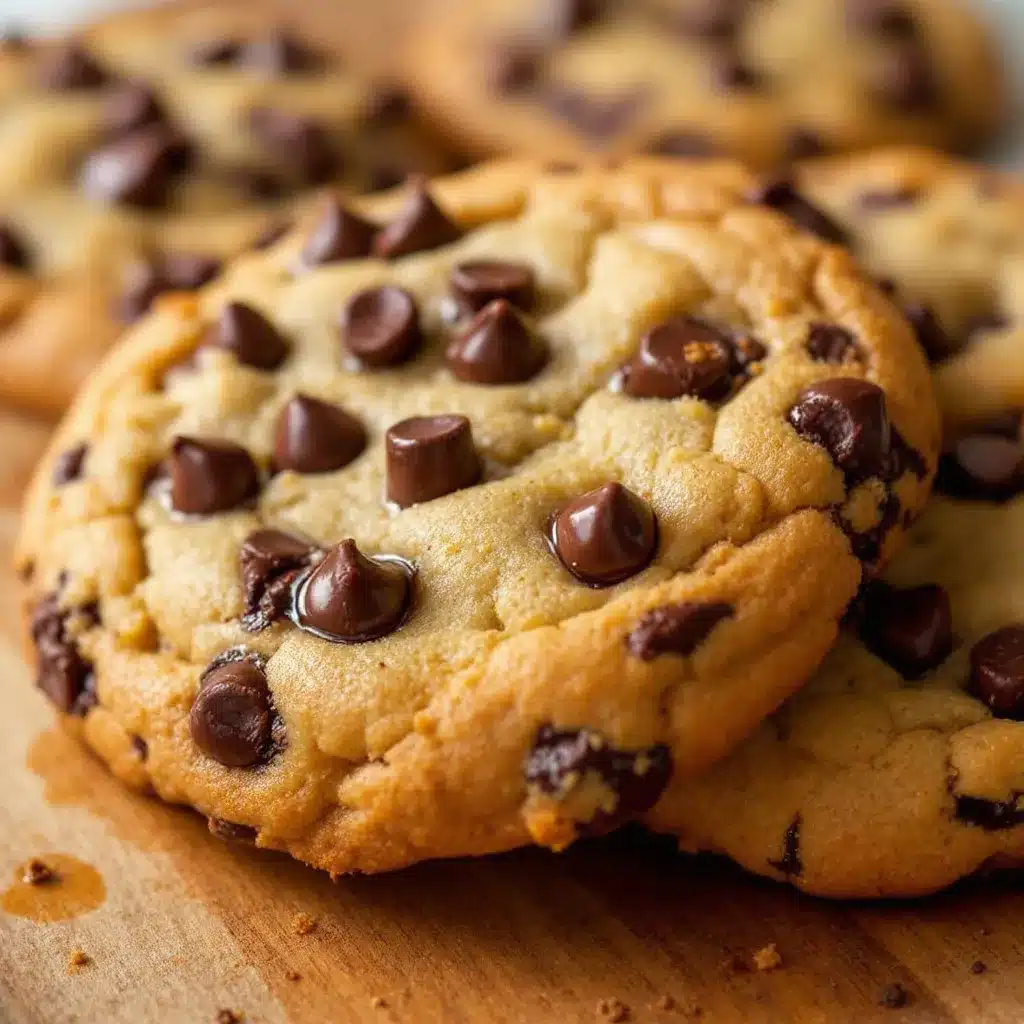
That first bite of my Perfect Chewy Small-Batch Chocolate Chip Cookies proved it. The chocolate was still melting on the tongue, and the crunch gave way to a soft, caramel-like center. It stuck with me because it solved a real problem without sacrificing the soul of the recipe.
Why You’ll Love This Recipe
There is a specific kind of magic that happens when you reduce a classic recipe to its smallest, most essential form. This isn’t just a “lite” version of chocolate chip cookies; it is a reimagined approach for the modern snacker who wants quality over quantity. After testing this small-batch method several times, I can tell you that the texture is superior because the cookies bake faster and more evenly. Here is why this recipe has earned a permanent spot in my rotation:
- Quick & Easy: You can have these mixed, baked, and eaten in under 30 minutes. It is the perfect solution for those late-night cravings when you don’t want to wait for a full batch to cool.
- Simple Ingredients: No fancy grocery trips needed. You likely already have butter, sugar, flour, and eggs in your kitchen. It relies on pantry staples that you trust.
- Perfect for Solo Treats: Great for a quiet evening with a cup of coffee or a shared dessert date night. It eliminates the waste factor entirely.
- Unbelievably Delicious: The texture and flavor combo is next-level comfort food. By using brown butter techniques (even on a small scale), you get a nutty depth that standard recipes often miss.
- Crowd-Pleaser: Even though the batch is small, the flavor profile is bold enough to impress. Kids and adults alike will ask for the recipe because they can’t believe how chewy they are.
What makes this different from the rest? It’s the balance. Many small-batch recipes fail because they don’t account for the leavening agents properly, resulting in flat, greasy discs. This recipe uses precise measurements to ensure they puff up just enough, then settle into that ideal chewy center. It’s comfort food reimagined—fast, efficient, but with the same soul-soothing satisfaction as a big batch. It’s perfect for when you want to feel like a pro baker without the cleanup headache.
What Ingredients You Will Need
This recipe uses simple, wholesome ingredients to deliver bold flavor and satisfying texture without the fuss. The key to chewiness lies in the sugar ratio and the quality of the chocolate. Here is what you need to gather:
- Unsalted Butter: 3 tablespoons, melted and slightly cooled. Melted butter creates that chewy texture because it hydrates the flour differently than creamed butter. I prefer using a high-fat butter like Kerrygold for the best flavor.
- Dark Brown Sugar: ¼ cup, packed. This is non-negotiable for chewiness. The molasses content keeps the cookies moist. If you use light brown sugar, they will be cakier.
- Granulated White Sugar: 1 tablespoon. This helps with the crisp edges. Don’t skip it entirely, or they might be too soft.
- Large Egg Yolk: 1 large egg yolk. Using just the yolk adds richness and fat, which contributes to that tender, cake-like chew rather than a crisp snap. Save the white for an omelet.
- Vanilla Extract: ½ teaspoon. Use pure vanilla, not imitation. The flavor is concentrated in a small batch, so it needs to be good.
- All-Purpose Flour: ½ cup plus 1 tablespoon. Do not use cake flour; you need the protein in all-purpose to hold the structure.
- Baking Soda: ¼ teaspoon. This provides the lift. Be careful not to add too much, or they will taste soapy.
- Fine Sea Salt: ¼ teaspoon. Salt is crucial for balancing the sweetness. It brings out the chocolate flavor.
- Chocolate Chips: ⅓ cup. I recommend using high-quality semi-sweet chips, like Ghirardelli or Guittard, for a better melt. You can also chop up a chocolate bar for a more rustic look.
For substitutions, you can use a dairy-free butter alternative if needed, though the flavor might be slightly different. If you are gluten-sensitive, a 1:1 gluten-free flour blend works well, but add a tiny bit more xanthan gum if your blend doesn’t already have it.
Equipment Needed
You don’t need much for this small-batch recipe, which is half the appeal. Here is what you will need:
- Small Mixing Bowl: A 1-quart bowl is perfect. If it’s too big, the ingredients might scatter when you stir.
- Fork or Small Whisk: For creaming the butter and sugars together. A fork works fine for this small volume.
- Silicone Spatula: To scrape the bowl and fold in the chocolate chips. A rubber scraper helps you get every bit of dough.
- Baking Sheet: A standard half-sheet pan or a smaller quarter-sheet pan. Since you are only making four cookies, a small pan prevents them from spreading onto the edges.
- Parchment Paper: Essential for easy cleanup and preventing sticking. You can cut a small square to fit your pan.
- Cooling Rack: Optional, but helpful if you want to stop the cooking process immediately after baking.
If you don’t have a small bowl, a large mug can work for mixing, but transferring the dough to the pan might be messy. A microwave-safe bowl is also great for melting the butter if you haven’t done it on the stove.
Preparation Method
Follow these steps carefully to get the perfect texture every time.
- Melt the Butter (2 minutes): Place the 3 tablespoons of butter in a microwave-safe bowl. Heat on high for 30-45 seconds until just melted. Do not let it boil. Let it cool for a minute so it doesn’t cook the egg.
- Mix Sugars (1 minute): Add the brown sugar and white sugar to the melted butter. Whisk vigorously with a fork for about 60 seconds. You want the mixture to look glossy and smooth. This step dissolves the sugar slightly, which is key for chewiness.
- Add Wet Ingredients (30 seconds): Stir in the egg yolk and vanilla extract. Mix until fully combined. The mixture might look slightly separated at first, but keep stirring until it becomes a uniform, shiny paste.
- Combine Dry Ingredients (1 minute): In a separate small bowl (or directly into the wet mix), whisk together the flour, baking soda, and salt. Make sure there are no clumps of baking soda.
- Form Dough (1 minute): Add the dry ingredients to the wet mixture. Stir gently with a spatula until just combined. Do not overmix, or the cookies will become tough. Fold in the chocolate chips.
- Chill (Optional but Recommended – 15-30 minutes): If you have time, cover the bowl and refrigerate the dough. This solidifies the butter and prevents the cookies from spreading too thin. If you are in a rush, you can skip this, but they will be wider.
- Preheat Oven (10 minutes): Preheat your oven to 350°F (175°C). Line your baking sheet with parchment paper.
- Shape Cookies (2 minutes): Divide the dough into four equal portions. Roll them into balls and place them on the baking sheet, spaced 2 inches apart. Gently flatten them slightly with your palm. They should be about 1 inch thick.
- Bake (10-12 minutes): Place in the oven. Bake for 10-12 minutes. You want the edges to be golden brown, but the centers should still look slightly underdone and soft. They will firm up as they cool.
- Cool (5 minutes): Let the cookies sit on the hot baking sheet for 5 minutes. This allows them to set. Then, transfer them to a cooling rack or eat them warm straight off the pan.
How do I know when they are done?
The visual cue is everything. Look for the edges to turn a light golden brown. The center should still look soft and puffy. If they look fully set and firm in the center, they will be overbaked. Remember, they continue to cook on the hot pan after you take them out.
What if my dough is too sticky?
If your kitchen is very warm, the dough might be sticky. This is why chilling is helpful. If you don’t have time to chill, add a tiny teaspoon of flour to your hands to prevent sticking when shaping.
Cooking Tips & Techniques
Getting the texture right on a small batch requires a bit of attention to detail. Here are some professional tips to ensure success:
- Don’t Overbake: This is the most common mistake. Small cookies bake faster than large ones. Check them at the 9-minute mark. They should look soft in the middle.
- Use a Scale: For such a small recipe, weighing your ingredients is the best way to ensure consistency. 3 tablespoons of butter is about 42 grams. ¼ cup of brown sugar is about 50 grams.
- Room Temperature Eggs: Make sure your egg yolk is close to room temperature. Cold eggs can seize the melted butter, making the dough grainy.
- Quality Chocolate: Since there is so little dough, the chocolate flavor is prominent. Use good chocolate. If you use cheap chips, the cookies will taste one-dimensional.
- Salt Flakes: Sprinkle a tiny pinch of flaky sea salt on top immediately after baking. It adds a professional touch and enhances the sweet-savory balance.
I once made a batch using cold butter and the cookies spread too much and became crispy all over. Switching to melted, cooled butter was the game-changer. It creates that distinct chewy texture that people love. Also, don’t be afraid to underbake. A slightly underbaked center is the hallmark of a great chocolate chip cookie.
Variations & Adaptations
While the classic version is my favorite, this small-batch recipe is a blank canvas. Here are some ways to customize it:
- White Chocolate Macadamia: Swap the semi-sweet chips for white chocolate chips and add 2 tablespoons of toasted macadamia nuts. It’s rich and tropical.
- Double Chocolate: Add 1 tablespoon of unsweetened cocoa powder to the dry ingredients and use dark chocolate chips. It’s intense and fudgy.
- Chewy Brown Butter Cookies: If you want to take it up a notch, brown the butter before mixing. Let it cool completely, then proceed with the recipe. This adds a nutty, caramel-like depth.
- Vegan Option: Use a vegan butter stick and a flax egg (1 tablespoon ground flaxseed mixed with 3 tablespoons water) instead of the yolk. The texture will be slightly different but still delicious.
- Pumpkin Spice: Add 1 tablespoon of pumpkin puree and ½ teaspoon of pumpkin pie spice. This pairs wonderfully with the chocolate. Note: This may require a tiny bit more flour.
I recently tried adding a teaspoon of instant espresso powder to the dry ingredients. It didn’t make the cookies taste like coffee; it just made the chocolate flavor pop in a way I hadn’t experienced before. It’s a subtle trick that works wonders.
Serving & Storage Suggestions
These cookies are best served warm, straight from the oven. They pair beautifully with a cold glass of milk, a hot cup of coffee, or a rich stout beer. If you are hosting a small dinner, serve them on a simple ceramic plate with a dollop of whipped cream.
Storage: If you have leftovers (unlikely), store them in an airtight container at room temperature for up to 3 days. Place a slice of bread in the container to keep them soft. They can also be frozen. Freeze the unbaked dough balls on a tray, then transfer to a freezer bag. Bake from frozen, adding 1-2 minutes to the bake time.
Reheating: If they have cooled down, microwave them for 10-15 seconds to restore the gooey texture. They should be soft and warm, not hard and crunchy.
Nutritional Information & Benefits
While these are a treat, they are made with simple, recognizable ingredients. Here is an approximate nutritional value per cookie:
- Calories: ~180-200 kcal
- Fat: 10g (mostly from butter and chocolate)
- Carbohydrates: 24g
- Sugar: 16g
- Protein: 2g
The use of egg yolk adds choline, which is good for brain health. Dark chocolate contains antioxidants, though the sugar content is significant. Enjoy these in moderation as a special indulgence. They are not a health food, but they are a better alternative to store-bought cookies which often contain preservatives and unknown ingredients.
Conclusion
Making Perfect Chewy Small-Batch Chocolate Chip Cookies is a small project with a huge reward. It solves the problem of waste, gives you control over the bake, and delivers a cookie that is soft, chewy, and full of chocolate. I love this recipe because it respects my time and my appetite. It doesn’t try to be something it’s not.
I encourage you to try it exactly as written first, then experiment with the variations. Add nuts, swap the chocolate, or try browning the butter. You might find your own perfect version. Let me know in the comments if you tried it, and what variations you added. I read every single comment and love hearing about your baking adventures.
Happy baking! And remember, the best cookie is the one you eat while it’s still warm.
FAQs
Can I freeze the dough?
Yes! Scoop the dough into balls and freeze them on a baking sheet. Once solid, transfer to a bag. You can bake them straight from frozen, just add 1-2 minutes to the bake time.
Why are my cookies flat?
This usually happens if the butter was too hot when mixed with the sugar, or if the dough wasn’t chilled. Make sure the butter is just melted and cooled, not hot. Chilling the dough for 15 minutes helps.
Can I use brown sugar only?
You can, but the cookies will be darker and softer. The white sugar helps with the crisp edges. For maximum chewiness, stick to the ratio provided.
What kind of chocolate chips should I use?
Semi-sweet is classic. Dark chocolate chips offer a less sweet, more intense flavor. Milk chocolate chips will make sweeter, softer cookies.
Can I make this recipe for one person?
Yes, simply halve all the ingredients. You will get two cookies. The baking time will be slightly less, so check them at 8-9 minutes.
Pin This Recipe!
Perfect Chewy Small-Batch Chocolate Chip Cookies

A reimagined, small-batch chocolate chip cookie recipe designed for two people. These cookies offer superior chewiness and crisp edges with minimal waste, using melted butter and precise measurements for perfect texture.
- Prep Time: 15 minutes
- Cook Time: 12 minutes
- Total Time: 27 minutes
- Yield: 4 servings 1x
- Category: Dessert
- Cuisine: American
Ingredients
- 3 tablespoons unsalted butter, melted and slightly cooled
- ¼ cup dark brown sugar, packed
- 1 tablespoon granulated white sugar
- 1 large egg yolk
- ½ teaspoon vanilla extract
- ½ cup plus 1 tablespoon all-purpose flour
- ¼ teaspoon baking soda
- ¼ teaspoon fine sea salt
- ⅓ cup chocolate chips (semi-sweet recommended)
Instructions
- Melt the butter in a microwave-safe bowl for 30-45 seconds until just melted. Let it cool for a minute.
- Add the brown sugar and white sugar to the melted butter. Whisk vigorously with a fork for about 60 seconds until glossy and smooth.
- Stir in the egg yolk and vanilla extract until fully combined into a uniform, shiny paste.
- Whisk together the flour, baking soda, and salt in a separate small bowl.
- Add the dry ingredients to the wet mixture. Stir gently with a spatula until just combined, then fold in the chocolate chips.
- Optional: Cover and refrigerate the dough for 15-30 minutes to prevent spreading.
- Preheat oven to 350°F (175°C) and line a baking sheet with parchment paper.
- Divide dough into four equal portions. Roll into balls, place on the sheet spaced 2 inches apart, and gently flatten slightly.
- Bake for 10-12 minutes until edges are golden brown but centers still look soft.
- Let cookies sit on the hot baking sheet for 5 minutes to set before transferring to a cooling rack or eating warm.
Notes
Use melted butter for chewiness rather than creamed butter. Do not overbake; centers should look soft. For best results, weigh ingredients for precision. Chilling dough prevents excessive spreading. Sprinkle with flaky sea salt after baking for enhanced flavor.
Nutrition
- Serving Size: 1 cookie
- Calories: 190
- Sugar: 16
- Sodium: 120
- Fat: 10
- Saturated Fat: 6
- Carbohydrates: 24
- Fiber: 1
- Protein: 2
Keywords: small batch cookies, chocolate chip cookies, chewy cookies, quick dessert, baking for two, easy cookies


