Love this? Save it for later!
Share the inspiration with your friends
I figured melting white chocolate in the microwave would be a straightforward, ten-minute affair. It took about fifteen minutes of frantic stirring and a near-meltdown in the sink for that assumption to fall apart completely. You know how it goes—those little candy corn kernels seem to multiply in the bag, and suddenly your kitchen counter looks like a confetti explosion from a very specific, sugary party. I was trying to make Easy Candy Corn Halloween Bark because my kids had that classic “I need a treat that looks scary but tastes like sugar” demand. Honestly, I just wanted to avoid the grocery store run during the Halloween rush.
The recipe calls for white chocolate, milk chocolate, and candy corn. Simple, right? Well, not exactly. The first time I made this, I dumped everything into a bowl and stirred it into a brown sludge. It tasted fine, but it looked like mud. My daughter stared at it like I’d just ruined Christmas. That was the moment I realized that layering isn’t just an aesthetic choice; it’s the entire structural integrity of the bark.
I ended up spending an hour getting the layers just right. The white layer had to set enough to hold the milk chocolate, but not so hard that the next layer wouldn’t stick. It’s a delicate balance, you know? By the time I finally got that distinct orange, white, and yellow look, I had chocolate on my apron, my sleeves, and probably my dog’s fur. But when we broke that first slab, the snap was satisfyingly crisp. It wasn’t just a snack; it was a small victory against the chaos of October.
Now, I make this almost every year. It’s become our little tradition. The kids help with the sprinkling, I handle the melting (with extreme caution), and we all wait for that final hardening time. It’s not complicated, but it requires a bit of patience. And honestly, that patience pays off when you see the empty plate an hour later. It’s one of those recipes that feels harder than it is, but once you get the hang of the layering, it’s effortless.
Why You’ll Love This Recipe
There are a million Halloween treats out there, but this Easy Candy Corn Halloween Bark hits a different note. It’s not just about the sugar rush, though that’s definitely part of the appeal. It’s about the ease and the visual payoff. You don’t need to be a pastry chef to make this work. In fact, the less professional you are, the more authentic the messy, fun vibe feels.
Here is why this recipe has earned a permanent spot in my rotation:
- Quick & Easy: You can have this done from start to finish in under 30 minutes. That’s including cooling time, which you can speed up by popping it in the fridge. Perfect for those last-minute trick-or-treat bags or a sudden party craving.
- Simple Ingredients: You likely already have the three main components in your pantry. White chocolate chips, milk chocolate chips, and a bag of candy corn. No fancy grocery trips needed, and no obscure ingredients you’ll only use once a year.
- Perfect for Halloween Parties: Whether it’s a school party, a neighborhood gathering, or just a spooky movie night at home, this bark fits right in. It’s festive without being overly complicated.
- Crowd-Pleaser: Kids love the colors, and adults love the simplicity. It’s always a hit because it looks impressive but requires zero skill to assemble. It’s the kind of treat that gets rave reviews without any stress.
- Unbelievably Delicious: The texture combo is next-level. You get the snap of the chocolate, the chew of the candy corn, and the sweet, creamy melt of the chocolate. It’s comfort food reimagined for the spookiest holiday.
What makes this recipe different from the rest is the layering technique. Most bark recipes just dump everything in a bowl. But here, we create distinct bands of color. It’s not just another version of holiday bark; it’s your best version because it actually looks like Halloween. It’s the kind of treat that makes you close your eyes after the first bite and smile. It’s healthier in the sense that it’s made in your kitchen with no preservatives, but with the same soul-soothing satisfaction of store-bought candy. Perfect for impressing guests without stressing over a complex recipe.
What Ingredients You Will Need
This recipe uses simple, wholesome ingredients to deliver bold flavor and satisfying texture without the fuss. The beauty of this bark is that it relies on high-quality chocolate chips for the best finish. If you use low-quality chocolate, it might not melt smoothly, and the final product could be grainy. I recommend using a brand like Ghirardelli or Ghirardelli for best texture, as they have a consistent melt point.
- White Chocolate Chips: One 12-ounce bag. These form the base layer. Look for chips that are designed for melting, not baking chips, as they have a higher cocoa butter content and melt smoother. (Adds a creamy, vanilla-rich base).
- Milk Chocolate Chips: One 12-ounce bag. These create the middle layer. Again, stick with melting chips for a glossy finish. (Provides a classic, sweet chocolate flavor).
- Candy Corn: Two 10-ounce bags. This is the star of the show. You want the standard kind, not the giant ones, so they distribute evenly. (Adds the iconic Halloween color and chewy texture).
- White Candy Melts (Optional): If you want a brighter white layer, you can substitute half the white chocolate with candy melts. They set harder and stay brighter. (Use if you want that stark, clean look).
- Orange Food Coloring Gel (Optional): If you want the milk chocolate layer to be more vibrant orange, you can add a drop of orange gel food coloring. (Adds a spooky pop of color).
Substitution guidance: If you are avoiding dairy, you can use dairy-free white and milk chocolate chips. Just be aware that they might melt at a slightly different rate, so watch the microwave closely. For a gluten-free option, ensure your chocolate chips and candy corn are certified gluten-free, as some brands process them in facilities with wheat. In summer, you might skip the candy corn and use orange and white sprinkles for a different look, but for Halloween, the candy corn is non-negotiable.
Equipment Needed
You don’t need much to make this bark, which is part of its charm. However, having the right tools makes the process less stressful.
- Large Microwave-Safe Bowl: You need a bowl big enough to hold two bags of chocolate chips without overflowing when they melt. A 4-quart bowl is ideal. (I use a large Pyrex bowl because I’ve learned the hard way that smaller bowls lead to chocolate explosions).
- Two Medium Microwave-Safe Bowls: You’ll melt the white and milk chocolate separately. Having two dedicated bowls prevents mixing colors and saves time.
- 8×8 Inch Baking Pan: This is the standard size for bark. Line it with parchment paper or a silicone mat. (Silicone mats are reusable and make cleanup a breeze, though I usually just use parchment for speed).
- Silicone Spatula: Essential for scraping the bowls clean and spreading the chocolate evenly. A flexible spatula works best to get into the corners.
- Whisk: A small whisk helps break up any lumps in the melted chocolate and ensures a smooth consistency.
- Parchment Paper: To line the pan. This is non-negotiable. Do not try to skip this, or you will be picking chocolate out of your pan for hours.
If you don’t have an 8×8 pan, a 9×9 will work, but the bark will be thinner. You can also use a jelly roll pan for a larger, thinner sheet. Budget-friendly option: If you don’t want to buy a new baking pan, you can use a rimmed baking sheet, but you’ll need to make two smaller batches.
Preparation Method
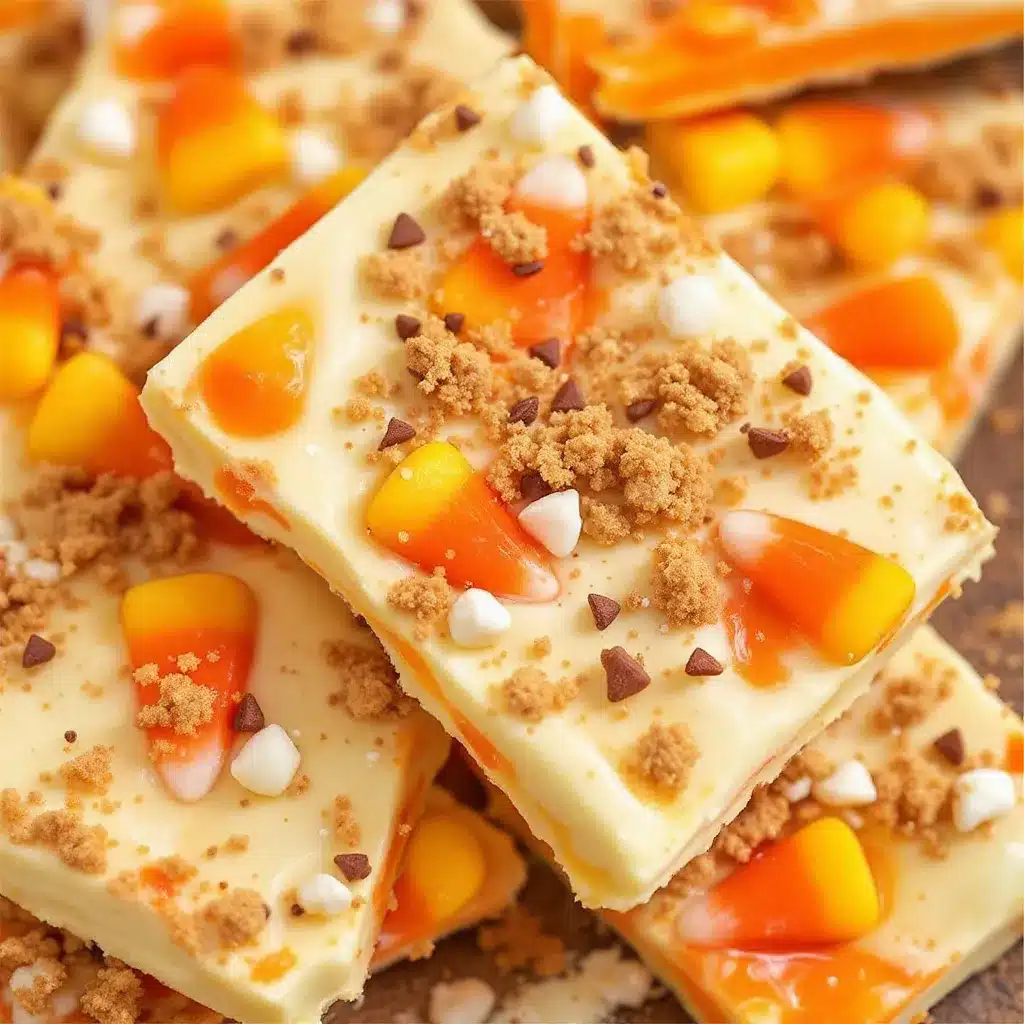
Making this bark is a process of patience and precision. Here is how to get it right every time.
- Prepare the Pan (2 minutes): Line your 8×8 inch baking pan with parchment paper, leaving an overhang on the sides. This overhang is your handle for lifting the bark out later. Do not skip this step. If the chocolate sticks, you’ll ruin the presentation.
- Melt the White Chocolate (3-4 minutes): Place the white chocolate chips in a microwave-safe bowl. Microwave on high for 1 minute. Remove and stir vigorously. If there are still lumps, microwave in 15-second intervals, stirring after each, until smooth. Do not overheat, or the chocolate will seize. It should look glossy and fluid.
- Spread the White Layer (2 minutes): Pour the melted white chocolate into the prepared pan. Use a silicone spatula to spread it evenly into all corners. You want a uniform layer, about 1/4 inch thick. Tap the pan gently on the counter to remove any air bubbles. Place the pan in the refrigerator for 10 minutes to set. This step is crucial; if the white layer isn’t set, the next layer will mix with it.
- Melt the Milk Chocolate (3-4 minutes): While the white layer is setting, melt the milk chocolate chips in a separate bowl using the same method as above. If you want orange bark, add a drop of orange gel food coloring now and stir until fully incorporated. The color should be a vibrant, spooky orange.
- Add the Candy Corn (1 minute): Once the white layer is firm to the touch, remove the pan from the fridge. Sprinkle half of the candy corn evenly over the white chocolate layer. Press them down gently so they stick. This layer acts as the “glue” for the next step.
- Spread the Milk Chocolate Layer (2 minutes): Pour the melted milk (or orange) chocolate over the candy corn. Spread it evenly, making sure to cover the candy corn completely. This creates the distinct color separation. Tap the pan again to level the surface.
- Top with Remaining Candy Corn (1 minute): Sprinkle the remaining candy corn over the milk chocolate layer. Press them in lightly. You want a dense layer of candy corn on top for that festive look.
- Chill and Set (30 minutes): Place the pan in the refrigerator for at least 30 minutes, or until the chocolate is completely hard. If you’re in a hurry, you can put it in the freezer for 15 minutes, but watch it closely so it doesn’t get too cold too fast.
- Break and Serve: Lift the bark out of the pan using the parchment paper overhang. Break it into irregular pieces by hand or with a knife. Serve immediately or store in an airtight container.
Cooking Tips & Techniques
The biggest mistake people make with chocolate bark is overheating the chocolate. Chocolate is sensitive. If you microwave it for too long, it can seize up and become grainy. Always melt in short intervals. Stirring is your best friend here. It distributes the heat evenly and prevents hot spots.
Another tip is to ensure your bowls are completely dry. Even a few drops of water can cause chocolate to seize. Keep your workspace dry and clean. If you’re adding food coloring, use gel coloring, not liquid. Liquid coloring can thin out the chocolate and affect the setting process. Gel coloring is more concentrated and won’t alter the texture.
Timing is everything. Don’t rush the setting time between layers. If the white layer is too soft, the milk chocolate will bleed into it, and you’ll lose that nice layered look. It’s better to wait an extra 5 minutes than to ruin the visual appeal. Also, when you break the bark, try to break it along the natural cracks. This gives you those jagged, rustic edges that look more professional than clean cuts.
Personal failure lesson: I once tried to speed up the process by putting the whole pan in the freezer. The chocolate cracked because it cooled too fast. Now, I always use the fridge. It’s slower, but it keeps the chocolate smooth and glossy.
Variations & Adaptations
While the classic candy corn version is a hit, you can tweak this recipe to suit different tastes or dietary needs.
- Gluten-Free Option: Use certified gluten-free chocolate chips and candy corn. Many major brands offer gluten-free versions, so check the labels. This ensures everyone at the party can enjoy the treat.
- Dairy-Free/Vegan: Swap the white and milk chocolate chips for dairy-free alternatives. Coconut oil-based chocolates work well, but they may not harden as firmly in the fridge. You might need to chill it longer.
- Spooky Colors: Skip the candy corn and use orange and black sprinkles instead. You can also add edible glitter for a shimmering effect. This is great for kids who don’t like the chewy texture of candy corn.
- Pumpkin Spice Twist: Add a pinch of pumpkin pie spice to the melted milk chocolate before spreading. It adds a subtle fall flavor that pairs well with the sweetness of the candy corn.
- White Chocolate Only: For a simpler version, use only white chocolate and orange sprinkles. This is easier to make and still looks festive.
I’ve tried adding crushed pretzels to the milk chocolate layer for a salty-sweet contrast, and it was surprisingly good. It adds a crunch that breaks up the sweetness. It’s a variation I’ll definitely keep in mind for future parties.
Serving & Storage Suggestions
Serve this bark at room temperature for the best texture. If it’s too cold, the chocolate will be hard and may crack your teeth. Presentation matters here. Arrange the pieces on a platter with other Halloween treats like cookies or cupcakes. It looks great in a glass bowl or on a rustic wooden board.
For storage, keep the bark in an airtight container at room temperature. It will stay fresh for up to two weeks. If your kitchen is hot, store it in the refrigerator, but let it come to room temperature before serving to avoid condensation. You can also freeze the bark for up to three months. Wrap it tightly in plastic wrap and then in foil. Thaw it in the refrigerator overnight.
The flavors develop over time as the candy corn softens slightly in the chocolate, creating a chewier texture. This is why it often tastes better the next day. Just make sure to keep it away from direct sunlight, which can cause the chocolate to bloom or melt.
Nutritional Information & Benefits
This treat is definitely a indulgence, but it’s made with simple ingredients. Each piece contains approximately 150 calories, with 10g of sugar and 8g of fat. It’s not a health food, but it’s a fun way to satisfy a sweet tooth without excessive additives. The white chocolate provides calcium, while the milk chocolate offers a small amount of iron. For those with dietary restrictions, the gluten-free and dairy-free options ensure everyone can participate in the fun. It’s a personal wellness choice to enjoy this in moderation, as part of a balanced diet. It’s better than store-bought candy because you know exactly what’s in it.
Conclusion
This Easy Candy Corn Halloween Bark is worth trying because it’s simple, festive, and delicious. It’s a great way to involve kids in the kitchen and create a fun Halloween tradition. Customize it with your favorite colors or toppings to make it your own. I love this recipe because it’s stress-free and always a hit. Try it this Halloween and let me know how it turns out! Share your photos or comments below. Happy Halloween, and enjoy the sweet spooky season.
FAQs
Can I use chocolate bars instead of chips?
Yes, you can chop up chocolate bars, but chips are designed to melt evenly and hold their shape better. If you use bars, chop them finely for consistent melting.
Why did my chocolate seize?
Chocolate seizes when it comes into contact with water or when it’s overheated. Ensure your bowls are dry and melt in short intervals, stirring frequently.
Can I make this ahead of time?
Absolutely. You can make it up to two weeks in advance. Store it in an airtight container at room temperature.
What if I don’t like candy corn?
You can substitute candy corn with orange and white sprinkles, crushed pretzels, or even small pumpkin-shaped candies.
How do I cut the bark into neat pieces?
Use a sharp knife and warm it under hot water before cutting. This helps the knife glide through the chocolate without cracking it.
Pin This Recipe!
Easy Candy Corn Halloween Bark
A festive, three-ingredient Halloween treat featuring distinct layers of white and milk chocolate studded with candy corn. This simple bark is perfect for parties and requires minimal effort for a high visual payoff.
- Prep Time: 10 minutes
- Cook Time: 10 minutes
- Total Time: 30 minutes
- Yield: Approximately 20-24 pieces 1x
- Category: Dessert
- Cuisine: American
Ingredients
- 12-ounce bag white chocolate chips
- 12-ounce bag milk chocolate chips
- 20-ounce bag candy corn (two 10-ounce bags)
- White candy melts (optional, for brighter white layer)
- Orange food coloring gel (optional, for vibrant orange layer)
Instructions
- Line an 8×8 inch baking pan with parchment paper, leaving an overhang on the sides for easy removal.
- Place white chocolate chips in a microwave-safe bowl. Microwave on high for 1 minute, then stir vigorously. Continue microwaving in 15-second intervals, stirring after each, until smooth and glossy. Do not overheat.
- Pour the melted white chocolate into the prepared pan. Spread evenly to a thickness of about 1/4 inch using a silicone spatula. Tap the pan gently to remove air bubbles.
- Place the pan in the refrigerator for 10 minutes to allow the white layer to set firmly.
- While the white layer sets, melt the milk chocolate chips in a separate microwave-safe bowl using the same method (1 minute high, then 15-second intervals with stirring). If desired, stir in orange gel food coloring.
- Remove the pan from the refrigerator. Sprinkle half of the candy corn evenly over the set white chocolate layer, pressing gently to adhere.
- Pour the melted milk chocolate over the candy corn layer. Spread evenly to cover the candy corn completely. Tap the pan to level the surface.
- Sprinkle the remaining candy corn over the milk chocolate layer, pressing lightly.
- Refrigerate the bark for at least 30 minutes, or until the chocolate is completely hard. Alternatively, freeze for 15 minutes if in a hurry.
- Lift the bark out of the pan using the parchment paper overhang. Break into irregular pieces by hand or with a knife and serve.
Notes
Ensure bowls are completely dry to prevent chocolate from seizing. Use gel food coloring rather than liquid to avoid altering the chocolate’s texture. Do not rush the setting time between layers, or the colors will bleed. For a salty-sweet contrast, consider adding crushed pretzels to the milk chocolate layer.
Nutrition
- Serving Size: 1 piece
- Calories: 150
- Sugar: 10
- Sodium: 15
- Fat: 8
- Saturated Fat: 5
- Carbohydrates: 18
- Fiber: 1
- Protein: 2
Keywords: Halloween, candy corn, chocolate bark, easy dessert, 3-ingredient recipe, party snack, fall treats, kid-friendly


