Love this? Save it for later!
Share the inspiration with your friends
The oven timer screamed at 6:45 PM, right when the doorbell rang and the first group of costumed trick-or-treaters was already marching up the driveway. I stood there, barefoot, holding a spoon that was dripping hot, gooey marshmallow onto my bare toe. It burned. It stuck. And honestly? It was the most stressful part of my entire Halloween night. I had planned to make elaborate mummy treats weeks ago. Instead, I was standing in my kitchen, trying to scrape caramelized sugar off my skin while neighbors waited for candy.
I looked at the pot of burnt marshmallows and then at the half-empty bag of popcorn on the counter. Something clicked. If I could just mix the popcorn into the sticky mess, maybe it would solidify into something grab-able. I dumped everything in, added orange food coloring, and started rolling. My hands were a mess. My kitchen smelled like burnt sugar and panic. But then, I pulled one out. It held its shape. It was orange. It looked like a little mummy.
I handed it to the kid in the Spider-Man suit. He didn’t care that it was slightly lopsided or that it had a bit of burnt edge. He just took a huge bite and smiled. That was the moment I stopped worrying about perfection. These Crispy Orange Mummy Popcorn Balls aren’t about culinary finesse. They are about survival. They are about turning a chaotic evening into a win. And they are ridiculously easy to make, even if you are burning your toes.
The best part? You can make them while the doorbell is ringing. No baking. No oven. Just a pot, some marshmallows, and a whole lot of sticky fingers. Once you try this, you’ll never go back to store-bought candy bowls. It’s the kind of treat that feels homemade but takes less time than wrapping a candy bar. Honestly, it’s a lifesaver.
Why You’ll Love This Recipe
Let’s be real for a second. Halloween is stressful. Between costumes, parties, and managing a house full of excited kids, you don’t need another complicated dessert that requires a stand mixer and three hours of chilling time. This recipe is different because it leans into the chaos. It’s fast, it’s fun, and it’s forgiving. I’ve tested this version over the last five years, tweaking the marshmallow-to-popcorn ratio until it hits that perfect sweet spot—not too dense, not too airy.
Here is why this recipe belongs in your Halloween rotation:
* **Quick & Easy:** You can have these ready in under 15 minutes. That is faster than ordering pizza. It is perfect for those last-minute moments when you realize you have no treats left.
* **Simple Ingredients:** You likely have everything in your pantry right now. Popcorn, marshmallows, butter, and orange food coloring. No fancy grocery trips needed. No obscure ingredients that require a special trip to an international market.
* **Perfect for Last-Minute Guests:** Whether you have a sudden influx of trick-or-treaters or a neighbor’s kid shows up early, these can be rolled in minutes. They are the ultimate emergency snack.
* **Crowd-Pleaser:** Kids love them because they are sweet and squishy. Adults love them because they are nostalgic. It brings back memories of school bake sales but with a spooky twist.
* **Unbelievably Delicious:** The texture is a mix of crunchy popcorn and chewy marshmallow. It’s comfort food reimagined for Halloween. It’s sweet, salty, and slightly orange-tasting in the best way possible.
* **No Bake Required:** This is the key. You don’t need to turn on the oven. This keeps your kitchen cool and saves energy. Plus, it means you aren’t stuck waiting for a timer. You just mix and roll.
This isn’t just another popcorn ball recipe. It’s the one that actually works. Most recipes fail because they get too hard to roll or too sticky to handle. I’ve solved that by adding a specific amount of butter and using the right temperature marshmallows. It’s a tested tip that makes a huge difference. It’s the kind of recipe that makes you feel like a hero in the kitchen, even if you’re covered in sticky sugar.
What Ingredients You Will Need
This recipe relies on simple, wholesome ingredients to deliver bold flavor and satisfying texture without the fuss. The magic here is in the ratio. Too much popcorn and it falls apart. Too much marshmallow and it becomes a brick. You need that balance for the perfect bite.
* **Plain Popcorn:** You’ll need about 10-12 cups of popped popcorn. I prefer air-popped or lightly buttered popcorn for this. Avoid the movie theater style with too much salt or oil, as it can make the balls greasy. If you use microwave popcorn, check the ingredients to ensure there are no weird additives that might prevent binding.
* **Marshmallows:** One 10-ounce bag of large marshmallows is standard. Do not use mini marshmallows unless you adjust the timing, as they melt faster but can become grainy if overheated. Large marshmallows give you that stretchy, gooey texture that holds everything together.
* **Unsalted Butter:** Two tablespoons of butter. This adds richness and helps prevent the marshmallow from sticking to your hands. I recommend using a high-quality butter like Kerrygold or Plugrá for the best flavor. If you are dairy-free, you can swap this for a plant-based butter stick, but avoid spreads that are high in water content.
* **Orange Food Coloring:** Gel food coloring is essential here. Liquid coloring will make the mixture too wet and cause the popcorn balls to become soggy. Gel coloring gives you that vibrant, spooky orange hue without changing the texture. I prefer Americolor or Chefmaster for their intense pigmentation.
* **White Chocolate or Candy Melts:** For the “mummy” wrapping effect, you’ll need white chocolate or white candy melts. Candy melts are easier because they are tempered and don’t require careful melting. If you use real white chocolate, you’ll need to temper it properly or it will turn white and streaky.
* **Edible Eyes:** Small candy eyes or icing dots. These are crucial for the mummy look. You can buy pre-made ones or make your own with royal icing. Just ensure they are food-safe and won’t melt too quickly in warm hands.
If you are looking to substitute, you can use puffed rice cereal instead of popcorn for a denser ball, but you lose that satisfying crunch. For a gluten-free option, just ensure your popcorn and marshmallows are certified gluten-free, as some marshmallows contain trace gluten from processing.
Equipment Needed
You don’t need much for this recipe, which is half the appeal. However, having the right tools makes the sticky process much less painful.
* **Large Microwave-Safe Bowl:** If you are melting marshmallows in the microwave, you need a bowl that is at least 4 quarts. Marshmallows expand significantly when heated. If the bowl is too small, they will overflow and create a huge mess. A glass Pyrex bowl works best because you can see the melting progress.
* **Spatula:** A sturdy silicone spatula is non-negotiable. You need something that can scrape the sides of the bowl and fold the popcorn in without breaking. Metal spoons will stick. Wooden spoons will absorb the sticky sugar. Silicone is your friend.
* **Mixing Bowl:** A large bowl for tossing the popcorn with the marshmallow mixture. Make sure it is wide enough so you can toss effectively.
* **Parchment Paper or Silpat:** Line your workspace with parchment paper. This is critical. The marshmallow mixture will stick to almost everything. Parchment paper allows you to roll the balls easily and prevents cleanup nightmares.
* **Microwave:** For melting the marshmallows. If you prefer stovetop, you will need a heavy-bottomed saucepan, but the microwave is faster and less likely to burn the sugar.
* **Double Boiler or Small Microwave-Safe Cup:** For melting the white chocolate or candy melts. A small cup is easier to dip the popcorn balls into.
I used to try to make this with just a spoon and a plate. It was a disaster. The sticky mess ruined my counter. Now, I always prep the parchment paper first. It saves so much time and frustration. Also, keep a bowl of water nearby to wet your hands. This helps prevent the sticky marshmallow from sticking to your skin.
Preparation Method
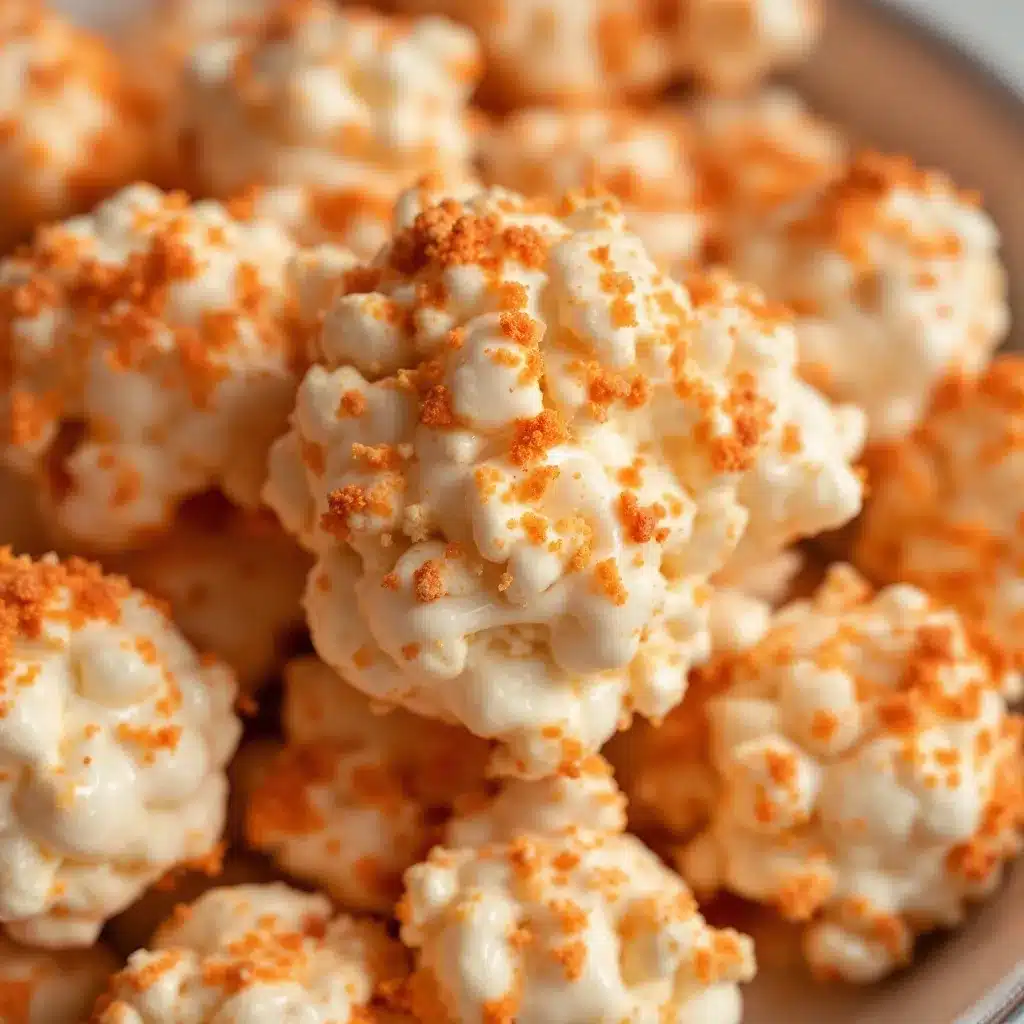
Getting these Crispy Orange Mummy Popcorn Balls ready is straightforward, but timing is everything. If you rush the melting, you get lumps. If you rush the rolling, you get mess. Follow these steps carefully for the best results.
1. **Prep Your Workspace:** Line a baking sheet or large plate with parchment paper. This is where you will place the finished balls. Make sure you have enough space to roll them out comfortably. If you are making a large batch, prep multiple sheets.
2. **Pop the Corn:** Pop your popcorn. Aim for about 10-12 cups of popped corn. Remove any unpopped kernels. They are a hazard when eating and can ruin the texture of the ball. Let the popcorn cool completely. Warm popcorn will melt the marshmallows too quickly and make the mixture soggy.
3. **Melt the Marshmallows:** In a large microwave-safe bowl, combine the marshmallows and butter. Microwave on high for 30 seconds. Stir. Then microwave for another 30 seconds. Stir again. Repeat in 15-second intervals until the mixture is smooth and creamy. Do not overheat. If the marshmallows burn, they will become hard and bitter. The mixture should be glossy and stretchy.
4. **Add Food Coloring:** Add a few drops of orange gel food coloring to the melted marshmallow mixture. Stir vigorously until the color is evenly distributed. The color will darken slightly as it cools, so aim for a bright orange. Remember, this is a small amount of coloring, so start with a little and add more if needed.
5. **Combine Popcorn and Mixture:** Pour the melted marshmallow mixture over the cooled popcorn. Use your spatula to gently fold the mixture. You want to coat every piece of popcorn evenly. Be gentle. If you stir too hard, you will crush the popcorn and create dust. It should look like a sticky, orange cloud.
6. **Roll the Balls:** Wet your hands with water or dip them in a little butter. This prevents sticking. Take a handful of the mixture and roll it into a ball. Aim for about 2-3 inches in diameter. Place them on the parchment paper. If the mixture gets too sticky, wet your hands again. Work quickly before the marshmallow hardens.
7. **Melt the White Chocolate:** In a separate microwave-safe cup, melt the white chocolate or candy melts. Microwave in 15-second intervals, stirring in between, until smooth. If using real white chocolate, be careful not to overheat it, or it will seize.
8. **Wrap the Mummies:** Dip the top half of each popcorn ball into the melted white chocolate. Use a fork to lift it out and let the excess drip off. Place it back on the parchment paper. While the chocolate is still wet, use a toothpick to drag lines of chocolate across the ball to create the “wrapping” effect.
9. **Add Eyes:** Immediately place the candy eyes on the white chocolate before it sets. If the chocolate hardens, the eyes won’t stick. You can use a toothpick to position them perfectly.
10. **Set and Serve:** Let the balls sit at room temperature for about 10-15 minutes until the chocolate is fully set. Once set, they can be stored in an airtight container.
The key here is speed. The marshmallow mixture hardens as it cools. If it gets too hard to roll, you can microwave it for 10 seconds to soften it up again. Don’t give up on it. Just give it a little heat and keep rolling.
Cooking Tips & Techniques
Making these balls seems easy, but there are a few tricks that separate the pros from the amateurs. I’ve learned these the hard way, mostly through sticky fingers and failed batches.
* **Temperature Control:** The marshmallow mixture needs to be warm enough to be sticky but not so hot that it burns your hands. If it’s too hot, it will burn you and melt the chocolate wrapping too quickly. If it’s too cool, it won’t bind. Aim for a warm, pliable texture.
* **Wet Hands are Key:** Never roll dry hands. Keep a small bowl of water next to you. Dip your fingers in, shake off the excess, and then roll. This creates a barrier between your skin and the sticky sugar. If you don’t do this, you will be picking marshmallow off your hands for hours.
* **Don’t Overcrowd the Bowl:** When folding the popcorn into the marshmallow, use a large bowl. If the bowl is too small, you’ll crush the popcorn. You want whole kernels for that satisfying crunch. Crushing them creates a dense, doughy ball instead of a light, crispy one.
* **Chocolate Consistency:** If your white chocolate is too thick, it will clump on the popcorn ball. If it’s too thin, it will drip off completely. If it’s too thick, add a tiny drop of vegetable oil. If it’s too thin, let it cool for a minute. The consistency should be like honey.
* **Work in Batches:** If you are making a large batch, work in small groups. The marshmallow mixture will start to harden in the bowl. Keep the bowl warm by placing it on top of the microwave for a few seconds if needed. This keeps the mixture pliable and easier to roll.
* **Avoid Humidity:** Humidity is the enemy of candy. If it’s a rainy day or very humid, the marshmallows will absorb moisture and become tacky. In that case, add a bit more popcorn to absorb the excess moisture. It’s a common mistake that leads to sticky, messy balls.
I once tried to make these in a humid kitchen without adjusting the recipe. The result was a sticky mess that wouldn’t hold its shape. I had to start over. Lesson learned: check the weather before you start cooking candy.
Variations & Adaptations
While the classic orange mummy is a Halloween staple, there are plenty of ways to tweak this recipe to suit different tastes or dietary needs.
* **Green Zombie Balls:** Swap the orange food coloring for green. Use green candy eyes for a zombie look. This is great for a more gruesome theme. It’s a fun variation for kids who think orange is too “sweet” looking.
* **Purple Witch Balls:** Use purple food coloring and black candy eyes. This gives a spooky, magical vibe. It’s perfect for a witch-themed party. The purple color is vibrant and looks great on a dessert table.
* **Gluten-Free Option:** Ensure your popcorn is certified gluten-free. Most plain popcorn is naturally gluten-free, but some flavored varieties contain wheat derivatives. Marshmallows are usually gluten-free, but check the label for cross-contamination warnings. This makes the treat safe for guests with celiac disease.
* **Dairy-Free Version:** Use plant-based butter and dairy-free marshmallows. There are several brands that make vegan marshmallows that melt just like regular ones. For the white chocolate, use dairy-free white chocolate chips. The texture might be slightly different, but the flavor will still be great.
* **Nut-Free:** This recipe is naturally nut-free, making it perfect for school parties or events with strict nut policies. Just ensure your marshmallows and popcorn are processed in a nut-free facility. This is a huge plus for parents of kids with allergies.
* **Seasonal Swaps:** For Thanksgiving, use brown food coloring and candy corn eyes. For Christmas, use red and green coloring with candy cane eyes. This recipe is versatile and can be adapted for any holiday.
I once made the green zombie version for a Halloween party. The kids loved them. They thought they were “gross” in the best way possible. It’s a fun way to add variety to your treat bag.
Serving & Storage Suggestions
These Crispy Orange Mummy Popcorn Balls are best served at room temperature. Cold balls can be too hard, and warm balls can be too sticky. Room temperature is the sweet spot for texture and flavor.
* **Presentation:** Arrange them on a platter lined with black or orange parchment paper. Add some fake spiders or bats around the edges for a spooky effect. They look great in mason jars tied with black ribbon. It’s a festive display that catches the eye.
* **Complementary Drinks:** Serve with apple cider or pumpkin spice lattes. The warmth of the drink contrasts nicely with the sweet, cold treat. For a non-alcoholic option, hot chocolate is a great pairing.
* **Storage:** Store in an airtight container at room temperature for up to 5 days. Do not refrigerate, as the marshmallows will become hard and lose their chewiness. If you need to store them longer, you can freeze them for up to 2 months. Thaw at room temperature before serving.
* **Reheating:** If the balls get too hard, you can microwave them for 5-10 seconds to soften them up. Be careful not to melt the chocolate wrapping. Just enough to make them chewy again.
* **Flavor Development:** The flavor actually improves after a day. The marshmallow and popcorn meld together, creating a more cohesive taste. If you make them a day ahead, they will taste even better.
I usually make these the night before the party. They hold up well overnight and are ready to go when the guests arrive. It’s a great make-ahead treat that saves time on the day of the event.
Nutritional Information & Benefits
While these are definitely a treat, they are made with simple ingredients. A typical ball contains about 150-200 calories, depending on the size. The main sources of calories are the marshmallows (sugar) and the popcorn (carbs).
* **Health Benefits:** Popcorn is a whole grain and contains fiber. When eaten in moderation, it can be a better option than candy bars. The fiber helps with digestion.
* **Dietary Considerations:** This recipe is not low-carb or keto-friendly due to the marshmallows. It is also not suitable for diabetics without modification. However, for a special occasion treat, it’s a fun indulgence.
* **Allergens:** This recipe contains dairy (butter, white chocolate) and is generally nut-free. Always check labels for potential cross-contamination.
* **Personal Wellness Perspective:** I view these as a “sometimes” food. They are fun and festive, but they are high in sugar. I try to balance them with healthier snacks during the day. It’s about moderation and enjoying the moment.
It’s important to remember that Halloween is about fun, not perfection. These treats are a way to celebrate the holiday with friends and family. Enjoy them in moderation and savor the sweetness.
Conclusion
These Crispy Orange Mummy Popcorn Balls are more than just a snack. They are a memory maker. They are about the sticky fingers, the laughter, and the joy of creating something fun with your hands. Whether you are a seasoned baker or a novice in the kitchen, this recipe is for you. It’s easy, it’s delicious, and it’s perfect for Halloween.
I love this recipe because it’s forgiving. You don’t need to be perfect. The lopsided balls are the best ones. They have character. They tell a story. And they are always a hit with kids and adults alike.
So, next time Halloween comes around, skip the store-bought candy. Make these. Your guests will thank you. And if you make a mess? Well, that’s part of the fun.
Try this recipe and let me know how it goes in the comments below. I’d love to see your creations. Share your photos on social media and tag me. Let’s make this Halloween sweeter together. Happy Halloween!
Frequently Asked Questions
Can I make these popcorn balls ahead of time?
Yes, you can make them up to 5 days in advance. Store them in an airtight container at room temperature. They will stay fresh and chewy. If you freeze them, they can last up to 2 months. Just thaw at room temperature before serving.
Why are my popcorn balls too sticky?
This usually happens if the marshmallow mixture is too wet or if you are working in a humid environment. Try adding a bit more popcorn to absorb the excess moisture. Also, make sure to wet your hands with water before rolling. This creates a barrier that prevents sticking.
Can I use mini marshmallows instead of large ones?
Yes, but you will need to adjust the melting time. Mini marshmallows melt faster and can become grainy if overheated. Stir them frequently and remove them from the heat as soon as they are smooth. The ratio of marshmallows to popcorn should remain the same.
How do I keep the white chocolate from cracking?
The chocolate cracks if it is too thick or if it is tempered incorrectly. If using candy melts, they are already tempered and should work well. If using real white chocolate, add a tiny drop of vegetable oil to thin it out. Dip the balls quickly and let the excess drip off before the chocolate sets.
Can I make these without food coloring?
Yes, you can omit the food coloring for a natural look. The marshmallows will give them a pale yellow or white color. You can use natural colorings like beet powder for pink or turmeric for yellow, but be aware that these may alter the flavor slightly. The mummy look will still work with white chocolate wrapping.
Pin This Recipe!
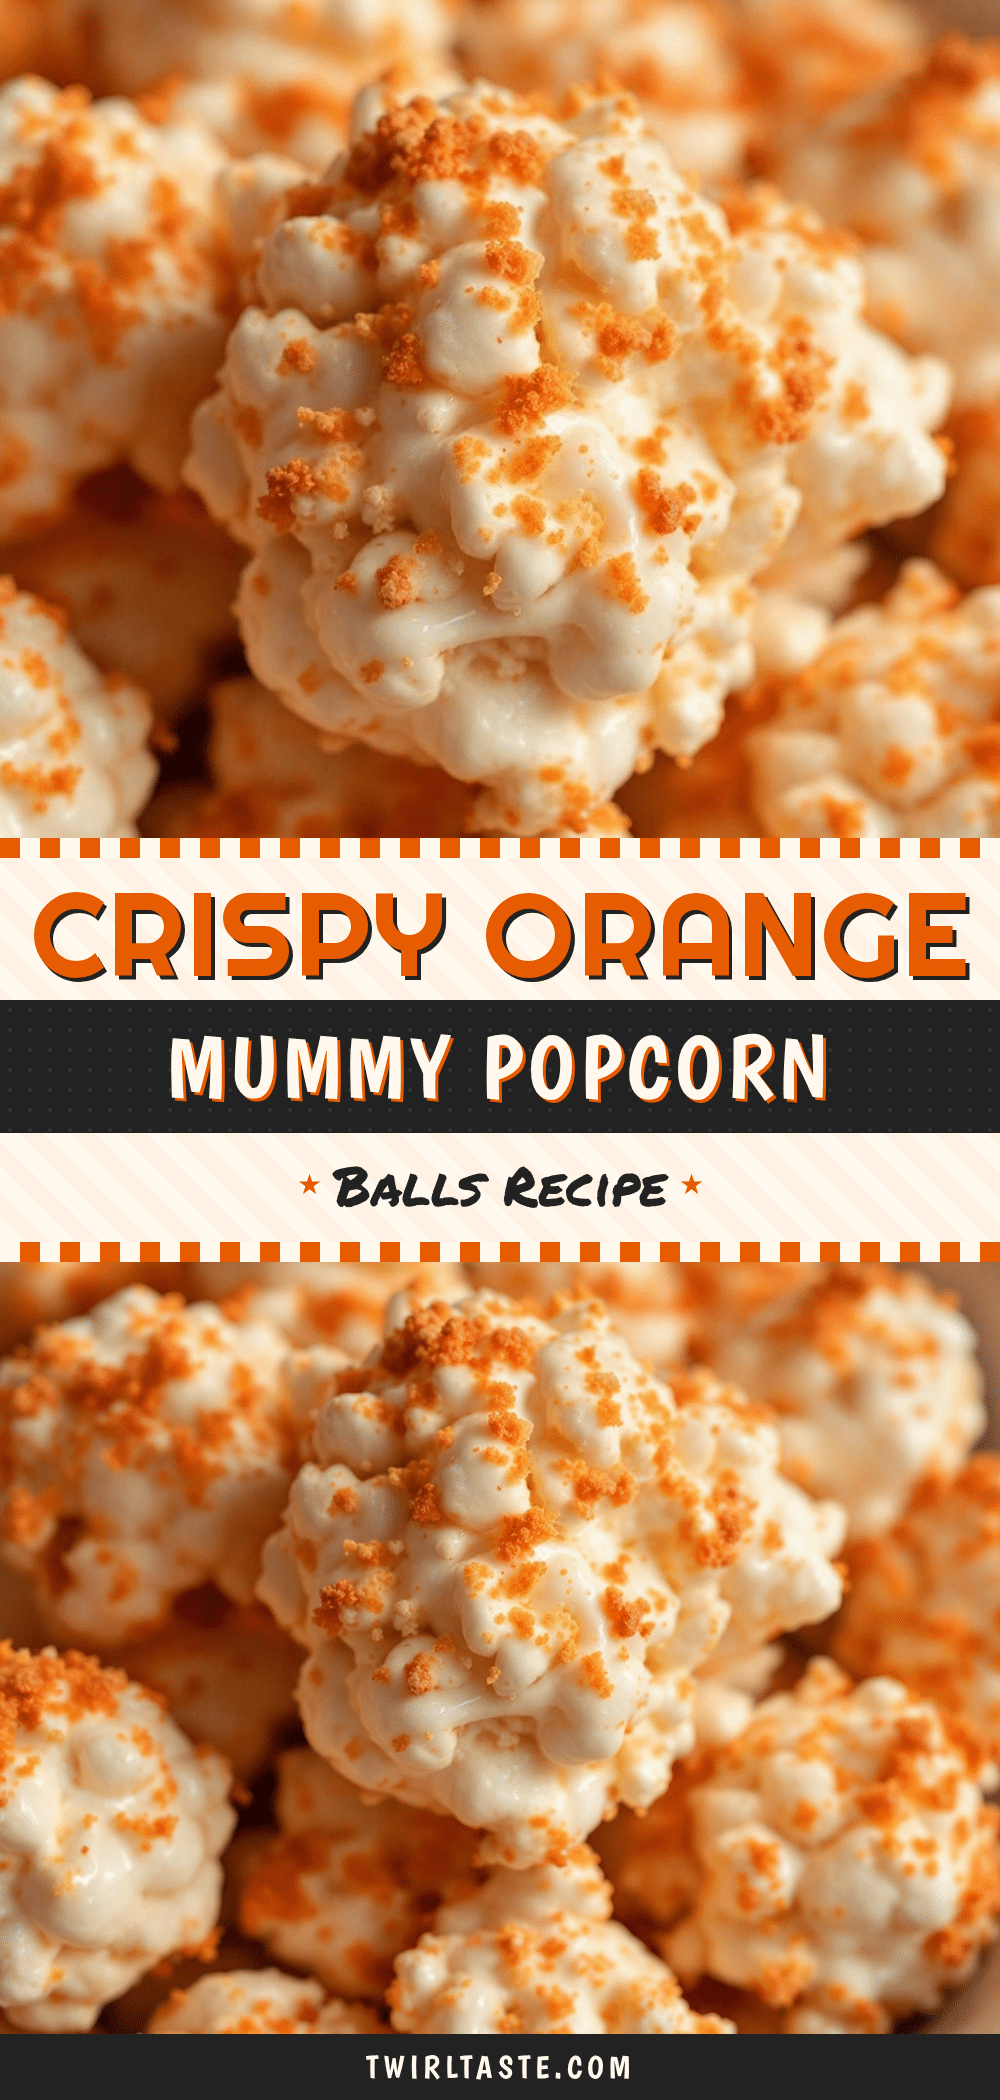
Crispy Orange Mummy Popcorn Balls: 5-Min Easy Halloween Treat

A quick, no-bake Halloween treat made with popcorn, marshmallows, and orange food coloring, wrapped in white chocolate to resemble mummies. Perfect for last-minute parties and trick-or-treaters.
- Prep Time: 10 minutes
- Cook Time: 5 minutes
- Total Time: 15 minutes
- Yield: Approximately 15-20 popcorn balls 1x
- Category: Dessert
- Cuisine: American
Ingredients
- 10–12 cups plain popped popcorn (air-popped or lightly buttered)
- 1 (10-ounce) bag large marshmallows
- 2 tablespoons unsalted butter
- Orange gel food coloring
- White chocolate or white candy melts
- Edible candy eyes or icing dots
Instructions
- Line a baking sheet or large plate with parchment paper.
- Pop the popcorn and remove any unpopped kernels. Let the popcorn cool completely.
- In a large microwave-safe bowl, combine marshmallows and butter. Microwave on high for 30 seconds, stir, then continue in 15-second intervals until smooth and creamy.
- Stir in orange gel food coloring until evenly distributed.
- Pour the melted marshmallow mixture over the cooled popcorn and gently fold to coat evenly.
- Wet hands with water or butter. Roll the mixture into 2-3 inch diameter balls and place on parchment paper.
- Melt white chocolate or candy melts in a separate microwave-safe cup in 15-second intervals.
- Dip the top half of each popcorn ball into the melted chocolate.
- Use a toothpick to drag lines of chocolate across the ball to create a mummy wrapping effect.
- Immediately place candy eyes on the wet chocolate.
- Let sit at room temperature for 10-15 minutes until the chocolate is fully set.
Notes
Ensure popcorn is completely cool before mixing to prevent sogginess. Wet hands frequently to prevent sticking. Work quickly as the marshmallow mixture hardens as it cools. Store in an airtight container at room temperature for up to 5 days. Do not refrigerate.
Nutrition
- Serving Size: 1 popcorn ball
- Calories: 175
- Sugar: 18
- Sodium: 45
- Fat: 6
- Saturated Fat: 3
- Carbohydrates: 28
- Fiber: 1
- Protein: 2
Keywords: Halloween treats, popcorn balls, mummy popcorn, no bake dessert, easy Halloween snacks, kids treats, orange popcorn balls


