Love this? Save it for later!
Share the inspiration with your friends
I burned three turkey legs before I realized I was doing it completely wrong. It was late November, the house smelled like wet wool and panic, and I was staring at a roasting pan that looked more like a crime scene than a holiday dinner. You know that feeling when you’ve spent hours stressing over a centerpiece, only to have it dry out because you couldn’t keep the heat steady? I was one of those people who thought turkey had to be the main event, the heavy, starchy anchor of the table. But honestly, by year five of hosting, I was done with the dry meat and the endless washing up.
The idea for this Easy Thanksgiving Turkey Charcuterie Cone Board didn’t come from a cookbook. It came from desperation and a bag of deli turkey I found in the fridge. I was trying to salvage the leftover breast meat from the previous night’s disaster. I rolled it up, added some sharp cheddar and cranberry sauce, and wrapped it in a tortilla. It was messy. It was delicious. It was the first thing my guests actually grabbed before the pie even came out.
That accidental roll changed how I view holiday appetizers. I stopped trying to impress with complexity and started focusing on flavor and ease. The cone board is just that—a fun, handheld way to enjoy all the classic Thanksgiving flavors without the hassle of carving or sitting at a stiff table. It’s informal, it’s fun, and it lets you eat with your hands.
I’ve made this board dozens of times since that first clumsy attempt. It’s become my secret weapon for pre-dinner snacking and a brilliant way to use up leftovers. If you’re tired of the same old cheese cubes and crackers, this is the game-changer you didn’t know you needed. It’s not just about saving time; it’s about enjoying the season without the stress.
Why You’ll Love This Recipe
This Easy Thanksgiving Turkey Charcuterie Cone Board isn’t just another appetizer; it’s a solution to the holiday eating chaos. I’ve tested this method with everything from thin deli slices to thick roast beef cuts, and the cone structure holds up surprisingly well. It’s built on years of trial and error, including a few disastrous attempts where the filling leaked out onto my hands. Now, the technique is foolproof.
Here is why this recipe stands out:
* **Quick & Easy**: You can assemble twenty of these in under fifteen minutes. It’s perfect for busy weeknights or last-minute party prep when you have zero time to cook a full meal.
* **Simple Ingredients**: No fancy grocery trips needed. You likely already have tortillas, cheese, and deli meat in your fridge or pantry.
* **Perfect for Parties**: Great for Thanksgiving appetizers, holiday mixers, or even as a fun lunchbox alternative for kids who are bored with standard sandwiches.
* **Crowd-Pleaser**: Always gets rave reviews from kids and adults alike. The handheld format removes the intimidation of eating formal holiday food.
* **Unbelievably Delicious**: The texture and flavor combo is next-level comfort food. The crunch of the tortilla against the soft turkey and creamy cheese is addictive.
What makes this different from a regular wrap is the presentation and the flavor balance. By using the cone shape, you get a concentrated bite of every ingredient. It’s not just turkey and cheese; it’s turkey, cheese, cranberry, and maybe a bit of crunch from celery or nuts, all in one perfect bite. I’ve swapped in ingredients for maple butternut squash soup sides before, but this is a standalone star. It’s the kind of snack that makes you close your eyes after the first bite. It’s comfort food reimagined—fast, fun, and satisfying. It’s perfect for impressing guests without stress, or turning a simple meal into something memorable.
What Ingredients You Will Need
This recipe uses simple, wholesome ingredients to deliver bold flavor and satisfying texture without the fuss. The beauty of the cone board is its versatility. You can use pantry staples or fresh fridge finds. The key is balancing salty, savory, sweet, and crunchy elements to mimic the full Thanksgiving experience in a single bite.
Here is what you need to gather:
* **Flour Tortillas**: Large, 10-inch flour tortillas are essential. They need to be pliable enough to roll but sturdy enough to hold the weight. I recommend brands like Mission or La Tortilla Factory for their consistency. If you need a gluten-free option, look for cassava-based tortillas which hold up better than almond flour ones.
* **Sliced Turkey Breast**: Deli-style sliced turkey is best. You want thin slices that layer well. If you are using leftover roast turkey, chop it into small strips so it fits easily in the cone. Look for low-sodium options if you are watching your salt intake.
* **Sharp Cheddar Cheese**: Sharp cheddar adds a necessary bite to cut through the mild turkey. Cut it into thin strips or small triangles. You can also use pepper jack for a spicy kick, or Swiss for a nuttier flavor profile.
* **Cranberry Sauce**: This is the secret weapon. Use jellied cranberry sauce cut into small strips or chunks. It provides the sweet-tart element that defines Thanksgiving flavors. If you prefer a smoother texture, you can spread a thin layer of whole-berry sauce inside the tortilla before adding other ingredients.
* **Celery Sticks**: Thinly sliced celery adds crucial crunch. It mimics the classic celery-and-cream-cheese dip flavor but in a solid form. Make sure to slice it on a bias for better rolling.
* **Cream Cheese**: Softened cream cheese acts as the glue. It helps the ingredients stick together and adds a creamy richness. You can use plain or herbed cream cheese depending on your preference.
* **Optional Add-Ins**: For extra texture, add small pieces of candied pecans, walnuts, or even a strip of crispy bacon. These additions elevate the snack without complicating the assembly.
I always keep a bowl of water nearby to help seal the tortillas, but the cream cheese usually does the job. You can also swap the turkey for slow cooker white chicken if you want a different protein profile, but turkey is the traditional choice for this theme.
Equipment Needed
You don’t need much to make these, which is part of the appeal. A standard kitchen setup is all you need.
* **Large Cutting Board**: You need plenty of space to lay out the tortillas and arrange the filling strips. A wooden or plastic board works fine.
* **Sharp Knife**: A good chef’s knife is helpful for slicing the cheese and celery uniformly. Uniform cuts ensure even rolling.
* **Small Bowl**: For softened cream cheese. If it’s too cold, it won’t spread well and might tear the tortilla.
* **Pastry Brush or Spoon**: To help spread the cream cheese evenly across the tortilla.
* **Small Bowl of Water**: Just a few tablespoons of water are enough. You’ll use this to wet the edge of the tortilla to seal the cone shape.
* **Plastic Wrap or Parchment Paper**: Optional, but helpful if you want to chill the cones before serving to help them hold their shape.
I once tried using a non-stick pan to warm the tortillas, but that made them too greasy. Stick to room temperature tortillas for the best results. If your tortillas are stiff, you can microwave them for 10 seconds, but be careful not to overheat them. Budget-friendly options are key here; you don’t need expensive tools. A simple knife and a plate are sufficient.
Preparation Method
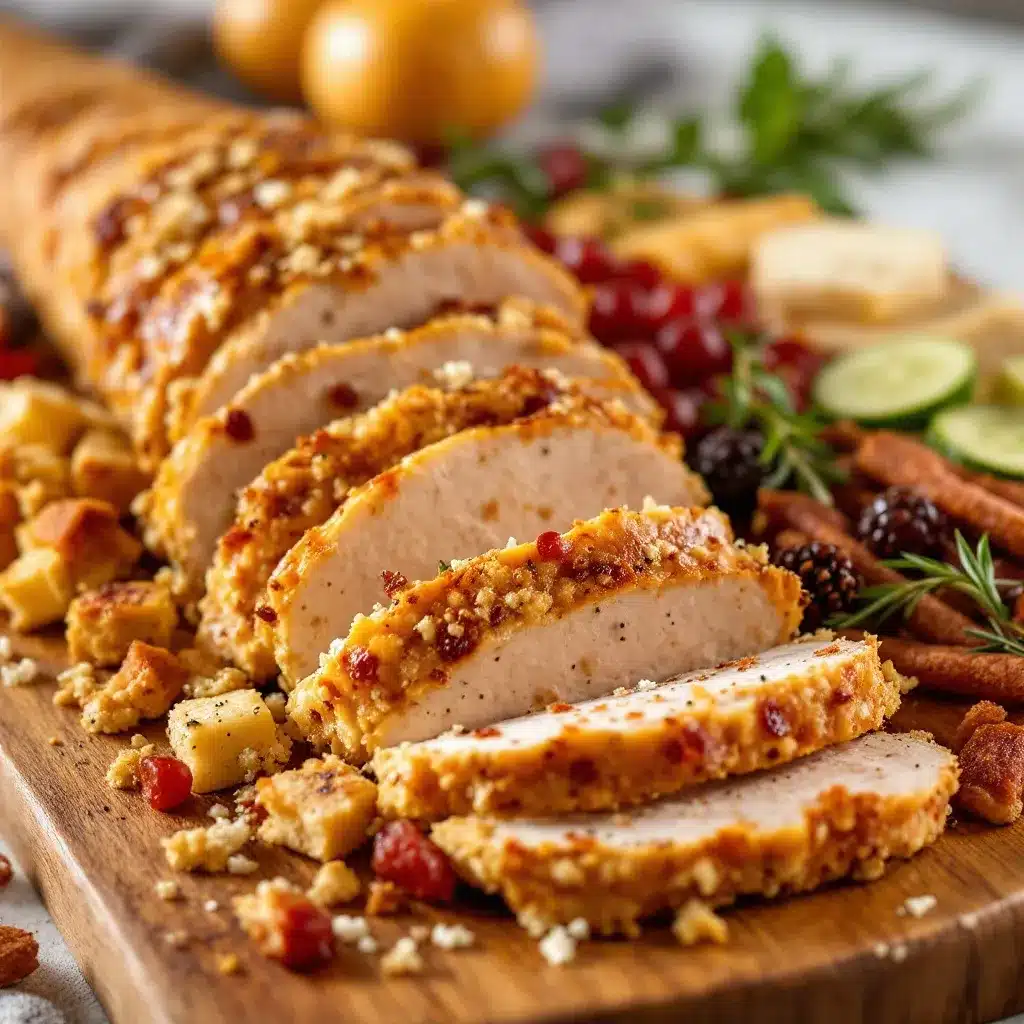
Getting the structure right is the most important part of this recipe. If the cone is too loose, it falls apart. If it’s too tight, the tortilla cracks. Here is how to do it step by step.
1. **Prepare Your Ingredients (5 minutes)**
Slice the cheddar cheese into strips about 1/4 inch wide. Slice the celery into similar-sized strips. If using jellied cranberry sauce, cut it into small cubes or strips. Have your turkey slices ready. If using leftover turkey, chop it into bite-sized pieces. This prep work ensures you can assemble quickly without thinking.
2. **Lay Out the Tortillas (2 minutes)**
Place a flour tortilla on your cutting board. It should be smooth and clean. If the tortilla is large, you can cut it in half for smaller, bite-sized cones, but full-size cones are easier to handle for adults.
3. **Spread the Cream Cheese (2 minutes)**
Take about 1 tablespoon of softened cream cheese. Spread it in a line across the bottom third of the tortilla. Don’t spread it all the way to the edges. Leave a border. This acts as the adhesive for your filling. If you skip this step, the ingredients will slide out.
4. **Add the Fillings (3 minutes)**
Layer the ingredients on top of the cream cheese line. Start with a few strips of turkey, then add cheese, then cranberry, then celery. Don’t overstuff. If you add too much, the cone will burst. A good rule of thumb is to use about 2-3 slices of turkey, 2 strips of cheese, 1-2 chunks of cranberry, and 1 strip of celery per tortilla.
5. **Roll the Cone (2 minutes)**
This is the tricky part. Starting from the edge with the filling, roll the tortilla tightly. You want a cone shape, not a burrito. Keep rolling until you reach the end of the tortilla. The shape should be a triangle that tapers to a point.
6. **Seal the Cone (1 minute)**
Wet the final edge of the tortilla with a little water. Press it down firmly against the rest of the roll. Hold it there for a few seconds to let the starch set. If you are worried about it opening, you can secure it with a toothpick, but usually, the cream cheese and moisture are enough.
7. **Chill and Serve (Optional but Recommended)**
Place the finished cones on a plate. If you have time, chill them in the fridge for 15-20 minutes. This helps the cream cheese firm up and the tortilla set. This step makes them much easier to eat without mess.
Cooking Tips & Techniques
There are a few tricks I’ve learned over the years to make these cones stand out. The first is temperature control. Your cream cheese must be fully softened. If it’s cold, it will tear the tortilla as you roll. I usually take it out of the fridge 30 minutes before I start assembling.
Another tip is the cranberry sauce. Jellied cranberry is easier to handle than whole berry because it holds its shape. If you use whole berry, chop it finely so it doesn’t slip out. I’ve also tried using cranberry sauce straight from the can, but it can be too wet. Patting it dry with a paper towel helps.
Don’t skip the celery. It provides the necessary crunch that contrasts with the soft turkey and cheese. Without it, the texture is too uniform. I also like to add a pinch of black pepper on top of the cream cheese before rolling for a little extra kick.
If you are making these ahead of time, store them in an airtight container in the fridge. They will keep for up to 2 days. However, the tortilla might soften slightly over time. To refresh them, you can let them sit at room temperature for 10 minutes before serving.
I once tried using corn tortillas, and they cracked immediately. Stick to flour tortillas. They are more forgiving and have a milder flavor that pairs better with the savory fillings. Also, avoid using overly large pieces of meat. Small, uniform pieces roll easier and create a more consistent bite.
Variations & Adaptations
While the classic turkey and cranberry combination is my favorite, there are many ways to adapt this recipe. You can change the protein, the cheese, or the add-ins to suit different tastes.
* **Leftover Turkey**: This is the most common variation. Use up your Thanksgiving leftovers by chopping the turkey into small pieces. It’s a great way to avoid food waste.
* **Ham and Swiss**: Swap the turkey for sliced ham and the cheddar for Swiss cheese. Add a bit of Dijon mustard instead of cranberry sauce for a sweet and savory twist. This pairs well with freezer-friendly turkey wraps ideas.
* **Turkey and Pesto**: Spread a thin layer of pesto on the tortilla instead of cream cheese. Add turkey, mozzarella, and sun-dried tomatoes. This gives it an Italian flair while keeping the turkey theme.
* **Spicy Turkey**: Add a strip of jalapeño or use pepper jack cheese. This is great for guests who like a bit of heat. You can also add a bit of hot sauce to the cream cheese.
* **Vegetarian Option**: Swap the turkey for roasted vegetables like zucchini and bell peppers. Use a hummus spread instead of cream cheese. This is a healthy and filling alternative.
I’ve also tried adding a strip of bacon for extra crunch and smokiness. It’s a bit indulgent, but it’s delicious. For a gluten-free version, use cassava or almond flour tortillas. Just be careful not to overfill them, as gluten-free tortillas are more fragile.
Serving & Storage Suggestions
These cones are best served chilled or at room temperature. Cold temperatures help the cream cheese hold its shape, making them easier to eat. I like to arrange them on a platter with the points facing up, like a forest of mini cones. It looks festive and fun.
For a complete Thanksgiving spread, serve these alongside crockpot football queso dip or a classic potato salad. They are also great with a side of healthy turkey chili if you want a heartier meal.
To store leftovers, place them in an airtight container in the refrigerator. They will last for up to 2 days. If you notice the tortillas becoming soggy, you can crisp them up in a toaster oven for a minute before serving. Do not freeze them, as the texture of the tortilla and cream cheese will change upon thawing.
For reheating, these are best eaten cold or at room temperature. If you must reheat, do so gently. High heat will melt the cheese too much and make the tortilla limp. A quick warm in the microwave for 10 seconds is enough if you prefer them slightly warm.
The flavors actually meld together over time, so making them a few hours ahead can enhance the taste. The cranberry sauce softens the cheese, and the turkey absorbs the creaminess. It’s a good thing to plan for if you are hosting a large party.
Nutritional Information & Benefits
These cones are a balanced snack. The turkey provides lean protein, which helps keep you full. The cheese adds calcium and fat, which helps with satiety. The cranberry sauce offers antioxidants, though it is high in sugar, so use it in moderation. The celery adds fiber and crunch with minimal calories.
A typical cone has about 150-200 calories, depending on the size of the tortilla and the amount of filling. It’s a reasonable snack option for holiday parties where calorie counts can run high. It’s also a good way to control portions, as each cone is a single serving.
For those watching their sodium, choose low-sodium turkey and cheese. You can also reduce the amount of cream cheese to lower the fat content. The recipe is naturally gluten-free if you use gluten-free tortillas. It’s also adaptable for dairy-free diets by using plant-based cheese and cream alternatives.
I find these cones to be a healthier alternative to fried appetizers. They are baked or assembled, not fried. This makes them a lighter option that still feels indulgent. It’s a good way to enjoy holiday flavors without the heaviness of a full meal.
Conclusion
The Easy Thanksgiving Turkey Charcuterie Cone Board is a simple, fun, and delicious way to enjoy holiday flavors. It’s perfect for parties, leftovers, or quick snacks. I hope you try this recipe and find it as useful as I have. It’s saved me from dry turkey disasters and given me a new way to present my food.
Feel free to customize the ingredients to suit your taste. Add your favorite cheese or swap the turkey for ham. The possibilities are endless. If you make this recipe, I’d love to hear how it went. Leave a comment below with your favorite variation. Share your photos on social media and tag me so I can see your creations.
Thank you for reading. I hope this recipe brings some ease and joy to your holiday table. Happy cooking!
Frequently Asked Questions
Can I make these cones ahead of time?
Yes, you can assemble them up to 24 hours in advance. Store them in an airtight container in the fridge. They will hold their shape well, though the tortilla may soften slightly.
What kind of tortillas work best?
Large flour tortillas are best because they are pliable and sturdy. Corn tortillas tend to crack when rolled. You can also use gluten-free flour tortillas if needed.
Can I use leftover turkey from Thanksgiving?
Absolutely. Chop the leftover turkey into small strips or cubes. It works perfectly in this recipe and is a great way to use up leftovers.
How do I stop the cones from falling apart?
Make sure to spread the cream cheese evenly and leave a border on the tortilla. Wet the final edge with water to help it seal. Chilling them before serving also helps them set.
Can I add other ingredients?
Yes, you can add bacon, nuts, or different cheeses. Just be careful not to overstuff the cones, as this can make them difficult to roll and seal.
Pin This Recipe!
Easy Thanksgiving Turkey Charcuterie Cone Board

A fun, handheld appetizer that combines classic Thanksgiving flavors like turkey, sharp cheddar, and cranberry sauce in a rolled flour tortilla cone. Perfect for parties, leftovers, or quick snacking.
- Prep Time: 15 minutes
- Cook Time: 0 minutes
- Total Time: 15 minutes
- Yield: 20 servings
- Category: Appetizer
- Cuisine: American
Ingredients
- Large flour tortillas (10-inch)
- Sliced turkey breast (deli-style or chopped leftovers)
- Sharp cheddar cheese (cut into strips)
- Jellied cranberry sauce (cut into strips or chunks)
- Celery sticks (thinly sliced on a bias)
- Softened cream cheese
- Water (for sealing edges)
- Optional: Candied pecans, walnuts, crispy bacon, black pepper
Instructions
- Slice cheddar cheese and celery into strips about 1/4 inch wide. Cut cranberry sauce into small cubes or strips. Prepare turkey slices or chop leftover turkey into bite-sized pieces.
- Place a flour tortilla on a cutting board.
- Spread approximately 1 tablespoon of softened cream cheese in a line across the bottom third of the tortilla, leaving a border at the edges.
- Layer ingredients on top of the cream cheese: start with turkey strips, then cheese, cranberry sauce, and celery. Avoid overstuffing.
- Starting from the edge with the filling, roll the tortilla tightly into a cone shape (not a burrito).
- Wet the final edge of the tortilla with water and press firmly to seal. Hold for a few seconds to let the starch set.
- Optional: Chill in the refrigerator for 15-20 minutes to help the cream cheese firm up and the cone hold its shape before serving.
Notes
Ensure cream cheese is fully softened to prevent tearing the tortilla. Jellied cranberry sauce is easier to handle than whole berry. Do not freeze as the texture will change. Store in an airtight container in the fridge for up to 2 days. If tortillas become soggy, let sit at room temperature for 10 minutes or crisp in a toaster oven.
Nutrition
- Serving Size: 1 cone
- Calories: 175
- Sugar: 4
- Sodium: 350
- Fat: 8
- Saturated Fat: 4
- Carbohydrates: 18
- Fiber: 1
- Protein: 8
Keywords: Thanksgiving appetizer, turkey charcuterie, holiday snacks, leftover turkey recipes, easy party food, handheld appetizers, cranberry turkey bites


