Love this? Save it for later!
Share the inspiration with your friends
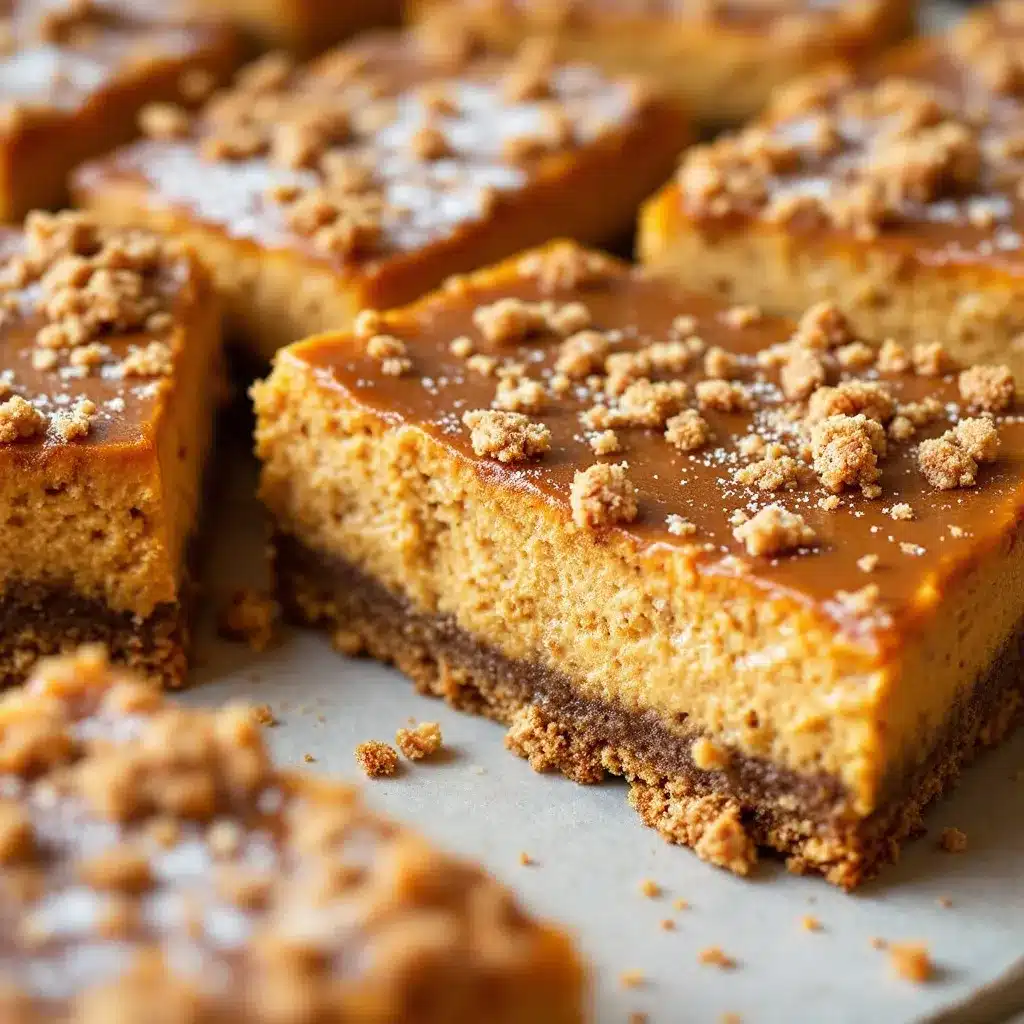
I did not trust pumpkin cheesecake bars. To be honest, I thought they sounded like a mistake until I took that first bite. I have made pumpkin pie. I have made pumpkin bread. I even made perfect pumpkin chocolate chip bread with cream cheese swirl last October, and it was good. But bars? I always assumed they would be dense, soggy, or just too sweet for my taste. You know how it is. You see a picture online, and it looks perfect, but you know the reality is usually a sad, crumbly mess that falls apart on the plate.
My friend Sarah brought a tin of these to a neighborhood potluck. She didn’t say much about them, just set the container on the table and walked away. I was already eyeing the potato salad, so I grabbed a small square just to be polite. I expected a standard graham cracker crust. Instead, I got something that crunched. A real, audible crunch that sounded like autumn leaves underfoot.
The filling was different too. It wasn’t the typical rubbery cheesecake texture that sticks to the roof of your mouth. It was airy, light, and had this incredible silkiness that melted away instantly. And the spice blend? It wasn’t just cinnamon. There was ginger. There was nutmeg. It tasted like a hug from someone who knows exactly what you need when the weather turns cold.
I went back for seconds. Then thirds. I stood there in my neighbor’s kitchen, holding a napkin, realizing that I had been wrong about pumpkin desserts for years. They don’t have to be heavy or complicated. Sometimes, they just need to be creamy, spiced, and baked in a bar format so you can grab one without committing to a whole cake.
That was the moment I decided to recreate it. I wanted that same balance of crunch and cream. I wanted a dessert that felt festive but didn’t require a degree in pastry arts to make. Honestly, I was skeptical about getting the crust right without it getting soggy during storage. But after three tries, I nailed it. The gingersnap crust stays crisp. The filling stays firm but tender. It is the kind of dessert that disappears before you can even think about taking a photo.
Now, every time fall hits, I make these. They are my proof that pumpkin doesn’t always have to be pie. It can be bars. It can be easy. And it can be the best thing you eat all season.
Why You’ll Love This Recipe
You might be wondering why you should add another pumpkin recipe to your list when you already have so many options. The answer is simple: these bars solve the biggest problem with pumpkin desserts. They are portable, stable, and infinitely more satisfying than a slice of pie sitting on a counter for three days. Here is why this recipe has become a staple in my kitchen:
* **Quick & Easy**: You do not need a stand mixer or hours of prep time. This comes together in under 45 minutes of active work, which is perfect for busy weeknights or last-minute holiday planning.
* **Simple Ingredients**: No fancy grocery trips needed. You likely already have gingersnaps, cream cheese, and pumpkin puree in your pantry or fridge. It is pantry-friendly cooking at its finest.
* **Perfect for Holiday Gatherings**: Whether it is Thanksgiving, Christmas, or a simple office party, these bars fit right in. They look elegant on a platter but are casual enough to eat with your hands.
* **Crowd-Pleaser**: I have served these to picky eaters and dessert lovers alike. They always get rave reviews from kids who love the ginger bite and adults who appreciate the creamy texture.
* **Unbelievably Delicious**: The texture and flavor combo is next-level comfort food. The contrast between the spicy, crunchy crust and the smooth, vanilla-kissed filling is what makes it special.
What makes this recipe different from the rest is the crust. Most pumpkin bars use a graham cracker base, which is fine, but it can be bland. Using crushed gingersnaps adds a layer of warmth and spice that complements the pumpkin perfectly. It is a small twist that makes a huge difference. I also use a bit of cornstarch in the filling to ensure it sets firmly enough to cut into clean squares without falling apart. This isn’t just another version—it is my best version.
This recipe isn’t just good—it is the kind that makes you close your eyes after the first bite. It is comfort food reimagined—healthier in the sense that it is portion-controlled, faster, but with the same soul-soothing satisfaction. It is perfect for impressing guests without stress, or turning a simple Tuesday dinner into something memorable.
What Ingredients You Will Need
This recipe uses simple, wholesome ingredients to deliver bold flavor and satisfying texture without the fuss. The beauty of these bars lies in the quality of a few key components. You do not need anything exotic, but you do need to pay attention to the details, especially with the cream cheese and the pumpkin puree.
Here is what you will need to make the perfect batch:
**For the Gingersnap Crust:**
* **Gingersnap cookies (2 cups, crushed)**: These are the star of the show. I recommend using store-bought gingersnaps like Keebler or store-brand varieties that are crisp. Avoid soft, cake-like ginger cookies as they will not create the right texture.
* **Unsalted butter (1/2 cup, melted)**: Using unsalted butter allows you to control the salt level. Make sure it is fully melted but not hot.
* **Granulated sugar (2 tablespoons)**: Just a little bit to help the crust caramelize slightly in the oven.
* **Ground cinnamon (1/2 teaspoon)**: Adds extra warmth to the base.
**For the Creamy Pumpkin Filling:**
* **Cream cheese (32 oz, full-fat)**: This is crucial. Use full-fat brick-style cream cheese, softened to room temperature. Do not use the whipped kind in a tub, and do not use low-fat. It will not set properly. Brands like Philadelphia work best for consistency.
* **Granulated sugar (1 1/2 cups)**: Pumpkin needs sweetness to balance the spices. Adjust slightly if you prefer less sweet.
* **Pumpkin puree (15 oz, not pumpkin pie filling)**: Make sure you get the plain puree in a can. Pumpkin pie filling already has sugar and spices added, which will throw off the balance.
* **Large eggs (4, room temperature)**: Room temperature eggs emulsify better into the cream cheese mixture, preventing lumps.
* **Vanilla extract (2 teaspoons)**: Use pure vanilla extract, not imitation, for a deeper flavor.
* **All-purpose flour (1/4 cup)**: This acts as a stabilizer to help the bars hold their shape when cut.
* **Cornstarch (1 tablespoon)**: This is the secret weapon. It ensures a firm, sliceable texture rather than a soft, custard-like center.
* **Pumpkin pie spice (2 teaspoons)**: If you do not have pumpkin pie spice, you can mix your own with cinnamon, ginger, nutmeg, and cloves.
* **Ground ginger (1/2 teaspoon)**: Adds a spicy kick that pairs beautifully with the crust.
* **Salt (1/2 teaspoon)**: Enhances all the other flavors.
**For the Optional Topping:**
* **Whipped cream**: For serving.
* **Crushed gingersnaps**: For garnish.
Substitution Tips
If you need a gluten-free option, use gluten-free gingersnaps and ensure your flour and cornstarch are certified gluten-free. For a dairy-free version, you can use vegan cream cheese and butter alternatives, though the texture may be slightly denser.
Equipment Needed
You do not need a lot of fancy gadgets to make these bars. In fact, keeping it simple helps you get to the dessert faster. Here is what you will need:
* **9×13 inch baking pan**: This is the standard size for bar cookies. Make sure it is metal for even baking. Glass pans may require a lower oven temperature.
* **Parchment paper**: This is non-negotiable. Line the pan with parchment paper, leaving an overhang on the sides. This allows you to lift the entire block of bars out of the pan once they are cool, making cutting and serving much easier.
* **Food processor or rolling pin**: To crush the gingersnaps. A food processor works fastest, but a rolling pin and a heavy-duty zip-top bag work just as well if you want to avoid extra dishes.
* **Electric mixer**: A hand mixer or stand mixer is helpful for beating the cream cheese and sugar until smooth. Doing this by hand is possible but requires significant arm strength.
* **Rubber spatula**: For scraping down the sides of the bowl and folding in the ingredients gently.
* **Cooling rack**: To cool the bars evenly after baking.
If you do not have a food processor, just be patient with the rolling pin method. It takes a few minutes, but it is satisfying to hear the cookies crack and crush. Also, make sure your cream cheese is truly softened. If it is cold, you will get little white lumps in your filling that are nearly impossible to mix out.
Preparation Method
Making these bars is straightforward, but precision matters. Follow these steps carefully for the best results.
1. **Prep the Pan**: Preheat your oven to 350°F (175°C). Line a 9×13 inch baking pan with parchment paper. Leave a 2-inch overhang on the long sides so you can lift the bars out later. Lightly grease the parchment with butter or cooking spray.
2. **Crush the Cookies**: Place the gingersnap cookies in a food processor. Pulse until they are fine crumbs. If you do not have a processor, put them in a heavy-duty zip-top bag and crush them with a rolling pin until they resemble coarse sand. Transfer the crumbs to a medium bowl.
3. **Make the Crust**: Add the melted butter, sugar, and cinnamon to the cookie crumbs. Stir until the mixture looks like wet sand. Press this mixture firmly into the bottom of the prepared pan. Use the bottom of a measuring cup to pack it down tightly. This step is important to prevent a crumbly crust later.
4. **Pre-bake the Crust**: Bake the crust for 8-10 minutes. It should be lightly golden. Remove from the oven and let it cool while you make the filling. This helps set the crust so it does not get soggy.
5. **Beat the Cream Cheese**: In a large bowl, beat the softened cream cheese on medium speed until it is completely smooth and creamy, about 2-3 minutes. Scrape down the sides and bottom of the bowl. This ensures no lumps remain.
6. **Add Sugar and Spices**: Add the granulated sugar, pumpkin pie spice, ground ginger, and salt to the cream cheese. Beat on low speed until combined. Scrape the bowl again.
7. **Mix in Pumpkin and Vanilla**: Add the pumpkin puree and vanilla extract. Mix on low speed until just combined. Be careful not to overmix once the pumpkin is added, as this can incorporate too much air and cause cracking.
8. **Add Flour and Cornstarch**: Sprinkle the flour and cornstarch over the mixture. Beat on low speed until smooth. The mixture will be thick but pourable.
9. **Add Eggs**: Add the eggs one at a time, beating on low speed just until each egg is incorporated. Do not overbeat after adding the eggs. This is a common mistake that leads to dense bars.
10. **Assemble and Bake**: Pour the filling over the pre-baked crust. Smooth the top with a spatula. Bake for 35-40 minutes. The edges should be set, but the center should still have a slight jiggle. It will continue to set as it cools.
11. **Cool Completely**: Let the bars cool in the pan on a wire rack for at least 1 hour. Then, refrigerate for at least 4 hours, preferably overnight. This chilling step is essential for clean cuts.
12. **Slice and Serve**: Lift the bars out of the pan using the parchment paper. Use a sharp knife to cut into squares. Wipe the knife between cuts for clean edges.
Cooking Tips & Techniques
I have learned a few hard lessons while perfecting this recipe. Here is how to avoid common pitfalls.
* **Room Temperature Ingredients**: This cannot be stressed enough. If your cream cheese is cold, you will have lumps. If your eggs are cold, they might shock the mixture. Take your ingredients out of the fridge 30-60 minutes before you start.
* **Do Not Overmix**: Once you add the eggs, mix only until combined. Overmixing adds air bubbles to the batter. When the bars bake, these bubbles expand and then collapse, causing cracks on the surface. It might not affect the taste, but it affects the look.
* **The Jiggle Test**: When checking for doneness, look for a slight jiggle in the center. If it looks completely set, it might be overbaked and dry. If it looks liquidy, it needs more time. The residual heat will finish the cooking process.
* **Patience with Cooling**: I know it is tempting to cut into them warm. Do not do it. The bars need to chill to firm up. If you cut them warm, they will be mushy and fall apart. Plan ahead and make them the day before you need them.
* **Clean Cuts**: Use a sharp knife. Dip the knife in hot water and wipe it dry between each cut. This ensures each square is neat and presentable.
Variations & Adaptations
While the classic version is my favorite, there are ways to tweak this recipe to suit your taste or dietary needs.
* **Caramel Drizzle**: Drizzle salted caramel sauce over the top before serving. The saltiness cuts through the sweetness beautifully.
* **Pumpkin Spice Latte Flavor**: Add 1 tablespoon of instant espresso powder to the filling. It enhances the pumpkin flavor without making it taste like coffee.
* **White Chocolate Swirl**: Melt white chocolate and swirl it into the filling before baking for a marbled effect.
* **Gluten-Free**: Use gluten-free gingersnaps and ensure all other ingredients are certified gluten-free. The texture remains the same.
* **Dairy-Free**: Use vegan cream cheese and butter. Note that the texture may be slightly softer, so chill for a longer period.
* **Lower Sugar**: Reduce the sugar in the filling by 1/4 cup. The pumpkin puree adds enough natural sweetness, and you can always add whipped cream on top for extra sweetness if needed.
I once tried adding orange zest to the filling. It was a nice change, but the ginger and pumpkin pair so well that I usually stick to the original spice blend.
Serving & Storage Suggestions
These bars are best served chilled. They hold their shape perfectly in the fridge. For presentation, top each bar with a dollop of whipped cream and a sprinkle of crushed gingersnaps. It adds a nice visual contrast and extra crunch.
**Storage Instructions:**
* **Refrigerator**: Store the bars in an airtight container in the refrigerator for up to 5 days. They actually taste better after a day or two as the flavors meld together.
* **Freezer**: You can freeze these bars for up to 2 months. Wrap the whole block in plastic wrap and then in aluminum foil, or cut into individual squares and freeze on a baking sheet before transferring to a freezer bag. Thaw in the refrigerator overnight before serving.
**Reheating:**
These are best eaten cold or at room temperature. If you prefer them slightly warm, you can microwave a square for 10-15 seconds. Be careful not to overheat, as the cream cheese can separate.
The flavors develop over time. The ginger in the crust softens slightly, becoming more integrated with the creamy filling. This is why they are often better on day two than on day one.
Nutritional Information & Benefits
While these are definitely a treat, they offer some interesting nutritional points. Pumpkin puree is rich in Vitamin A, which is great for eye health and immune function. It is also a good source of fiber. Cream cheese provides protein and calcium, though it is also high in saturated fat.
One serving (one bar) contains approximately 280 calories. It has about 15g of fat, 30g of carbohydrates, and 4g of protein. The sugar content is moderate, mostly from the added sugar in the crust and filling. If you are watching your sugar intake, consider reducing the sugar in the filling or using a sugar substitute that bakes well.
For those with dietary restrictions, this recipe can be adapted to be gluten-free or dairy-free, though the nutritional profile will change. It is a balanced dessert that feels indulgent but is not overly heavy compared to a slice of pie.
Conclusion
These Creamy Pumpkin Cheesecake Bars with Gingersnap Crust are a game-changer. They are easy to make, delicious to eat, and perfect for any autumn gathering. I hope you try this recipe and find it as comforting as I do. Feel free to customize it with your favorite toppings or spices.
If you make these bars, I would love to hear from you. Leave a comment below with your thoughts or tag me on social media. Share your photos and let me know how they turned out. Happy baking, and enjoy every bite of this seasonal favorite.
Frequently Asked Questions
Can I use pumpkin pie filling instead of pumpkin puree?
No, do not use pumpkin pie filling. It already contains sugar and spices, which will make the bars too sweet and alter the texture. Use plain pumpkin puree from a can.
Why did my cheesecake bars crack?
Cracking is usually caused by overmixing the batter after adding the eggs, or by baking the bars at too high a temperature. Make sure to mix gently and use the jiggle test to determine when they are done.
Can I make these bars ahead of time?
Yes, these bars are even better the next day. You can make them up to 2 days in advance and store them in the refrigerator.
Can I freeze the crust before adding the filling?
Yes, you can pre-bake the crust and let it cool completely before adding the filling. This can help ensure a crispier crust.
What size pan should I use?
A 9×13 inch baking pan is ideal. If you use a smaller pan, the bars will be thicker and may take longer to bake. If you use a larger pan, the bars will be thinner and bake faster.
Pin This Recipe!
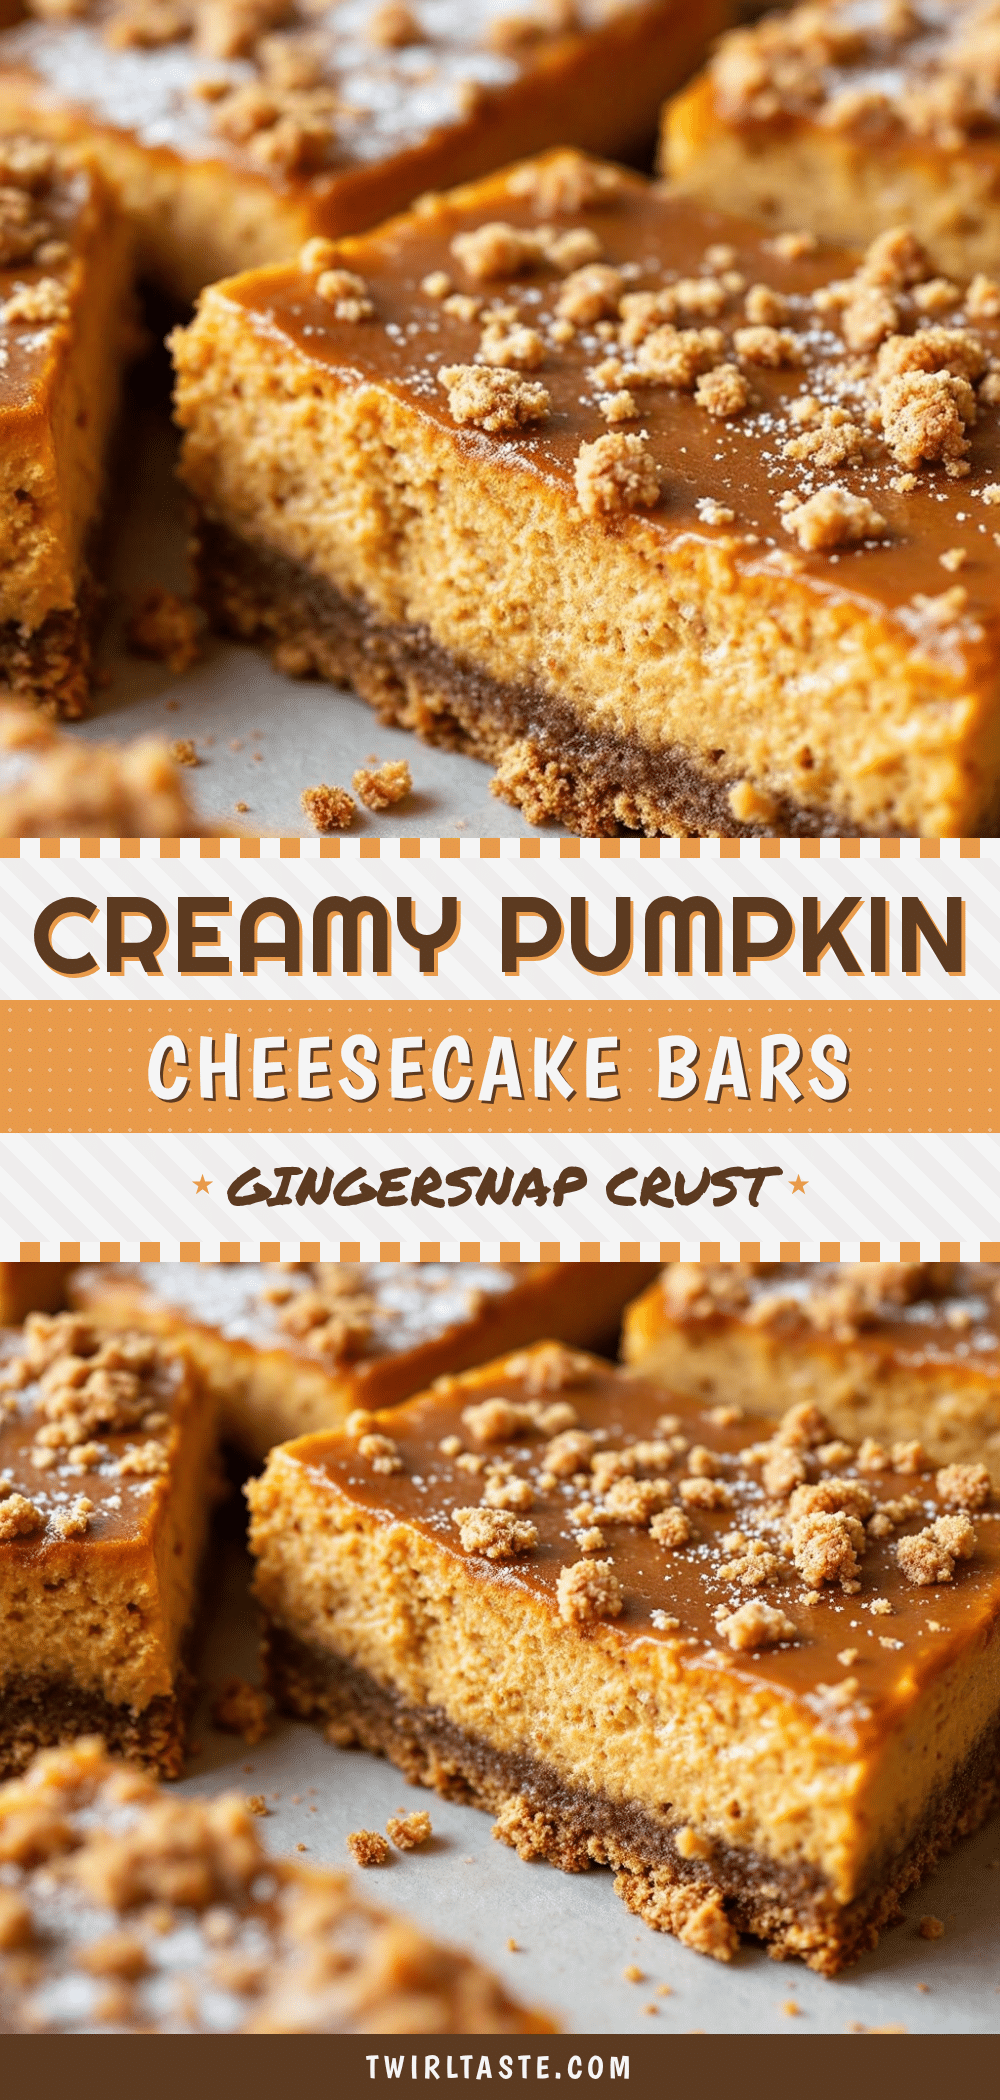
Creamy Pumpkin Cheesecake Bars: Easy Holiday Dessert Recipe
These creamy pumpkin cheesecake bars feature a crunchy gingersnap crust and a silky, spiced filling. They are easy to make, portable, and perfect for holiday gatherings.
- Prep Time: 15 minutes
- Cook Time: 50 minutes
- Total Time: 65 minutes
- Yield: 12 servings 1x
- Category: Dessert
- Cuisine: American
Ingredients
- 2 cups crushed gingersnap cookies
- 1/2 cup unsalted butter, melted
- 2 tablespoons granulated sugar
- 1/2 teaspoon ground cinnamon
- 32 oz full-fat brick-style cream cheese, softened to room temperature
- 1 1/2 cups granulated sugar
- 15 oz pumpkin puree (not pumpkin pie filling)
- 4 large eggs, room temperature
- 2 teaspoons pure vanilla extract
- 1/4 cup all-purpose flour
- 1 tablespoon cornstarch
- 2 teaspoons pumpkin pie spice
- 1/2 teaspoon ground ginger
- 1/2 teaspoon salt
Instructions
- Preheat oven to 350°F (175°C). Line a 9×13 inch baking pan with parchment paper, leaving a 2-inch overhang on the long sides. Lightly grease the parchment.
- Crush gingersnap cookies into fine crumbs using a food processor or rolling pin. Transfer to a medium bowl.
- Add melted butter, 2 tablespoons sugar, and cinnamon to the crumbs. Stir until mixture resembles wet sand.
- Press the crust mixture firmly into the bottom of the prepared pan using the bottom of a measuring cup.
- Pre-bake the crust for 8-10 minutes until lightly golden. Remove from oven and let cool while making the filling.
- In a large bowl, beat softened cream cheese on medium speed until smooth and creamy (2-3 minutes). Scrape down sides and bottom.
- Add 1 1/2 cups sugar, pumpkin pie spice, ground ginger, and salt. Beat on low speed until combined. Scrape bowl again.
- Add pumpkin puree and vanilla extract. Mix on low speed until just combined. Do not overmix.
- Sprinkle flour and cornstarch over the mixture. Beat on low speed until smooth.
- Add eggs one at a time, beating on low speed just until incorporated. Do not overbeat.
- Pour filling over the pre-baked crust and smooth the top with a spatula.
- Bake for 35-40 minutes. Edges should be set, but the center should have a slight jiggle.
- Let bars cool in the pan on a wire rack for at least 1 hour.
- Refrigerate for at least 4 hours, preferably overnight, to firm up.
- Lift bars out of the pan using parchment paper. Use a sharp knife dipped in hot water and wiped dry to cut into squares.
Notes
Ensure cream cheese and eggs are at room temperature to prevent lumps. Do not overmix the batter after adding eggs to avoid cracking. The bars must be chilled completely before cutting for clean slices. They can be stored in the refrigerator for up to 5 days or frozen for up to 2 months.
Nutrition
- Serving Size: 1 bar
- Calories: 280
- Sugar: 22
- Sodium: 250
- Fat: 15
- Saturated Fat: 8
- Carbohydrates: 30
- Fiber: 1
- Protein: 4
Keywords: pumpkin cheesecake bars, gingersnap crust, holiday dessert, fall baking, easy pumpkin recipe, cream cheese bars


