Love this? Save it for later!
Share the inspiration with your friends
The Tupperware container came back empty in my four-year-old’s lunchbox. Not half-eaten, not picked at, not traded away. Completely empty. That had never happened before. Not with the store-bought bars, not with the fruit pouches, not even with the leftover pizza I’d snuck in there once on a desperate morning.
I stood there staring at the clean plastic, turning it over in my hands like it was evidence. My kid actually ate the whole thing. The granola bar I’d thrown together the night before in a fit of “I refuse to spend another dollar on those overpriced, crumbly things” energy. The one I’d made with oats from the back of the pantry, peanut butter I’d scraped from the jar’s last clinging bits, and honey I’d warmed in the microwave because it had crystallized. That one.
She asked for another one the next morning. Then her friend asked for one at the park. Then my husband asked if I could “make more of those bar things.” And just like that, these healthy no-bake granola bars became the most requested item in our kitchen. No oven required, no fancy equipment, no specialty ingredients from a store twenty minutes away. Just real food that actually tastes good enough to compete with the packaged stuff.
That’s the thing about homemade snacks. They don’t need to be complicated to be the thing everyone reaches for. Sometimes the simplest recipes are the ones that stick.
Why You’ll Love This Recipe
These healthy no-bake granola bars solve the eternal snack problem. You know the one. The kids are hungry, you’re out of ideas, and the only things in the pantry require turning on the oven or making a trip to the store. These bars come together in about fifteen minutes of active work, then chill in the fridge while you do literally anything else.
Here’s what makes them different from everything else out there:
- No baking required. Not even a little bit. No preheating, no watching the oven, no worrying about burning the edges. Just mix, press, and chill.
- Real ingredients you already have. Oats, peanut butter, honey, maybe some chocolate chips if you’re feeling generous. No weird preservatives, no ingredient lists that require a chemistry degree to pronounce.
- Kids actually eat them. I’m not kidding about the empty lunchbox thing. These bars have been tested on picky eaters, snack-obsessed toddlers, and hungry teenagers. They pass every time.
- They hold together. Unlike some homemade granola bars that crumble into sad little oat pieces the moment you unwrap them, these stay intact. They travel well, they survive lunchboxes, and they don’t leave a mess everywhere.
- Endlessly customizable. Got a kid who hates raisins? Leave them out. One who loves coconut? Throw it in. These bars are forgiving and flexible.
I’ve made these bars more times than I can count, and I’ve learned a few things along the way. The texture depends on how firmly you press the mixture into the pan. The sweetness can be adjusted by the type of honey you use. And if you add too many mix-ins, the bars get a little crumbly. But honestly, even the “mistakes” are still pretty delicious.
What Ingredients You Will Need
This recipe uses simple, everyday ingredients that work together to create a bar that’s chewy, satisfying, and just sweet enough without being over the top.
- Rolled oats (2 cups / 180g) – Use old-fashioned rolled oats, not quick oats. Quick oats absorb moisture differently and can make the bars mushy. I’ve tested both, and rolled oats give the best texture.
- Creamy peanut butter (1/2 cup / 130g) – Natural peanut butter works fine, but make sure it’s well-stirred. If the oil separates too much, the bars can turn out greasy. I personally prefer a brand like Justin’s or Smucker’s Natural for consistent results.
- Honey (1/3 cup / 110g) – Local honey adds nice flavor variation. If your honey has crystallized, warm it gently in the microwave for about 10 seconds before measuring.
- Coconut oil (2 tablespoons / 30g) – This helps bind everything together and adds a subtle richness. Refined coconut oil has no coconut flavor; unrefined adds a light coconut note.
- Vanilla extract (1 teaspoon) – Pure vanilla extract makes a difference here. The imitation stuff works in a pinch, but the real thing adds warmth.
- Salt (1/4 teaspoon) – Just a pinch to balance the sweetness and bring out the peanut butter flavor.
- Mini chocolate chips (1/3 cup / 60g) – Mini chips distribute more evenly than regular-sized ones. I use dark chocolate chips for a slightly less sweet bar, but milk chocolate works too.
- Ground flaxseed (2 tablespoons / 14g) – Totally optional, but it adds fiber and omega-3s without changing the taste. I sneak it in and nobody notices.
- Optional mix-ins – Dried cranberries, chopped almonds, shredded coconut, sunflower seeds, or mini M&Ms. Keep the total extra mix-ins to about 1/4 cup to avoid making the bars too crumbly.
If you’re avoiding peanuts, sunflower seed butter or almond butter both work well. Just note that sunflower seed butter can react with baking soda if you ever bake these, but since we’re not baking, it’s fine. Almond butter makes the bars slightly less sweet, so you might want to add an extra tablespoon of honey.
Equipment Needed
You don’t need much for this recipe, which is honestly my favorite part. Here’s what you’ll need:
- 8×8 inch baking pan – A metal or glass pan works. If you use glass, the bars might need a few extra minutes in the fridge to set.
- Parchment paper – This is non-negotiable for easy removal. Leave some overhang on two sides to create handles.
- Medium mixing bowl – Any bowl large enough to hold all the ingredients will do.
- Spatula or wooden spoon – For mixing and pressing the mixture into the pan.
- Measuring cups and spoons – Accuracy matters for the wet ingredients especially.
- Small saucepan or microwave-safe bowl – For melting the peanut butter, honey, and coconut oil together.
If you don’t have an 8×8 pan, a 9×9 pan works too. The bars will just be slightly thinner. You can also use a loaf pan and make thicker bars, but you’ll need to adjust the chilling time.
I’ve made these bars using just a bowl and a microwave when I was traveling and had limited kitchen access. They turned out fine. The key is pressing the mixture down firmly with the back of a spatula or even a flat-bottomed glass.
Preparation Method
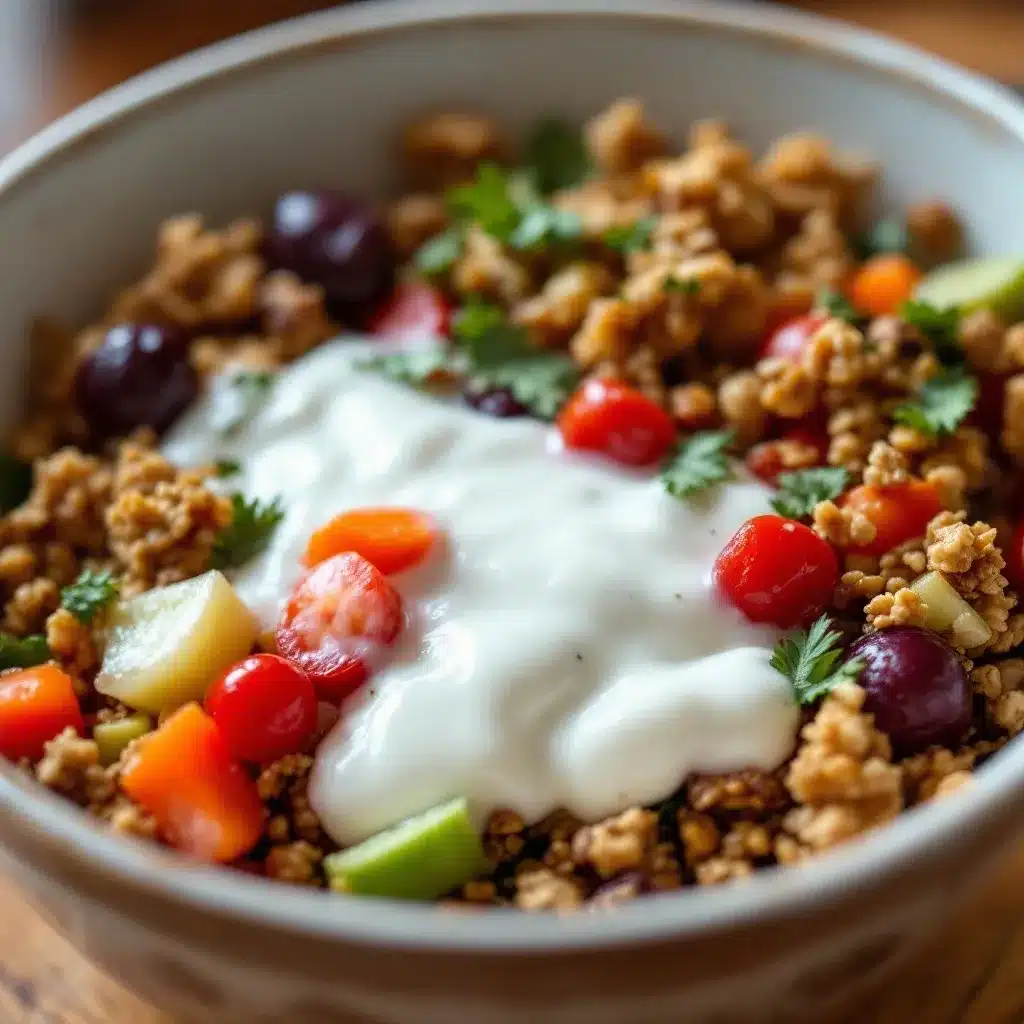
These healthy no-bake granola bars come together in a few simple steps. The whole process takes about 15 minutes of hands-on time, plus at least 2 hours of chilling.
- Line your pan. Cut a piece of parchment paper large enough to cover the bottom and up two opposite sides of your 8×8 pan. This creates handles that make lifting the bars out super easy later. Set the pan aside.
- Combine the wet ingredients. In a small saucepan over low heat (or in a microwave-safe bowl in 20-second bursts), warm the peanut butter, honey, and coconut oil together. Stir until everything is smooth and fully combined. Don’t let it boil – you just want it warm enough to mix easily. The mixture should look glossy and smell amazing.
- Stir in the vanilla and salt. Remove from heat and add the vanilla extract and salt. Give it a good stir. The salt might look like it’s not dissolving, but it will distribute as you mix everything together.
- Mix the dry ingredients. In your medium mixing bowl, combine the rolled oats, flaxseed (if using), and any dry mix-ins like dried fruit or seeds. Don’t add the chocolate chips yet – they’ll melt if you add them to the warm mixture.
- Pour and combine. Pour the warm peanut butter mixture over the oats. Stir with a spatula until every oat is coated. The mixture will look thick and sticky, and that’s exactly what you want. Keep stirring until you don’t see any dry oats left.
- Add the chocolate chips. Let the mixture cool for about 2-3 minutes (just until it’s no longer hot to the touch), then fold in the chocolate chips. If the mixture is too warm, the chips will melt and create a chocolate swirl instead of distinct chips. Both versions are delicious, but I prefer the little pockets of chocolate.
- Press into the pan. Transfer the mixture to your lined pan. Here’s the most important step: press it down firmly and evenly. Use the back of a spatula, the bottom of a measuring cup, or even your clean hands (lightly oiled to prevent sticking). Press until the surface is flat and compact. The firmer you press, the better the bars will hold together.
- Chill. Place the pan in the refrigerator for at least 2 hours. Overnight is even better. Don’t rush this step – the bars need time to set properly.
- Cut and serve. Once fully chilled, lift the bars out using the parchment handles. Place on a cutting board and use a sharp knife to cut into 12 even bars. A clean, sharp knife makes cleaner cuts. If the knife sticks, wipe it clean between cuts.
A note on timing: I’ve made the mistake of cutting these too early, and the bars were a sticky mess. They still tasted good, but they didn’t hold their shape. Patience pays off here.
Cooking Tips & Techniques
After making these bars more times than I can count, I’ve picked up a few tricks that make a real difference.
Press firmly. This is the number one tip. The bars hold together because of how densely the ingredients are packed, not because of any magical binding agent. I use the bottom of a flat measuring cup and really lean into it. You want the surface to look compact and even, not loose and crumbly.
Room temperature ingredients help. If your peanut butter and honey are both at room temperature, they mix together much more smoothly. Cold peanut butter is stubborn and doesn’t incorporate well. If you forgot to take them out ahead of time, the low heat method in the saucepan handles it fine.
Don’t overheat the wet mixture. High heat can make the honey seize up or the peanut butter separate. Low and slow is the way to go. I’ve definitely scorched a batch before by walking away from the stove, and the bars had a slightly burnt, bitter taste. Not ideal.
Chill thoroughly. Two hours is the minimum, but four hours is better. Overnight is best. If you’re in a hurry, you can pop them in the freezer for about 45 minutes, but check them frequently so they don’t freeze solid.
Warm the knife. For the cleanest cuts, run your knife under hot water, dry it off, then cut. The warmth helps the knife glide through the bars without dragging or crumbling. Wipe the blade clean between cuts for the best results.
Store properly. These bars keep well in the fridge for up to two weeks. At room temperature, they’ll last about 3-4 days, but they get softer and more prone to falling apart. I keep mine in the fridge and grab one whenever I need a quick snack.
Variations & Adaptations
One of the best things about these healthy no-bake granola bars is how adaptable they are. Here are some variations I’ve tried and loved:
Nut-free version. Swap the peanut butter for sunflower seed butter or tahini. Sunflower seed butter gives a slightly different flavor, but it works beautifully. Just be aware that the bars might have a greenish tint after a day or two – that’s a natural reaction between sunflower seeds and other ingredients, and it’s totally harmless.
Vegan option. Replace the honey with maple syrup or agave nectar. Maple syrup adds a lovely flavor that pairs well with oats and chocolate. The bars might be slightly less firm, so add an extra tablespoon of coconut oil to help with binding.
Lower sugar version. Use just 1/4 cup of honey and add 1/4 cup of unsweetened applesauce. The applesauce adds moisture and sweetness without the sugar. These bars will be softer, so they’re best stored in the fridge.
Tropical twist. Add 1/4 cup of shredded coconut and 1/4 cup of dried mango, chopped small. Swap the chocolate chips for white chocolate chips if you’re feeling fancy. This version reminds me of those tropical granola bars from the store, but way better.
Protein boost. Add 2 tablespoons of your favorite protein powder. Vanilla or chocolate both work. You might need to add an extra tablespoon of honey or milk to compensate for the dryness that protein powder adds. I’ve done this with chocolate protein powder, and it turned out like a fudgy granola bar.
Seasonal version. In the fall, add 1/4 teaspoon of cinnamon and 1/8 teaspoon of nutmeg, plus 1/4 cup of dried apple pieces. It tastes like autumn in bar form.
Serving & Storage Suggestions
These bars are incredibly versatile when it comes to serving. I’ve packed them in lunchboxes, taken them on hikes, served them as after-school snacks, and even crumbled them over yogurt for breakfast.
Serving temperature. I prefer them straight from the fridge. They’re firmer and hold their shape better. If you like a softer bar, let them sit at room temperature for about 5 minutes before eating. My kids eat them straight from the fridge without complaint, which tells you something.
Pairing ideas. These bars go great with a glass of cold milk, a cup of coffee, or a smoothie. For a more substantial snack, I sometimes serve them with apple slices or a handful of grapes. If you’re packing a lunch, throw in a creamy strawberry cheesecake overnight oats for a balanced meal.
Storage. Keep the bars in an airtight container in the refrigerator for up to 2 weeks. Layer them between sheets of parchment paper to prevent sticking. If you’re stacking them, make sure they’re fully set before layering.
Freezer instructions. These bars freeze beautifully. Wrap each bar individually in plastic wrap, then place them in a freezer-safe bag or container. They’ll keep for up to 3 months. To thaw, just let them sit at room temperature for about 15 minutes, or pop one straight into a lunchbox – it’ll be thawed by lunchtime.
Room temperature storage. If you’re taking these on a road trip or packing them in a lunchbox without an ice pack, they’ll be fine at room temperature for a day. After that, they start to soften and lose their structure. I wouldn’t recommend leaving them out for more than 2 days.
One thing I’ve noticed: the flavors actually get better after a day or two in the fridge. The oats absorb some of the moisture, and everything melds together. So if you can wait a day before eating them, you’ll be rewarded.
Nutritional Information & Benefits
These bars aren’t just tasty – they actually offer some real nutritional value, which is rare in the snack world.
Per bar (makes 12): Approximately 190 calories, 8g fat, 26g carbohydrates, 4g fiber, 10g sugar, 5g protein. These values will vary based on your specific ingredients and any mix-ins you add.
Key benefits: Oats provide complex carbohydrates for sustained energy, plus beta-glucan, which supports heart health. Peanut butter adds protein and healthy fats that keep kids (and adults) feeling full longer. Flaxseed contributes omega-3 fatty acids and extra fiber. The chocolate chips add antioxidants – at least, that’s what I tell myself.
Dietary considerations: These bars are naturally dairy-free if you use dairy-free chocolate chips. They’re also egg-free and can be made vegan with maple syrup. For gluten-free bars, use certified gluten-free oats. The bars are not low in sugar, but the sugar comes from honey and chocolate, not refined white sugar or corn syrup.
Allergen notes: Contains peanuts (if using peanut butter) and oats (which may contain traces of gluten depending on processing). Sunflower seed butter is a safe alternative for nut-free environments.
I don’t pretend these are a health food, but they’re a genuinely better option than most store-bought granola bars, which often contain preservatives, artificial flavors, and way more sugar. If you’re looking for another healthy snack option, try these healthy high-protein dark chocolate almond butter protein balls for a quick energy boost.
Conclusion
These healthy no-bake granola bars have become a staple in our house for a reason. They’re simple to make, they use ingredients I almost always have on hand, and they actually get eaten. Not picked at, not ignored, not traded away. Eaten.
The best part is that you can make them your own. Add what you love, leave out what you don’t, and don’t stress about getting it perfect. The first time I made these, I pressed them too lightly and they fell apart. The second time, I added too many chocolate chips and they were a little too sweet. But my kids ate both batches without complaint, and that’s when I knew I’d found something worth keeping.
I’d love to hear how these turn out for you. What mix-ins did you use? Did your kids actually eat them? Drop a comment below and let me know. And if you’re looking for more snack ideas that actually work, check out these wholesome chunky monkey granola bars for another easy homemade option.
Happy snacking!
Frequently Asked Questions
Can I use quick oats instead of rolled oats?
You can, but the texture will be different. Quick oats absorb more moisture and can make the bars softer and almost mushy. Rolled oats give a chewier, more satisfying texture that holds up better. If you only have quick oats, reduce the honey by a tablespoon to compensate.
Why did my bars fall apart?
This usually happens for one of three reasons: you didn’t press the mixture firmly enough into the pan, you didn’t chill them long enough, or you added too many dry mix-ins. Next time, press down with serious intention, chill for at least 2 hours (overnight is better), and keep extra mix-ins to about 1/4 cup total.
Can I make these without peanut butter?
Absolutely. Sunflower seed butter, almond butter, cashew butter, or tahini all work well. Each will change the flavor slightly, but the binding properties are similar. Just make sure your alternative nut or seed butter is well-stirred and not too oily.
How long do these bars last at room temperature?
They’ll last about 3-4 days at room temperature, but they’ll get softer over time. For best results, store them in the refrigerator where they’ll stay firm and fresh for up to 2 weeks. If you’re packing them in a lunchbox, they’ll be fine for the day without refrigeration.
Can I double this recipe?
Yes! Double all the ingredients and use a 9×13 inch pan instead of an 8×8. The chilling time might need to increase by about 30 minutes since the mixture will be thicker. You’ll get about 24 bars from a doubled batch, which is perfect for meal prep or feeding a crowd.
Pin This Recipe!
Healthy No-Bake Granola Bars Kids Love (Easy Recipe)
These healthy no-bake granola bars are made with simple ingredients like oats, peanut butter, and honey. They come together in about 15 minutes of active work, then chill in the fridge for a chewy, satisfying snack that kids actually eat.
- Prep Time: 15 minutes
- Cook Time: 0 minutes
- Total Time: 2 hours 15 minutes (includes chilling)
- Yield: 12 bars 1x
- Category: Snack
- Cuisine: American
Ingredients
- 2 cups (180g) rolled oats
- 1/2 cup (130g) creamy peanut butter
- 1/3 cup (110g) honey
- 2 tablespoons (30g) coconut oil
- 1 teaspoon vanilla extract
- 1/4 teaspoon salt
- 1/3 cup (60g) mini chocolate chips
- 2 tablespoons (14g) ground flaxseed (optional)
- Optional mix-ins: dried cranberries, chopped almonds, shredded coconut, sunflower seeds, or mini M&Ms (keep total to about 1/4 cup)
Instructions
- Line an 8×8 inch baking pan with parchment paper, leaving overhang on two sides for handles.
- In a small saucepan over low heat (or microwave-safe bowl in 20-second bursts), warm the peanut butter, honey, and coconut oil together until smooth and glossy. Do not let it boil.
- Remove from heat and stir in the vanilla extract and salt.
- In a medium mixing bowl, combine the rolled oats, flaxseed (if using), and any dry mix-ins (except chocolate chips).
- Pour the warm peanut butter mixture over the oats and stir until every oat is coated and no dry oats remain.
- Let the mixture cool for 2-3 minutes until no longer hot to the touch, then fold in the mini chocolate chips.
- Transfer the mixture to the lined pan and press down firmly and evenly using the back of a spatula, bottom of a measuring cup, or lightly oiled hands. Press until the surface is flat and compact.
- Refrigerate for at least 2 hours, preferably overnight, until fully set.
- Lift the bars out using the parchment handles, place on a cutting board, and cut into 12 even bars with a sharp knife. Wipe the knife clean between cuts for best results.
Notes
Press the mixture firmly into the pan for best texture. Chill thoroughly (at least 2 hours, overnight is better) before cutting. For cleaner cuts, warm the knife under hot water and wipe clean between cuts. Store in the refrigerator for up to 2 weeks or freeze for up to 3 months.
Nutrition
- Serving Size: 1 bar
- Calories: 190
- Sugar: 10
- Sodium: 85
- Fat: 8
- Saturated Fat: 3
- Carbohydrates: 26
- Fiber: 4
- Protein: 5
Keywords: no-bake granola bars, healthy granola bars, kid-friendly snacks, easy granola bars, homemade granola bars, peanut butter granola bars


