Love this? Save it for later!
Share the inspiration with your friends
The bag of black gel food coloring was already open on the counter, and I’d just dripped some on my favorite apron. My niece had texted twenty minutes earlier—“Can we make something spooky for the Halloween party? Not a regular cake. Something with a face.” I looked at what I had: butter softening in a bowl, a bag of dark chocolate chips, and a bottle of vanilla that was almost empty. The cookie dough came together fast—no electric mixer needed, just a bowl and a wooden spoon. And as I shaped the first black cat face, pressing in candy eyes and piping a little grin, I realized this wasn’t just a recipe; it was the kind of thing that makes kids (and let’s be honest, adults) actually gasp when they see it.
There’s something about a Black Cat Halloween Cookie Cake that feels like edible mischief. It’s not too sweet, not too complicated—just a giant, shareable cookie shaped like a cat, with that perfect chewy center and slightly crisp edges. I wasn’t trying to invent anything fancy. I just wanted something that would make people smile before they even took a bite. And honestly? It worked better than I expected.
This is the dessert that disappears first at parties. The one people photograph before they cut into it. And the best part? You don’t need any special skills or expensive tools. If you can roll dough into a ball and press in some chocolate chips, you can make this. It’s the kind of recipe that feels like a secret weapon—simple enough for a weeknight, showy enough for a crowd.
Why You’ll Love This Recipe
I’ve tested this Black Cat Halloween Cookie Cake six times to get the texture just right. Not too cakey, not too flat—that Goldilocks zone of bakery-style cookie density. Here’s why it works:
- One Bowl, No Mixer: You don’t need a stand mixer or hand beaters. Just a bowl and a spatula. Less cleanup, more fun.
- No Fancy Ingredients: Butter, sugar, flour, eggs, vanilla, cocoa powder—stuff you probably already have. The black food coloring is the only specialty item, and you can find it at any grocery store.
- Perfect for Halloween Parties: It’s a conversation starter. Kids love the cat face, and adults love that it’s not overly sweet or complicated.
- Crowd-Pleasing Texture: The edges get slightly crisp while the center stays soft and chewy. It’s the texture people fight over at bake sales.
- Customizable: You can make it gluten-free, dairy-free, or add different decorations. I’ve even made a version with white chocolate chips for a ghostly look.
What makes this recipe different from other Halloween desserts? Most require multiple steps, specialty pans, or fondant—which is basically edible play-dough that tastes like nothing. This cookie cake uses a simple shaping technique that anyone can do. No rolling pins, no cookie cutters, no stress. Just press the dough into a cat shape on a parchment-lined sheet pan, bake, and decorate.
This is the kind of dessert that makes you look like a rockstar with minimal effort. It’s comfort food with a spooky twist—the same soul-soothing satisfaction of a chocolate chip cookie, but dressed up for the holiday. Perfect for impressing guests without spending hours in the kitchen.
What Ingredients You Will Need
This recipe uses simple, pantry-friendly ingredients to create a rich, chocolatey cookie base that holds its shape beautifully. Here’s what you’ll need:
For the Cookie Cake Base
- Unsalted butter, softened — ½ cup (1 stick / 113g). Make sure it’s at room temperature so it creams properly with the sugar. I use Kerrygold for the richness, but any good-quality butter works.
- Granulated sugar — ¾ cup (150g). Adds sweetness and helps create those slightly crisp edges.
- Light brown sugar, packed — ¼ cup (50g). Adds moisture and a subtle caramel note. You can use dark brown sugar for a deeper flavor.
- Large egg — 1, at room temperature. Helps bind the dough and adds richness.
- Vanilla extract — 1 teaspoon. Pure vanilla is best, but imitation works fine in a pinch.
- Black gel food coloring — 1 to 2 teaspoons. Gel is better than liquid because it gives a deep black color without thinning the dough. Americolor and Wilton both make good options.
- All-purpose flour — 1 ¾ cups (220g). Spoon and level for accuracy. Too much flour makes the cookie dry.
- Unsweetened cocoa powder — ¼ cup (20g). Use Dutch-process for a darker color and richer flavor, or natural cocoa if that’s what you have.
- Baking soda — ½ teaspoon. Helps the cookie spread just enough.
- Salt — ½ teaspoon. Balances the sweetness and enhances the chocolate flavor.
For the Decoration
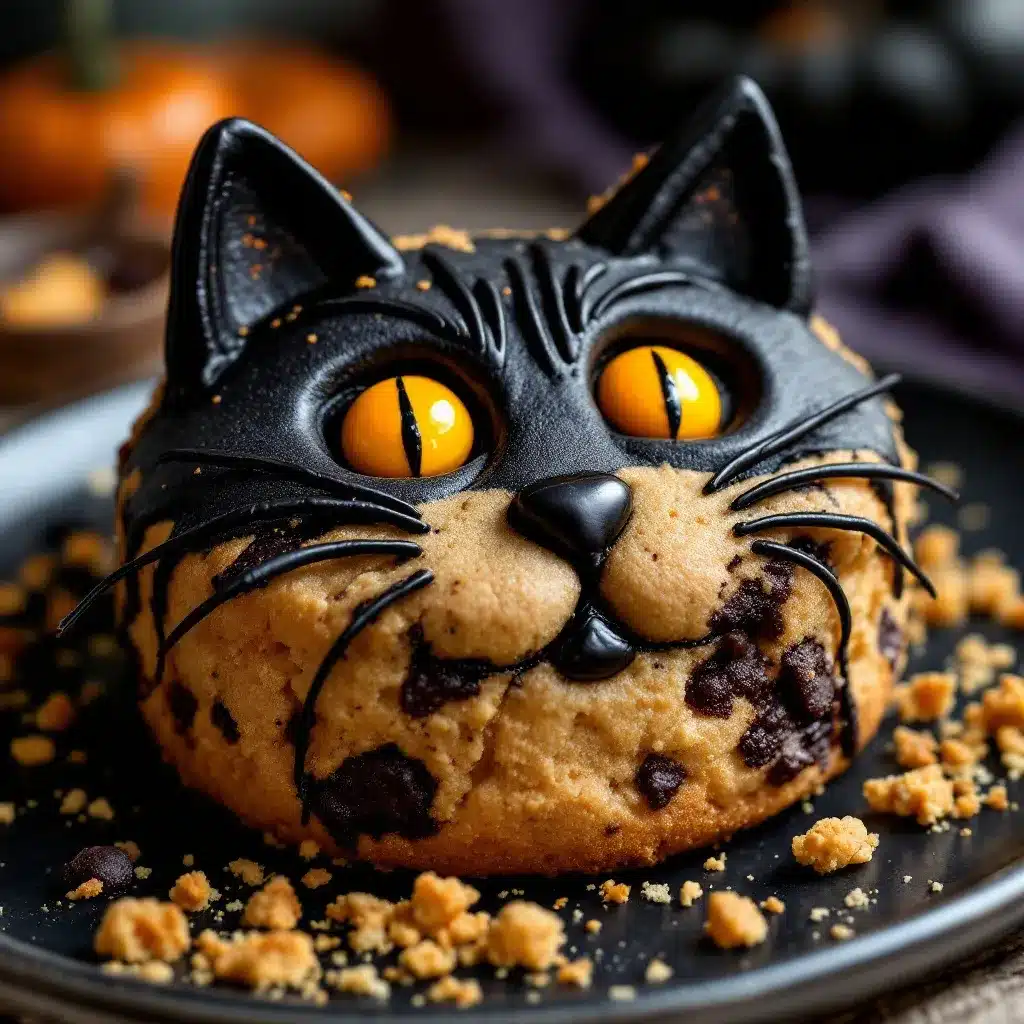
- Candy eyes — 2 large (about 1 inch wide). You can find these at craft stores or online. Wilton makes edible eyes that work perfectly.
- Black licorice strings — 2 pieces, about 4 inches each, for the whiskers. You can also use black decorating icing or melted chocolate piped into thin lines.
- Mini chocolate chips — ¼ cup (45g), for the nose and optional details. Dark or semisweet both work.
- Optional decorations: Orange sprinkles, white chocolate drizzle, or edible glitter for extra flair.
Ingredient Tips & Substitutions
- Gluten-free option: Replace all-purpose flour with a 1:1 gluten-free baking blend. I’ve tested with King Arthur Measure for Measure and it works great.
- Dairy-free option: Use vegan butter (like Earth Balance) and dairy-free chocolate chips. The texture will be slightly softer but still delicious.
- Egg-free option: Replace the egg with a flax egg (1 tablespoon ground flaxseed mixed with 3 tablespoons water, let sit for 5 minutes). The cookie will be a bit more cakey but still holds its shape.
- Black food coloring alternatives: If you don’t want to use food coloring, you can use black cocoa powder (like the kind from King Arthur) for a naturally dark color. The flavor will be more like Oreo cookies.
Equipment Needed
- Large mixing bowl — Any bowl works, but a wide one makes mixing easier.
- Wooden spoon or silicone spatula — For creaming the butter and sugar by hand.
- Measuring cups and spoons — Accurate measurements matter in baking. I prefer metal measuring cups for dry ingredients.
- Sheet pan — A standard 13×18 inch half-sheet pan works perfectly. Line it with parchment paper for easy cleanup.
- Parchment paper — Non-negotiable. It prevents sticking and makes transferring the cookie cake a breeze.
- Offset spatula or butter knife — For shaping the dough into the cat face.
- Cooling rack — Lets air circulate so the cookie cools evenly without getting soggy on the bottom.
- Small piping bag or zip-top bag — For piping the mouth and details. A zip-top bag with a tiny corner snipped off works perfectly.
If you don’t have an offset spatula, a regular butter knife works fine. And if you don’t have a piping bag, a small zip-top bag does the job. I’ve made this recipe with nothing but a bowl, a spoon, and my hands—and it still turned out great.
Preparation Method
- Preheat your oven to 350°F (175°C). Line a large sheet pan with parchment paper. Make sure the parchment is flat—crumpled paper will leave marks on your cookie.
- Cream the butter and sugars. In a large bowl, beat the softened butter, granulated sugar, and brown sugar together with a wooden spoon until light and fluffy, about 2 minutes. Scrape down the sides of the bowl. You want the mixture to look pale and slightly aerated—this is what gives the cookie its tender texture.
- Add the egg, vanilla, and food coloring. Crack the egg into the bowl and add the vanilla. Stir until fully combined. Add the black gel food coloring—start with 1 teaspoon, stir, and check the color. If you want it darker, add more in ¼-teaspoon increments. The dough should look like black ink. Don’t worry if it seems too dark; it will lighten slightly during baking.
- Mix the dry ingredients separately. In a small bowl, whisk together the flour, cocoa powder, baking soda, and salt. This ensures the leavening and salt are evenly distributed. If you skip this step, you might end up with a pocket of baking soda that tastes metallic.
- Combine wet and dry ingredients. Add the flour mixture to the wet ingredients in two additions, stirring gently after each. Mix just until no streaks of flour remain. Overmixing will develop gluten and make the cookie tough. The dough should be soft but not sticky—if it feels too wet, add 1 tablespoon more flour.
- Shape the cat face on the pan. Transfer the dough to the center of the prepared sheet pan. Using your hands or an offset spatula, shape it into a rough cat face shape—a large circle for the head and two triangles for the ears. The head should be about 8 inches wide and the ears about 2 inches tall. Don’t worry about perfection; the dough will spread slightly. Keep the thickness even—about ½ inch thick—so it bakes uniformly.
- Bake for 12-15 minutes. Place the pan in the preheated oven. Bake until the edges are set and the center looks slightly puffed but still soft. A toothpick inserted in the center should come out with a few moist crumbs, not wet batter. For a chewier texture, bake closer to 12 minutes. For a crisper cookie, go to 15 minutes. Let it cool on the pan for 10 minutes—it will continue to set as it cools.
- Transfer to a cooling rack. Use the parchment paper to lift the cookie cake onto a cooling rack. Let it cool completely before decorating—about 30 minutes. Decorating while warm will cause the candy eyes to melt and slide off.
- Decorate the cat face. Once completely cool, press the candy eyes gently into the cookie. For the nose, place a mini chocolate chip point-side down in the center of the face. For the mouth, pipe a small “W” shape using black decorating icing or melted chocolate. For the whiskers, place two black licorice strings on each side of the nose, curving them slightly outward. Add extra mini chocolate chips around the face for texture, if desired.
- Let the decorations set. If you used melted chocolate for the mouth, let it set for about 10 minutes before serving. The licorice and candy eyes will stay in place once the cookie is cool.
Cooking Tips & Techniques
I’ve made this cookie cake about a dozen times now, and here’s what I’ve learned the hard way:
Don’t overmix the dough. I once got distracted and kept stirring, and the cookie came out tough and dense. Mix just until the flour disappears—those last few streaks of flour are better than a tough cookie.
Gel food coloring is worth the extra cost. Liquid food coloring will make your dough soupy and the color will be more gray than black. Gel gives you that deep, rich black without changing the dough’s consistency. I use Americolor Super Black, and one bottle lasts for several batches.
Chill the dough if it’s too sticky. If your kitchen is warm or your butter was too soft, the dough might be hard to shape. Pop it in the fridge for 15 minutes—it will be much easier to handle.
Use a ruler for the ears. I know that sounds silly, but the first time I made this, one ear was twice the size of the other. Now I use a small ruler to make sure both ears are about the same size. It makes the cat look more like a cat and less like a lopsided blob.
Bake on the middle rack. The bottom rack will burn the cookie’s bottom before the center is done. The top rack will brown the ears too quickly. Middle rack, every time.
Let it cool completely. I know it’s tempting to decorate right away, but warm cookie = melted candy eyes. Trust me on this one.
Variations & Adaptations
One of the best things about this Black Cat Halloween Cookie Cake is how easy it is to customize. Here are some variations I’ve tried:
- Ghost Cookie Cake: Skip the black food coloring and use white chocolate chips instead of dark. Shape the dough into a ghost shape (a rounded top with a wavy bottom). Use mini chocolate chips for eyes and a mouth. It’s a fun twist if you want to make both for a party.
- Pumpkin Cat: Add ½ cup pumpkin puree and 1 teaspoon pumpkin pie spice to the wet ingredients. Reduce the flour to 1 ½ cups. The dough will be stickier, so chill it for 30 minutes before shaping. The result is a moist, cakey cookie with a subtle fall flavor—perfect for a pumpkin chai latte pairing.
- Gluten-Free Version: Use a 1:1 gluten-free flour blend. I’ve tested this with King Arthur Measure for Measure, and it works beautifully. The texture is slightly more tender but holds its shape just as well.
- Vegan Version: Replace the butter with vegan butter, the egg with a flax egg, and use dairy-free chocolate chips. The cookie will be slightly softer but still delicious.
- Double Chocolate: Add ½ cup white chocolate chips or mini marshmallows to the dough before shaping. The white chips look like stars against the black cookie—very Halloween-y.
Serving & Storage Suggestions
This cookie cake is best served at room temperature, cut into wedges like a pizza. It’s sturdy enough to hold up on a dessert table but soft enough to eat with your hands. I usually serve it with a glass of cold milk or a scoop of vanilla ice cream—the contrast between the warm cookie and cold ice cream is unbeatable.
For a Halloween party, place the cookie cake on a black or orange platter. Add some fake spiderwebs or plastic spiders around the base for extra spooky vibes. Kids love it, and adults will appreciate the effort (even though it took you 20 minutes of actual work).
Storage: Store leftover cookie cake in an airtight container at room temperature for up to 3 days. The texture stays soft and chewy. If you live in a humid climate, add a piece of bread to the container—it absorbs excess moisture and keeps the cookie from getting soggy.
Freezing: You can freeze the baked, undecorated cookie cake for up to 2 months. Wrap it tightly in plastic wrap, then foil. Thaw at room temperature, then decorate. You can also freeze the raw dough (shaped into the cat face on a parchment-lined pan) and bake it straight from the freezer—just add 3-5 minutes to the baking time.
Reheating: If you want that fresh-from-the-oven experience, pop a slice in the microwave for 10 seconds. It will be warm and gooey, just like it came out of the oven.
Nutritional Information & Benefits
Per serving (1/8 of the cookie cake):
- Calories: 285
- Fat: 13g
- Saturated Fat: 8g
- Carbohydrates: 39g
- Sugar: 25g
- Fiber: 2g
- Protein: 4g
- Sodium: 195mg
This recipe uses cocoa powder, which is rich in antioxidants called flavonoids. Studies suggest that cocoa can help reduce inflammation and improve heart health—so there’s a tiny silver lining to this indulgent treat. The butter provides vitamin A, and the egg adds protein and B vitamins.
If you’re watching your sugar intake, you can reduce the granulated sugar to ½ cup and add ¼ cup of unsweetened applesauce. The cookie will be less sweet but still delicious. For a lower-carb option, replace the all-purpose flour with almond flour—the texture will be more crumbly but the flavor is still great.
This recipe contains gluten, dairy, and eggs. For allergen-friendly versions, see the variations section above.
Conclusion
This Black Cat Halloween Cookie Cake is the kind of recipe that makes Halloween feel special without making you crazy. It’s simple enough for a weeknight baking session with kids, but impressive enough for a party. The best part? You don’t need any special skills or equipment. Just a bowl, a spoon, and a little bit of imagination.
I love this recipe because it’s not just about the cookie—it’s about the look on people’s faces when they see it. That moment of surprise and delight. It’s edible art that tastes as good as it looks. And honestly, that’s the best kind of dessert.
I’d love to see your version! Share your black cat cookie cake on social media and tag me—I always get a kick out of seeing the different faces people create. And if you try a variation (like the ghost or pumpkin version), let me know how it turns out. Drop a comment below with your favorite Halloween dessert, or share a photo of your cookie cake. Happy Halloween, and happy baking!
Frequently Asked Questions
Can I make this cookie cake ahead of time?
Absolutely! Bake the cookie cake up to 2 days in advance and store it in an airtight container at room temperature. Decorate it the day you plan to serve it for the freshest look. You can also freeze the baked, undecorated cookie for up to 2 months—just thaw and decorate when ready.
My dough is too sticky to shape. What should I do?
If your dough is sticky, it likely means your butter was too soft or your kitchen is warm. Pop the dough in the fridge for 15-20 minutes. It will firm up and be much easier to shape. If it’s still sticky after chilling, add 1 tablespoon of flour at a time until it feels manageable.
Can I use liquid food coloring instead of gel?
You can, but I don’t recommend it. Liquid food coloring will thin out your dough and the color will be more of a dark gray than true black. Gel food coloring gives you that deep, rich black without affecting the dough’s consistency. It’s worth the extra dollar or two.
How do I get the cat face shape right?
Don’t overthink it! Shape a large circle for the head and two triangles for the ears. Use your hands or an offset spatula. The dough will spread slightly during baking, so make the ears a bit taller than you think they need to be. I like to use a small ruler to make sure both ears are the same size.
Can I use this dough to make cookies instead of a cake?
Yes! Scoop the dough into 2-tablespoon balls and bake at 350°F for 8-10 minutes. You’ll get about 18 cookies. Decorate them with candy eyes and licorice whiskers for individual black cat cookies—perfect for party favors or lunchbox treats.
Pin This Recipe!
Black Cat Cookie Cake: Easy Halloween Dessert Recipe

A giant, shareable cookie shaped like a black cat with a chewy center and crisp edges. This easy one-bowl, no-mixer recipe is perfect for Halloween parties and guaranteed to impress.
- Prep Time: 20 minutes
- Cook Time: 15 minutes
- Total Time: 1 hour 5 minutes
- Yield: 8 servings 1x
- Category: Dessert
- Cuisine: American
Ingredients
- ½ cup (1 stick / 113g) unsalted butter, softened
- ¾ cup (150g) granulated sugar
- ¼ cup (50g) light brown sugar, packed
- 1 large egg, at room temperature
- 1 teaspoon vanilla extract
- 1 to 2 teaspoons black gel food coloring
- 1 ¾ cups (220g) all-purpose flour
- ¼ cup (20g) unsweetened cocoa powder
- ½ teaspoon baking soda
- ½ teaspoon salt
- 2 large candy eyes (about 1 inch wide)
- 2 pieces black licorice strings (about 4 inches each)
- ¼ cup (45g) mini chocolate chips
Instructions
- Preheat your oven to 350°F (175°C). Line a large sheet pan with parchment paper.
- In a large bowl, beat the softened butter, granulated sugar, and brown sugar together with a wooden spoon until light and fluffy, about 2 minutes. Scrape down the sides of the bowl.
- Add the egg, vanilla, and black gel food coloring. Stir until fully combined. Start with 1 teaspoon of food coloring and add more in ¼-teaspoon increments until the dough is deep black.
- In a small bowl, whisk together the flour, cocoa powder, baking soda, and salt.
- Add the flour mixture to the wet ingredients in two additions, stirring gently after each. Mix just until no streaks of flour remain. The dough should be soft but not sticky.
- Transfer the dough to the center of the prepared sheet pan. Using your hands or an offset spatula, shape it into a rough cat face shape—a large circle for the head and two triangles for the ears. The head should be about 8 inches wide and the ears about 2 inches tall. Keep the thickness even, about ½ inch thick.
- Bake for 12-15 minutes, until the edges are set and the center looks slightly puffed but still soft. Let it cool on the pan for 10 minutes.
- Use the parchment paper to lift the cookie cake onto a cooling rack. Let it cool completely before decorating, about 30 minutes.
- Once completely cool, press the candy eyes gently into the cookie. For the nose, place a mini chocolate chip point-side down in the center of the face. Pipe a small ‘W’ shape for the mouth using black decorating icing or melted chocolate. Place two black licorice strings on each side of the nose for whiskers. Add extra mini chocolate chips around the face for texture, if desired.
- If you used melted chocolate for the mouth, let it set for about 10 minutes before serving.
Notes
Gel food coloring is essential for a deep black color without thinning the dough. Chill the dough for 15 minutes if it’s too sticky to shape. Let the cookie cool completely before decorating to prevent candy eyes from melting. For a chewier texture, bake closer to 12 minutes; for a crisper cookie, bake 15 minutes.
Nutrition
- Serving Size: 1/8 of cookie cake
- Calories: 285
- Sugar: 25
- Sodium: 195
- Fat: 13
- Saturated Fat: 8
- Carbohydrates: 39
- Fiber: 2
- Protein: 4
Keywords: Halloween cookie cake, black cat cookie, Halloween dessert, easy cookie cake, spooky dessert, chocolate cookie cake


