Love this? Save it for later!
Share the inspiration with your friends
I had been looking for a Halloween treat that actually worked for school party goody bags. Not the usual pre-wrapped candy that melts in pockets or the elaborate decorated cookies that get crushed before the first bite. For a while, I just accepted that homemade treats for Halloween meant either something that would go stale by morning or something that required hours of royal icing work I didn’t have time for. Then my daughter came home from a friend’s party with a crumbly little cookie wrapped in a napkin, and I took one bite and knew—this was the answer. She said it was a pumpkin pie cookie, and I spent the next week trying to reverse-engineer it in my kitchen.
The first batch was too soggy. The second fell apart completely. But the third—that one worked. These mini pumpkin pie cookies have a buttery crust that holds its shape, a creamy spiced filling that doesn’t weep, and they’re small enough to fit three in a treat bag without breaking. Honestly, they solved a problem I didn’t even know I had until I saw my daughter’s face light up when I handed her a bag of these for her class party. They’re not fancy, and they don’t pretend to be. They’re just really good little cookies that taste like Thanksgiving in a two-bite package.
What surprised me most was how simple they turned out to be. No chilling the dough for hours, no piping bags, no complicated decorating. Just a few pantry ingredients and a mini muffin tin, and you’ve got something that looks like you spent way more time on it than you actually did. That’s my favorite kind of recipe—the one that makes you look like a hero without the stress. These cookies have become my go-to for Halloween, Thanksgiving, and honestly any fall gathering where I need to bring something that disappears fast.
Why You’ll Love This Recipe
I’ve tested these mini pumpkin pie cookies more times than I care to admit, and here’s what I’ve learned: they’re the perfect intersection of easy and impressive. You don’t need to be a baker to pull these off, and that’s coming from someone who has definitely had her share of kitchen disasters.
- Quick & Easy: From start to finish, these come together in about 30 minutes. No complicated techniques, no specialty equipment, just straightforward steps that work every time.
- Simple Ingredients: You probably have most of these in your pantry right now. Canned pumpkin, butter, flour, sugar, and basic spices—no hunting down obscure ingredients at three different stores.
- Perfect for Halloween Treat Bags: These hold up beautifully in treat bags without getting crushed or melting. They’re sturdy enough to stack and small enough to fit several in a goody bag without breaking.
- Crowd-Pleaser: Kids love them because they’re cookie-sized, and adults love them because they taste like mini pumpkin pies. I’ve brought these to Halloween parties, school events, and family gatherings, and they always disappear first.
- Unbelievably Delicious: The combination of buttery crust and creamy pumpkin filling with warm fall spices is next-level comfort food. The texture is soft but not mushy, with just the right amount of crumble.
What makes these different from other pumpkin cookie recipes is the technique. Instead of a soft drop cookie that spreads into a puddle, these use a press-in crust method that gives you a sturdy base with a tender crumb. The filling stays creamy without being runny because we use just the right ratio of pumpkin to egg. I’ve tried versions with cream cheese, with condensed milk, with all sorts of variations, and this simple version wins every time.
These cookies aren’t just good—they’re the kind that makes you close your eyes after the first bite. It’s comfort food reimagined for Halloween, with the same soul-soothing satisfaction of pumpkin pie but in a portable, shareable size. Perfect for impressing other parents at the school party without spending all night in the kitchen, or turning a simple Halloween gathering into something memorable.
What Ingredients You Will Need
This recipe uses simple, wholesome ingredients to deliver bold pumpkin flavor and satisfying texture without the fuss. Most of these are pantry staples, especially if you do any fall baking. Here’s what you’ll need and why each ingredient matters.
For the Crust
- 1 ½ cups all-purpose flour (provides structure and stability for the mini crusts)
- ½ cup unsalted butter, cold and cubed (cold butter creates flaky, tender crust—I use Kerrygold for its rich flavor)
- ¼ cup granulated sugar (adds just enough sweetness to balance the savory butter)
- ¼ teaspoon salt (enhances all the flavors and prevents the crust from tasting flat)
- 2-3 tablespoons ice water (binds the dough without making it tough; add one tablespoon at a time)
For the Pumpkin Filling
- ¾ cup canned pumpkin puree (not pumpkin pie filling—make sure it’s 100% pure pumpkin. Libby’s is my go-to for consistent results)
- ¼ cup granulated sugar (sweetens the filling without overpowering the pumpkin flavor)
- ¼ cup brown sugar, packed (adds moisture and a deeper, caramel-like sweetness)
- 1 large egg (binds the filling and gives it that custard-like texture)
- ¼ cup heavy cream (adds richness and a silky mouthfeel; you can substitute half-and-half if needed)
- 1 teaspoon vanilla extract (rounds out the spices and adds warmth)
- 1 teaspoon pumpkin pie spice (if you don’t have this, use ½ teaspoon cinnamon, ¼ teaspoon nutmeg, ¼ teaspoon ginger, and a pinch of cloves)
- ¼ teaspoon cinnamon (extra warmth because you can never have too much cinnamon in pumpkin recipes)
For Topping (Optional but Recommended)
- Whipped cream (for serving, if you’re feeling fancy)
- Powdered sugar (for dusting right before serving)
- Caramel sauce (a drizzle takes these over the top)
For the best texture, make sure your butter is truly cold when you start the crust. I pop my cubed butter in the freezer for 10 minutes before I begin. And please don’t skip the salt in the crust—it makes a noticeable difference in balancing the sweetness of the filling. If you’re looking for a dairy-free option, you can use cold vegan butter and coconut cream in place of the heavy cream. I’ve tested it, and while the texture is slightly different, it still tastes fantastic.
Equipment Needed
You don’t need a fully stocked bakery to make these cookies. Here’s what you’ll actually use:
- Mini muffin tin (24-cup works best; this is non-negotiable for the shape and size)
- Pastry cutter or food processor (for cutting butter into flour; two forks work in a pinch but a pastry cutter is faster)
- Mixing bowls (one medium, one small)
- Measuring cups and spoons (accuracy matters in baking)
- Whisk (for the filling)
- Small cookie scoop or teaspoon (for portioning the filling evenly)
- Fork (for crimping the crust edges and pricking the bottoms)
- Cooling rack (essential for preventing soggy bottoms)
If you don’t have a mini muffin tin, you can use a regular muffin tin, but you’ll need to adjust the baking time and you’ll get larger cookies—about half the number. I found my mini muffin tin at a thrift store for three dollars, so keep an eye out if you don’t have one. A food processor speeds up the crust-making significantly, but honestly, I often make it by hand because I find it therapeutic. Just make sure your butter stays cold throughout the process.
Preparation Method
Let’s get baking. I’ve broken this down into clear steps so you can follow along without any confusion. Trust me, if I can make these work after my first disastrous attempt, you’ve got this.
- Preheat your oven to 350°F (175°C). Lightly grease your mini muffin tin with butter or non-stick spray. I use butter because it adds a little extra flavor to the crust, but spray works fine too.
- Make the crust dough. In a medium bowl, whisk together the flour, ¼ cup sugar, and salt. Add the cold, cubed butter. Using a pastry cutter or your fingertips, work the butter into the flour until the mixture resembles coarse crumbs with some pea-sized butter pieces remaining. This takes about 2-3 minutes by hand. Don’t overwork it—you want those little butter pockets for a flaky texture.
- Add the ice water. Sprinkle 2 tablespoons of ice water over the flour mixture and stir with a fork until the dough starts to come together. If it seems too dry, add the third tablespoon. The dough should hold together when pinched but not be sticky. Form it into a disk, wrap in plastic wrap, and refrigerate for 10 minutes. (I know, I said no chilling, but this quick chill makes the dough easier to work with—trust me on this one.)
- Press the crust into the muffin tin. Pinch off small pieces of dough (about 1 tablespoon each) and press them into the bottom and up the sides of each mini muffin cup. Aim for an even thickness, about ⅛ inch. Don’t worry if the edges are a little ragged—that’s part of the charm. Prick the bottoms of each crust with a fork to prevent bubbling.
- Bake the crusts. Place the muffin tin in the oven and bake for 8 minutes. The crusts should look set but not browned. Remove from the oven and let them cool slightly while you make the filling. This pre-bake step is crucial—skip it and you’ll end up with soggy bottoms.
- Make the pumpkin filling. In a small bowl, whisk together the pumpkin puree, ¼ cup granulated sugar, brown sugar, egg, heavy cream, vanilla extract, pumpkin pie spice, and cinnamon. Whisk until smooth and fully combined. The mixture should be thick but pourable, like a loose pudding.
- Fill the crusts. Using a small cookie scoop or teaspoon, carefully fill each pre-baked crust with the pumpkin mixture. Fill almost to the top but leave a tiny gap—the filling will puff slightly as it bakes. A heaping teaspoon per cup is usually perfect.
- Bake the filled cookies. Return the muffin tin to the oven and bake for 12-15 minutes, or until the filling is set around the edges but still slightly jiggly in the center. The tops should look matte, not glossy. Don’t overbake or the filling will crack.
- Cool completely. Let the cookies cool in the pan for 5 minutes, then carefully run a knife around the edges to loosen them. Transfer to a wire rack to cool completely. This is the hardest part—waiting—but they need to cool fully for the filling to set properly.
Here’s a sensory cue to watch for: when the filling is done, it should smell like pumpkin pie (warm, spicy, sweet) and the edges will look slightly darker than the center. If you gently shake the pan, the centers should wobble just a little. That’s your sign they’re perfect. Let them cool completely before adding any toppings or packing them into treat bags.
Cooking Tips & Techniques
I’ve made these mini pumpkin pie cookies at least a dozen times, and I’ve learned a few things the hard way. Let me save you from my mistakes.
Don’t skip the pre-bake. The first time I made these, I was in a hurry and thought, “How bad could it be if I just bake the crust and filling together?” Pretty bad, turns out. The crust came out soggy and the bottom never really cooked through. That 8-minute pre-bake is non-negotiable for a crisp, tender crust that holds up to the moist filling.
Keep your butter cold. Warm butter melts into the flour instead of creating those little pockets of steam that make crust flaky. If your kitchen is warm, pop the dough in the fridge for 15 minutes before pressing it into the pan. I learned this lesson on a particularly hot September day when my dough turned into a greasy mess.
Watch the filling consistency. If your pumpkin puree seems watery (some brands are thinner than others), you can drain it slightly by placing it in a fine-mesh strainer for 10 minutes before mixing. This prevents the filling from being too runny and seeping into the crust. I had one batch where the filling was practically soup, and the cookies never set properly.
Use a light hand when pressing the crust. You want the crust to be even, but don’t compact it too much or it will be tough. Think gentle pressure, not aggressive mashing. I press with my thumbs and then use the bottom of a shot glass to smooth out the bottoms—works like a charm.
Let them cool completely before removing from the pan. I know it’s tempting to pop them out while they’re warm, but they’re fragile at that stage. Give them the full 5 minutes in the pan, then another 15-20 minutes on the cooling rack. Patience pays off with clean edges and intact crusts.
One more thing: if you’re making these for Halloween treat bags, wait until they’re completely cool before bagging them. Any residual warmth will create condensation in the bag, making the cookies soggy. I learned that one the hard way during my daughter’s class party prep.
Variations & Adaptations
One of the things I love about this recipe is how flexible it is. Here are some variations I’ve tried and loved:
Gluten-Free Version: Substitute the all-purpose flour with a 1:1 gluten-free baking flour blend. I’ve used Bob’s Red Mill with great results. The crust will be slightly more crumbly, so handle gently when removing from the pan. My gluten-free friend actually said she preferred this version because the crust was extra tender.
Dairy-Free Version: Use cold vegan butter (I like Miyoko’s) in the crust and replace the heavy cream with full-fat coconut cream. The filling will have a subtle coconut undertone that actually pairs beautifully with the pumpkin and spices. Just make sure your vegan butter is really cold before starting.
Spiced Variation: Add ¼ teaspoon of cardamom or allspice to the filling for a more complex flavor profile. I tried this for Thanksgiving one year and it was a hit—the cardamom adds an unexpected warmth that makes these taste even more special.
Chocolate Drizzle: Once the cookies are completely cool, drizzle melted dark chocolate over the tops. The bitterness of the chocolate balances the sweet pumpkin filling perfectly. This is my personal favorite variation, especially for Halloween when a little extra indulgence feels right.
Savory Version: For a fun twist, reduce the sugar in both the crust and filling, and add ¼ cup of shredded sharp cheddar cheese to the crust. Skip the sweet spices and add a pinch of black pepper and sage to the filling. These savory mini pies are surprisingly delicious and make great appetizers for fall parties.
If you’re short on time, you can use refrigerated pie crust instead of making your own. Just roll it out, cut circles with a biscuit cutter, and press them into the mini muffin tin. It won’t be quite as tender as homemade, but it’s a solid shortcut when you need one. I’ve done this for last-minute school events and nobody complained.
Serving & Storage Suggestions
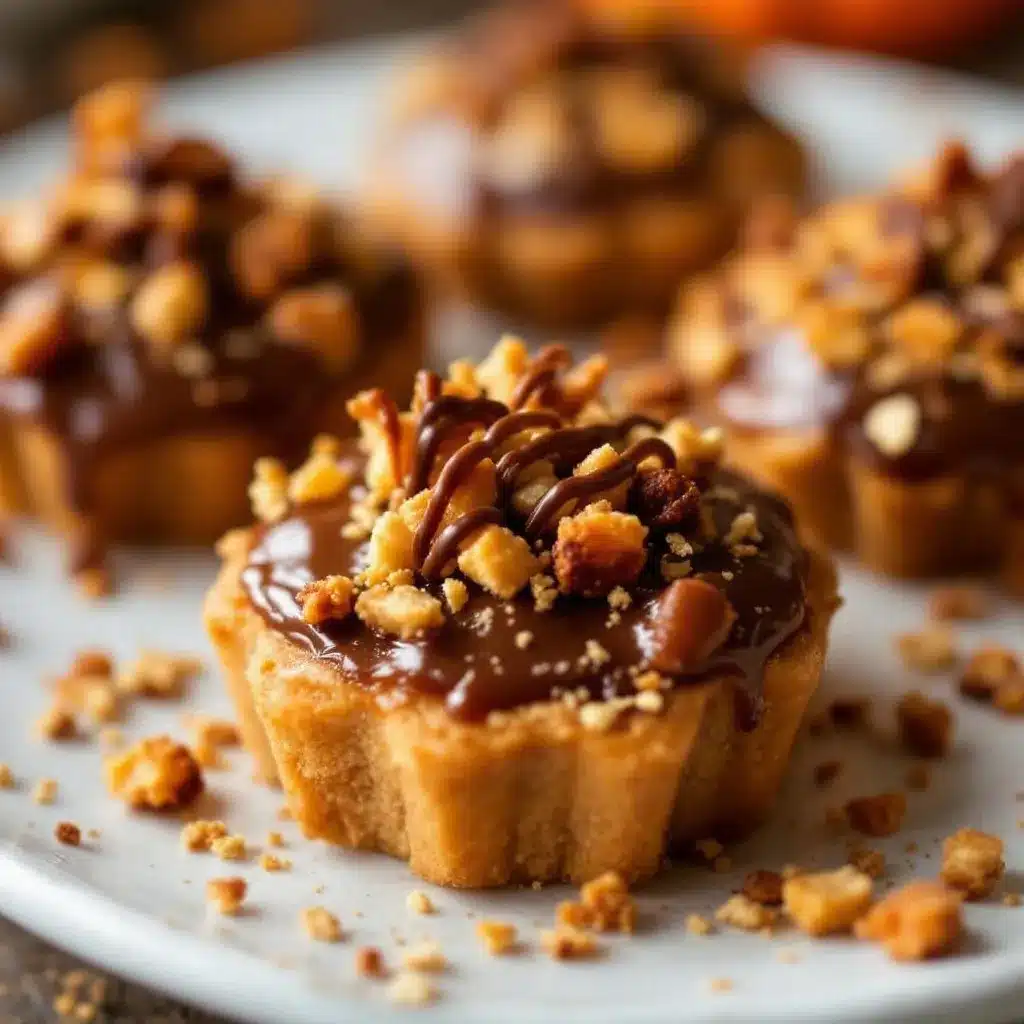
These mini pumpkin pie cookies are best served at room temperature, which makes them perfect for parties and treat bags. If you’re serving them at home, a light dusting of powdered sugar right before serving makes them look extra special. For Halloween, I like to add a tiny dollop of whipped cream and a sprinkle of cinnamon on top—it takes about 30 seconds and looks like you fussed.
These pair beautifully with a warm cup of coffee or apple cider. I’ve also served them alongside a maple pumpkin cold foam iced coffee for a cozy fall afternoon treat. If you’re putting together a Halloween dessert table, they look great next to crispy witch finger breadsticks for a fun savory-sweet contrast.
Storage: Store these cookies in an airtight container at room temperature for up to 3 days. If you need to stack them, place a sheet of parchment paper between layers to prevent sticking. Don’t refrigerate them—the fridge dries out the filling and makes the crust tough.
Freezer Instructions: These freeze beautifully. Place the completely cooled cookies on a baking sheet and freeze for 1 hour, then transfer to a freezer-safe bag or container. They’ll keep for up to 2 months. To thaw, let them sit at room temperature for about 20 minutes. I always keep a batch in the freezer for unexpected guests or last-minute Halloween parties.
Reheating: If you want that just-baked warmth, pop them in a 300°F (150°C) oven for 5 minutes. Don’t use the microwave—it makes the crust soggy. The flavor actually deepens after a day or two, so don’t worry if you make them ahead. The spices meld together and the texture becomes even more pie-like.
For Halloween treat bags, I place each cookie in a small cupcake liner first, then stack them in clear cellophane bags tied with orange ribbon. They stay fresh and look adorable. I’ve also sent these in lunchboxes as a surprise—they hold up well and make for a happy midday discovery.
Nutritional Information & Benefits
Here’s the approximate nutritional breakdown for one mini pumpkin pie cookie (based on 24 cookies):
| Nutrient | Amount per Cookie |
|---|---|
| Calories | 95 |
| Total Fat | 5g |
| Saturated Fat | 3g |
| Cholesterol | 20mg |
| Sodium | 45mg |
| Total Carbohydrates | 12g |
| Dietary Fiber | 1g |
| Sugars | 7g |
| Protein | 2g |
| Vitamin A | 35% DV |
Pumpkin is packed with vitamin A, which supports eye health and immune function. It’s also a good source of fiber and antioxidants. While these are definitely a treat, they’re a more nutrient-dense option compared to typical Halloween candy. The butter provides vitamin A and healthy fats, and the egg adds a small protein boost.
These cookies are vegetarian-friendly and can easily be made gluten-free or dairy-free with the substitutions mentioned above. They contain dairy, eggs, and gluten in their standard form, so keep that in mind if you’re serving a crowd with dietary restrictions. For a lower-sugar option, you can reduce the sugar in both the crust and filling by about 25% without significantly affecting the texture.
I personally love that these feel indulgent without being over-the-top. They satisfy that pumpkin pie craving in a portion-controlled size, which means I can enjoy one (or two) without the guilt of a full slice. For me, that’s the sweet spot—a treat that feels special but doesn’t leave me in a sugar coma.
Conclusion
These easy mini pumpkin pie cookies have honestly become my most-requested fall recipe. They solve the perennial Halloween treat bag problem—something homemade that won’t get crushed, won’t melt, and won’t cause a sugar rush that keeps kids bouncing off walls until midnight. Plus, they taste like a warm hug in cookie form.
What I love most about this recipe is how adaptable it is. You can dress them up with whipped cream and caramel for a Thanksgiving dessert table, or keep them simple for Halloween goody bags. They’re forgiving enough for beginner bakers but impressive enough to make you look like you know what you’re doing. I’ve made these with my kids, with friends, and solo on a quiet Sunday afternoon, and they’ve never let me down.
I’d love to hear how these turn out for you. Did you add your own twist? Did your kids help press the crusts into the pan? Did you make them for a Halloween party or just because you were craving pumpkin? Drop a comment below and let me know—I read every single one, and your variations might inspire someone else’s baking adventure. And if you’re looking for more fall baking inspiration, you might enjoy these brown butter pumpkin cream cheese swirl muffins or this caramel apple cinnamon roll bundt cake for your next cozy baking day.
Happy Halloween baking, friends. May your treat bags be full, your crusts be flaky, and your pumpkin cravings be thoroughly satisfied.
Frequently Asked Questions
Can I use fresh pumpkin instead of canned?
Yes, but you’ll need to roast and puree it first, then drain off any excess liquid. Fresh pumpkin tends to be more watery than canned, so spread the puree on a paper towel-lined plate for about 10 minutes before using. Canned pumpkin is more consistent and convenient, which is why I recommend it for this recipe.
How do I keep the crust from getting soggy?
The pre-bake step is your best defense against soggy crusts. Bake the empty crusts for 8 minutes before adding the filling. Also, make sure your pumpkin puree isn’t too watery—if it seems thin, drain it slightly. And always let the cookies cool completely in the pan before removing them.
Can I make these ahead of time for a party?
Absolutely. You can make them up to 3 days ahead and store them in an airtight container at room temperature. The flavors actually improve after a day or two as the spices meld together. You can also freeze them for up to 2 months—just thaw at room temperature before serving.
How many cookies does this recipe make?
This recipe makes 24 mini pumpkin pie cookies when using a standard 24-cup mini muffin tin. If you have a smaller tin, you may need to bake in batches. The dough and filling both hold up well while waiting.
Can I double this recipe?
Yes, this recipe doubles easily. Just make sure you have two mini muffin tins or plan to bake in batches. The crust dough can be made in a larger batch without any issues, and the filling scales perfectly. I often double this for classroom parties and bake sales.
Pin This Recipe!
Easy Mini Pumpkin Pie Cookies for Halloween Treat Bags
These mini pumpkin pie cookies have a buttery crust that holds its shape, a creamy spiced filling that doesn’t weep, and they’re small enough to fit three in a treat bag without breaking. They’re quick, easy, and perfect for Halloween goody bags or any fall gathering.
- Prep Time: 15 minutes
- Cook Time: 20 minutes
- Total Time: 35 minutes
- Yield: 24 cookies 1x
- Category: Dessert
- Cuisine: American
Ingredients
- 1 ½ cups all-purpose flour
- ½ cup unsalted butter, cold and cubed
- ¼ cup granulated sugar
- ¼ teaspoon salt
- 2–3 tablespoons ice water
- ¾ cup canned pumpkin puree
- ¼ cup granulated sugar
- ¼ cup brown sugar, packed
- 1 large egg
- ¼ cup heavy cream
- 1 teaspoon vanilla extract
- 1 teaspoon pumpkin pie spice
- ¼ teaspoon cinnamon
- Whipped cream (for serving, optional)
- Powdered sugar (for dusting, optional)
- Caramel sauce (for drizzling, optional)
Instructions
- Preheat your oven to 350°F (175°C). Lightly grease your mini muffin tin with butter or non-stick spray.
- Make the crust dough: In a medium bowl, whisk together the flour, ¼ cup sugar, and salt. Add the cold, cubed butter. Using a pastry cutter or your fingertips, work the butter into the flour until the mixture resembles coarse crumbs with some pea-sized butter pieces remaining.
- Add the ice water: Sprinkle 2 tablespoons of ice water over the flour mixture and stir with a fork until the dough starts to come together. If it seems too dry, add the third tablespoon. Form it into a disk, wrap in plastic wrap, and refrigerate for 10 minutes.
- Press the crust into the muffin tin: Pinch off small pieces of dough (about 1 tablespoon each) and press them into the bottom and up the sides of each mini muffin cup. Aim for an even thickness, about ⅛ inch. Prick the bottoms of each crust with a fork to prevent bubbling.
- Bake the crusts: Place the muffin tin in the oven and bake for 8 minutes. The crusts should look set but not browned. Remove from the oven and let them cool slightly while you make the filling.
- Make the pumpkin filling: In a small bowl, whisk together the pumpkin puree, ¼ cup granulated sugar, brown sugar, egg, heavy cream, vanilla extract, pumpkin pie spice, and cinnamon. Whisk until smooth and fully combined.
- Fill the crusts: Using a small cookie scoop or teaspoon, carefully fill each pre-baked crust with the pumpkin mixture. Fill almost to the top but leave a tiny gap.
- Bake the filled cookies: Return the muffin tin to the oven and bake for 12-15 minutes, or until the filling is set around the edges but still slightly jiggly in the center.
- Cool completely: Let the cookies cool in the pan for 5 minutes, then carefully run a knife around the edges to loosen them. Transfer to a wire rack to cool completely.
Notes
Don’t skip the pre-bake step for the crust to avoid sogginess. Keep butter cold for a flaky crust. Let cookies cool completely before removing from pan or bagging. For Halloween treat bags, wait until completely cool to avoid condensation.
Nutrition
- Serving Size: 1 cookie
- Calories: 95
- Sugar: 7
- Sodium: 45
- Fat: 5
- Saturated Fat: 3
- Carbohydrates: 12
- Fiber: 1
- Protein: 2
Keywords: mini pumpkin pie cookies, Halloween treats, pumpkin cookies, easy fall baking, treat bag cookies


