Love this? Save it for later!
Share the inspiration with your friends
My niece looked up from the plate, Oreo crumbs dusted across her upper lip, and said, “Auntie, can you make these for my Halloween party?” Not “these are good” or “I like them.” She asked for them by name, three days in a row, unprompted. That’s when I knew the spider web truffles had officially become a thing in our house.
I’d been messing around in the kitchen one rainy Saturday afternoon, wanting something festive but not fussy. You know how it is—you want the wow factor without spending hours piping intricate designs. These Easy No-Bake Spider Web Oreo Truffles were born from that exact kind of lazy ambition. They look like you tried really hard. But honestly? The hardest part is waiting for the chocolate to set.
There’s something satisfying about a treat that looks spooky but tastes like pure childhood nostalgia. Creamy, rich, with that classic Oreo crunch everyone loves. And the spider web design? It’s ridiculously simple—a toothpick does all the work. No steady hands required.
These truffles have become my go-to for Halloween gatherings, classroom parties, and even just a fun weekend project with the kids. They disappear fast, and nobody believes how little effort they took.
Why You’ll Love This Recipe
Let me tell you why these truffles earn a permanent spot in my Halloween rotation. I’m not exaggerating when I say they’ve been tested at multiple parties, by picky eaters and dessert snobs alike. Every single time, the plate comes back empty.
- No Baking Required : The oven stays off. Seriously. If you can crush cookies and melt chocolate, you can make these. Perfect for hot fall days or small kitchens.
- Simple Ingredients : You need four main ingredients. Four. Oreos, cream cheese, white chocolate, and a little black icing. Chances are you already have most of them.
- Perfect for Halloween Parties : They look dramatic on a dessert table. The spider web design immediately says “Halloween” without being gory or over-the-top. Great for school functions and family gatherings alike.
- Crowd-Pleaser : Kids go crazy for them. Adults sneak extras when they think nobody’s looking. I’ve watched people take one bite, pause, and then grab two more.
- Unbelievably Delicious : The texture is what gets you. Creamy truffle filling with a crisp chocolate shell, and that subtle tang from the cream cheese cutting through the sweetness. It’s dangerously addictive.
What makes these different from every other Oreo truffle recipe out there? It’s the method. Instead of just dipping and calling it done, I add the spider web detail that transforms them from plain truffles into conversation starters. And I’ve figured out exactly how to get the chocolate coating smooth and crack-free—no tempering required. I’ve tested this with cheap chocolate chips and fancy couverture, and trust me, the technique matters more than the brand.
These truffles are the kind of treat that makes you close your eyes after the first bite. It’s comfort food dressed up for a party—familiar, satisfying, but with a little Halloween magic thrown in.
What Ingredients You Will Need
This recipe uses simple, everyday ingredients to create something that looks far more complicated than it actually is. No specialty baking sections required. Here’s everything you need:
For the Truffle Base
- 1 package (14.3 oz) regular Oreo cookies – Don’t use Double Stuf or Thins. The regular ones have the perfect cookie-to-creme ratio for truffles. I’ve tested this with generic chocolate sandwich cookies too, and they work fine, but Oreos give the most consistent texture.
- 8 oz cream cheese, softened – Full-fat cream cheese is non-negotiable here. Low-fat versions make the filling too soft and sticky to roll. Let it sit on the counter for about 30 minutes before starting.
- Pinch of salt – Sounds weird, I know. But a tiny pinch balances the sweetness and makes the chocolate flavor pop. Trust me on this one.
For the Coating

- 12 oz white chocolate melting wafers or white chocolate chips – I prefer Ghirardelli white chocolate melting wafers for the smoothest finish. White chocolate chips work too, but add a teaspoon of coconut oil to help them thin out for dipping.
- 1 teaspoon coconut oil or vegetable shortening – This helps the chocolate flow smoothly and gives a beautiful shine. Skip this and you’ll end up with thick, clumpy coating.
For the Spider Web Design
- Black decorating icing – The kind that comes in a tube with a fine tip. Wilton’s black icing pen works great. You could also melt black candy melts, but the tube is way easier.
- A toothpick – This is your magic wand. Don’t laugh. A simple toothpick creates the entire spider web effect.
Optional Decorations
- Edible glitter or luster dust – For a little extra shimmer. Totally optional, but kids love it.
- Mini candy eyeballs – Stick one on each truffle for a spooky spider look. My nephew insists on these.
- Orange sprinkles – A fun alternative if you want to skip the spider web design.
Equipment Needed
You don’t need a fancy kitchen to pull these off. Here’s what you’ll actually use:
- Food processor – For crushing the Oreos into fine crumbs. A blender works in a pinch, but a food processor gives the most consistent texture. I’ve also used a rolling pin and a zip-top bag when my food processor was in the dishwasher. It works, but your arms will get a workout.
- Electric hand mixer or stand mixer – For beating the cream cheese until smooth before mixing in the cookie crumbs. A wooden spoon works if you’re patient, but the mixer saves time.
- Small cookie scoop or tablespoon – For portioning the truffle mixture evenly. I use a 1-tablespoon scoop for bite-sized truffles.
- Baking sheet lined with parchment paper – For holding the truffles as they set. Parchment is key—wax paper will stick.
- Microwave-safe bowl – For melting the white chocolate. Glass or ceramic works best.
- Fork or dipping tool – For coating the truffles. A regular dinner fork works fine. I’ve also used chopsticks in a pinch.
- Toothpick – For creating the spider web design. This is non-negotiable.
- Refrigerator space – You’ll need room for a baking sheet to chill flat. Clear a shelf before you start.
Preparation Method
Let’s walk through this step by step. I’ll include all the little details I wish someone had told me the first time I made these.
Step 1: Crush the Oreos
Place the entire package of Oreos—yes, creme filling and all—into your food processor. Pulse until you have fine, uniform crumbs. You want them to look like dark sand. No large chunks remaining. This takes about 30 seconds of pulsing. If you’re using the bag-and-rolling-pin method, put the cookies in a zip-top bag, squeeze out the air, and go to town with a rolling pin. It takes longer, but it’s oddly satisfying.
Step 2: Mix the Truffle Filling
In a large bowl, beat the softened cream cheese with an electric mixer until smooth and fluffy, about 2 minutes. Add the Oreo crumbs and the pinch of salt. Mix on low speed until everything comes together. The mixture will look crumbly at first, then suddenly form a cohesive dough. Scrape down the sides of the bowl once or twice. When it’s ready, it should hold together when pressed between your fingers. If it feels too dry, add a teaspoon of milk. Too wet? Add a few more crushed Oreos.
Step 3: Roll the Truffles
Using your cookie scoop or a tablespoon, portion out the mixture and roll it between your palms into smooth balls. Aim for about 1 inch in diameter. Place each ball on the parchment-lined baking sheet. You should get about 24 to 28 truffles, depending on size. Wet your hands slightly if the mixture starts sticking to your palms. Pop the baking sheet into the refrigerator for at least 30 minutes. This step is crucial—cold truffles hold their shape when dipped.
Step 4: Melt the White Chocolate
Place the white chocolate melting wafers and coconut oil in a microwave-safe bowl. Microwave in 30-second intervals, stirring thoroughly after each interval. White chocolate burns easily, so don’t rush this. It usually takes about 2 minutes total. Stir until completely smooth and glossy. If it seizes up or gets grainy, you overheated it. Start over with fresh chocolate—it’s not worth trying to salvage burnt chocolate.
Step 5: Dip the Truffles
Remove the truffles from the refrigerator. Working one at a time, drop a truffle into the melted white chocolate. Use a fork to roll it around until completely coated. Lift it out with the fork, letting excess chocolate drip back into the bowl. Gently tap the fork on the edge of the bowl to encourage dripping. Transfer the coated truffle back to the parchment-lined sheet. Repeat with the remaining truffles. Work quickly—the truffles warm up fast and can start falling apart in the chocolate.
Step 6: Create the Spider Web Design
Here’s where the magic happens. While the white chocolate coating is still wet—and I mean immediately after dipping—squeeze a small dot of black decorating icing in the center of each truffle. Then, using a toothpick, drag the black icing outward in straight lines from the center to the edges, like spokes on a wheel. Space them evenly, about 6 to 8 spokes per truffle. Then, drag the toothpick in curved lines between the spokes to create the web effect. Start from the center and work outward. The toothpick pulls the black icing through the white chocolate, creating those beautiful web lines. If the chocolate starts setting before you finish, the lines won’t spread properly. So work in small batches of 3 to 4 truffles at a time.
Step 7: Let Them Set
Place the finished truffles back in the refrigerator for at least 20 minutes, or until the chocolate is completely firm. The coating should be matte and firm to the touch. Once set, they’re ready to serve.
Cooking Tips & Techniques
I’ve made these truffles more times than I can count, and I’ve learned a few things the hard way. Here’s what I wish I’d known from the start:
Temperature is everything. The truffle filling needs to be cold before dipping. If you skip the 30-minute chill, the balls will fall apart in the warm chocolate. I learned this when I got impatient and ended up with chocolate soup filled with Oreo chunks. Not pretty.
Don’t overheat the white chocolate. White chocolate is finicky. It seizes up when overheated or when exposed to even a drop of water. Use a completely dry bowl and spoon. If your chocolate gets too thick while you’re working, microwave it for 10 seconds and stir. Don’t add water to thin it out—use coconut oil.
Work in small batches. Don’t dip all the truffles at once and then try to do the spider web design. The chocolate sets quickly. Dip 3 or 4 truffles, do their webs, then dip the next batch. This keeps the chocolate wet enough for the toothpick to work its magic.
Use a toothpick, not a knife. I tried using the tip of a knife once. It made thick, messy lines. A toothpick creates those delicate, thin lines that look like actual spider silk. It’s the right tool for the job.
Chill between layers if needed. If you want to add sprinkles or candy eyes, do it right after dipping, before the chocolate sets. If you’re doing multiple decorations, let one layer set in the fridge before adding the next.
Don’t skip the salt. I know it seems unnecessary, but that tiny pinch of salt in the filling makes the chocolate flavor pop. It’s the difference between “good” and “can’t stop eating these.”
Variations & Adaptations
These truffles are endlessly customizable. Here are some of my favorite variations:
Dark Chocolate Spider Webs
Swap the white chocolate coating for dark or milk chocolate. The spider web design works the same way—just use white icing instead of black. The contrast is striking, and the dark chocolate balances the sweet filling beautifully.
Peanut Butter Oreo Truffles
Add ¼ cup creamy peanut butter to the cream cheese before mixing. It adds a nutty richness that pairs perfectly with the chocolate. Use milk chocolate coating for a Reese’s-inspired treat. My husband says these are his favorite version.
Mint Chocolate Truffles
Add ½ teaspoon peppermint extract to the cream cheese mixture. Use dark chocolate coating and white icing for the web. These taste like thin mints in truffle form. Perfect for Christmas parties too.
Gluten-Free Option
Use gluten-free chocolate sandwich cookies. Most brands work well, though the texture might be slightly crumblier. The recipe remains otherwise unchanged. I’ve tested this with Glutino brand cookies and they worked perfectly.
Vegan Adaptation
Use dairy-free cream cheese and vegan chocolate sandwich cookies. For the coating, use vegan white chocolate chips. The texture will be slightly softer, so chill the truffles longer before dipping. It’s not quite the same as the original, but it’s still delicious.
Spooky Variations
Instead of spider webs, try drizzling orange-tinted white chocolate over the truffles for a pumpkin theme. Or press a mini candy eyeball into the center of each truffle before the chocolate sets for a creepy-cute look. For a graveyard theme, crumble extra Oreo “dirt” on top.
Serving & Storage Suggestions
These truffles are best served cold, straight from the refrigerator. The filling stays firm and the chocolate coating snaps when you bite into it. Let them sit at room temperature for more than 15 minutes, and they’ll start to soften. Still delicious, but messier to eat.
Presentation ideas: Arrange them on a black platter for maximum Halloween drama. Add some fake spider webs around the edges of the plate. Or place each truffle in a mini paper cupcake liner for easy grabbing at parties. I’ve also stacked them on a cake stand for a more elegant look.
What to serve with them: These truffles pair beautifully with a hot cup of coffee or a cold glass of milk. For a Halloween dessert table, set them out alongside easy baked pumpkin donuts with cinnamon sugar coating and a perfect pumpkin roll with cream cheese filling for a full spread. The contrast between the rich truffles and spiced pumpkin treats is fantastic.
Storage instructions: Store the truffles in an airtight container in the refrigerator for up to 2 weeks. Layer them between sheets of parchment paper to prevent sticking. They actually taste better after a day or two—the flavors meld together and the texture becomes perfectly creamy.
Freezing instructions: These truffles freeze beautifully. Place them in a single layer on a baking sheet and freeze until solid, about 1 hour. Transfer to a freezer-safe container with parchment between layers. They’ll keep for up to 3 months. Thaw in the refrigerator overnight before serving. Don’t thaw at room temperature—they’ll get too soft.
Make-ahead tip: You can prepare the truffle balls (without coating) up to 3 days in advance. Keep them covered in the refrigerator. Dip and decorate the day you plan to serve them for the freshest look.
Nutritional Information & Benefits
Let’s be real—these are a treat, not a health food. But here’s what you should know:
Estimated nutrition per truffle (based on 24 truffles):
- Calories: 165
- Fat: 10g
- Carbohydrates: 18g
- Sugar: 13g
- Protein: 2g
- Sodium: 95mg
Dietary considerations: These truffles contain dairy, wheat, and soy. They are not vegan or gluten-free in their standard form, though adaptations are possible (see variations above). White chocolate contains cocoa butter, which has a small amount of antioxidants, but let’s not pretend these are anything but a delicious indulgence.
Healthier twist: If you want to lighten them up, use reduced-fat cream cheese and skip the white chocolate coating. Roll the truffle balls in cocoa powder or crushed nuts instead. The texture will be different—more like a truffle than a candy—but still satisfying.
Portion control tip: These are rich. One or two truffles is usually enough to satisfy a sweet craving. I’ve found that making them smaller (using a teaspoon instead of a tablespoon) helps with portion control without sacrificing the fun.
For a more balanced Halloween dessert spread, pair these with something lighter like easy apple nachos with peanut butter drizzle. The fresh fruit balances the richness of the truffles.
Conclusion
These Easy No-Bake Spider Web Oreo Truffles have become my Halloween signature. They’re the treat I bring to parties, the recipe friends text me asking for, and the project I pull out when I want to do something fun with my niece without spending hours in the kitchen.
What I love most about them is how they make people feel. Watch someone’s face when they see the spider web design for the first time. Then watch them take a bite. That moment of surprise followed by pure enjoyment? That’s why I keep making them.
Don’t be afraid to make these your own. Use different cookie flavors, experiment with the designs, or add your favorite toppings. The basic recipe is forgiving and adaptable. And if your spider webs don’t look perfect? That’s fine. They’ll still taste amazing, and honestly, imperfect webs look more authentic anyway.
I’d love to hear how yours turn out. Drop a comment below and let me know if you tried any fun variations. Did you use candy eyes? Add sprinkles? Make a peanut butter version? Share your creations—I read every comment and I’m always looking for new ideas to try.
Happy Halloween, and happy snacking!
Frequently Asked Questions
Can I use Double Stuf Oreos for this recipe?
You can, but the texture will be slightly different. Double Stuf Oreos have more creme filling, which makes the truffle mixture softer and stickier. If you use them, reduce the cream cheese by about 2 tablespoons to compensate. Regular Oreos give the most consistent results.
Why did my white chocolate seize up?
White chocolate seizes when it gets too hot or when it comes into contact with even a tiny amount of water. Make sure your bowl and utensils are completely dry. Microwave in short bursts and stir frequently. If it does seize, you can try adding a teaspoon of coconut oil and stirring vigorously, but often it’s better to start over with fresh chocolate.
How far in advance can I make these truffles?
You can make the truffle balls up to 3 days ahead and keep them in the refrigerator. Dip and decorate them up to 2 days before serving. Fully assembled truffles keep well in the fridge for up to 2 weeks. They also freeze beautifully for up to 3 months.
My spider web design didn’t turn out well. What went wrong?
Most likely, the white chocolate had already started setting by the time you added the web design. Work in small batches of 3 to 4 truffles at a time. Dip them, immediately add the black icing dot, and drag the toothpick through while the chocolate is still wet. If the chocolate firms up, the lines won’t spread properly.
Can I use milk chocolate instead of white chocolate?
Absolutely. Milk chocolate or dark chocolate both work beautifully. Use white icing for the spider web design instead of black for better contrast. The technique is exactly the same. Dark chocolate pairs especially well with the sweet Oreo filling if you prefer a less sugary treat.
Pin This Recipe!
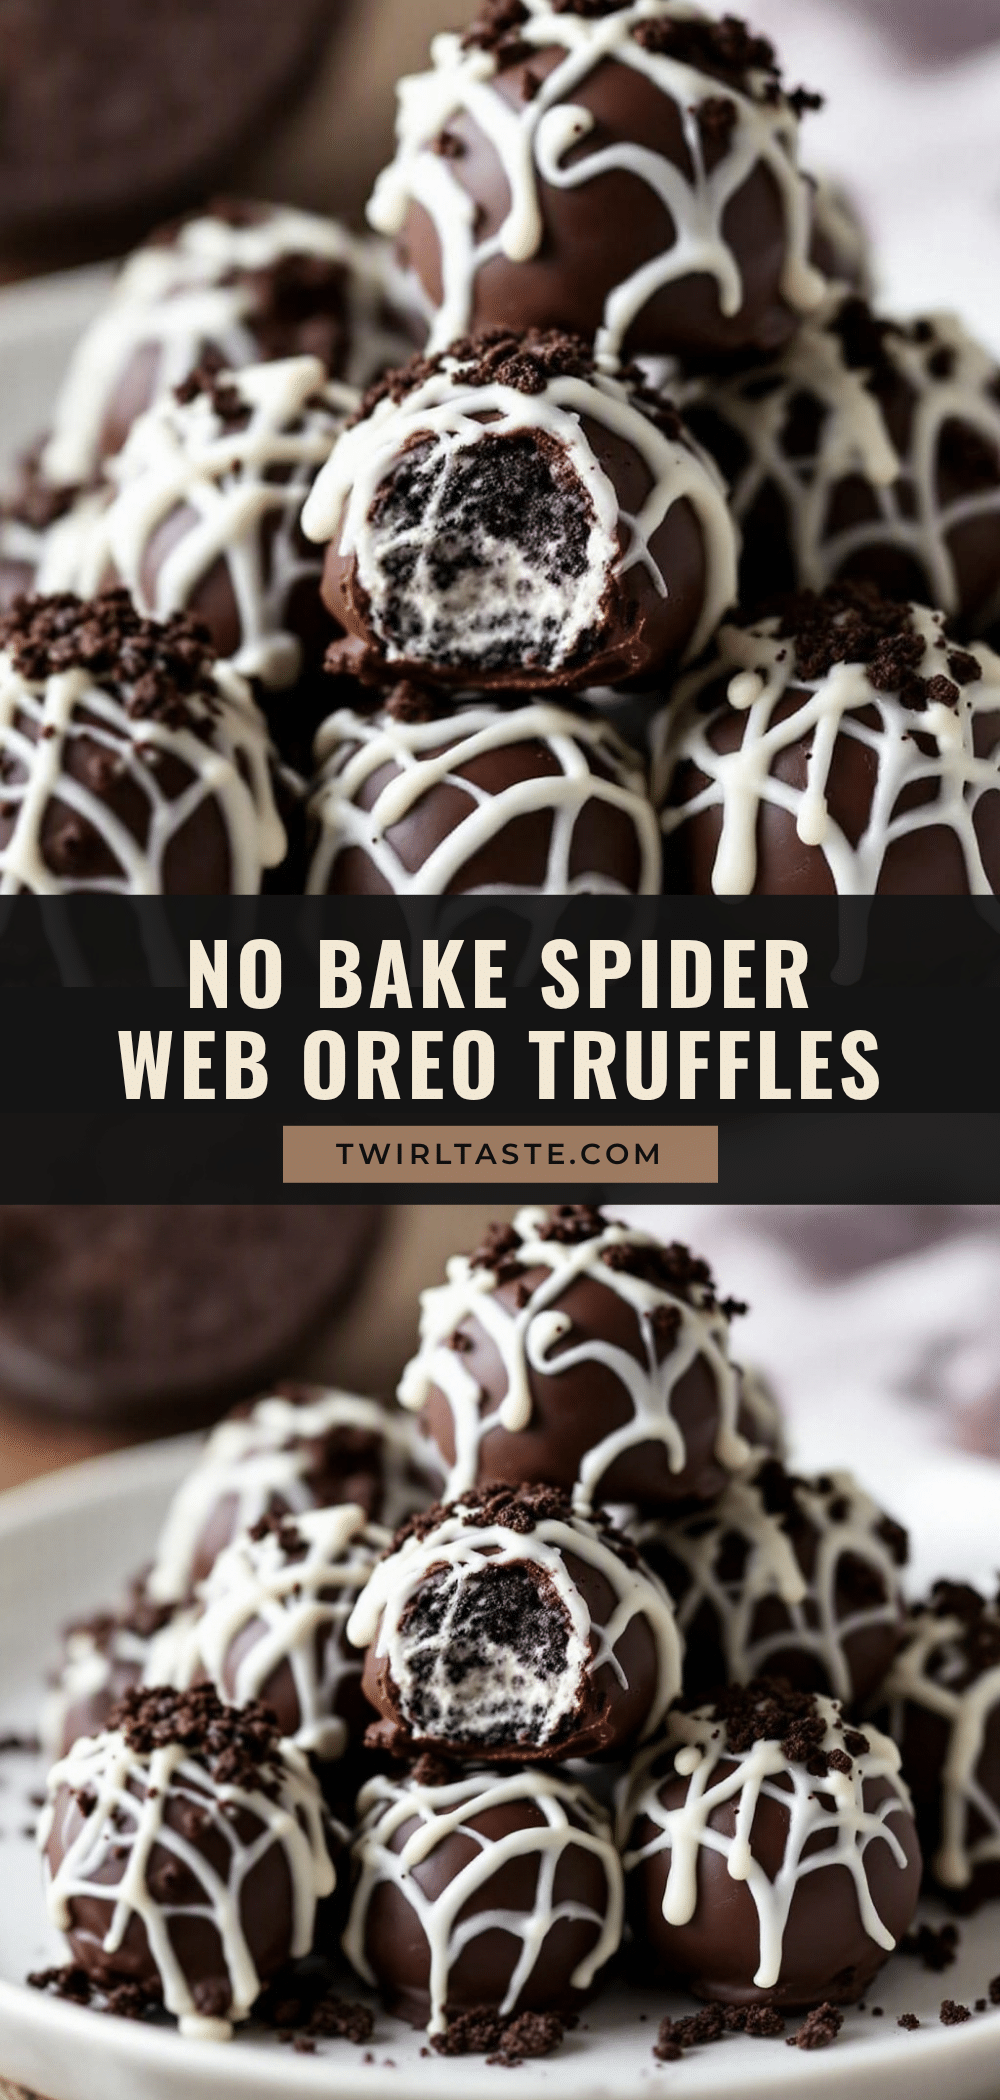
Easy No-Bake Spider Web Oreo Truffles: Perfect Halloween Treat

These Easy No-Bake Spider Web Oreo Truffles are a spooky yet simple Halloween treat that looks impressive but requires minimal effort. With a creamy Oreo filling, a smooth white chocolate coating, and a toothpick-created spider web design, they’re perfect for parties and guaranteed to disappear fast.
- Prep Time: 30 minutes
- Cook Time: 0 minutes
- Total Time: 1 hour 20 minutes (includes chilling time)
- Yield: 24 servings 1x
- Category: Dessert
- Cuisine: American
Ingredients
- 1 package (14.3 oz) regular Oreo cookies
- 8 oz cream cheese, softened
- Pinch of salt
- 12 oz white chocolate melting wafers or white chocolate chips
- 1 teaspoon coconut oil or vegetable shortening
- Black decorating icing (tube with fine tip)
- 1 toothpick
- Optional: edible glitter or luster dust, mini candy eyeballs, orange sprinkles
Instructions
- Crush the Oreos: Place the entire package of Oreos (creme filling and all) into a food processor. Pulse until you have fine, uniform crumbs resembling dark sand, about 30 seconds.
- Mix the truffle filling: In a large bowl, beat the softened cream cheese with an electric mixer until smooth and fluffy, about 2 minutes. Add the Oreo crumbs and pinch of salt. Mix on low speed until a cohesive dough forms. If too dry, add a teaspoon of milk; if too wet, add more crushed Oreos.
- Roll the truffles: Using a small cookie scoop or tablespoon, portion the mixture and roll into 1-inch balls. Place on a parchment-lined baking sheet. Refrigerate for at least 30 minutes.
- Melt the white chocolate: Place white chocolate melting wafers and coconut oil in a microwave-safe bowl. Microwave in 30-second intervals, stirring after each, until smooth and glossy (about 2 minutes total).
- Dip the truffles: Remove truffles from refrigerator. Working one at a time, drop a truffle into the melted white chocolate. Use a fork to coat completely, then lift out, letting excess drip off. Transfer back to parchment-lined sheet. Work in small batches of 3-4.
- Create the spider web design: While the white chocolate is still wet, squeeze a small dot of black decorating icing in the center of each truffle. Using a toothpick, drag the black icing outward in straight lines from center to edges (6-8 spokes). Then drag the toothpick in curved lines between spokes to create the web effect. Work immediately after dipping.
- Let them set: Place finished truffles back in the refrigerator for at least 20 minutes, or until chocolate is completely firm.
Notes
Temperature is key: chill truffle balls before dipping to prevent them from falling apart. Don’t overheat white chocolate; use short microwave bursts. Work in small batches for the spider web design. A toothpick creates delicate lines better than a knife. Don’t skip the pinch of salt—it enhances the chocolate flavor.
Nutrition
- Serving Size: 1 truffle
- Calories: 165
- Sugar: 13
- Sodium: 95
- Fat: 10
- Saturated Fat: 6
- Carbohydrates: 18
- Protein: 2
Keywords: Halloween treats, no-bake desserts, Oreo truffles, spider web truffles, easy Halloween recipes, white chocolate truffles, kid-friendly Halloween


