Love this? Save it for later!
Share the inspiration with your friends
Sunday morning, 6:47 AM, and the kitchen light is the only one on in the house. The coffee maker is gurgling, and I’m staring at a solitary, overly ripe banana on the counter and a can of pumpkin puree that seems to have migrated from the pantry to the prime real estate spot. I wasn’t planning on baking. But the air outside has that sharp, first-frost chill, and the only thing my brain wants is a slice of something dense, spiced, and studded with melty pockets of chocolate. Not a loaf. Something more celebratory, more substantial. A bundt cake. That’s how this Best Chocolate Chip Pumpkin Bundt Cake came to be—not from a grand plan, but from a quiet Sunday craving and a desperate need to use up what I had.
I’ve made a lot of pumpkin bread in my time. Honestly, I’ve probably made a version of it every fall since I could reach the counter. But I wanted something different. I wanted the crust to be a little more caramelized, the crumb a little tighter but still incredibly moist. I wanted the chocolate chips to feel intentional, not like an afterthought. So I started tinkering. I swapped my usual loaf pan for a bundt pan, adjusted the fat ratio, and added a few more chocolate chips than I’d normally admit to. The result? A cake that feels fancy enough for a holiday brunch but is easy enough for a random Tuesday. It’s the kind of cake that makes you close your eyes after the first bite. And I knew I had to write it down before I forgot exactly what I did.
This isn’t a fussy recipe. There’s no creaming butter and sugar for ten minutes, no sifting dry ingredients three times. It’s a one-bowl situation (well, technically two, but we don’t need to split hairs) that comes together in about fifteen minutes of active work. The hardest part is waiting for it to cool enough to glaze. But trust me, it’s worth the wait. This cake has become my go-to for fall gatherings, and I have a feeling it’s about to become yours, too.
Why You’ll Love This Recipe
Let me be real with you for a second. There are a million pumpkin cake recipes out there. I’ve tested a lot of them. Some are too dry. Some are too dense. Some are so spiced they taste more like a candle than a dessert. This one hits the sweet spot. It’s incredibly moist without being soggy, thanks to the perfect balance of pumpkin puree and oil. The chocolate chips add little pockets of richness that pair beautifully with the warm, cozy spices. And the texture? It’s tender, with a slightly crisp edge that only a bundt pan can give you.
- Simple Ingredients: You probably have most of these in your pantry right now. No weird extracts or hard-to-find flours.
- One-Bowl Batter: Okay, two bowls if you count the dry ingredients. But the cleanup is minimal, and I love a recipe that doesn’t require a sink full of dishes.
- Perfect for Any Occasion: It’s fancy enough for Thanksgiving dessert but simple enough for a weekend coffee cake. It’s a crowd-pleaser, plain and simple.
- Incredibly Moist: The pumpkin puree and oil keep this cake tender for days. It actually gets better on day two, if you can believe it.
- Chocolate and Pumpkin Together: It’s a classic combination for a reason. The semi-sweet chocolate chips balance the earthy sweetness of the pumpkin and the warmth of the spices.
I’ve tested this recipe four times to get the baking time and temperature just right. I wanted a cake that was fully cooked through without a gummy center, with a beautiful golden-brown crust. The first time, I underbaked it by five minutes. The second time, I overmixed the batter and got a tough, domed cake. This version? It’s the Goldilocks of pumpkin bundt cakes. It’s my best version, and I’m so excited to share it with you.
What Ingredients You Will Need
This recipe uses simple, wholesome ingredients that work together to create a deeply flavorful and tender cake. Most of these are pantry staples, especially if you’re a fall baking enthusiast like me. I’ve included a few notes on what to look for and potential substitutions.
- All-Purpose Flour: 2 ¾ cups (330g). Spoon and level it into your measuring cup. Don’t scoop directly from the bag, or you’ll end up with too much flour and a dry cake.
- Baking Soda: 1 ½ teaspoons. This is our main leavening agent. Make sure it’s fresh.
- Baking Powder: 1 teaspoon. Adds a little extra lift.
- Salt: 1 teaspoon. Don’t skip it. Salt enhances all the other flavors and balances the sweetness.
- Pumpkin Pie Spice: 2 teaspoons. You can use a store-bought blend or make your own with cinnamon, nutmeg, ginger, and cloves. I prefer using a good quality blend like Simply Organic for the best flavor.
- Cinnamon: 1 teaspoon. Because you can never have too much cinnamon in a pumpkin cake.
- Granulated Sugar: 1 ½ cups (300g). Adds sweetness and helps create a tender crumb.
- Brown Sugar: 1 cup, packed (200g). I use light brown sugar for moisture and a hint of molasses flavor. Dark brown sugar would also work beautifully if you want a deeper flavor.
- Vegetable Oil: 1 cup (240ml). Use a neutral-flavored oil like canola or avocado oil. This is what keeps the cake so incredibly moist.
- Large Eggs: 4, at room temperature. Room temperature eggs emulsify better into the batter, creating a smoother, more even crumb.
- Vanilla Extract: 2 teaspoons. Pure vanilla extract is always best, but imitation will work in a pinch.
- Pumpkin Puree: 1 (15-ounce) can (about 1 ¾ cups). Make sure you’re buying 100% pure pumpkin puree, not pumpkin pie filling. Libby’s is my go-to brand for consistent results.
- Semi-Sweet Chocolate Chips: 1 ½ cups (270g). I love the richness of semi-sweet against the spiced pumpkin. You could also use dark chocolate chips or even milk chocolate if you prefer a sweeter cake.
- For the Glaze (Optional but Recommended): 1 cup (120g) powdered sugar, 2-3 tablespoons milk or heavy cream, and ½ teaspoon vanilla extract.
If you’re looking for a gluten-free option, you can substitute the all-purpose flour with a good quality 1:1 gluten-free baking flour blend that contains xanthan gum. I’ve had great results with King Arthur Flour’s Measure for Measure blend. For a dairy-free glaze, simply use your favorite dairy-free milk.
Equipment Needed
You don’t need a lot of fancy equipment for this cake, which is one of the reasons I love it so much. Here’s what you’ll need:
- A 10 to 15-cup Bundt Pan: This is non-negotiable. A standard 10-cup pan works perfectly. Make sure it’s a good quality, non-stick pan. I’ve had my Nordic Ware Anniversary Bundt Pan for years, and it’s never let me down.
- Two Large Mixing Bowls: One for the dry ingredients, one for the wet. If you’re feeling brave, you can whisk the dry ingredients in a separate bowl and then add them to the wet.
- A Whisk and a Rubber Spatula: The whisk for the dry ingredients, the spatula for folding everything together. A sturdy wooden spoon works, too.
- A Hand Mixer or Stand Mixer: You can mix the wet ingredients by hand, but a mixer makes it much easier to get a smooth, lump-free batter. I use my KitchenAid stand mixer with the paddle attachment.
- A Cooling Rack: Essential for letting the cake cool completely before glazing. If you try to glaze a warm cake, the glaze will just melt right off.
- Measuring Cups and Spoons: For accuracy, especially with the flour and spices.
If you don’t have a bundt pan, you could theoretically bake this in two 9×5-inch loaf pans. Just reduce the baking time and start checking for doneness around 45 minutes. But honestly? The bundt pan gives you that beautiful, crackly crust and elegant shape that makes this cake feel special.
Preparation Method
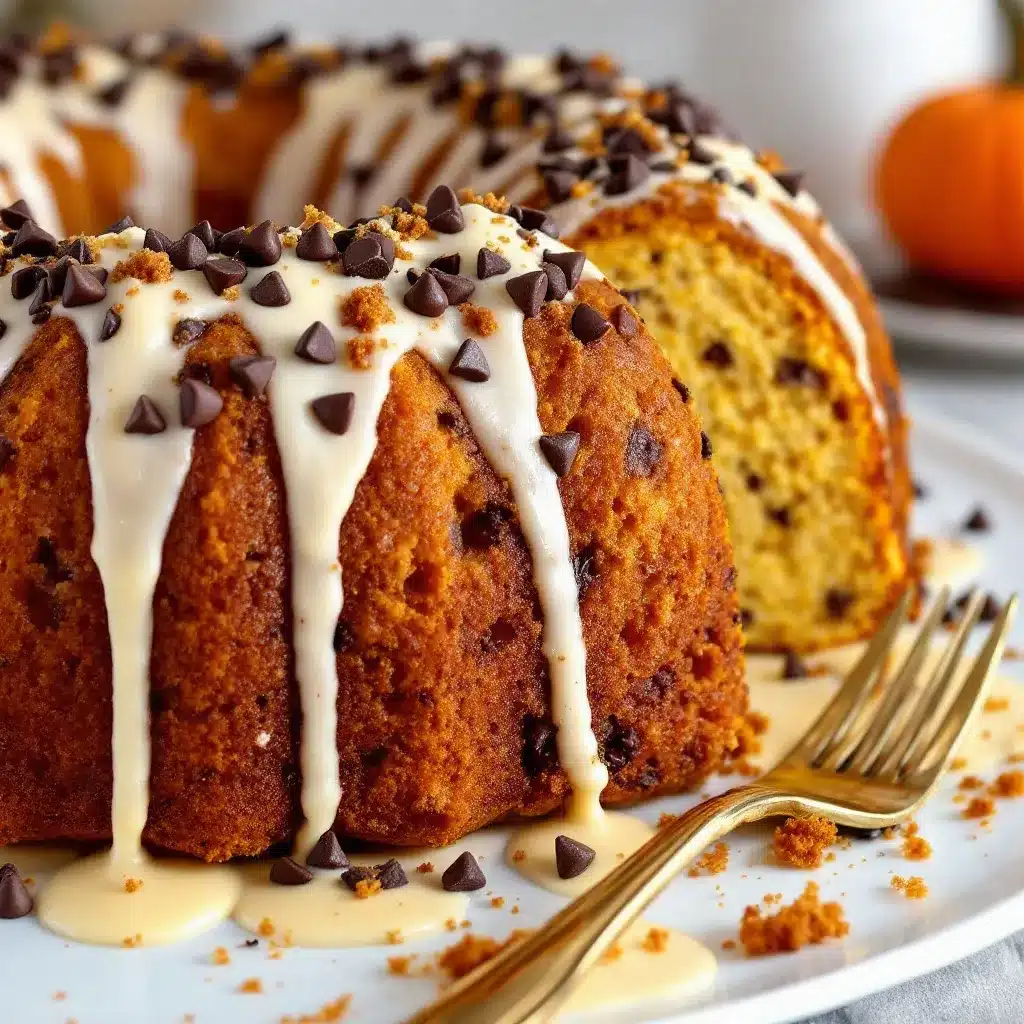
Alright, let’s get to the fun part. This recipe is straightforward, but I’ll walk you through each step so you get a perfect result every time.
- Preheat and Prep: First things first, preheat your oven to 350°F (175°C). Generously grease your bundt pan. I cannot stress this enough. Use a pastry brush to coat every nook and cranny with softened butter or a baking spray that contains flour (like Baker’s Joy). Don’t skip this step, or your beautiful cake will be stuck in the pan.
- Whisk the Dry Ingredients: In a large bowl, whisk together the all-purpose flour, baking soda, baking powder, salt, pumpkin pie spice, and cinnamon. This ensures the leaveners and spices are evenly distributed throughout the flour. Set this bowl aside.
- Mix the Wet Ingredients: In the bowl of your stand mixer (or a separate large bowl if using a hand mixer), combine the granulated sugar and brown sugar. Add the vegetable oil and beat on medium speed for about a minute until the mixture looks like wet sand and is well combined.
- Add the Eggs and Vanilla: Add the eggs one at a time, beating well after each addition. The batter should look smooth and slightly thickened. Then, add the vanilla extract and beat until combined.
- Add the Pumpkin: Add the entire can of pumpkin puree to the wet mixture. Beat on low speed until the pumpkin is fully incorporated. The batter will look a little curdled at this point—don’t panic! That’s totally normal.
- Combine Wet and Dry: With the mixer on low speed, gradually add the flour mixture to the wet ingredients. Mix only until the flour is just incorporated. A few streaks of flour are okay. Overmixing at this stage will develop the gluten and make your cake tough.
- Fold in the Chocolate Chips: Remove the bowl from the mixer. Using a rubber spatula, gently fold in the chocolate chips. Make sure they are evenly distributed throughout the batter. I like to reserve about a quarter cup of chips to sprinkle on top of the batter once it’s in the pan.
- Fill the Pan: Pour the thick batter into your prepared bundt pan. Use the spatula to spread it into an even layer. Give the pan a few gentle taps on the counter to release any air bubbles. Sprinkle the reserved chocolate chips on top of the batter (they’ll sink slightly as the cake bakes).
- Bake: Place the pan in the preheated oven and bake for 55 to 65 minutes. The cake is done when a long wooden skewer or cake tester inserted into the center comes out clean or with a few moist crumbs. The top should be a deep golden brown and spring back when lightly touched. My oven runs a little hot, so I always start checking at the 50-minute mark.
- Cool in the Pan: This is the hardest part. Place the hot bundt pan on a wire cooling rack and let it cool in the pan for exactly 15 minutes. Do not skip this step. The cake needs this time to set and firm up so it doesn’t fall apart when you invert it.
- Invert the Cake: After 15 minutes, place a cooling rack or a serving plate upside down over the top of the bundt pan. Using oven mitts, carefully flip the pan over. Gently lift the pan off. If any part of the cake sticks, let it sit for another 5 minutes and try again. Let the cake cool completely on the rack before glazing, about 1 to 2 hours.
- Make the Glaze: Once the cake is completely cool, make the glaze. In a small bowl, whisk together the powdered sugar, 2 tablespoons of milk or cream, and the vanilla extract. Whisk until smooth. If it’s too thick, add another tablespoon of milk. If it’s too thin, add a little more powdered sugar. You want a thick, pourable consistency.
- Glaze and Serve: Drizzle the glaze over the cooled cake. Let it set for about 15 minutes before slicing and serving.
Cooking Tips & Techniques
I’ve made this cake enough times to learn a few things the hard way. Here are my best tips to ensure your cake turns out perfectly.
- The Room Temperature Rule: I know it’s a pain, but make sure your eggs are at room temperature. Cold eggs can seize the batter and make it lumpy. To quickly bring eggs to room temperature, place them in a bowl of warm (not hot) water for 5-10 minutes.
- Don’t Overmix: This is the number one mistake I see. Once you add the flour, mix until it’s just combined. A few streaks of flour are fine. Overmixing develops gluten, which will give you a dense, tough, and potentially domed cake instead of a tender, even crumb.
- The Toothpick Test is King: Ovens are liars. They all run at slightly different temperatures. Don’t rely solely on the baking time. Start checking for doneness at 55 minutes. A wooden skewer inserted into the deepest part of the cake should come out clean or with a few moist crumbs. If it’s wet with batter, it needs more time.
- Patience with the Pan: Let the cake cool in the pan for exactly 15 minutes. If you try to turn it out too early, it will fall apart. If you let it cool completely in the pan, it will steam and become soggy on the bottom. I set a timer on my phone for this step because I will absolutely forget.
- My Biggest Fail: The very first time I made this, I used a brand new bundt pan and forgot to grease it. I thought “non-stick” meant I didn’t need to. I spent a solid thirty minutes trying to pry chunks of cake out of that pan. It was a disaster. Learn from my mistake. Grease your pan generously, even if it claims to be non-stick.
Variations & Adaptations
This recipe is a fantastic base, and it’s very forgiving. Here are a few ways to make it your own.
- Nutty Pumpkin Cake: Fold in ½ cup of toasted, chopped pecans or walnuts along with the chocolate chips. The crunch adds a wonderful textural contrast.
- Spice It Up: If you’re a spice lover, add a pinch of ground cloves, allspice, or even a tiny pinch of cardamom to the flour mixture. I once made this with a teaspoon of fresh grated ginger, and it was incredible.
- Chocolate Lover’s Dream: Swap the semi-sweet chips for dark chocolate chunks, or use a combination of milk and white chocolate chips. You could also add a tablespoon of cocoa powder to the dry ingredients for a double-chocolate version.
- Cream Cheese Swirl: For a truly decadent treat, swirl in a cream cheese filling. Beat together 4 ounces of softened cream cheese, ¼ cup of sugar, and 1 egg. Pour half the cake batter into the pan, dollop the cream cheese mixture on top, then cover with the remaining batter. Swirl gently with a knife.
- Gluten-Free Adaptation: As I mentioned, a good 1:1 gluten-free flour blend works perfectly here. I’ve tested this with King Arthur Flour’s Measure for Measure blend, and the texture was spot on—moist and tender, not at all gritty.
Serving & Storage Suggestions
This cake is a star on its own, but a few thoughtful accompaniments can make it even better.
- Serving: This cake is best served at room temperature. The glaze will be set, and the crumb will be perfectly tender. A slice is wonderful with a hot cup of coffee or a cold glass of milk. For an extra special treat, serve it with a dollop of lightly sweetened whipped cream or a scoop of vanilla bean ice cream.
- Presentation: For a beautiful presentation, dust the top of the glazed cake with a little extra cinnamon or a pinch of flaky sea salt before serving. The salt really makes the chocolate and pumpkin flavors pop.
- Storage: Store any leftover cake in an airtight container at room temperature for up to 3 days. The cake actually gets more moist and flavorful on day two as the spices have time to meld. I promise you, it’s even better the next morning for breakfast.
- Freezing: This cake freezes beautifully. You can freeze the unglazed cake, wrapped tightly in plastic wrap and then a layer of aluminum foil, for up to 3 months. To thaw, let it come to room temperature on the counter. Then, make the glaze fresh and drizzle it over the top. You can also freeze individual slices for a quick treat.
- Reheating: If you want a warm slice, pop it in the microwave for about 15-20 seconds. The chocolate chips will get all melty again. It’s pure comfort.
Nutritional Information & Benefits
Let’s be honest, this is a cake, not a health food. But it does have some redeeming qualities, mainly thanks to the star ingredient. The estimated nutritional information for one slice (based on 12 servings) is as follows:
- Calories: Approximately 480-520
- Fat: 24g
- Carbohydrates: 67g
- Protein: 6g
- Fiber: 3g
- Sugar: 42g
Pumpkin is a fantastic source of Vitamin A, which is great for eye health and your immune system. It’s also packed with fiber, which helps keep you feeling full. The spices, like cinnamon and ginger, have anti-inflammatory properties. And hey, dark chocolate is full of antioxidants. So while I wouldn’t call this a health food, it’s certainly not the worst thing you could eat. It’s a treat made with real, whole-food ingredients. For me, that’s a win. If you’re looking for a lighter option, you could try my healthy no-bake granola bars for a quick energy boost.
Conclusion
So there you have it. My Best Chocolate Chip Pumpkin Bundt Cake. It’s the cake I turn to when I want something that feels special but doesn’t require a day in the kitchen. It’s forgiving, it’s foolproof, and honestly, it’s just plain delicious. The combination of tender, spiced pumpkin cake with those melty pockets of chocolate is pure magic. I love how it makes my whole house smell like fall, and I love even more how happy it makes people when I bring it to a gathering.
I really hope you give this recipe a try. Don’t be afraid to make it your own—add some nuts, swap the chocolate chips for white chocolate, or go wild with the cream cheese swirl. The beauty of a good base recipe is that it’s a canvas for your own creativity. And if you do make it, I’d love to hear about it. Leave a comment below and let me know how it turned out. Did you make any changes? Share a photo on Pinterest and tag me! Your feedback and adaptations are what make this community so special. Happy baking, friends. I’m already thinking about making another one for next weekend.
Frequently Asked Questions
Can I use fresh pumpkin puree instead of canned?
Yes, you can! Just make sure you strain the fresh puree very well. Fresh pumpkin has a lot more water than canned, which can make your cake soggy. After you puree your roasted pumpkin, let it drain in a cheesecloth-lined sieve for at least an hour to remove excess moisture.
My cake stuck to the pan! What did I do wrong?
This is the most common bundt cake problem. The two main culprits are not greasing the pan well enough or not letting the cake cool long enough in the pan. Make sure you use a generous amount of butter or baking spray, getting into all the crevices. And stick to that 15-minute cooling time in the pan—it’s crucial for the cake to release cleanly.
Can I make this cake ahead of time?
Absolutely! This is a perfect make-ahead dessert. You can bake the cake a day or two in advance. Store it unglazed, tightly wrapped, at room temperature. Then, make the glaze and drizzle it over the cake on the day you plan to serve it. It actually tastes even better the next day!
Can I use a different type of chocolate chip?
Definitely. This recipe is very flexible. Milk chocolate chips will make for a sweeter cake. Dark chocolate chips (60-70% cacao) will provide a richer, more intense chocolate flavor that pairs beautifully with the pumpkin. White chocolate chips would also be delicious and add a creamy sweetness.
Can I turn this into cupcakes or a loaf?
Yes, you can! For cupcakes, fill lined muffin tins about ¾ full and bake at 350°F for 18-22 minutes. For a loaf, pour the batter into two greased 9×5-inch loaf pans and bake for 45-55 minutes, or until a toothpick inserted in the center comes out clean. The baking time will vary, so keep an eye on them. If you love a good pumpkin loaf, you should definitely check out my easy one-bowl chocolate chip pumpkin bread for a simpler, everyday version.
Pin This Recipe!
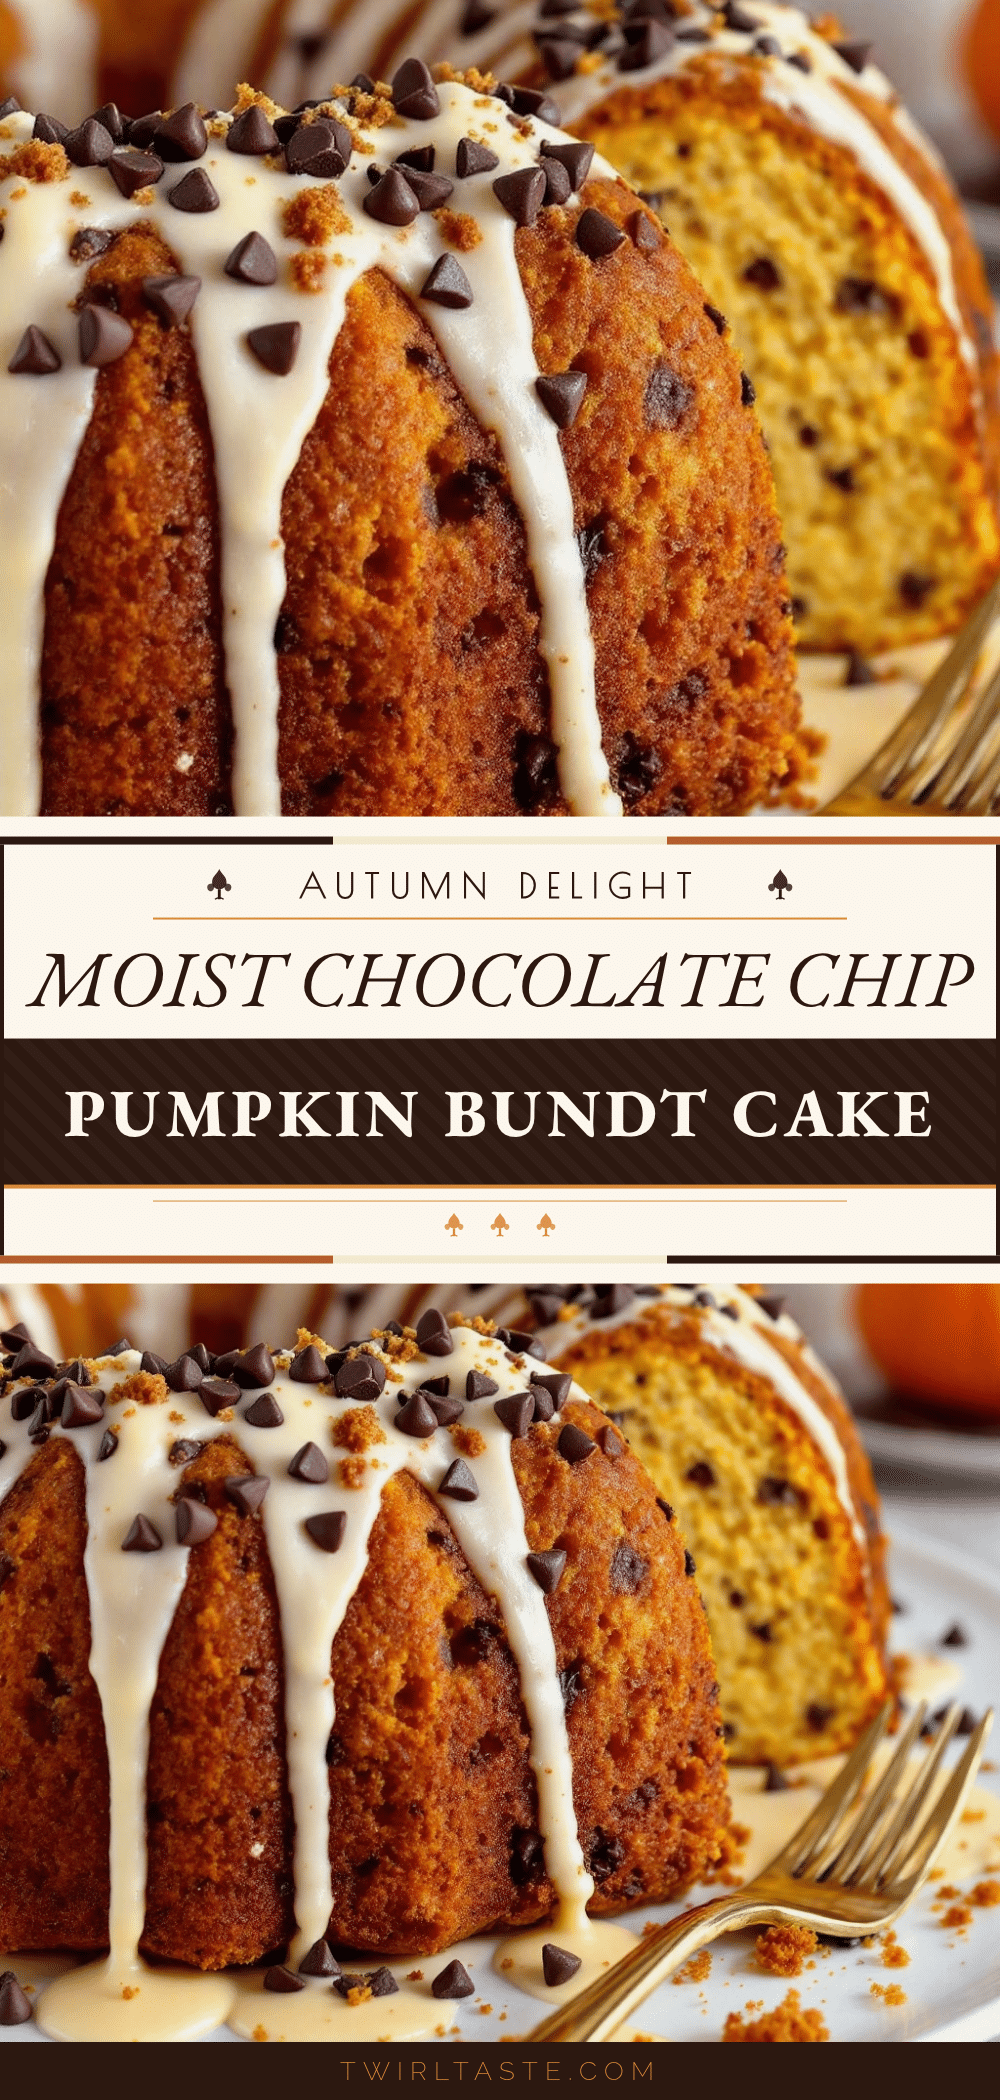
Best Chocolate Chip Pumpkin Bundt Cake
This incredibly moist and tender pumpkin bundt cake is studded with semi-sweet chocolate chips and spiced with warm fall flavors. It’s easy enough for a weekday treat but elegant enough for a holiday brunch.
- Prep Time: 15 minutes
- Cook Time: 55-65 minutes
- Total Time: 1 hour 10 minutes to 1 hour 20 minutes
- Yield: 12 servings 1x
- Category: Dessert
- Cuisine: American
Ingredients
- 2 ¾ cups (330g) all-purpose flour
- 1 ½ teaspoons baking soda
- 1 teaspoon baking powder
- 1 teaspoon salt
- 2 teaspoons pumpkin pie spice
- 1 teaspoon cinnamon
- 1 ½ cups (300g) granulated sugar
- 1 cup (200g) packed light brown sugar
- 1 cup (240ml) vegetable oil
- 4 large eggs, at room temperature
- 2 teaspoons vanilla extract
- 1 (15-ounce) can pumpkin puree (about 1 ¾ cups)
- 1 ½ cups (270g) semi-sweet chocolate chips
- For the glaze: 1 cup (120g) powdered sugar, 2-3 tablespoons milk or heavy cream, ½ teaspoon vanilla extract
Instructions
- Preheat oven to 350°F (175°C). Generously grease a 10 to 15-cup bundt pan with butter or baking spray.
- In a large bowl, whisk together flour, baking soda, baking powder, salt, pumpkin pie spice, and cinnamon. Set aside.
- In the bowl of a stand mixer (or a large bowl with a hand mixer), combine granulated sugar and brown sugar. Add vegetable oil and beat on medium speed for about 1 minute until well combined.
- Add eggs one at a time, beating well after each addition. Add vanilla extract and beat until combined.
- Add pumpkin puree and beat on low speed until fully incorporated. The batter may look curdled; that’s normal.
- With mixer on low speed, gradually add the flour mixture to the wet ingredients. Mix only until just incorporated; do not overmix.
- Remove bowl from mixer. Using a rubber spatula, gently fold in chocolate chips. Reserve about ¼ cup of chips to sprinkle on top of the batter in the pan.
- Pour batter into prepared bundt pan and spread evenly. Tap pan gently on the counter to release air bubbles. Sprinkle reserved chocolate chips on top.
- Bake for 55 to 65 minutes, until a wooden skewer inserted into the center comes out clean or with a few moist crumbs. Start checking at 50 minutes.
- Place hot bundt pan on a wire cooling rack and let cool in the pan for exactly 15 minutes.
- After 15 minutes, invert the cake onto a cooling rack or serving plate. Let cool completely, about 1 to 2 hours.
- For the glaze: In a small bowl, whisk together powdered sugar, 2 tablespoons milk or cream, and vanilla extract until smooth. Add more milk if too thick, or more powdered sugar if too thin.
- Drizzle glaze over cooled cake. Let set for about 15 minutes before slicing and serving.
Notes
Make sure eggs are at room temperature. Do not overmix the batter once flour is added. Grease the bundt pan generously, even if it’s non-stick. Let the cake cool in the pan for exactly 15 minutes before inverting. The cake can be stored at room temperature for up to 3 days or frozen (unglazed) for up to 3 months.
Nutrition
- Serving Size: 1 slice
- Calories: 480520
- Sugar: 42
- Sodium: 380
- Fat: 24
- Saturated Fat: 6
- Carbohydrates: 67
- Fiber: 3
- Protein: 6
Keywords: pumpkin bundt cake, chocolate chip pumpkin cake, fall dessert, pumpkin cake, bundt cake, easy pumpkin recipe


