Love this? Save it for later!
Share the inspiration with your friends
I assumed making spider cookies would require piping bags, royal icing mastery, and a steady hand that I simply do not possess. It took about twenty minutes for that assumption to shatter into a pile of melted chocolate and broken pretzel sticks. Honestly, I was staring at a bag of candy eyes and wondering if I had lost my mind when I decided to tackle this Halloween project. The internet promised delicate, eight-legged arachnids that looked professional enough to sell at a bake sale. What I got was a tray of adorable, slightly lopsided chocolate discs with legs that kept sliding off. But here is the thing about baking disasters—they often lead to the best family memories. My kids were laughing as they tried to glue the pretzel legs on with melted chocolate, calling them “spider monkeys” instead of spiders. That moment of chaos turned into something special. These cookies don’t need to be perfect to be delicious. In fact, the rustic, homemade look adds to the spooky charm. You know how some recipes feel like homework? This one feels like playtime. The rich chocolate base pairs perfectly with the salty crunch of the pretzels, creating a sweet and savory balance that keeps people coming back for more. It is a trick-or-treat favorite that is actually fun to make, even if you are not a professional decorator. The contrast between the expected difficulty and the actual simplicity is what makes this recipe stick. I realized I didn’t need to be an artist to make something scary and tasty. I just needed chocolate, pretzels, and a little bit of patience. Now, every year when October hits, this is the first thing I pull out of the pantry. It has become a quiet tradition in our house, a small ritual of sugar and spice before the real Halloween rush begins.
Why You’ll Love This Recipe
There is a specific kind of magic in baking that makes your kitchen smell like a bakery, and these chocolate spider cookies deliver that experience without the stress. I have tested dozens of Halloween cookie recipes over the years, from intricate sugar cookies to complex fruit tarts, but this one stands out for its sheer approachability. You do not need to be a piping expert or own a dozen specialized tools. The beauty of this recipe lies in its forgiving nature. If a leg is a little crooked, it just adds character. If the chocolate is slightly too dark, it just makes the spider look more menacing. Here is why these cookies have earned a permanent spot in my seasonal rotation:
- Quick & Easy: You can have these ready in under 30 minutes. This is perfect for last-minute trick-or-treaters or a quick Tuesday night treat when you need to lift everyone’s spirits.
- Simple Ingredients: No fancy grocery trips needed. You likely already have chocolate chips, pretzels, and candy eyes in your pantry. It is pantry-friendly baking at its finest.
- Perfect for Parties: These are the ultimate crowd-pleaser for Halloween gatherings, school bake sales, or spooky movie nights. They are small enough to eat in one or two bites but impressive enough to look great on a platter.
- Crowd-Pleaser: Kids love the visual of the spider, and adults love the taste. The combination of sweet chocolate and salty pretzel is a classic flavor profile that gets rave reviews from all ages.
- Unbelievably Delicious: The texture is next-level comfort food. The cookie base is soft and chewy, while the pretzel legs add a satisfying crunch. It is the kind of treat that makes you close your eyes after the first bite.
- Unique Twist: Unlike standard chocolate cookies, the addition of the pretzel legs transforms a simple snack into a thematic masterpiece. It is not just another chocolate chip cookie; it is an experience.
This recipe isn’t just good—it is the kind of dessert that sparks conversation. It is comfort food reimagined with a spooky twist, healthier in portion size, but with the same soul-soothing satisfaction. Perfect for impressing guests without stress, or turning a simple meal into something memorable.
What Ingredients You Will Need
This recipe uses simple, wholesome ingredients to deliver bold flavor and satisfying texture without the fuss. The key to a great spider cookie is balancing the sweetness of the chocolate with the saltiness of the pretzels. You do not need high-end gourmet ingredients, but quality matters. Using good chocolate chips will make a noticeable difference in the final taste. I recommend using a brand like Ghirardelli or Guittard for the semi-sweet chocolate, as they melt smoothly and have a rich cocoa flavor. For the pretzels, look for standard-sized pretzel rods or twists that are sturdy enough to hold their shape. Avoid the overly salty pretzels, as they can overpower the sweetness of the cookie. If you are making these for children with allergies, you can easily swap out the ingredients for allergy-friendly alternatives, which I will discuss later. The ingredients are grouped by their function in the recipe to help you organize your prep work efficiently.
- For the Cookie Base:
- Unsalted butter, softened (adds richness and moisture)
- Granulated sugar (for sweetness and slight crisp edges)
- Brown sugar, packed (for chewiness and depth of flavor)
- Large egg, room temperature (binds the ingredients together)
- Vanilla extract (pure vanilla is best for aroma)
- All-purpose flour (the structural foundation)
- Baking soda (helps the cookies spread and rise slightly)
- Salt (balances the sweetness)
- For the Chocolate Shell:
- Semi-sweet chocolate chips (forms the spider’s body)
- White chocolate chips (optional, for a contrasting look or drizzle)
- Coconut oil or shortening (helps thin the chocolate for easier dipping)
- For the Spider Details:
- Pretzel rods or sticks (the legs—look for uniform thickness)
- Candy eyes, small (for the spooky face)
- Chocolate sprinkles or black icing gel (optional, for extra detail)
If you do not have pretzel rods, pretzel twists work well too, though you may need to break them into smaller pieces. For a gluten-free option, you can use gluten-free flour and certified gluten-free pretzels. The substitution is straightforward and does not compromise the taste.
Equipment Needed
You do not need a lot of fancy gear to make these cookies, which is part of their appeal. A standard baking sheet lined with parchment paper is essential to prevent sticking and ensure even baking. I always recommend using parchment paper over silicone mats for cookies, as it allows for better airflow and easier cleanup. A mixing bowl, either glass or stainless steel, is needed for combining the dough. A wooden spoon or a hand mixer will work fine for creaming the butter and sugars. For melting the chocolate, a microwave-safe bowl is the easiest option, but you can also use a double boiler on the stove if you prefer more control. I personally use a microwave in 30-second intervals, stirring in between, to avoid burning the chocolate. You will also need a small pair of kitchen shears or scissors to trim the pretzel legs to the right length. Finally, a cooling rack is necessary to let the cookies set properly after assembly. If you do not have a cooling rack, you can use a clean wire whisk turned upside down. These tools are likely already in your kitchen, making this a budget-friendly baking project.
Preparation Method
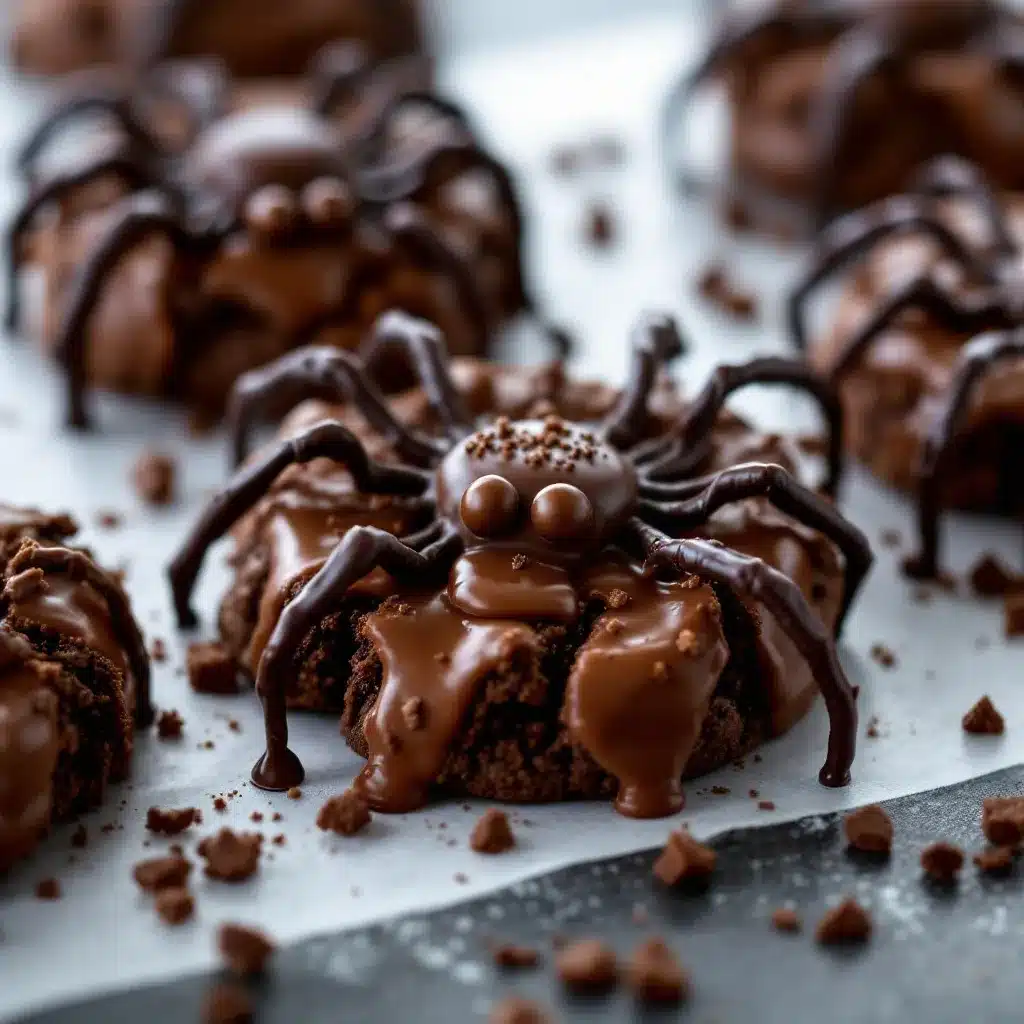
Making these cookies is a step-by-step process that is easy to follow if you stay organized. Here is how to bring your spider creations to life.
- Prepare the Dough: Preheat your oven to 350°F (175°C). Line two baking sheets with parchment paper. In a large mixing bowl, cream together the softened butter, granulated sugar, and brown sugar until the mixture is light and fluffy. This usually takes about 2-3 minutes. If you are using a hand mixer, this happens quickly. If you are mixing by hand, you might need a bit more elbow grease. The mixture should look pale and creamy.
- Add Wet Ingredients: Beat in the egg and vanilla extract until fully combined. Scrape down the sides of the bowl with a spatula to ensure everything is incorporated. You want a smooth, homogeneous mixture here. No streaks of egg or vanilla should remain.
- Mix Dry Ingredients: In a separate bowl, whisk together the flour, baking soda, and salt. Gradually add the dry ingredients to the wet mixture. Mix on low speed or stir by hand until just combined. Do not overmix, or the cookies will become tough. The dough should be soft but not sticky. If it is too sticky, add a teaspoon of flour. If it is too dry, add a teaspoon of milk.
- Chill the Dough: This step is optional but recommended. Cover the dough and refrigerate it for 15-20 minutes. Chilling helps the cookies hold their shape and prevents them from spreading too thin. While the dough chills, you can start prepping your pretzel legs. Break the pretzel rods into quarters or halves, depending on the size of your cookies. You want eight pieces for each spider.
- Scoop and Bake: Scoop tablespoon-sized portions of dough onto the prepared baking sheets. Space them about two inches apart. Bake for 8-10 minutes, or until the edges are lightly golden. The centers may still look slightly soft, but they will firm up as they cool. Do not overbake, as you want them to remain chewy.
- Cool Completely: Let the cookies cool on the baking sheet for 5 minutes, then transfer them to a wire rack to cool completely. This is crucial. If you try to assemble the spiders while the cookies are warm, the chocolate will melt and slide off. Patience is key here.
- Melt the Chocolate: Once the cookies are cool, melt the semi-sweet chocolate chips in a microwave-safe bowl. Heat in 30-second intervals, stirring in between, until smooth. If the chocolate is too thick, add a teaspoon of coconut oil or shortening to thin it out. This makes dipping easier.
- Assemble the Spiders: Dip the top half of each cookie into the melted chocolate. You want a smooth, even coating. Place the cookie chocolate-side up on a sheet of parchment paper. While the chocolate is still wet, press the pretzel legs into the chocolate. You need four legs on each side. If the legs do not stick, add a tiny dab of chocolate to the end of the pretzel before attaching it. This acts as glue.
- Add the Eyes: Place two candy eyes on the chocolate-covered part of the cookie, near the front. Press gently to secure them. If you are using an icing gel, you can draw a small mouth or fangs for extra spooky effect. Let the cookies sit at room temperature until the chocolate sets completely, which takes about 15-20 minutes. You can speed this up by placing them in the refrigerator for 5 minutes.
How do I prevent the pretzel legs from sliding off?
The most common issue is using cookies that are not cool enough. Ensure the cookies are completely cool before dipping. Also, make sure the chocolate is not too hot or too thin. It should be thick enough to hold the pretzel in place. If needed, use a toothpick to apply a small amount of chocolate to the end of the pretzel before attaching it to the cookie.
Can I make the dough ahead of time?
Yes, you can make the dough up to 3 days in advance. Store it in an airtight container in the refrigerator. You can also freeze the dough balls for up to 3 months. Just thaw them in the refrigerator overnight before baking.
Cooking Tips & Techniques
Baking cookies might seem simple, but there are a few nuances that can make the difference between a good cookie and a great one. First, butter temperature is critical. If your butter is too soft, the cookies will spread too much. If it is too hard, they will be dense. Aim for butter that yields slightly to pressure but still holds its shape. Another tip is to measure your flour correctly. Scooping flour directly from the bag can pack it down, leading to dry cookies. Instead, spoon the flour into your measuring cup and level it off with a knife. This ensures the correct ratio of flour to fat. When melting chocolate, low and slow is the way to go. High heat can cause chocolate to seize, turning it into a grainy, unusable mess. If your chocolate does seize, you can sometimes rescue it by adding a tablespoon of hot water and stirring vigorously, but prevention is better than cure. I once ruined a batch of chocolate by overheating it, and it took me an hour to clean the bowl. Do not make my mistake. Also, when attaching the pretzel legs, work quickly. The chocolate sets fast, especially if your kitchen is cool. Have all your pretzels pre-broken and ready to go before you start dipping. This workflow efficiency prevents the chocolate from setting before you can attach all eight legs. Finally, taste test your pretzels. Some brands are saltier than others. If they are very salty, you might want to reduce the salt in the cookie dough slightly. It is all about balance.
Variations & Adaptations
While the classic chocolate spider is a favorite, there are many ways to customize this recipe to suit different tastes and dietary needs. Here are a few variations I have tried with success.
- White Chocolate Spiders: Substitute the semi-sweet chocolate with white chocolate. This creates a striking contrast with the dark pretzel legs and red candy eyes. It is less sweet and has a creamy, vanilla flavor that pairs well with the saltiness of the pretzels.
- Green Monster Spiders: Add a few drops of green food coloring to the white chocolate for a monster-themed twist. Use green candy eyes and maybe some sprinkles for a fun, non-spooky version for younger kids.
- Gluten-Free Option: Use a 1:1 gluten-free flour blend in the cookie dough. Ensure your pretzels are certified gluten-free, as standard pretzels contain wheat. Most gluten-free pretzels are made from rice flour or potato starch and work just as well.
- Vegan Adaptation: Use dairy-free chocolate chips and vegan butter. For the pretzels, check the label, as some contain milk solids. There are many vegan pretzel brands available. This variation is surprisingly rich and satisfying.
- Mini Spiders: Make smaller cookie dough balls for bite-sized treats. These are perfect for party favors or for children who prefer smaller portions. Adjust the baking time to 6-7 minutes.
I personally love adding a pinch of sea salt on top of the chocolate before it sets. The salt flakes enhance the chocolate flavor and add a nice visual texture. It is a small detail that makes a big difference.
Serving & Storage Suggestions
These cookies are best served at room temperature, where the chocolate is set but the cookie remains soft. Arrange them on a platter with a dark background, like a black slate or a dark blue plate, to make the colors pop. They are visually striking and perfect for Halloween parties. For storage, keep the cookies in an airtight container at room temperature for up to 5 days. If your kitchen is humid, store them in the refrigerator to prevent the chocolate from sweating. If you need to freeze them, place them in a single layer on a baking sheet and freeze until solid, then transfer to a freezer bag. They will keep for up to 3 months. To serve, let them thaw at room temperature for 30 minutes. The flavors develop over time, so these cookies actually taste better on the second day as the moisture from the dough fully distributes. They are also great paired with a glass of cold milk or a cup of hot coffee. The contrast of temperatures and flavors is delightful.
Nutritional Information & Benefits
While these are definitely a treat, they offer some balance through their ingredients. The chocolate provides antioxidants, particularly if you use semi-sweet or dark chocolate. The pretzels add a crunch and a bit of sodium, which can be satisfying after a day of sugar. Each cookie contains approximately 150-180 calories, depending on the size. They are not low-carb or keto-friendly due to the sugar and flour, but they can be enjoyed in moderation. For those with nut allergies, this recipe is generally safe, but always check your chocolate and pretzel labels for cross-contamination warnings. I try to keep my baking balanced, so I often serve these alongside fresh fruit or yogurt to add some fiber and protein to the meal. It is about enjoying the treat while being mindful of overall nutrition.
Conclusion
These chocolate spider cookies are more than just a Halloween treat; they are a fun, easy, and delicious way to celebrate the season. The combination of sweet chocolate and salty pretzels is irresistible, and the spooky design is sure to impress. I hope you enjoy making these as much as I do. Feel free to experiment with different colors and decorations to make them your own. Don’t forget to share your creations on social media and tag me! I love seeing your spooky baking adventures. If you have any questions or tips, leave a comment below. Happy baking, and happy Halloween!
FAQs
Can I use pretzel twists instead of rods?
Yes, pretzel twists work well. You may need to break them into smaller, uniform pieces to create eight legs. It might take a bit more creativity, but the result is the same.
How long does the chocolate take to set?
At room temperature, it takes about 15-20 minutes. If you place them in the refrigerator, it can take as little as 5 minutes.
Can I make the dough without chilling?
Yes, you can bake the dough immediately, but the cookies may spread more. Chilling helps them hold their shape better, so I recommend it if you have time.
What if I don’t have candy eyes?
You can use small pieces of white chocolate or even white frosting to create eyes. Draw pupils with black icing or a black marker. The effect is similar and just as cute.
Are these cookies suitable for school parties?
Yes, they are generally safe for school parties, but always check with the school administration regarding nut and dairy policies. Most schools allow these types of cookies.
Pin This Recipe!
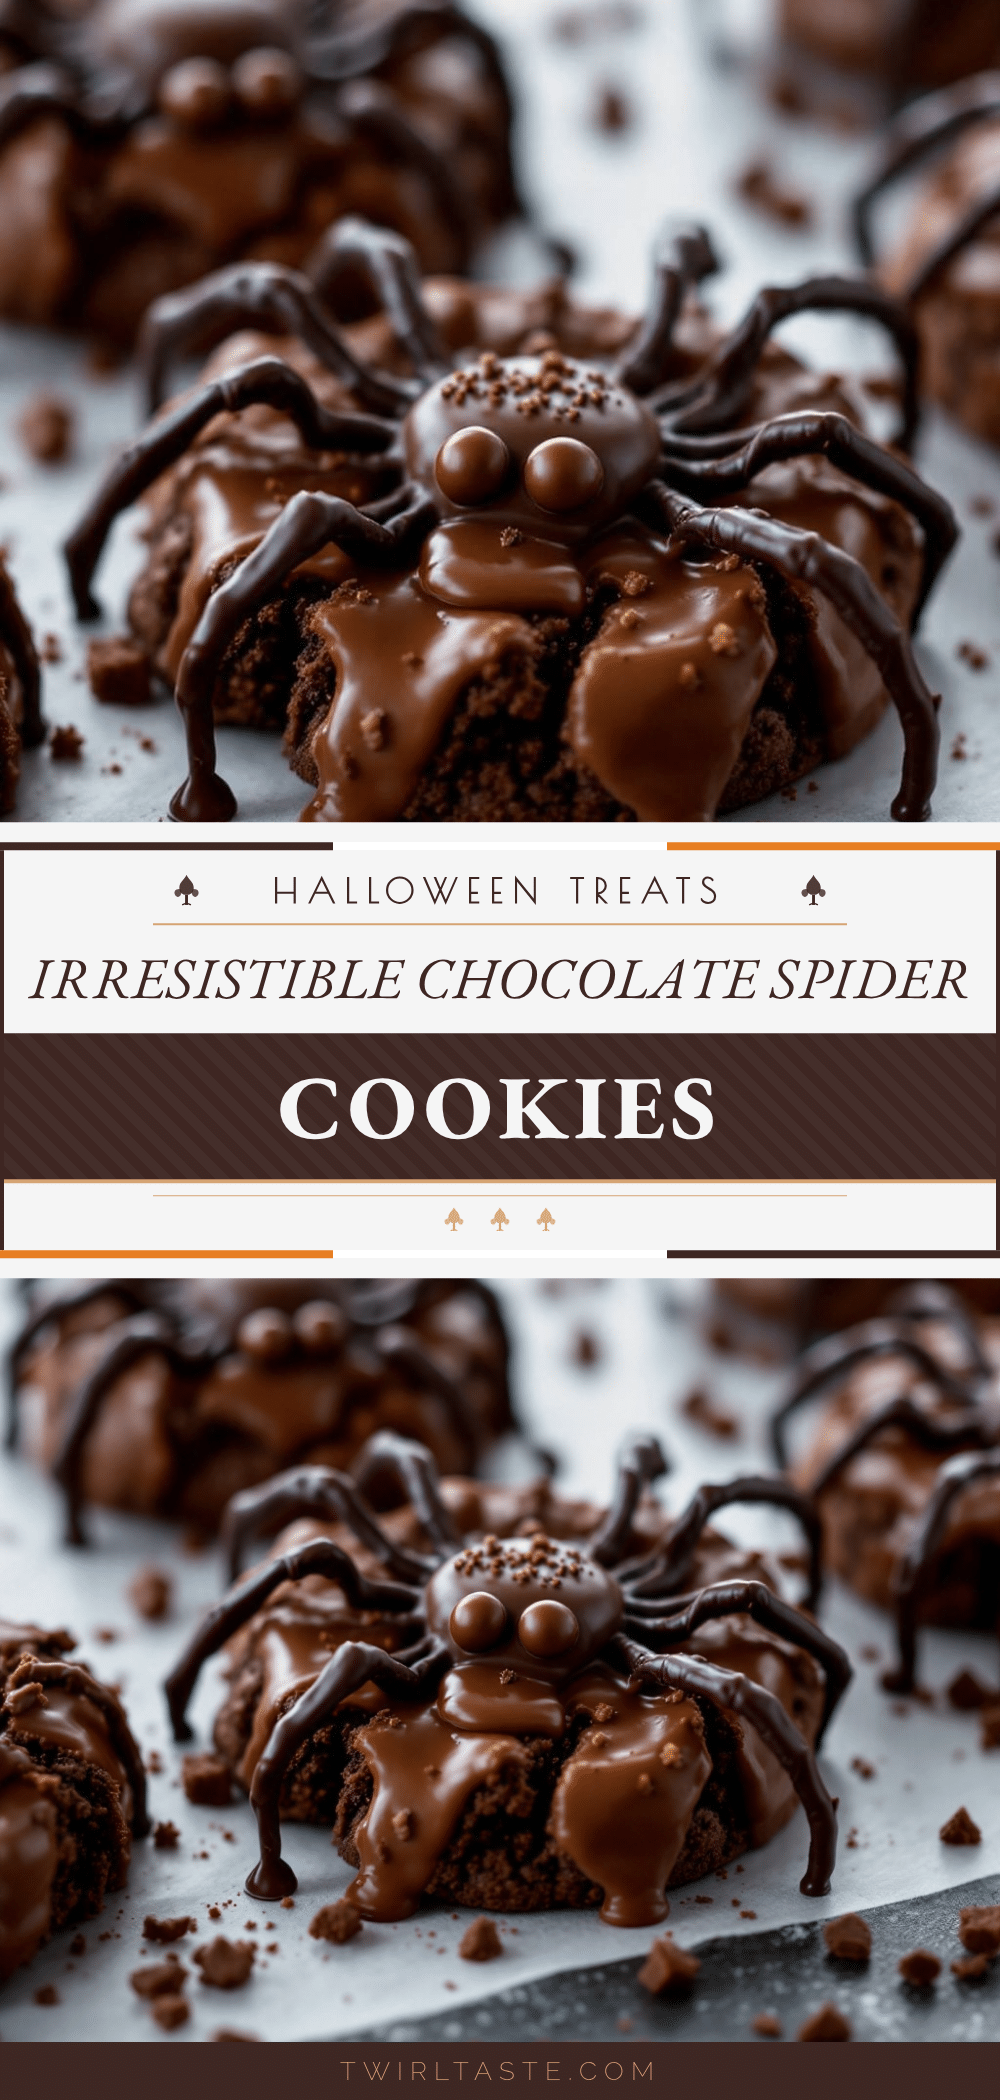
Chocolate Spider Cookies: Easy Halloween Recipe
These adorable, slightly rustic chocolate spider cookies combine a soft, chewy cookie base with salty pretzel legs and candy eyes. They are easy to make, require no special piping skills, and are perfect for Halloween parties or family baking sessions.
- Prep Time: 20 minutes
- Cook Time: 10 minutes
- Total Time: 30 minutes
- Yield: Approximately 12-15 cookies
- Category: Dessert
- Cuisine: American
Ingredients
- Unsalted butter, softened
- Granulated sugar
- Brown sugar, packed
- Large egg, room temperature
- Vanilla extract
- All-purpose flour
- Baking soda
- Salt
- Semi-sweet chocolate chips
- White chocolate chips (optional)
- Coconut oil or shortening
- Pretzel rods or sticks
- Candy eyes, small
- Chocolate sprinkles or black icing gel (optional)
Instructions
- Preheat oven to 350°F (175°C) and line two baking sheets with parchment paper.
- In a large mixing bowl, cream together softened butter, granulated sugar, and brown sugar until light and fluffy (2-3 minutes).
- Beat in the egg and vanilla extract until fully combined and smooth.
- In a separate bowl, whisk together flour, baking soda, and salt. Gradually add dry ingredients to the wet mixture and mix until just combined.
- Cover the dough and refrigerate for 15-20 minutes (optional but recommended).
- Scoop tablespoon-sized portions of dough onto baking sheets, spacing them 2 inches apart.
- Bake for 8-10 minutes until edges are lightly golden. Centers may look soft but will firm up as they cool.
- Let cookies cool on the baking sheet for 5 minutes, then transfer to a wire rack to cool completely.
- Melt semi-sweet chocolate chips in a microwave-safe bowl in 30-second intervals, stirring until smooth. Add coconut oil if needed to thin.
- Dip the top half of each cooled cookie into the melted chocolate and place chocolate-side up on parchment paper.
- While chocolate is wet, press four pretzel legs into each side of the cookie to create eight legs.
- Place two candy eyes on the chocolate-covered part of the cookie near the front.
- Let cookies sit at room temperature for 15-20 minutes until chocolate sets, or refrigerate for 5 minutes to speed up the process.
Notes
Ensure cookies are completely cool before dipping to prevent chocolate from sliding off. If pretzel legs do not stick, use a tiny dab of chocolate as glue. For gluten-free options, use gluten-free flour and certified gluten-free pretzels. For vegan options, use dairy-free chocolate and vegan butter.
Nutrition
- Serving Size: 1 cookie
- Calories: 165
- Sugar: 14
- Sodium: 120
- Fat: 9
- Saturated Fat: 5
- Carbohydrates: 20
- Fiber: 1
- Protein: 2
Keywords: Halloween cookies, spider cookies, chocolate pretzel cookies, easy Halloween treats, kid-friendly baking, spooky snacks, fall recipes


