Love this? Save it for later!
Share the inspiration with your friends
Let’s just get the ugly part out of the way. I actually ruined the gingersnap crust before the batter was even mixed. It sounds ridiculous, but I was so eager to get those mini pumpkin cheesecakes into the oven that I left the buttered crumbs on the stovetop burner for a second too long while I wrestled with a stubborn egg. The smell hit me first—not the warm, cozy scent of cinnamon and nutmeg, but the sharp, acrid tang of burnt sugar.
I stood there in my kitchen, staring at the blackened mess in the pan, feeling pretty defeated. It was one of those moments where you question if you have any talent in the kitchen at all. I wanted to scrape it all down the sink and order takeout instead. But honestly, I couldn’t let a little burnt cookie crumbs stop me. I scraped out the pan, started over with fresh ingredients, and this time, I kept a closer eye on the heat.
That failure taught me something important about baking these little gems. You have to respect the crust. It’s the foundation of the entire dessert, and if you rush it, everything else falls apart. The second batch came out golden and crisp, with that perfect snap when you press your finger into it. The creamy pumpkin filling set beautifully on top, smooth and vibrant orange against the dark, spiced base.
I remember taking the first bite of that second batch. It was quiet, just me and the cooling rack, but the flavor was loud. The tang of the cream cheese balanced the sweet pumpkin, and the gingersnap crust added that spicy kick that makes fall desserts feel like a hug. I knew right then that I had finally nailed it. It wasn’t just a recipe; it was a lesson in patience that paid off in the most delicious way possible.
Why You’ll Love This Recipe for Your Fall Gatherings
There is a specific kind of magic that happens when you combine the richness of cream cheese with the earthy sweetness of pumpkin. These mini pumpkin cheesecakes are not just another dessert to add to your list; they are the kind of treat that turns a simple Tuesday evening into a little celebration. I’ve tested this recipe dozens of times, tweaking the spice ratios and butter levels, and I can tell you with confidence that this version hits every single mark.
- Quick & Easy Prep: Making individual portions means you spend less time worrying about a giant cake cracking in the center. You can mix this up in about 20 minutes, which is perfect for busy weeknights or when you need a last-minute dessert for guests.
- Simple Ingredients: You probably have most of this in your pantry right now. Cream cheese, pumpkin puree, spices, and gingersnaps are staples that most home cooks keep on hand. No fancy grocery trips needed for this one.
- Perfect for Fall Occasions: Whether it’s a Halloween party, Thanksgiving brunch, or just a cozy movie night, these fit right in. They look elegant enough for a dinner party but are sturdy enough to handle being passed around at a casual get-together.
- Crowd-Pleaser Factor: Kids love the bite-sized size, and adults appreciate the sophisticated spice profile. They are always a hit, even with people who usually skip dessert.
- Unbelievably Delicious Texture: The contrast between the crunchy, buttery crust and the silky, dense filling is next-level comfort food. It’s the kind of texture combo that makes you close your eyes after the first bite.
What makes this recipe different from the rest is the balance. A lot of pumpkin cheesecake recipes can be too sweet or too dense. This one uses a specific ratio of cream cheese to pumpkin that keeps it light yet substantial. The gingersnap crust isn’t just a base; it adds a spicy warmth that complements the pumpkin without overpowering it. It’s comfort food reimagined—simpler, faster, but with the same soul-soothing satisfaction as a slice of pie.
What Ingredients You Will Need
This recipe relies on simple, high-quality ingredients to deliver bold flavor and satisfying texture without the fuss. The key to a great cheesecake is not using too many ingredients, but using the right ones. Here is what you need to gather before you start mixing.
For the Gingersnap Crust
- Gingersnap Cookies: About 1.5 cups of crumbs. I recommend using store-bought gingersnaps like Keebler or a generic brand that is known for being spicy. Avoid the soft, cake-like ones; you need the hard, crisp variety for the best texture. (adds a spicy kick)
- Unsalted Butter: 4 tablespoons, melted. Using unsalted butter allows you to control the saltiness, though you can use salted if that’s all you have. (provides richness)
- Granulated Sugar: 1 tablespoon. This helps the crust hold together and adds a slight caramelization. (optional but recommended)
- Pinch of Salt: Just a small pinch to balance the sweetness. (enhances flavor)
For the Creamy Pumpkin Filling
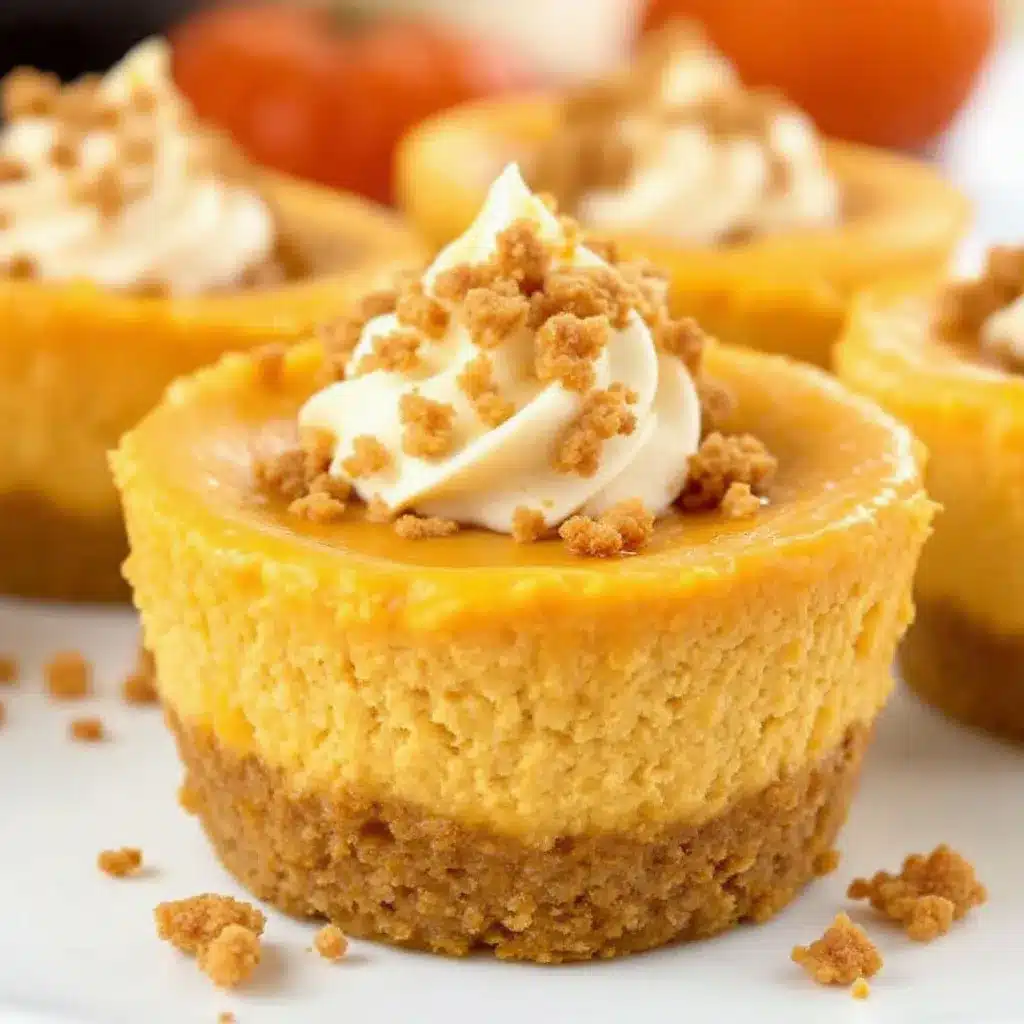
- Full-Fat Cream Cheese: 16 ounces (450g), softened to room temperature. This is non-negotiable. Low-fat cream cheese will make the filling grainy and watery. I prefer the block style over the tub kind for the smoothest result. (creates the creamy base)
- Pumpkin Puree: 1 cup (240g). Make sure you use 100% pure pumpkin puree, not pumpkin pie filling. Pie filling has added sugar and spices, which will throw off the balance of this recipe. (provides the main flavor)
- Granulated Sugar: ¾ cup (150g). You can reduce this to ½ cup if you prefer a less sweet, more tangy cheesecake. (sweetens the mix)
- Large Eggs: 2 large eggs, room temperature. Cold eggs can cause the mixture to curdle when mixed with the cream cheese. (binds the filling)
- Egg Yolk: 1 extra large egg yolk. This adds extra richness and helps create that dense, custard-like texture. (adds richness)
- Vanilla Extract: 1 teaspoon. Use pure vanilla extract for the best flavor. (adds depth)
- Pumpkin Pie Spice: 1 tablespoon. If you don’t have this blend, you can make your own with cinnamon, ginger, nutmeg, and cloves. (adds fall warmth)
- Ginger Powder: ½ teaspoon. This enhances the gingersnap flavor in the crust. (boosts spice)
- Cinnamon: ½ teaspoon. (classic spice)
- Nutmeg: ¼ teaspoon. (adds warmth)
- Cloves: ¼ teaspoon. (adds depth)
For the Topping (Optional)
- Whipped Cream: Homemade or store-bought. (adds lightness)
- Extra Gingersnap Crumbs: For garnish. (adds crunch)
Equipment Needed
You don’t need a lot of fancy gadgets to make these, but having the right tools will save you a lot of headache. The most important piece of equipment is a standard 12-cup muffin tin. Make sure it is clean and dry. I usually use a non-stick muffin tin, which helps with removal later.
You will also need cupcake liners. I recommend paper liners with a sturdy base so they don’t collapse under the weight of the cheesecake. If you can’t find standard liners, you can cut circles of parchment paper, but liners are easier.
An electric hand mixer or a stand mixer is helpful for beating the cream cheese until it is smooth. Doing this by hand is possible, but it takes a lot of arm strength and you might end up with lumps. A wooden spoon is good for folding in the pumpkin puree gently.
Finally, have a cooling rack ready. Cheesecakes are sensitive to temperature changes, so they need to cool gradually. If you don’t have a rack, a clean counter space works, but a rack allows air to circulate underneath, preventing condensation.
Preparation Method
Getting these mini pumpkin cheesecakes right is all about technique. Let’s walk through the process step-by-step so you can avoid common pitfalls.
- Preheat and Prep: Preheat your oven to 325°F (165°C). This is a lower temperature than many cakes, which helps the cheesecakes cook evenly without cracking. Line your 12-cup muffin tin with cupcake liners. If your liners are flimsy, you might want to place them in a second empty muffin tin for extra support.
- Make the Crust: In a medium bowl, combine the gingersnap crumbs, melted butter, sugar, and a pinch of salt. Mix until it looks like wet sand. You should be able to squeeze a handful and have it hold its shape. If it’s too dry, add a teaspoon more melted butter. If it’s too wet, add a tablespoon more crumbs.
- Press the Crusts: Divide the crumb mixture evenly among the 12 cupcake liners. Use the bottom of a measuring cup or a small glass to press the crumbs down firmly. Make sure to push them up the sides a little bit, about an inch or so. This creates a nice container for the filling. Set the tin aside.
- Beat the Cream Cheese: In a large bowl, beat the softened cream cheese with an electric mixer on medium speed until it is completely smooth and creamy. This should take about 2-3 minutes. Scrape down the sides of the bowl with a spatula to ensure there are no lumps. Lumps in the cream cheese will show up in the final product, so don’t skip this step.
- Add Sugar and Spices: Add the ¾ cup of granulated sugar, pumpkin pie spice, ginger powder, cinnamon, nutmeg, and cloves to the cream cheese. Beat on low speed until combined. Be careful not to overmix here, as you don’t want to incorporate too much air, which can cause cracking.
- Incorporate Eggs: Add the eggs and the extra egg yolk one at a time. Mix on low speed just until the yellow disappears. Overmixing after adding eggs introduces air bubbles that expand in the oven and can cause the cheesecakes to puff up and then collapse, leading to cracks.
- Fold in Pumpkin: Add the pumpkin puree and vanilla extract. Use a spatula to gently fold these into the mixture. Stop as soon as the pumpkin is incorporated. The batter should be smooth and vibrant orange.
- Fill the Cups: Divide the batter evenly among the prepared crusts. You can use a small ice cream scoop for consistent portions, or a spoon. Fill them almost to the top, leaving a little space so they don’t overflow.
- Bake: Place the muffin tin in the center of the preheated oven. Bake for 20-25 minutes. The cheesecakes are done when the edges are set but the centers still have a slight jiggle when you gently shake the pan. They will continue to set as they cool. Do not overbake, or they will become dense and dry.
- Cool Gradually: Turn off the oven and crack the door open slightly. Let the cheesecakes sit in the cooling oven for 1 hour. This gradual cooling helps prevent cracking. After an hour, remove them from the oven and let them cool completely on a wire rack.
- Chill: Once cooled, cover the muffin tin with plastic wrap and refrigerate for at least 4 hours, or preferably overnight. This step is crucial for the flavors to meld and the texture to set properly.
Cooking Tips & Techniques
Even experienced bakers run into issues with cheesecakes, but knowing how to troubleshoot can save your dessert. Here are some tips from my own kitchen failures and successes.
Room Temperature is Key: I cannot stress this enough. Your cream cheese and eggs must be at room temperature. If you forget, you can soften the cream cheese by leaving it out for an hour or microwaving it in 10-second bursts. Cold ingredients create lumps that are impossible to beat out, resulting in a grainy texture.
Don’t Overmix: When you add the eggs, mix on the lowest speed possible. You just want to combine them. Overmixing incorporates air into the batter, which expands in the oven and causes the cheesecakes to rise too much and then crack as they cool.
The Water Bath Trick: For extra insurance against cracks, you can place the muffin tin in a larger roasting pan and fill the roasting pan with hot water halfway up the sides of the muffin tin. This creates a steamy environment that cooks the cheesecakes gently. However, for mini cheesecakes, this is often optional because they cook so quickly. I usually skip it for convenience, but if you are worried, try it.
Check for Doneness: The visual cues are important. The edges should be firm, but the center should still jiggle slightly like Jell-O. If the center is liquid, they need more time. If the center is firm and there are no jiggles, they might be overbaked.
Patience with Cooling: The gradual cooling process in the turned-off oven is essential. Sudden temperature changes cause the structure to contract too quickly, leading to cracks. If you rush this step, you might end up with a beautiful taste but a cracked appearance.
Variations & Adaptations
One of the best things about these mini pumpkin cheesecakes is how easy they are to customize. Here are a few variations I’ve tried that work wonderfully.
Gluten-Free Option: You can easily make this recipe gluten-free by using gluten-free gingersnap cookies for the crust. Most major brands offer gluten-free versions. Just check the label to ensure they are certified gluten-free. The rest of the recipe is naturally gluten-free, as long as your pumpkin puree doesn’t have any additives.
Dairy-Free Version: For a dairy-free twist, use a plant-based cream cheese alternative. Brands like Kite Hill or Miyoko’s work well. You may need to add a little cornstarch to help with the setting, as plant-based cheeses can sometimes be softer. Use coconut cream instead of whipped cream for the topping.
Maple Glaze Drizzle: For an extra special touch, mix together 2 tablespoons of maple syrup, 1 tablespoon of powdered sugar, and a splash of milk. Drizzle this over the chilled cheesecakes just before serving. The maple flavor pairs beautifully with the pumpkin and gingersnaps.
Walnut Crust: If you want a nuttier flavor, replace half of the gingersnap crumbs with finely chopped walnuts. Toast the walnuts in the oven for 5 minutes before chopping to bring out their flavor. This adds a nice crunch and richness.
White Chocolate Swirl: Melt some white chocolate and swirl it into the pumpkin batter before baking. Use a toothpick to create a marbled effect. This adds a sweet, creamy contrast to the spiced pumpkin.
Serving & Storage Suggestions
These mini pumpkin cheesecakes are best served chilled. They hold their shape well and are easy to pick up with your fingers, making them perfect for parties. I like to top them with a small dollop of whipped cream and a sprinkle of extra gingersnap crumbs for a bit of texture contrast.
Storage: Store the cheesecakes in an airtight container in the refrigerator for up to 5 days. They actually taste even better after a day or two as the flavors have more time to meld. If you want to freeze them, place them in a single layer in the freezer until solid, then transfer them to a freezer-safe bag. They will keep for up to 2 months. Thaw them in the refrigerator overnight before serving.
Reheating: You generally don’t want to reheat cheesecakes, as the texture can become watery. However, if you prefer a slightly softer texture, you can let them sit at room temperature for 15-20 minutes before eating. Avoid using the microwave, as it can melt the cream cheese and ruin the structure.
Complementary Dishes: These go well with a cup of hot coffee or tea. They also pair nicely with a spiced cider or a glass of dessert wine. If you are serving them as part of a larger meal, they work well after a hearty dinner like slow cooker pulled pork sliders or a roasted chicken.
Nutritional Information & Benefits
While these are definitely a treat, they can fit into a balanced diet in moderation. Here is an approximate nutritional breakdown per mini cheesecake (without topping):
- Calories: Approximately 180-200 calories
- Fat: 12g (mostly from cream cheese and butter)
- Carbohydrates: 18g (from pumpkin, sugar, and gingersnaps)
- Protein: 4g
- Fiber: 1g
Pumpkin is a great source of vitamin A and potassium, which are beneficial for eye health and blood pressure. The gingersnap crust adds a small amount of fiber, especially if you use whole grain versions. These cheesecakes are naturally gluten-free if you use gluten-free cookies, and they can be made dairy-free with substitutions. However, they are high in sugar and saturated fat, so enjoy them as a special indulgence rather than a daily snack.
Conclusion
Making creamy mini pumpkin cheesecakes with a gingersnap crust is a rewarding experience that brings the warmth of fall into your kitchen. From the spicy, buttery crust to the smooth, tangy filling, every bite is a celebration of autumn flavors. I hope this recipe becomes a staple in your fall baking routine, just as it has in mine.
Feel free to experiment with the toppings and variations to make them your own. Whether you add a maple glaze or a white chocolate swirl, these cheesecakes are a blank canvas for your creativity. Don’t be afraid to make mistakes, like I did with my first batch; they are just part of the learning process.
If you try this recipe, I would love to hear how it turned out for you. Leave a comment below with your thoughts, or share a photo on social media and tag me. I love seeing your creations and reading about your baking adventures. Happy baking, and enjoy every bite of these delicious mini treats!
Frequently Asked Questions
Can I use pumpkin pie filling instead of pumpkin puree?
No, you should not use pumpkin pie filling. Pumpkin pie filling already contains sugar and spices, which will make the cheesecakes too sweet and alter the texture. Always use 100% pure pumpkin puree for the best results.
Why did my mini cheesecakes crack?
Cracking is usually caused by overmixing the batter, which incorporates too much air, or by cooling the cheesecakes too quickly. Make sure to mix on low speed after adding eggs and let the cheesecakes cool gradually in the turned-off oven.
Can I make these ahead of time?
Yes, these cheesecakes are even better the next day. You can make them up to 2 days in advance and store them in the refrigerator. They can also be frozen for up to 2 months.
How do I know when the cheesecakes are done?
The edges should be set, but the centers should still have a slight jiggle when you gently shake the pan. They will continue to set as they cool. Avoid overbaking, as this can make them dry.
Can I use a different type of cookie for the crust?
Yes, you can use other cookies like vanilla wafers, chocolate cookies, or speculoos cookies. Just adjust the sugar in the crust if the cookies are very sweet. Gingersnaps are traditional for pumpkin cheesecake, but other spices can work well too.
Pin This Recipe!
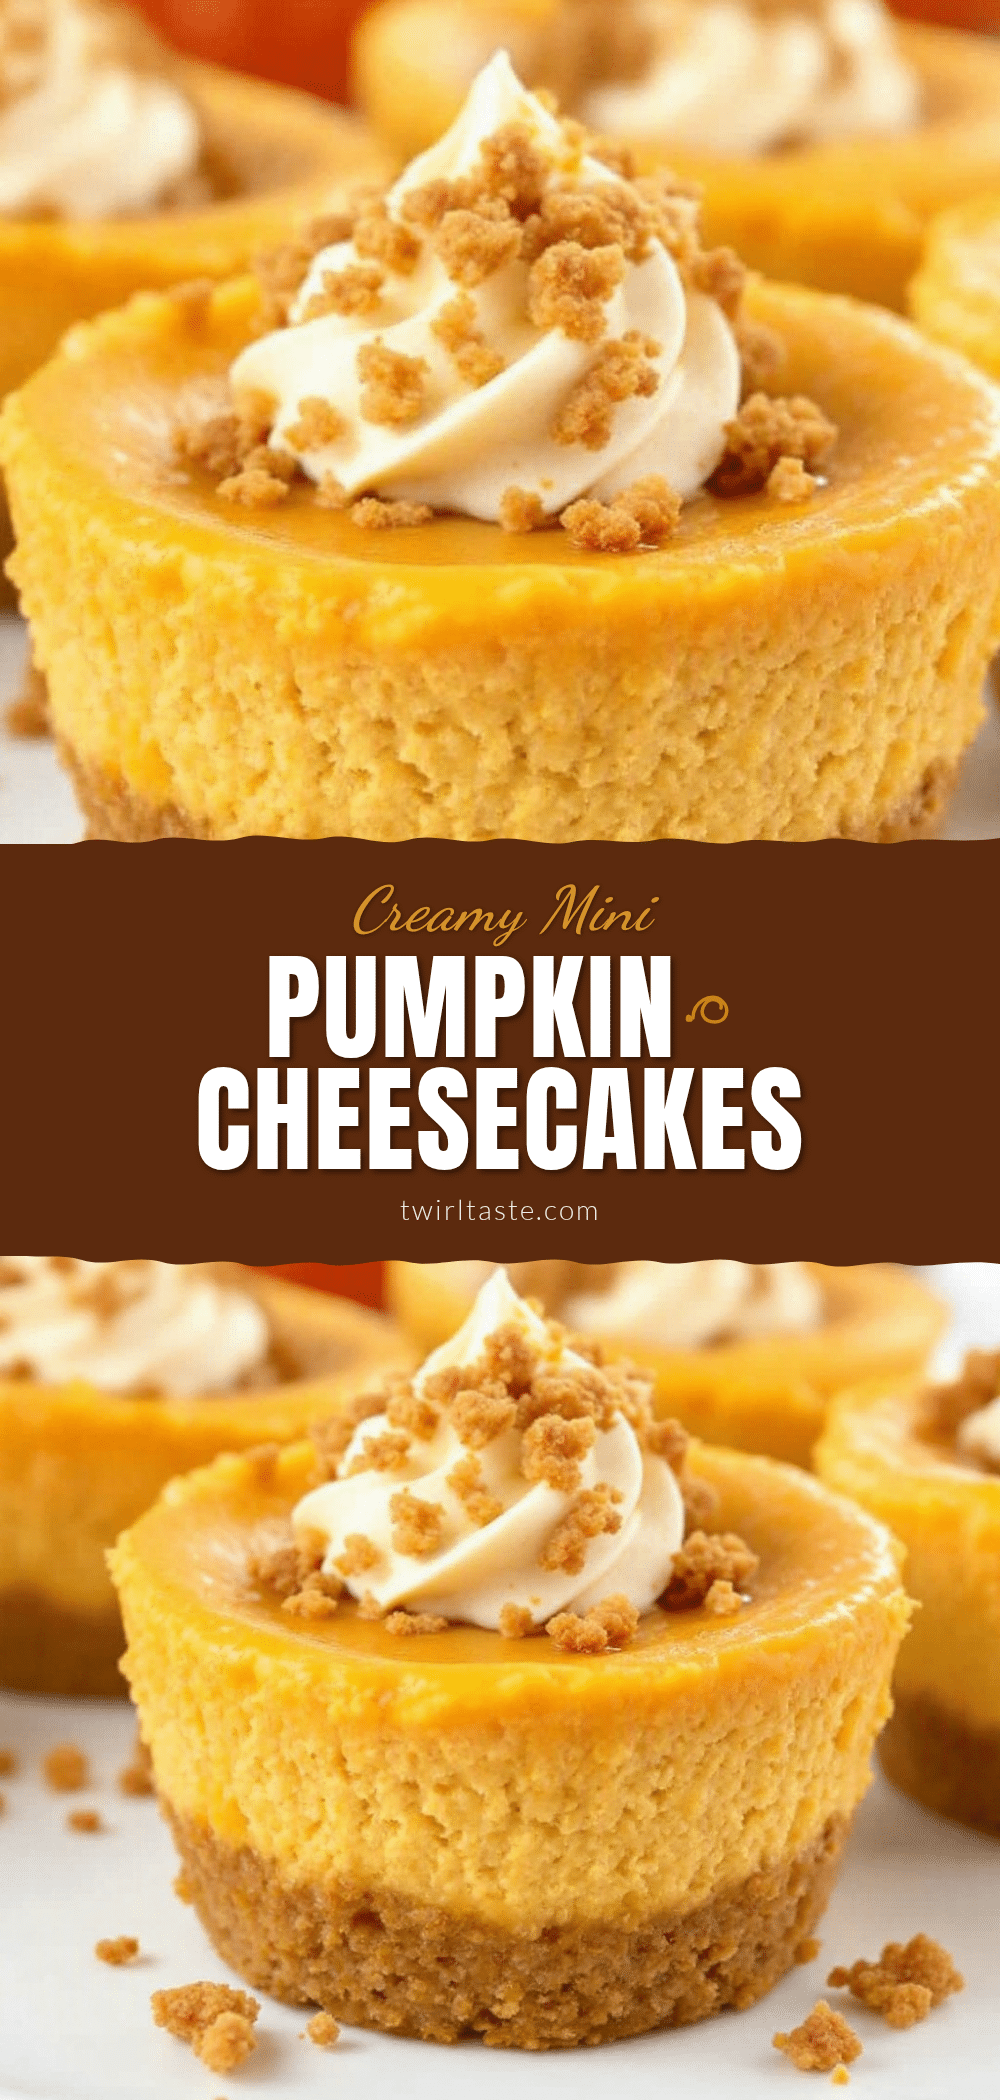
Creamy Mini Pumpkin Cheesecakes: Best Easy Fall Dessert
These mini pumpkin cheesecakes feature a spicy gingersnap crust and a smooth, tangy pumpkin cream cheese filling. They are easy to make, perfect for fall gatherings, and offer a delightful balance of sweet and spiced flavors.
- Prep Time: 20 minutes
- Cook Time: 25 minutes
- Total Time: 4 hours 45 minutes
- Yield: 12 servings 1x
- Category: Dessert
- Cuisine: American
Ingredients
- 1.5 cups gingersnap cookie crumbs
- 4 tablespoons unsalted butter, melted
- 1 tablespoon granulated sugar
- Pinch of salt
- 16 ounces (450g) full-fat cream cheese, softened to room temperature
- 1 cup (240g) 100% pure pumpkin puree
- 3/4 cup (150g) granulated sugar
- 2 large eggs, room temperature
- 1 large egg yolk
- 1 teaspoon vanilla extract
- 1 tablespoon pumpkin pie spice
- 1/2 teaspoon ginger powder
- 1/2 teaspoon cinnamon
- 1/4 teaspoon nutmeg
- 1/4 teaspoon cloves
Instructions
- Preheat oven to 325°F (165°C). Line a 12-cup muffin tin with cupcake liners.
- In a medium bowl, combine gingersnap crumbs, melted butter, sugar, and salt. Mix until it resembles wet sand.
- Divide the crumb mixture evenly among the 12 liners. Press firmly into the bottom and up the sides about an inch. Set aside.
- In a large bowl, beat the softened cream cheese with an electric mixer on medium speed until smooth (2-3 minutes). Scrape down the sides.
- Add the 3/4 cup granulated sugar, pumpkin pie spice, ginger powder, cinnamon, nutmeg, and cloves. Beat on low speed until combined.
- Add the eggs and egg yolk one at a time, mixing on low speed just until combined. Do not overmix.
- Gently fold in the pumpkin puree and vanilla extract until the batter is smooth and vibrant orange.
- Divide the batter evenly among the prepared crusts, filling almost to the top.
- Bake for 20-25 minutes until edges are set but centers still have a slight jiggle.
- Turn off the oven and crack the door open. Let cheesecakes sit in the oven for 1 hour to cool gradually.
- Remove from oven and cool completely on a wire rack.
- Cover and refrigerate for at least 4 hours or overnight before serving.
Notes
Ensure cream cheese and eggs are at room temperature to prevent lumps. Do not overmix the batter after adding eggs to avoid cracking. For best results, chill overnight. Can be stored in the refrigerator for up to 5 days or frozen for up to 2 months.
Nutrition
- Serving Size: 1 mini cheesecake
- Calories: 190
- Sugar: 14
- Sodium: 120
- Fat: 12
- Saturated Fat: 7
- Carbohydrates: 18
- Fiber: 1
- Protein: 4
Keywords: pumpkin cheesecake, mini cheesecakes, fall dessert, gingersnap crust, easy baking, Thanksgiving dessert, gluten-free option


