Love this? Save it for later!
Share the inspiration with your friends
The bag of tortilla chips was empty. Not just “we need to buy more” empty, but “did someone eat the entire bag in four minutes” empty. My kids were staring at me with that specific combination of guilt and anticipation that only children who have witnessed a snack miracle can muster. The empty plate sat in the center of the table like a trophy. Someone had already asked for the recipe before the last crumb was gone. Honestly, I wasn’t even surprised. It happens every time I make this.
I didn’t plan for it to be a hit. I just wanted something crunchy, something green, and something that wouldn’t involve turning on the oven because it was already too hot for comfort. But you know how it goes. You try one slice, then another, and suddenly you’re playing defense against hungry teenagers. The Crispy Skeleton Veggie Tray with Creamy Ranch started as a lazy Tuesday solution and ended up being the star of the dinner table. It’s not fancy. It doesn’t require a chef’s degree. But it does require patience when cutting the shapes, because let’s face it, my skeleton arms are lopsided.
What stuck with me wasn’t just the taste, though the crunch and the dip are undeniable. It was the look on their faces. The moment they realized their veggies were wearing costumes. That’s the real win. It’s quiet pride, really. Watching them pick at the “ribs” of celery and laugh while dipping them into the creamy sauce. I didn’t cook it for me. I cooked it for that reaction. And honestly? It’s worth every second of cutting those jagged edges.
Why You’ll Love This Recipe
There is a specific kind of magic that happens when you stop treating vegetables like punishment and start treating them like play. I’ve tested dozens of veggie tray ideas over the years. Some are too sophisticated. Some are too messy. This one hits the sweet spot. It’s rooted in simple, reliable flavors that everyone knows and loves, but the presentation changes everything. It’s not just a snack; it’s an experience. And it’s incredibly easy to pull off, even if your idea of cooking is boiling water.
- Quick & Easy: You can have this ready in under 20 minutes. No baking, no chopping marathon. Just slice, arrange, and dip. It’s perfect for busy weeknights or when you need a last-minute appetizer that looks like you tried way harder than you actually did.
- Simple Ingredients: You likely already have everything in your kitchen. Celery, carrots, bell peppers, ranch dressing, and cheese. No fancy grocery trips needed. It’s pantry-friendly and fridge-clearing at the same time.
- Perfect for Halloween: While it’s great for any day, this Crispy Skeleton Veggie Tray with Creamy Ranch is a Halloween game-changer. It’s spooky without being scary, and healthy without being boring. It fits right in with other festive treats like mini pumpkin pie cookies but keeps things light.
- Crowd-Pleaser: Kids love the shapes. Adults love the dip. It always gets rave reviews. I’ve served this at potlucks where people thought it was a fancy charcuterie board, and at family dinners where it disappeared in minutes. It works everywhere.
- Unbelievably Delicious: The crunch of the raw veggies against the cool, herby ranch is next-level comfort food. It’s the texture combo you didn’t know you needed. It’s not just good—it’s the kind of snack that makes you close your eyes after the first bite.
What makes this different from the rest? It’s the cheese. Most veggie trays skip the cheese or just sprinkle it on top. Here, we use it to build the skeleton. The sharp cheddar adds a savory depth that balances the sweetness of the carrots and the freshness of the celery. It’s comfort food reimagined—healthier, faster, but with the same soul-soothing satisfaction. It’s perfect for impressing guests without stress, or turning a simple meal into something memorable. Plus, if you’re looking for other spooky treats, these witch finger cookies are a great dessert pairing.
What Ingredients You Will Need
This recipe uses simple, wholesome ingredients to deliver bold flavor and satisfying texture without the fuss. The key is quality. Since there aren’t many components, each one needs to pull its weight. You want crisp vegetables, sharp cheese, and a dip that’s thick enough to cling but smooth enough to drizzle. I stick to basics because simplicity lets the flavors shine. You can swap items based on what’s in season or what you have on hand, but the core structure remains the same.
- Celery Stalks: You need about 4-5 large stalks. Look for bright green, firm stalks that snap cleanly when bent. If they’re limp, they won’t hold the cheese well. I prefer organic if possible, but conventional works fine if washed thoroughly.
- Carrots: 3-4 medium carrots. Peeled and cut into sticks. Look for straight, smooth carrots. The orange color provides the “bones” for the skeleton. If you can’t find straight ones, don’t worry; you can cut them to fit.
- Red Bell Pepper: 1 large red bell pepper. This adds a pop of color and a slight sweetness that contrasts with the savory ranch. Red is traditional for Halloween, but green works too if you want a more monochromatic look.
- Sharp Cheddar Cheese: 1 cup, shredded. I recommend using block cheese and shredding it yourself. Pre-shredded cheese has anti-caking agents that prevent it from melting or sticking properly. Sharp cheddar has more flavor than mild, which is crucial here.
- Ranch Dressing: 1 cup. Use a good quality store-bought ranch or your homemade version. If you like it thicker, use a dip consistency. If you like it pourable, use a salad dressing consistency. I prefer a thick dip for this recipe so it coats the veggies heavily.
- Black Olives or Green Olives: 1/2 cup, sliced. These are the “eyes” and “mouth” of the skeleton. Kalamata olives add a nice briny kick. If you’re using green olives, slice them into rounds. If you’re using black olives, slice them into strips or circles depending on the effect you want.
- Optional: Everything Bagel Seasoning: A sprinkle on top for extra crunch and flavor. This is a personal favorite of mine. It adds a savory, garlicky note that complements the ranch perfectly.
For the ranch, I often keep a jar of pulled pork sliders dip in mind because the flavor profile is similar—creamy, tangy, and herby. If you’re making the ranch from scratch, use buttermilk for authenticity. If you’re buying it, check the ingredient list. Avoid anything with high fructose corn syrup if you can help it. The quality of the ranch makes or breaks this dish.
Equipment Needed
You don’t need much for this recipe, which is part of its charm. A large cutting board is essential. I use a wooden one because it’s gentle on my knives and doesn’t slip. A sharp chef’s knife is your best friend here. You need to be able to cut through the celery and carrots cleanly. A dull knife will crush the veggies and make them look messy. A paring knife is helpful for the detailed work, like cutting the olives into eyes or carving small details into the cheese.
A mixing bowl is needed if you’re making the ranch from scratch. If you’re using store-bought, you can skip this. A serving platter or large plate is required. I recommend a dark-colored platter, like black or dark blue, because it makes the orange carrots and green celery pop. It enhances the spooky vibe. If you don’t have a platter, a large baking sheet works too, just line it with parchment paper for easy cleanup.
Optional but helpful: A cheese grater. If you’re shredding your own cheddar, a box grater is faster than a knife. It also gives you more control over the size of the shreds. Small shreds stick better to the celery than large chunks. A small spoon or knife tip is useful for arranging the olive eyes. You want precision here. These tools are basic, but having the right ones makes the process faster and less frustrating. I’ve learned this the hard way after struggling with a dull paring knife years ago.
Preparation Method
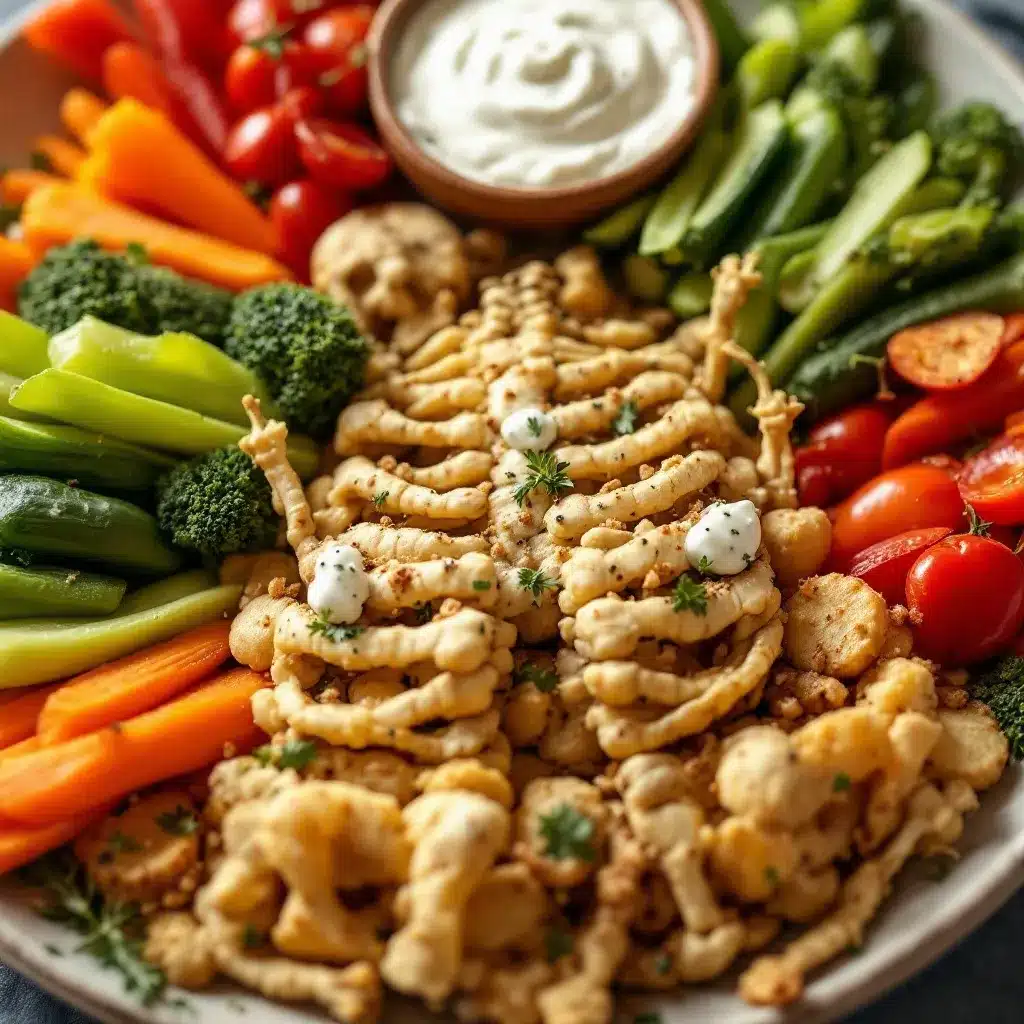
Getting started is the easiest part. First, wash all your vegetables thoroughly. This is non-negotiable. You don’t want grit on your snacks. Pat them dry with a paper towel. Wet veggies won’t hold the cheese as well, and they’ll make the tray soggy faster. Take your celery stalks and separate them. You want individual sticks, not the whole bunch. Trim off the tough bottom ends. These are usually woody and hard to chew. Discard them or save them for stock.
Next, prepare the carrots. Peel them if they’re not organic. Cut them into sticks that are roughly the same thickness as the celery. You want them to be long enough to act as “bones.” If you have short carrots, you can cut them in half. The goal is to have pieces that are easy to pick up and dip. Set them aside in a bowl of cold water. This keeps them crisp and bright orange. It’s a trick I learned from professional kitchens. Cold water preserves the crunch.
Now, the red bell pepper. Cut it in half and remove the seeds and white membrane. Slice it into thin strips. These will be used as accents or additional “ribs” if you run out of celery. Set them aside. The pepper adds a nice color contrast. It breaks up the green and orange palette. It makes the tray look more professional. If you’re not a fan of raw pepper, you can skip it, but I recommend trying it.
Time for the cheese. Shred your sharp cheddar. If you’re using a block, start with the large holes on your grater. This gives you fluffy shreds that melt slightly when they touch the warm veggies (if you’re serving them warm) or just stick well at room temperature. If you’re using pre-shredded, give it a good shake in the bag to break up any clumps. The cheese needs to be fine enough to adhere to the celery but chunky enough to provide texture.
Now, the assembly. This is where the fun begins. Take a celery stick and lay it flat. Sprinkle a line of shredded cheese down the center. This is the “spine.” Add more cheese on either side to create the “ribs.” You can be artistic or just pile it on. I usually just pile it on because it looks more like a real skeleton that way. Add a carrot stick on top of the cheese to act as a cross-bone. Repeat with the other vegetables. Use the bell pepper strips to fill in gaps. It doesn’t have to be perfect. The lopsided look is part of the charm.
Once the skeletons are assembled, place them on the serving platter. Arrange them in a scattered pattern. Don’t line them up perfectly. You want it to look like a spooky graveyard. Add the sliced olives on top to create eyes and mouths. A couple of olive slices for eyes, and a small strip for a mouth. Use a toothpick to hold them in place if needed. Just be sure to remove the toothpicks before eating. Safety first.
Finally, prepare the ranch. If you’re using store-bought, give it a good stir. If you’re making it from scratch, combine sour cream, mayo, buttermilk, and your ranch seasoning mix. Blend until smooth. Chill it in the fridge for at least 30 minutes before serving. This helps the flavors meld. Serve the ranch in a small bowl in the center of the platter. Or, for a dramatic effect, drizzle it around the skeletons. The choice is yours. I usually do both. It looks impressive and ensures everyone gets plenty of dip.
How do I keep the veggies crisp?
Store them in cold water in the fridge. Change the water every few hours. This keeps them hydrated and crunchy. Avoid leaving them out at room temperature for more than two hours. Bacteria love warm, moist environments.
Can I make this ahead of time?
Yes. Assemble the skeletons up to 4 hours in advance. Cover the platter with plastic wrap and refrigerate. Add the olives just before serving to prevent them from drying out. The ranch can be made 2 days ahead.
What if I don’t like ranch?
Substitute with blue cheese, Caesar, or a simple olive oil and balsamic vinegar mix. The crunch of the veggies pairs well with almost any dressing. Try a buffalo dip for a spicy twist.
Is this recipe gluten-free?
Yes, naturally. Just ensure your ranch dressing is gluten-free. Most are, but always check the label. Some flavored chips or crackers might contain gluten, but for this tray, it’s safe.
How do I store leftovers?
Keep the veggies and dip separate. Store the veggie tray in an airtight container in the fridge. The dip can be stored in a separate jar. Consume within 3 days for best quality. The veggies may lose some crunch over time.
Cooking Tips & Techniques
One of the biggest mistakes people make with veggie trays is using wilted vegetables. It’s tempting to use what’s in the crisper drawer, but if it’s limp, it’s not going to work. Take the time to select the freshest produce you can find. The texture difference is night and day. A crisp celery stick is satisfying to bite into. A limp one is disappointing. It’s a small detail that makes a big difference.
Another tip is to work efficiently. Have all your ingredients prepped before you start assembling. This is called mise en place, a fancy French term for “everything in its place.” It sounds professional, but it’s really just about organization. If you’re chopping cheese while holding a celery stick, you’re going to make a mess. Prep everything first, then assemble. It’s faster and cleaner.
Don’t be afraid to overdo the cheese. This is a treat, not a salad. The cheese is a key component of the flavor profile. It adds saltiness, richness, and protein. If you’re worried about calories, you can reduce the amount slightly, but I don’t recommend it. The joy of this recipe is indulgence. It’s a Halloween snack. Indulge.
When cutting the olives, use a sharp paring knife. It gives you more control. If you use a dull knife, the olives will squish. Squished olives don’t look like eyes. They look like bruises. Be gentle. Slice them thinly for a more delicate appearance. You can also use black sesame seeds for eyes if you’re avoiding olives. It’s a nice alternative.
Multitasking is key. While the ranch chills, you can assemble the skeletons. This saves time. You can also prepare the veggies while the ranch is mixing. Just keep an eye on the clock. You don’t want the veggies to sit out too long. The goal is to serve them fresh. Freshness is the most important ingredient.
Finally, taste as you go. Before you serve, dip a celery stick into the ranch. Does it need more salt? More pepper? Adjust the seasoning before you present it. It’s easier to fix it now than to have guests complain later. Trust me. I’ve learned this the hard way. A simple adjustment can save the whole dish.
Variations & Adaptations
This recipe is highly adaptable. You can change the vegetables, the cheese, and the dip to suit your preferences. Here are a few ideas to get you started.
- Gluten-Free Option: This recipe is naturally gluten-free. Just ensure your ranch dressing and cheese are certified gluten-free. Some ranch mixes contain wheat starch. Check the label.
- Dairy-Free Option: Use dairy-free cheese shreds and a dairy-free ranch dressing. There are many good options available now. Cashew-based cheeses work well. They have a similar texture to dairy cheese.
- Spicy Twist: Add cayenne pepper or hot sauce to the ranch. This creates a spicy kick that contrasts with the sweet veggies. It’s a great option for adults who like heat. Try a spicy tomato soup dip for a different flavor profile.
- Seasonal Variation: In the fall, add roasted butternut squash cubes. They add a sweet, earthy flavor. In the spring, add snap peas and radishes. They add a fresh, peppery note. Adapt to what’s in season.
- Protein Boost: Add cooked bacon bits or diced ham. This turns the snack into a more substantial meal. It’s a great option for lunch boxes or heavier snacks. The saltiness of the meat pairs well with the ranch.
I once tried adding sun-dried tomatoes to the tray. It was a disaster. They were too sticky and made the veggies soggy. Stick to dry ingredients. Avoid wet additions unless you’re serving immediately. I also tried using mozzarella cheese. It was too bland. Sharp cheddar is essential for flavor. Don’t skimp on the cheese quality.
Serving & Storage Suggestions
Serve this tray at room temperature. Cold veggies from the fridge can be less flavorful. Let them sit out for 15-20 minutes before serving. This allows the flavors to develop. The cheese will soften slightly, making it more enjoyable. The ranch will also thin out a bit, making it easier to dip.
Pair this with other Halloween treats. Mummy sugar cookies are a perfect dessert. They’re cute and sweet. The contrast between the savory veggies and the sweet cookies is delicious. You can also serve it with pumpkin bread for a complete fall snack board.
Store leftovers in the refrigerator. Keep the veggies and dip separate. This prevents sogginess. The veggies will last for 3-4 days. The dip will last for 5-7 days. If the veggies lose their crunch, use them in a stir-fry or soup. Don’t waste them. Get creative.
Reheating is not recommended for the veggies. They’re best fresh. If you’re serving the ranch warm, heat it gently in the microwave. Do not boil it. Warm ranch is creamy and comforting. It’s a nice change from cold dip.
Nutritional Information & Benefits
This recipe is a great source of vitamins and minerals. Celery is low in calories and high in fiber. It aids digestion and hydration. Carrots are rich in beta-carotene, which converts to vitamin A. It’s good for eye health and immunity. Bell peppers are high in vitamin C. They boost the immune system and promote healthy skin.
The cheese adds protein and calcium. It’s important for bone health. The ranch dressing adds fat and calories. Use it in moderation. If you’re watching your weight, use a light ranch or Greek yogurt instead. The overall dish is balanced. It provides a mix of carbs, protein, and fat.
For those with dietary restrictions, this recipe is easily adaptable. It’s gluten-free and can be made dairy-free. It’s also vegetarian and vegan-friendly with the right substitutions. It’s a versatile recipe that fits many lifestyles. Enjoy it as a healthy snack or a light appetizer.
Conclusion
The Crispy Skeleton Veggie Tray with Creamy Ranch is more than just a snack. It’s a fun, easy, and delicious way to enjoy vegetables. It’s perfect for Halloween, but it’s great any time of year. It’s a crowd-pleaser that’s easy to make and even easier to eat. I hope you try it and enjoy it as much as I do.
Feel free to customize it. Add your own touches. Make it your own. The possibilities are endless. Just remember to have fun with it. Cooking should be enjoyable. Don’t take it too seriously. Laugh at the lopsided skeletons. Enjoy the crunch. Dip it all.
If you make this recipe, please share your photos. I’d love to see your creations. Tag me on social media or leave a comment below. Your feedback means the world to me. Thank you for reading. Happy Halloween, and happy eating!
FAQs
Can I use different vegetables?
Yes! Cucumbers, radishes, and snap peas work well. Just ensure they are crisp and fresh.
How long does the ranch last?
Homemade ranch lasts 5-7 days in the fridge. Store-bought lasts until the expiration date.
Can I freeze this recipe?
No. The veggies will become soggy upon thawing. It’s best served fresh.
Is this recipe kid-friendly?
Absolutely. Kids love the shapes and the dip. It’s a great way to get them to eat veggies.
What other dips work with this tray?
Blue cheese, hummus, and guacamole are great alternatives. Try cheesecake dip for a sweet option.
Pin This Recipe!
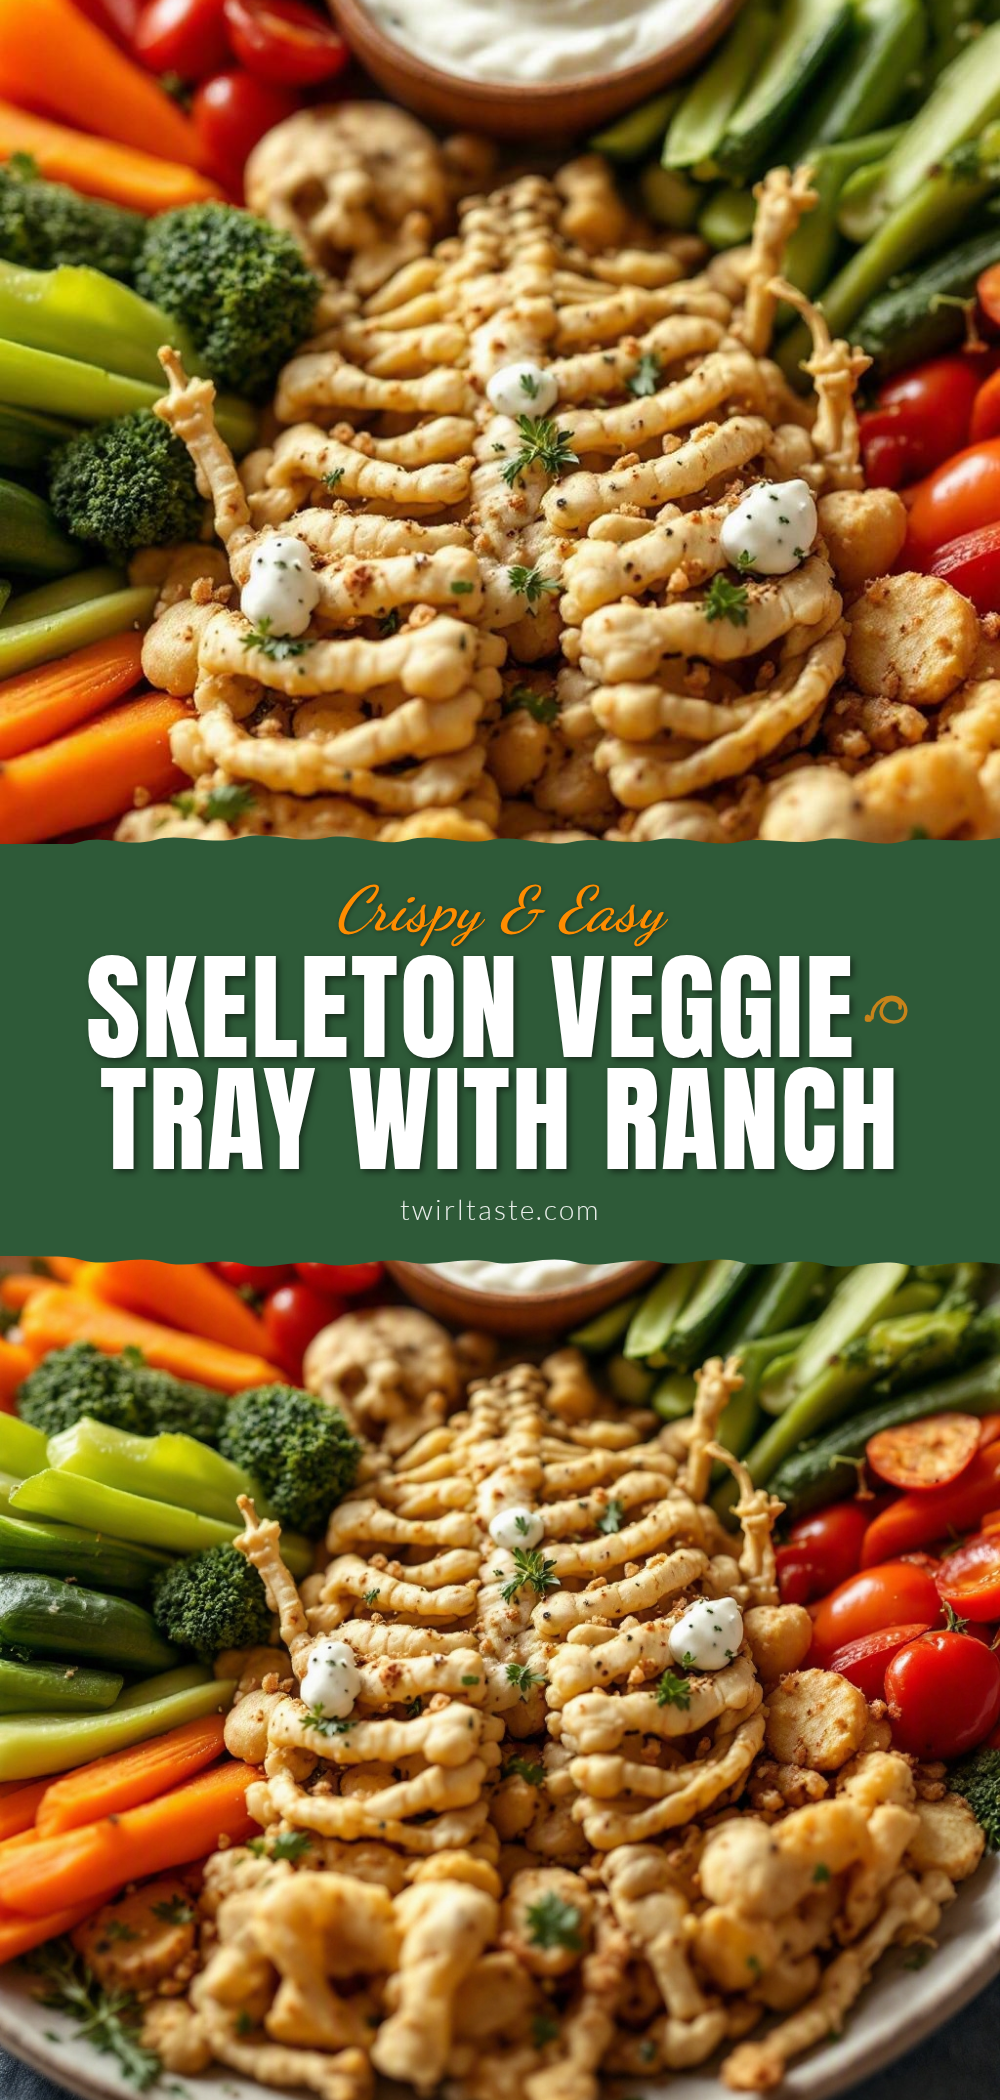
Crispy Skeleton Veggie Tray: 3-Step Healthy Halloween Snack
A fun and spooky Halloween snack featuring celery and carrots arranged like skeletons with cheddar cheese and served with creamy ranch dressing. This easy, no-bake appetizer is ready in under 20 minutes and is a crowd-pleaser for kids and adults alike.
- Prep Time: 20 minutes
- Cook Time: 0 minutes
- Total Time: 20 minutes
- Yield: 4 servings 1x
- Category: Appetizer
- Cuisine: American
Ingredients
- 4–5 large celery stalks
- 3–4 medium carrots
- 1 large red bell pepper
- 1 cup sharp cheddar cheese, shredded
- 1 cup ranch dressing
- 1/2 cup black or green olives, sliced
- Everything bagel seasoning (optional)
Instructions
- Wash and dry all vegetables thoroughly. Trim tough ends from celery stalks.
- Cut carrots into sticks similar in thickness to celery. Soak in cold water to maintain crispness.
- Slice red bell pepper into thin strips.
- Shred sharp cheddar cheese using a box grater.
- Lay celery sticks flat and sprinkle shredded cheese down the center to form the ‘spine’ and ‘ribs’.
- Place carrot sticks on top of the cheese to act as cross-bones.
- Arrange assembled skeletons on a serving platter in a scattered pattern.
- Add sliced olives to create eyes and mouths on the skeletons.
- Prepare ranch dressing (if making from scratch, blend sour cream, mayo, buttermilk, and seasoning; chill for 30 minutes).
- Serve ranch in a bowl in the center of the platter or drizzle around the skeletons.
Notes
For best results, use block cheese and shred it yourself to ensure it sticks properly. Keep veggies crisp by storing them in cold water. Assemble skeletons up to 4 hours in advance, but add olives just before serving. Serve at room temperature for better flavor.
Nutrition
- Serving Size: Approximately 4-5 sk
- Calories: 250
- Sugar: 5
- Sodium: 450
- Fat: 18
- Saturated Fat: 8
- Carbohydrates: 12
- Fiber: 3
- Protein: 8
Keywords: Halloween snack, veggie tray, healthy snack, celery sticks, ranch dip, skeleton snack, easy appetizer, gluten-free snack


