Love this? Save it for later!
Share the inspiration with your friends
Not the chewy center. Not the sticky sweetness that clings to your fingers. The crunch is what made me make these Crispy Maple Pecan Pie Bars — everything else is secondary. I remember standing in my kitchen last Tuesday, staring at a baking sheet that looked less like dessert and more like a science experiment gone slightly right. The edges were dark amber, almost burnt in the way I like them. The center was set, but not jiggly. Just firm enough to snap when you hit it with a knife.
Let’s face it, most pecan pie recipes fail at the texture test. You slice it, and the middle slides out like gooey caramel. It’s messy. It’s delicious, sure, but it’s a commitment issue. You need a fork, a napkin, and probably a moment of silence to deal with the aftermath. These bars? They don’t do that. They hold their line. They stay put. And when you bite down, the sound is loud enough to make your neighbor look over the fence.
I’ve spent years trying to fix the “soggy bottom” syndrome in bar cookies. I’ve tried adding flour to the filling. I’ve tried pre-baking the crust. I’ve even tried freezing the pan before slicing, which just makes the knife slip. But honestly, the secret wasn’t in the chemistry. It was in the ratio. When you get the maple syrup thick enough to coat the back of a spoon but thin enough to soak into those toasted pecans, magic happens. You know that feeling when you pull something out of the oven and you just *know* it’s going to be good? This is that feeling.
It started because I had a bag of pecans that had been sitting in the pantry too long. They weren’t rancid, just tired. I needed to wake them up. Roasting them changed everything. It brought out that nutty, almost smoky flavor that pairs so well with the sharp tang of maple. I wasn’t trying to reinvent the wheel. I was just trying to make something that didn’t fall apart. And now, every time I make these, I hear that same crisp crackle. It’s the sound of a recipe that finally worked.
Why You’ll Love This Recipe
After testing this recipe over a dozen times (yes, I ate the failures too, don’t judge me), I can tell you this isn’t just another sweet tooth fix. It’s a lesson in patience and texture. The difference between these and any other pecan bar you’ve tried is in the structural integrity. We aren’t using corn syrup here. We’re using real maple syrup, which behaves differently. It crystallizes slightly as it cools, creating that shatteringly crisp exterior while keeping the inside tender but firm. It’s a balance I’ve been chasing for years.
- Quick & Easy: Comes together in under 30 minutes of prep time, perfect for busy weeknights or when you need a dessert for a last-minute dinner party. You don’t need to be a pastry chef to pull this off.
- Simple Ingredients: No fancy grocery trips needed. You likely already have pecans, maple syrup, eggs, and butter in your kitchen. It’s pantry-friendly cooking at its finest.
- Perfect for Gatherings: Great for potlucks, holiday mornings, or cozy autumn dinners. They travel well and don’t require refrigeration until you’re ready to serve them.
- Crowd-Pleaser: Always gets rave reviews from kids who love the sweetness and adults who appreciate the lack of artificial aftertaste. It’s universally liked.
- Unbelievably Delicious: The texture and flavor combo is next-level comfort food. The contrast between the buttery crust and the crunchy, caramelized topping is addictive.
What makes this recipe different is the intentional toasting of the nuts. Most people just sprinkle them on raw. I toast them first. It changes the entire flavor profile, adding a depth that feels expensive but is actually very cheap to make. It’s not just another version of pecan pie bars—it’s your best version. It’s the kind that makes you close your eyes after the first bite because you’re just trying to process the crunch. It’s comfort food reimagined—simpler, faster, but with the same soul-soothing satisfaction. Perfect for impressing guests without the stress of a deep dish pie.
What Ingredients You Will Need
This recipe uses simple, wholesome ingredients to deliver bold flavor and satisfying texture without the fuss. The magic here is in the quality of the maple syrup and the freshness of the pecans. You don’t need a lot, but you need the right stuff. Avoid the pancake syrup bottles; that’s just sugar water with flavoring. You need the real deal.
For the Crust
- Unsalted butter, softened: 1/2 cup (113g). This gives the crust its rich, shortbread-like quality. I prefer Kerrygold or Organic Valley for their consistent water content.
- All-purpose flour: 1 cup (125g). Standard flour works best here. Don’t switch to cake flour or it won’t hold up.
- Granulated sugar: 1/4 cup (50g). Just enough to sweeten the base without making it a cookie.
- Salt: 1/4 teaspoon. Essential for balancing the sweetness.
For the Filling
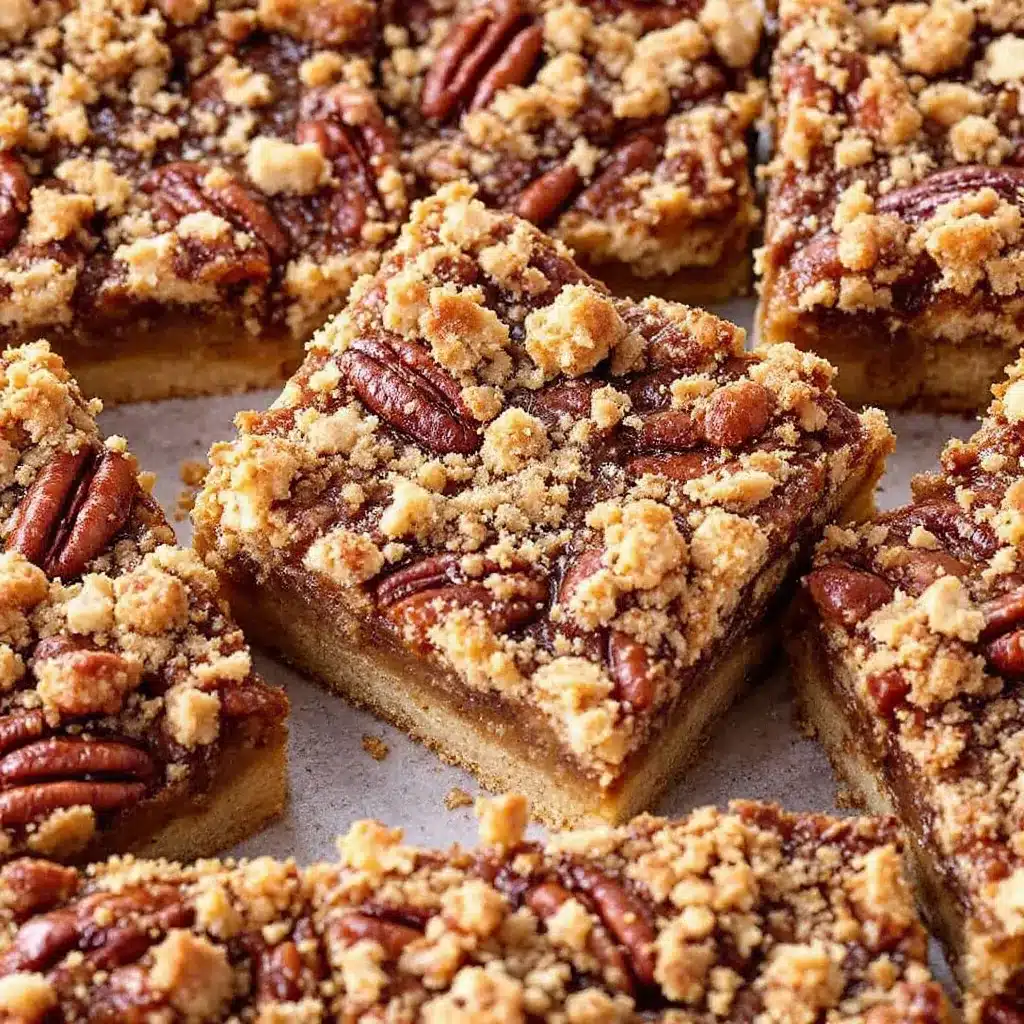
- Real maple syrup: 1 cup (340g). Grade A Dark or Grade B is best. It has a stronger flavor that stands up to baking. Avoid “Pancake Syrup” at all costs.
- Light brown sugar: 1 cup (200g). Packed. This adds the molasses notes that complement the maple.
- Large eggs, room temperature: 2. These act as the binder. Room temp eggs mix more evenly, preventing streaks.
- Vanilla extract: 1 teaspoon. Pure vanilla, not imitation. It makes a subtle but noticeable difference.
For the Topping
- Whole pecan halves: 1 1/2 cups (170g). Look for large, intact halves. Broken pieces work, but the presentation isn’t as nice. I source mine from local farmers markets when possible, but major grocery store brands are fine too.
- Optional: Flaky sea salt: A pinch for sprinkling on top before baking. It adds a professional finish.
If you’re allergic to pecans, you can swap them for walnuts or macadamia nuts, though the flavor will shift slightly. For a gluten-free option, use a 1:1 gluten-free flour blend for the crust, but be aware the texture might be slightly more crumbly.
Equipment Needed
You don’t need much, which is part of the appeal. A standard 9×9 inch square baking pan is ideal. If you only have a 9×13, you can use it, but the bars will be thinner and might cook too fast. Keep an eye on them. I always line my pan with parchment paper, leaving an overhang on the sides. This is non-negotiable for easy removal. Trying to pry sticky bars out of a bare pan is a recipe for disaster and broken nails.
A medium mixing bowl for the crust and a slightly larger one for the filling are all you need. A whisk is better than a spoon for the filling—it incorporates the eggs without overmixing, which can make the bars tough. A rubber spatula is helpful for scraping the bowl clean. For the pecans, a small skillet is needed for toasting. Don’t skip this step; it’s worth the extra pan to wash.
If you don’t have a 9×9 pan, you can use a 9-inch round cake pan, but the baking time will be shorter. Budget-friendly options work just fine here. You don’t need a stand mixer or a food processor. Hand mixing is actually preferred because it prevents the crust from becoming too dense. Keep it simple.
Preparation Method
Step 1: Prep the Oven and Pan (5 minutes)
Preheat your oven to 350°F (175°C). This is a moderate temperature that allows the filling to set without burning the top. Line your 9×9 inch baking pan with parchment paper. Grease the parchment lightly with butter or cooking spray. This ensures nothing sticks, even with all that sticky syrup.
Step 2: Make the Crust (5 minutes)
In a medium bowl, combine the softened butter, flour, sugar, and salt. Use your fingers or a fork to mix it until it resembles coarse sand. It should hold together when you squeeze it. Press this mixture firmly and evenly into the bottom of your prepared pan. Use the bottom of a measuring cup to pack it down tight. A loose crust leads to a messy bar. Bake this blind for 10 minutes. This pre-bakes the bottom so it doesn’t get soggy from the wet filling.
Step 3: Toast the Pecans (3 minutes)
While the crust bakes, place your pecans in a dry skillet over medium heat. Toast them for about 3-4 minutes, shaking the pan frequently. You’ll know they’re done when they smell nutty and look slightly darker. Watch them closely; nuts go from toasted to burnt in seconds. Remove from heat and let them cool slightly. Chop them roughly if you prefer smaller pieces, or leave them whole for that signature crunch.
Step 4: Make the Filling (5 minutes)
In a large bowl, whisk the maple syrup and brown sugar together until smooth. The sugar needs to dissolve into the syrup. Add the eggs one at a time, whisking gently after each addition. Be careful not to whip too much air into the mixture, or the bars might rise and crack. Stir in the vanilla extract. Finally, fold in the toasted pecans. They should be coated in the syrup.
Step 5: Assemble and Bake (25-30 minutes)
Pour the filling over the pre-baked crust. Spread it out evenly. Return to the oven and bake for 25-30 minutes. The edges should be bubbling and golden brown. The center might still look slightly jiggly, but it will set as it cools. Do not overbake, or they will become hard as rocks. Remove from the oven and let it cool in the pan on a wire rack for at least 30 minutes.
Step 6: Cool and Slice (Crucial Step)
This is where most people fail. You must let these bars cool completely. Ideally, let them cool for 2 hours, or even better, refrigerate them for an hour. The filling needs to set firmly. If you cut them warm, they will be a mess. Once cool, lift them out using the parchment overhang and slice into squares. Dust with flaky salt if desired.
Cooking Tips & Techniques
The biggest mistake people make is under-toasting the pecans. Raw pecans taste bitter and flat. Toasting unlocks the oils. It’s a small step that makes a huge difference. Also, don’t rush the cooling process. I know it’s tempting to cut into that warm, gooey center, but these bars are designed to be firm. If you cut them hot, you’ll lose the “crispy” part of the name. They need time to crystallize.
Another tip: make sure your butter is softened but not melted for the crust. Melted butter changes the texture from shortbread to cakey. You want that crumbly, sand-like texture. When whisking the filling, add the eggs slowly. If you dump them in all at once, you might get bits of cooked egg white. Whisking gently ensures a smooth, glossy finish.
Keep an eye on the oven temperature. Every oven is different. If your bars are browning too fast on top but the center is still runny, cover them loosely with aluminum foil for the last 10 minutes of baking. This shields the top while the inside finishes cooking. Consistency is key. If you bake a batch and they come out too soft, next time bake them 2 minutes longer. If they’re hard, reduce the time by 2 minutes.
Multitasking helps here. Toast the nuts while the crust bakes. Clean your bowls while the bars cool. This recipe is efficient, but it requires attention during the active phases. Don’t walk away while the pecans are in the pan. Burnt nuts smell terrible and ruin the batch. Learn from my mistake: I once walked away for 30 seconds and had to throw away an entire cup of expensive pecans. Don’t be like me.
Variations & Adaptations
While the classic maple pecan flavor is unbeatable, there are ways to tweak this recipe to suit your tastes or dietary needs. For a chocolate twist, add 1/2 cup of semi-sweet chocolate chips to the filling before pouring it over the crust. The chocolate melts slightly and creates pockets of richness. It pairs surprisingly well with the maple.
If you want to reduce the sugar, you can reduce the brown sugar to 3/4 cup, but the bars won’t set as firmly. The sugar isn’t just for sweetness; it’s a structural component. For a nut-free version, you can use toasted pumpkin seeds (pepitas) or sunflower seeds. They provide a similar crunch, though the flavor will be milder. I’ve tried sunflower seeds, and they work well if you add a bit more vanilla to boost the flavor.
For a bourbon kick, substitute 2 tablespoons of the maple syrup with good-quality bourbon. It adds a warm, spicy depth that is perfect for fall. Just be careful not to add too much liquid, as it can throw off the setting ratio. I usually swap 2 tablespoons of syrup for 2 tablespoons of bourbon and bake for an extra 2 minutes to evaporate the alcohol.
Dietary adaptations are possible but require trade-offs. For a gluten-free crust, use a 1:1 GF flour blend with xanthan gum. The texture will be slightly more delicate. For a dairy-free version, use a high-quality vegan butter stick. Some vegan butters have higher water content, so you might need to add a tablespoon more flour to the crust to compensate.
Serving & Storage Suggestions
These bars are best served at room temperature. Cold bars from the fridge can be too hard to bite through comfortably. Let them sit on the counter for 15 minutes before serving. They pair wonderfully with a hot cup of coffee or a glass of cold milk. The bitterness of coffee cuts through the sweetness perfectly. I also like to serve them with a dollop of unsweetened whipped cream for those who want a bit of lightness against the dense bar.
For storage, keep them in an airtight container at room temperature for up to 3 days. If your kitchen is very hot or humid, refrigerate them. They will last in the fridge for up to a week. To freeze them, wrap individual bars in plastic wrap and place them in a freezer-safe bag. They freeze beautifully for up to 3 months. Thaw them at room temperature for an hour before eating.
Reheating isn’t usually necessary, but if you prefer them warm, microwave a single bar for 10-15 seconds. This softens the filling slightly without melting the whole thing. The flavors actually develop over the first 24 hours, so they often taste better on day two than on day one. The maple and pecan flavors meld together, becoming more cohesive and rich.
Nutritional Information & Benefits
While these are definitely a dessert, they do offer some nutritional benefits. Pecans are rich in healthy monounsaturated fats, fiber, and antioxidants. They are known to support heart health and reduce inflammation. Maple syrup, unlike refined white sugar, contains trace minerals like zinc and manganese. It has a lower glycemic index than sugar, though it is still high in calories.
Each bar (assuming 16 bars) contains approximately 280 calories, 15g of fat, 35g of carbohydrates, and 3g of protein. The fat content is primarily from the pecans and butter, so it’s satiating. However, due to the sugar content, these should be enjoyed in moderation. They are not a health food, but they are a better option than many processed candies because of the whole food ingredients.
For those with dietary restrictions, note that these contain tree nuts, dairy, and gluten. Always check labels if you have severe allergies. Personally, I appreciate that I can feel good about the quality of ingredients. It’s not just empty calories; there’s actual nutrition in the nuts and the real maple. It’s a balance of indulgence and wholesome components.
Conclusion
Crispy Maple Pecan Pie Bars are worth the effort because they deliver on every promise: crunch, flavor, and ease. They are not complicated, but they require respect for the ingredients. Toasting the nuts, using real maple, and waiting for the bars to cool are the keys to success. I love this recipe because it brings me back to those autumn afternoons when the air gets crisp and the kitchen smells like cinnamon and nuts. It’s a seasonal comfort that I crave year-round.
I encourage you to try it and make it your own. Add the chocolate. Swap the nuts. Try the bourbon. Cooking is about experimentation, and this recipe is a solid foundation for creativity. Once you make them, you’ll understand why I’m so obsessed with the crunch. It’s a rare treat in a world of soggy desserts.
Please share your results with me! I’d love to see how you customize them. Leave a comment below with your favorite variation or any tips you’ve discovered. If you make these, tag me on social media so I can see your creations. Happy baking, and remember: let them cool!
Frequently Asked Questions
Can I use corn syrup instead of maple syrup?
Technically yes, but you will lose the distinct maple flavor that defines this recipe. Corn syrup bars are closer to traditional pecan pie, but they lack the complexity of maple. If you must use it, mix it with a little vanilla to add some flavor, but I strongly recommend sticking to real maple syrup for the best taste.
Why are my bars too soft?
This usually happens if they are cut before they are completely cool, or if the oven temperature was too low. The filling needs time to set as it cools. If you cut them warm, they will be gooey. Also, ensure your pecans are toasted and not adding excess moisture. Next time, try baking for an extra 2-3 minutes and let them cool in the pan for at least 2 hours.
Can I make these in a different pan size?
You can use a 9×13 inch pan, but the bars will be thinner. Reduce the baking time by about 5-7 minutes and check for doneness earlier. A 9-inch round pan is also an option, but the bars will be thicker and may need more time to set in the center. Adjust baking times accordingly.
How do I store leftover bars?
Store them in an airtight container at room temperature for up to 3 days. If your kitchen is warm, refrigerate them. They will keep for up to a week in the fridge. You can also freeze them for up to 3 months. Wrap individual bars in plastic wrap to prevent freezer burn.
Can I use walnuts instead of pecans?
Yes, walnuts work well as a substitute. They have a slightly more bitter taste, which can balance the sweetness nicely. Toast them just like you would pecans. The texture will be similar, though the flavor profile will be different. It’s a great option if you want to switch things up.
Pin This Recipe!
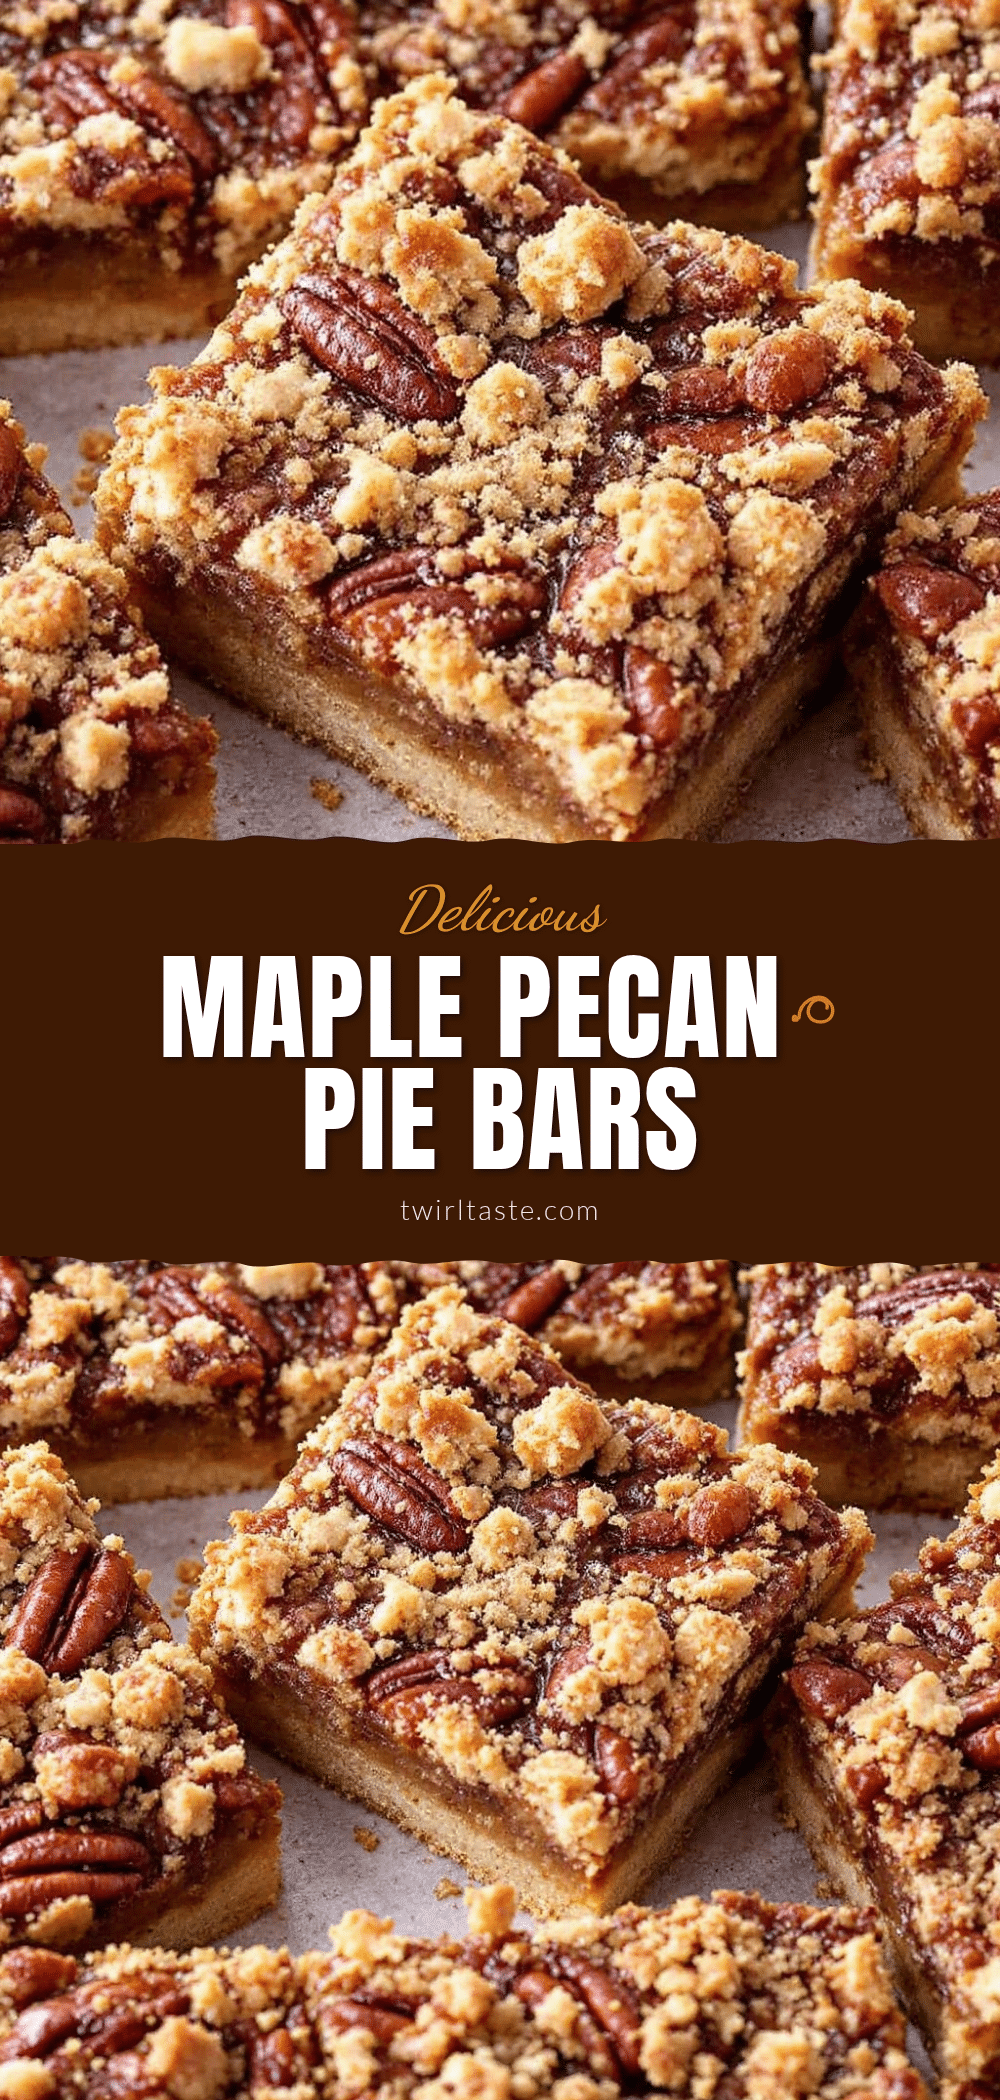
Crispy Maple Pecan Pie Bars
These crispy maple pecan pie bars offer a satisfying crunch and firm texture, avoiding the common gooey center of traditional pecan pie. Made with real maple syrup and toasted pecans, they are an easy, pantry-friendly dessert perfect for gatherings.
- Prep Time: 15 minutes
- Cook Time: 35-40 minutes
- Total Time: 50-55 minutes
- Yield: 16 servings 1x
- Category: Dessert
- Cuisine: American
Ingredients
- 1/2 cup (113g) unsalted butter, softened
- 1 cup (125g) all-purpose flour
- 1/4 cup (50g) granulated sugar
- 1/4 teaspoon salt
- 1 cup (340g) real maple syrup (Grade A Dark or Grade B)
- 1 cup (200g) light brown sugar, packed
- 2 large eggs, room temperature
- 1 teaspoon vanilla extract
- 1 1/2 cups (170g) whole pecan halves
- Optional: Flaky sea salt for sprinkling
Instructions
- Preheat oven to 350°F (175°C). Line a 9×9 inch baking pan with parchment paper, leaving an overhang on the sides, and grease lightly.
- In a medium bowl, combine softened butter, flour, granulated sugar, and salt. Mix until it resembles coarse sand.
- Press the crust mixture firmly and evenly into the bottom of the prepared pan. Bake for 10 minutes to pre-bake the crust.
- While the crust bakes, toast pecans in a dry skillet over medium heat for 3-4 minutes until fragrant and slightly darker. Let cool slightly.
- In a large bowl, whisk maple syrup and brown sugar until smooth. Add eggs one at a time, whisking gently to avoid incorporating too much air. Stir in vanilla extract.
- Fold the toasted pecans into the filling mixture.
- Pour the filling over the pre-baked crust and spread evenly.
- Bake for 25-30 minutes until edges are bubbling and golden brown. The center may look slightly jiggly but will set as it cools.
- Cool in the pan on a wire rack for at least 30 minutes, ideally 2 hours or refrigerated for an hour, until completely set.
- Lift bars out using parchment overhang and slice into squares. Dust with flaky sea salt if desired.
Notes
Do not cut the bars while warm, as they need time to crystallize and set firmly. Toasting the pecans is essential for flavor and texture. Ensure butter is softened, not melted, for the crust. If using a 9×13 pan, reduce baking time by 5-7 minutes.
Nutrition
- Serving Size: 1 bar
- Calories: 280
- Sugar: 28
- Sodium: 120
- Fat: 15
- Saturated Fat: 5
- Carbohydrates: 35
- Fiber: 2
- Protein: 3
Keywords: pecan pie bars, maple pecan bars, crispy dessert, easy 3 ingredient dessert, fall baking, gluten-free option, nutty dessert


