Love this? Save it for later!
Share the inspiration with your friends
Third time this week and the spatula is still fighting me. Honestly, I didn’t plan on making creamy Biscoff cheesecake bars three times in five days. It just happened. The first batch was for a Tuesday night craving that hit hard after a long shift. The second batch was because I couldn’t stop thinking about that first bite, so I made another one to see if I could tweak the crust. The third batch? That one was for you, my readers, because I needed to get the ratios exactly right.
There is something dangerously addictive about the combination of spiced cookie butter and tangy cream cheese. It’s not just a dessert; it’s a loop. I found myself standing in my kitchen at 11 PM, scraping the bowl clean, wondering if I had enough cream cheese left in the fridge. The smell alone is enough to pull you out of sleep. It smells like holiday mornings and comfort food all at once.
I’ve tried making this recipe in spring, summer, and winter. It doesn’t matter what the weather is doing outside. The bars stay firm in the heat if you keep them chilled, and they taste even better after sitting in the fridge for a day. The flavors meld together, becoming richer and more complex. That’s the secret, really. Patience. But let’s face it, who has patience for cheesecake?
I started with a standard graham cracker crust, then switched to a Biscoff cookie crust. The difference was night and day. The spiced buttery flavor of the cookies carries the entire bar. It’s not just a topping; it’s the foundation. I spent hours testing different amounts of powdered sugar, trying to find that sweet spot between too rich and just right.
By the third time I made these bars, I knew every step by heart. I knew how long to beat the cream cheese to avoid lumps. I knew exactly when the edges would look set but the center would still jiggle slightly. It wasn’t about perfection anymore; it was about consistency. And honestly, the consistency was perfect.
I didn’t tell my family I was making them again. I just kept the box in the pantry and waited for the right moment. Now that you’re here, you get to share in the obsession. These bars are worth the repeat attempts. They are worth the extra cleanup. They are worth every second of the chilling time.
Why You’ll Love This Recipe
This isn’t just another dessert recipe you’ll bookmark and forget. These creamy Biscoff cheesecake bars have been tested, tasted, and tweaked until they reached their absolute peak. I’ve spent years developing recipes, and I can tell you when something is special. This one is it. The texture is incredibly smooth, almost like a mousse, but with the substantial weight of a real cheesecake. It’s the kind of treat that makes you close your eyes after the first bite and just sigh.
- No-Bake Simplicity: You don’t need to turn on your oven. This is perfect for hot days or when you just don’t want to heat up the kitchen. It comes together in under 30 minutes of active prep time, making it perfect for busy weeknights or last-minute dinner party guests.
- Simple Ingredients: You likely already have most of this in your pantry. Biscoff spread, cream cheese, powdered sugar, and vanilla. No fancy grocery trips needed. It’s wholesome, simple, and delivers bold flavor without the fuss.
- Perfect for Any Occasion: Whether it’s a holiday potluck, a cozy dinner with friends, or just a Tuesday night treat, these bars fit anywhere. They are portable, easy to serve, and always look impressive on a plate.
- Crowd-Pleaser: Kids love the sweetness, and adults appreciate the tangy balance. I’ve served these to picky eaters and dessert snobs alike, and they all ask for the recipe. It’s a guaranteed hit.
- Unbelievably Delicious: The texture and flavor combo is next-level comfort food. The spiced notes of the cookie butter pair perfectly with the dairy tang. It’s not just good; it’s the kind of dessert that lingers in your memory.
What makes this recipe different from the rest is the attention to detail in the crust. Most no-bake recipes use a basic graham cracker base, but here we use crushed Biscoff cookies mixed with melted spread. This creates a crust that is sturdy enough to hold the filling but soft enough to melt in your mouth. It’s a technique I’ve perfected over dozens of trials. It’s not just another version; it’s the best version.
What Ingredients You Will Need
This recipe relies on high-quality ingredients to deliver that rich, professional taste. Because there are so few components, the quality of each one matters. You don’t need exotic spices or hard-to-find items. Just good basics and a little bit of patience.
For the Crust
- Biscoff Cookies: About 2 cups of crushed cookies. I recommend using original Lotus Biscoff cookies for the authentic spiced flavor. Don’t use the spread alone; the texture of the crushed cookies is crucial.
- Melted Biscoff Spread: About 1/4 cup. This acts as the binder. It adds extra richness and helps the crust hold together firmly.
- Unsalted Butter: 1/4 cup, melted. Using real butter gives a better mouthfeel than oil. If you need a dairy-free option, you can use refined coconut oil, but the flavor will be different.
For the Cheesecake Filling
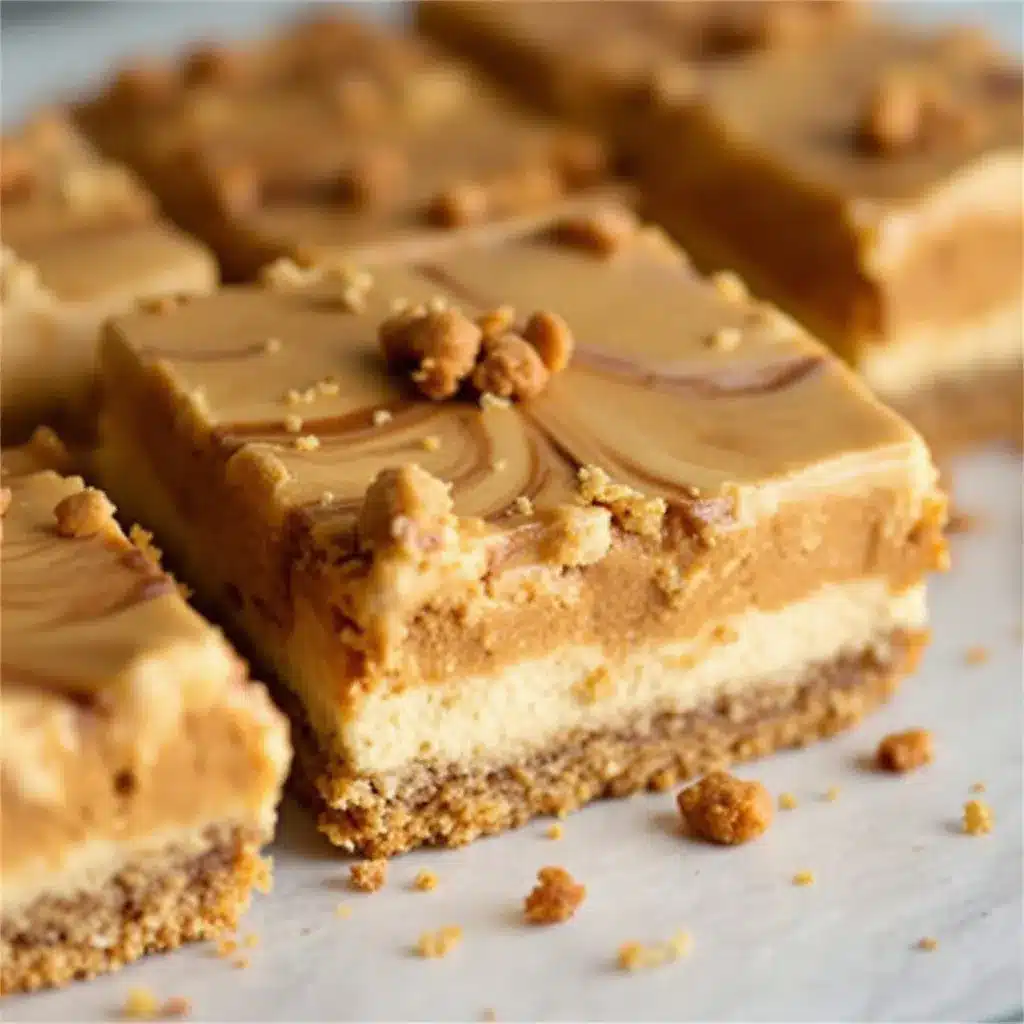
- Cream Cheese: 2 blocks (16 oz total), softened to room temperature. This is non-negotiable. If the cream cheese is cold, you will get lumps. I use Philadelphia brand because it has a consistent texture and mild tang.
- Powdered Sugar: 1 cup. Sifting this is important to avoid grainy spots in the final bar. It dissolves easily into the dairy.
- Heavy Cream: 1 cup, cold. This is whipped to stiff peaks and folded in. It provides the airy, light texture that defines a good no-bake cheesecake. Do not substitute with milk; it won’t whip.
- Biscoff Spread: 1/2 cup, softened. This is folded into the cream cheese mixture for the main flavor. It should be at room temperature so it mixes smoothly.
- Vanilla Extract: 1 teaspoon. Pure vanilla adds depth. I avoid imitation vanilla in desserts where the flavor is prominent.
- Salt: A pinch. This balances the sweetness and enhances the spices in the Biscoff.
For the Topping
- Extra Biscoff Spread: For drizzling. You can warm it slightly in the microwave for easier drizzling.
- Crushed Biscoff Cookies: For garnish. Adds a nice crunch and visual appeal.
Equipment Needed
You don’t need a lot of fancy tools to make these bars. A few standard kitchen items will do the job.
- 9×9 Inch Baking Pan: Line it with parchment paper. This is essential for lifting the bars out later. Without it, you’ll be digging for every piece.
- Food Processor or Blender: To crush the cookies into fine crumbs. A ziplock bag and a rolling pin work too, but it takes more effort.
- Mixing Bowls: Two large bowls. One for the crust and one for the filling.
- Electric Mixer: Handheld or stand mixer. Beating the cream cheese and heavy cream by hand is tiring and often results in uneven mixing. A mixer ensures a smooth, lump-free texture.
- Spatula: A flexible silicone spatula is best for folding in the whipped cream without deflating it.
I once tried using a wooden spoon for the filling, and it took me twice as long. The mixture was dense and heavy. Stick to the electric mixer for best results. It’s a small investment of time that pays off in quality.
Preparation Method
Making these bars is straightforward, but precision matters. Follow these steps carefully for the best results.
- Prepare the Pan: Line a 9×9 inch baking pan with parchment paper, leaving an overhang on the sides. This acts as a sling to lift the finished bars out easily. Set aside.
- Make the Crust: Place the Biscoff cookies in a food processor. Pulse until they are fine crumbs. If you don’t have a processor, put them in a bag and crush them with a rolling pin. Transfer the crumbs to a mixing bowl. Add the melted Biscoff spread and melted butter. Mix until the crumbs are evenly coated and look like wet sand.
- Press the Crust: Pour the crust mixture into the prepared pan. Use the back of a spoon or a flat-bottomed glass to press it down firmly. You want it even and compact. If it’s loose, the bars will crumble. Chill the crust in the fridge for 15 minutes while you make the filling.
- Beat the Cream Cheese: In a large bowl, beat the softened cream cheese on medium speed until it is completely smooth and creamy. This should take about 2-3 minutes. Scrape down the sides and bottom of the bowl. Any lumps will show up in the final product.
- Add Sugar and Flavor: Add the powdered sugar, vanilla extract, and pinch of salt. Beat on low speed until combined. Scrape the bowl again. The mixture should be thick and smooth.
- Fold in Biscoff Spread: Add the 1/2 cup of softened Biscoff spread. Beat on low speed just until incorporated. Do not overmix, or you might incorporate too much air too early.
- Whip the Heavy Cream: In a separate cold bowl, whip the heavy cream on high speed until stiff peaks form. This means when you lift the beaters, the cream stands up straight. Be careful not to over-whip it into butter.
- Fold the Cream: Gently fold the whipped cream into the cream cheese mixture in two additions. Use a spatula and use a gentle folding motion. Turn the bowl over itself. Stop as soon as no white streaks remain. The mixture will be light and fluffy.
- Assemble: Pour the filling over the chilled crust. Spread it out evenly with the spatula. Tap the pan gently on the counter to remove air bubbles.
- Chill: Refrigerate for at least 4 hours, preferably overnight. The bars need time to set. If you cut them too soon, they will be messy.
- Top and Serve: Once set, lift the bars out of the pan using the parchment sling. Drizzle with warm Biscoff spread and sprinkle with crushed cookies. Slice into squares using a sharp knife.
Cooking Tips & Techniques
The biggest mistake people make with no-bake cheesecakes is rushing the process. Here is how to avoid common pitfalls.
- Room Temperature Ingredients: Ensure your cream cheese and Biscoff spread are at room temperature. Cold ingredients lead to lumps and a dense texture. Plan ahead and take them out of the fridge an hour before you start.
- Don’t Overmix: Once you add the whipped cream, mix gently. Overmixing deflates the air you worked hard to incorporate. The result will be dense and heavy, not light and creamy.
- Chill the Bowl: For whipping the heavy cream, use a cold bowl and cold beaters. This helps the cream whip faster and hold its shape better. If your kitchen is warm, put the bowl in the fridge for 10 minutes first.
- Sharp Knife: When slicing the bars, use a sharp knife. Dip it in hot water and wipe it dry between cuts. This gives you clean edges and prevents the filling from sticking to the blade.
- Patience Pays Off: I know it’s hard to wait, but these bars taste better the next day. The flavors have time to meld, and the texture becomes more uniform. If you can wait overnight, do it.
Variations & Adaptations
While the classic version is my favorite, there are plenty of ways to tweak this recipe.
- Gluten-Free: Use gluten-free Biscoff-style cookies or a gluten-free graham cracker crust. Check the label to ensure the cookies are certified gluten-free.
- Dairy-Free: Use vegan cream cheese and vegan butter. For the heavy cream, use a high-fat coconut cream that whips well. The flavor will be different, but still delicious.
- Strawberry Swirl: Warm up some strawberry jam and swirl it into the filling before chilling. It adds a beautiful pink marbled effect and a fruity contrast to the spiced cookies.
- Chocolate Drizzle: Swap the Biscoff drizzle for a dark chocolate ganache. The bitterness of the chocolate pairs surprisingly well with the sweet cookie butter.
- Mini Bars: Use a muffin tin to make mini cheesecake bars. Reduce the chilling time to 2 hours. These are perfect for party platters and portion control.
Serving & Storage Suggestions
These bars are best served cold. Straight from the fridge, they have the perfect firm texture. They pair well with a cup of hot coffee or tea, which cuts through the richness. You can also serve them with fresh berries on the side for a bit of acidity.
Storage: Keep the bars in an airtight container in the refrigerator for up to 5 days. They can also be frozen for up to 2 months. Wrap them tightly in plastic wrap and then foil. Thaw them in the fridge overnight before serving.
Reheating: Do not reheat these bars. They are meant to be eaten cold. If you leave them out at room temperature for more than 2 hours, they will become too soft and the texture will suffer.
Nutritional Information & Benefits
Each bar contains approximately 350 calories, 25g of fat, and 30g of sugar. While this is a rich dessert, it is also a source of calcium from the cream cheese. The Biscoff spread provides some iron, though it is still high in sugar. Enjoy these as an occasional treat rather than a daily snack. If you are watching your sugar intake, consider using a sugar substitute in the filling, though the texture may vary slightly.
Conclusion
These creamy Biscoff cheesecake bars are worth the effort. They are rich, creamy, and packed with flavor. I hope you enjoy making them as much as I have. Feel free to customize them with your favorite toppings or swirls. Let me know in the comments how you like to serve them. Share your photos on social media so I can see your creations. Happy baking!
FAQs
Can I use a different type of cookie butter?
Yes, you can use other brands like Speculoos or homemade cookie butter. The flavor will be slightly different, but the texture will remain the same. Original Lotus Biscoff is recommended for the most authentic taste.
Why are my cheesecake bars loose?
This usually happens if the crust wasn’t pressed firmly enough or if the bars weren’t chilled long enough. Make sure to press the crust down tightly and chill for at least 4 hours, preferably overnight.
Can I freeze these bars?
Yes, they freeze very well. Wrap them individually in plastic wrap and place them in a freezer-safe bag. They will keep for up to 2 months. Thaw in the fridge before serving.
Do I need to use a mixer?
While you can mix by hand, an electric mixer is highly recommended. It ensures the cream cheese is smooth and the heavy cream is whipped to stiff peaks. Mixing by hand is labor-intensive and may not yield the same texture.
How do I store leftovers?
Store leftovers in an airtight container in the refrigerator. They will stay fresh for up to 5 days. Do not leave them out at room temperature for more than 2 hours.
Pin This Recipe!
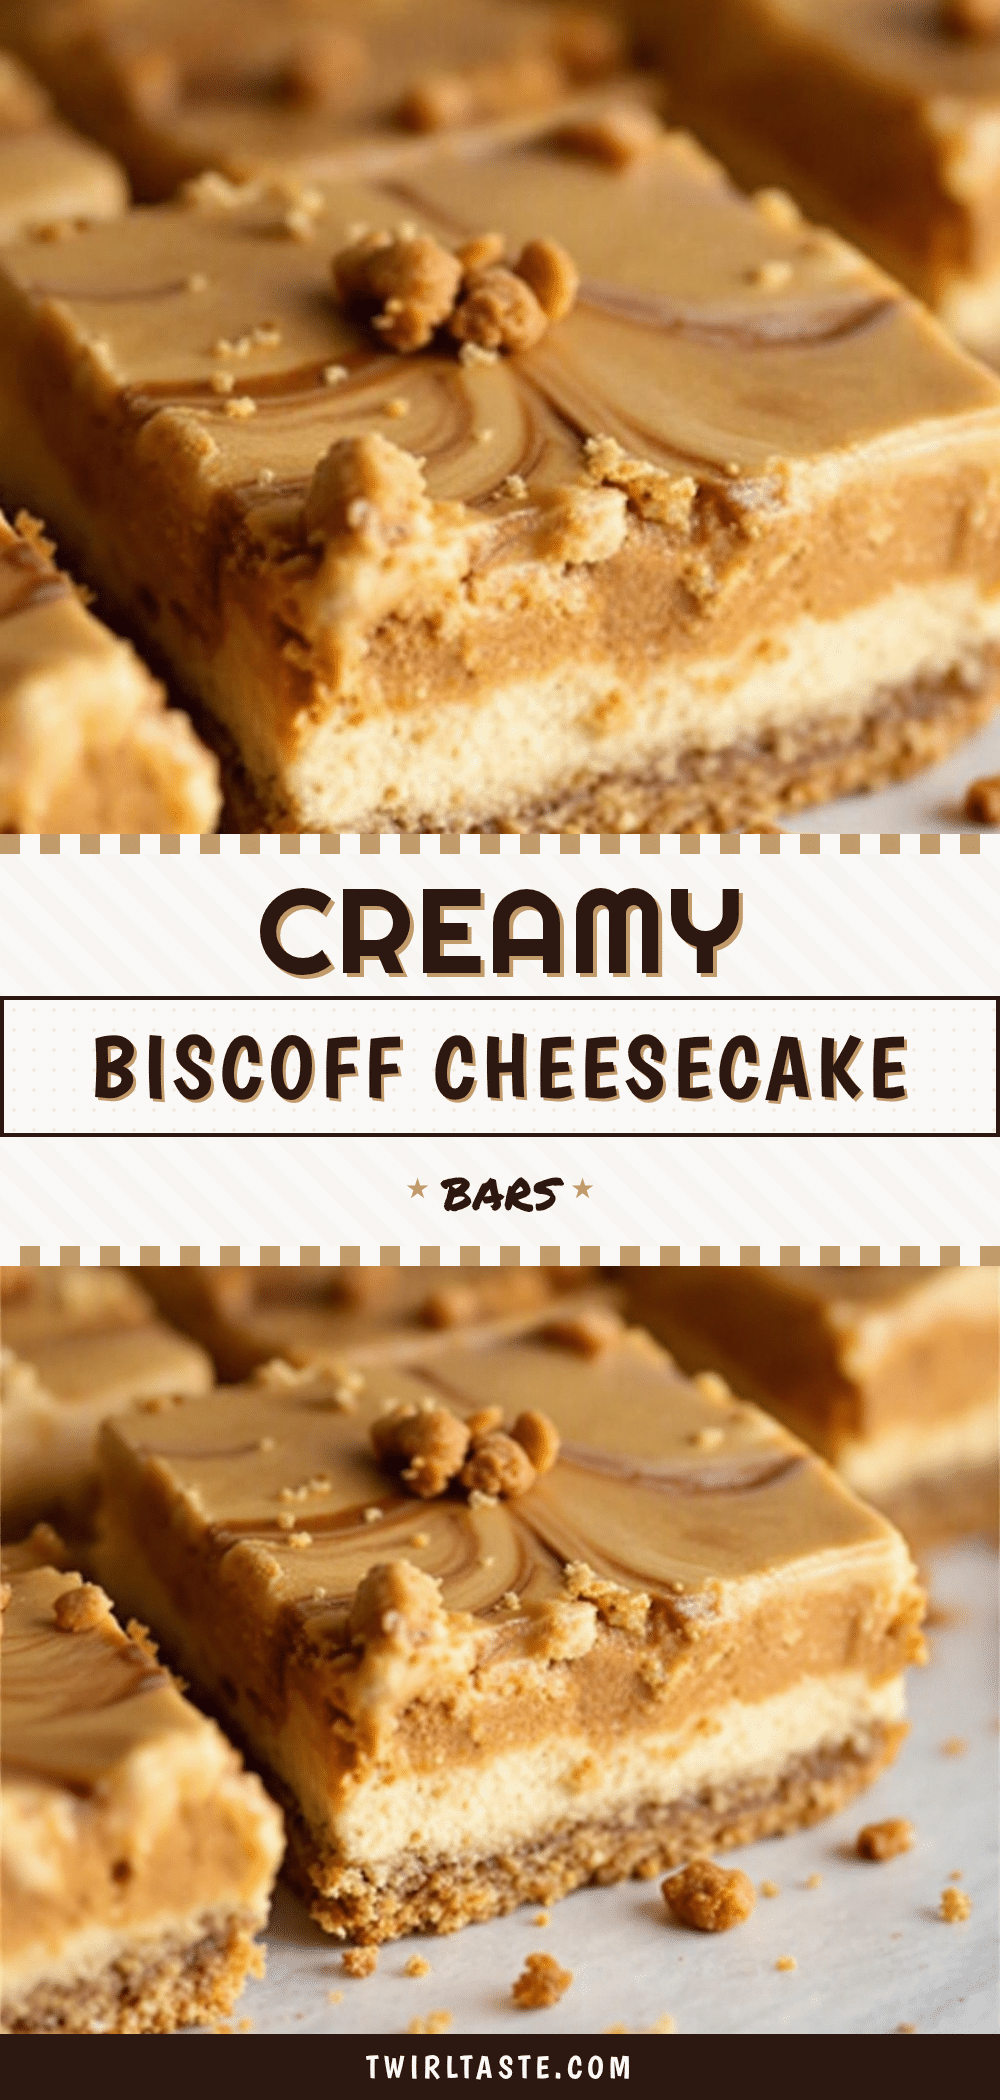
Creamy Biscoff Cheesecake Bars: Best Easy No-Bake Recipe
These creamy Biscoff cheesecake bars are a no-bake dessert featuring a spiced cookie butter crust and a rich, tangy cream cheese filling. They are easy to make, incredibly smooth, and perfect for any occasion.
- Prep Time: 30 minutes
- Cook Time: 0 minutes
- Total Time: 4 hours 30 minutes
- Yield: 9 servings 1x
- Category: Dessert
- Cuisine: American
Ingredients
- 2 cups crushed Biscoff cookies
- 1/4 cup melted Biscoff spread
- 1/4 cup unsalted butter, melted
- 16 oz cream cheese, softened to room temperature
- 1 cup powdered sugar
- 1 cup heavy cream, cold
- 1/2 cup Biscoff spread, softened
- 1 teaspoon vanilla extract
- A pinch of salt
- Extra Biscoff spread for drizzling
- Crushed Biscoff cookies for garnish
Instructions
- Line a 9×9 inch baking pan with parchment paper, leaving an overhang on the sides, and set aside.
- Place Biscoff cookies in a food processor and pulse until fine crumbs. Transfer to a mixing bowl.
- Add melted Biscoff spread and melted butter to the crumbs. Mix until evenly coated and resembling wet sand.
- Press the crust mixture firmly and evenly into the prepared pan. Chill in the fridge for 15 minutes.
- In a large bowl, beat the softened cream cheese on medium speed until smooth and creamy (2-3 minutes). Scrape down the sides.
- Add powdered sugar, vanilla extract, and salt. Beat on low speed until combined and smooth.
- Add the 1/2 cup softened Biscoff spread. Beat on low speed just until incorporated.
- In a separate cold bowl, whip the heavy cream on high speed until stiff peaks form.
- Gently fold the whipped cream into the cream cheese mixture in two additions using a spatula until no white streaks remain.
- Pour the filling over the chilled crust and spread evenly. Tap the pan gently to remove air bubbles.
- Refrigerate for at least 4 hours, preferably overnight, until set.
- Lift bars out of the pan using the parchment sling. Drizzle with warm Biscoff spread and sprinkle with crushed cookies.
- Slice into squares using a sharp knife.
Notes
Ensure cream cheese and Biscoff spread are at room temperature to avoid lumps. Use a cold bowl for whipping heavy cream. For clean cuts, dip a sharp knife in hot water and wipe dry between slices. These bars taste better after sitting in the fridge overnight as flavors meld.
Nutrition
- Serving Size: 1 bar
- Calories: 350
- Sugar: 30
- Sodium: 200
- Fat: 25
- Saturated Fat: 12
- Carbohydrates: 30
- Fiber: 1
- Protein: 5
Keywords: Biscoff, cheesecake bars, no-bake dessert, cookie butter, Lotus Biscoff, easy dessert, cream cheese, spiced cookies


