Love this? Save it for later!
Share the inspiration with your friends
I burned more than one batch of marshmallow before I figured out how to make these Easy Halloween Rice Krispie Treat Pumpkins without turning the whole kitchen into a sticky disaster zone. Honestly, the first time I tried, I thought I was being clever by cranking up the heat to speed things along. The marshmallows turned into this brown, scorched mess that smelled like regret, and the Rice Krispies puffed up into a brick that could have held down a tent in a hurricane. It was a total waste of a good box of cereal and a bag of marshmallows, and I stood there staring at the pan feeling like maybe I just wasnt cut out for no-bake desserts.
But here is the thing about these pumpkins—they are worth the learning curve. My kid came home from a school Halloween party raving about these little orange treats a friend’s mom had brought in, and I figured I had to give them another shot. I mean, how hard could it really be? (Famous last words, right?) After that first disaster, I dialed it way back, used a lower heat, and watched that marshmallow mixture like a hawk. The second batch came out soft, perfectly sticky, and easy to shape into those cute little pumpkin forms. My daughter stood on a stool next to me, pressing orange sprinkles into the tops while I laughed at how seriously she was taking the job.
These treats have become our go-to for Halloween class parties, neighborhood get-togethers, and even just a fun weekend project when the October weather turns chilly and we are stuck inside. They are not just another dessert—they are the kind of thing that makes you feel like you actually pulled off something special without spending hours in the kitchen. And honestly, that is a win in my book.
Why You Will Love This Recipe
Let me tell you why these Easy Halloween Rice Krispie Treat Pumpkins have earned a permanent spot in our fall rotation. First off, they come together in about 20 minutes flat—no oven, no complicated steps, just a stovetop and a little patience. When you have got a house full of kids hyped up on candy and costume excitement, that speed is a lifesaver.
- Quick & Easy: From start to finish, you are looking at around 20 minutes of active time. The hardest part is waiting for the marshmallow mixture to cool enough to handle.
- Simple Ingredients: You probably already have everything in your pantry. Butter, marshmallows, Rice Krispies cereal, and a few orange sprinkles. No fancy grocery runs required.
- Perfect for Halloween Parties: These little pumpkins are the star of any class party, trunk-or-treat event, or spooky movie night. They look impressive but take almost no effort.
- Crowd-Pleaser: Kids absolutely love them, and adults always grab two. The combination of crispy, chewy, and sweet is hard to resist.
- Unbelievably Cute: Let us be real—anything shaped like a mini pumpkin is automatically more fun to eat. The orange color and little green stem pretzel stick make them instantly recognizable.
What sets this recipe apart from the basic Rice Krispie treat is the shaping technique and the attention to texture. I have tested this more times than I care to admit, and I have found that using a slightly lower butter-to-marshmallow ratio gives you a firmer treat that holds its shape better without getting rock hard. That is the secret—a little less butter than the classic recipe, and you get a pumpkin that stays cute without crumbling apart.
These pumpkins are the kind of treat that makes you close your eyes after the first bite. They are nostalgic but fresh, simple but special. And when you see a table full of them lined up like a little pumpkin patch, it just feels right for the season.
What Ingredients You Will Need
This recipe uses basic, pantry-friendly ingredients to create something that looks way more complicated than it actually is. Here is everything you need to make these Easy Halloween Rice Krispie Treat Pumpkins come to life.
- 3 tablespoons unsalted butter (I use Land O Lakes—it has a consistent fat content that works well for melting)
- 1 package (10 ounces) regular marshmallows (Jet-Puffed is my go-to; mini marshmallows melt faster if you prefer those)
- 6 cups Rice Krispies cereal (the original brand gives the best texture, but generic works in a pinch)
- Orange gel food coloring (I prefer gel over liquid because it is more concentrated and does not thin out the marshmallow mixture)
- Orange sanding sugar or sprinkles (for coating the outside—get the fine sanding sugar for the smoothest look)
- Pretzel sticks (broken into small pieces for the stems)
- Green candy melts or green frosting (for attaching the stems and adding a little leaf detail—optional but cute)
- Non-stick cooking spray (for your hands and the pan)
That is it. Seven ingredients, and you probably already have most of them. The orange food coloring and sanding sugar are the only things you might need to pick up, but they are easy to find at any grocery store during the fall season. If you cannot find orange sanding sugar, you can use regular sugar mixed with a drop of orange food coloring and let it dry overnight—it works just as well.
One thing I have learned the hard way: do not skip the non-stick spray on your hands. The marshmallow mixture is incredibly sticky, and trying to shape these without greased hands is a recipe for frustration. I keep a small bowl of water nearby too, just to wet my fingers slightly if things get too tacky.
Equipment Needed
You do not need a lot of fancy tools for this recipe, which is part of why I love it. Here is what you will need:
- Large saucepan (at least 4-quart capacity—you need room to stir the cereal in without spilling)
- Rubber spatula or wooden spoon (silicone spatula works best for scraping every bit of marshmallow goodness)
- 9×13-inch baking pan (for letting the mixture cool slightly before shaping—I use a metal one)
- Parchment paper (line the pan for easy cleanup)
- Small bowl of water (for wetting your fingers while shaping)
- Cutting board or clean work surface (for shaping the pumpkins)
- Piping bag or small zip-top bag (if you are using melted candy melts for the stems)
If you do not have a 9×13 pan, you can use a large mixing bowl instead—just spread the mixture out on a piece of parchment paper. I have also used a rimmed baking sheet in a pinch, and it worked fine. The key is to have a large, flat surface where the mixture can cool enough to handle without setting completely.
Preparation Method
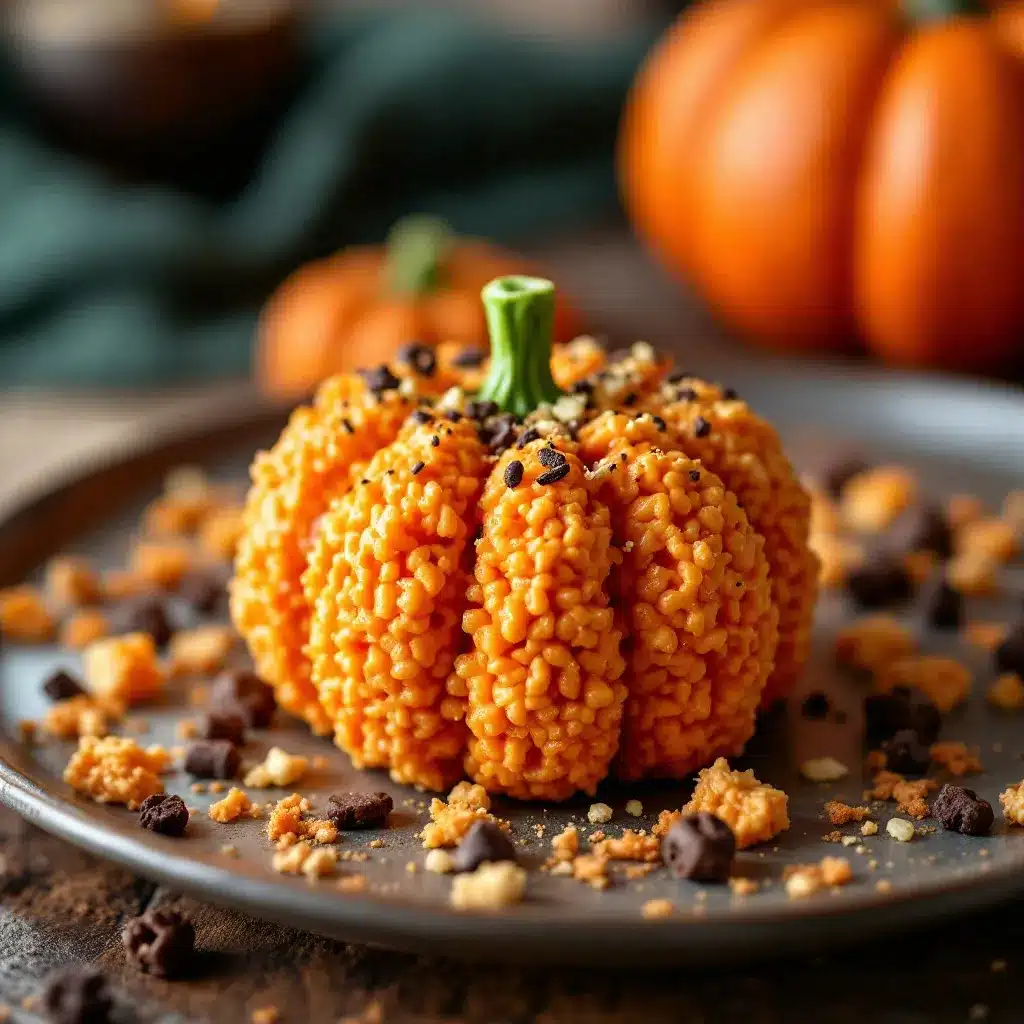
Follow these steps carefully, and you will have a cute little pumpkin patch on your counter in no time. I have broken it down so even a first-timer can nail it.
- Prep your workspace: Line your 9×13-inch pan with parchment paper, leaving some overhang on the sides. Spray the parchment lightly with non-stick cooking spray. Set aside.
- Melt the butter: In your large saucepan, melt the 3 tablespoons of unsalted butter over medium-low heat. Do not rush this—medium-low is important. If the butter browns, it will change the flavor and make the treats taste nutty instead of sweet and buttery.
- Add the marshmallows: Once the butter is fully melted, add the entire package of marshmallows. Stir constantly with your rubber spatula until the marshmallows are completely melted and the mixture is smooth. This takes about 4-5 minutes. Keep the heat on low—do not turn it up. Patience here is everything.
- Add the orange color: Remove the saucepan from the heat. Add about 15-20 drops of orange gel food coloring (or more if you want a deeper shade). Stir until the color is evenly distributed. The mixture should look like a bright, vibrant orange—think Halloween pumpkin, not pastel.
- Fold in the cereal: Add the 6 cups of Rice Krispies cereal to the saucepan. Fold gently with your spatula until all the cereal is coated in the orange marshmallow mixture. Be careful not to crush the cereal—you want those puffs to stay intact for the best texture.
- Transfer to the pan: Scrape the mixture into your prepared 9×13 pan. Press it down gently with the back of your spatula (spray the spatula with non-stick spray first). Do not press too hard—you want a thick layer, not a compacted brick. Let it cool for about 5-10 minutes, just until it is cool enough to handle but still warm and pliable.
- Shape the pumpkins: Spray your hands generously with non-stick cooking spray. Scoop out about 2 tablespoons of the mixture and roll it into a ball. Then, gently pinch the top to create a slight point, and use your fingers to shape the bottom into a round pumpkin form. You want it to look like a mini pumpkin—rounded on the bottom, slightly tapered at the top. Place each shaped pumpkin on a piece of parchment paper.
- Add the orange coating: Pour some orange sanding sugar into a shallow bowl. Roll each shaped pumpkin in the sugar, coating it evenly. This gives them that beautiful sparkly orange look and adds a little crunch.
- Attach the stems: Break a pretzel stick into small pieces—about 1/2 inch each. Dip one end of the pretzel piece into melted green candy melts or green frosting, and press it gently into the top of the pumpkin. Hold for a few seconds until it stays in place. If you want to add a little leaf, pipe a small green leaf shape next to the stem using the same candy melts.
- Let them set: Place the finished pumpkins on a baking sheet lined with parchment paper. Let them sit at room temperature for about 15-20 minutes until the stems are secure and the treats are fully set.
One thing I always tell people: do not overwork the mixture when shaping. The more you handle it, the denser the treats get. Just shape them gently, and they will stay light and chewy.
Cooking Tips & Techniques
I have made these Easy Halloween Rice Krispie Treat Pumpkins more times than I can count, and I have definitely learned a few things the hard way. Here are my best tips to help you avoid the same mistakes.
Low and slow is the rule. I cannot stress this enough. Melting the marshmallows over low heat is non-negotiable. High heat will scorch the marshmallows, and once that happens, there is no going back. The mixture will be brown, bitter, and unusable. I keep my burner on the lowest setting and stir constantly. It takes a few extra minutes, but it is worth it.
Watch the moisture. Marshmallows are basically sugar and gelatin, and they absorb moisture from the air. If you are making these on a humid day, the mixture might feel stickier than usual. That is okay—just add a little more non-stick spray to your hands. If the mixture feels too wet, let it cool for an extra 2-3 minutes before shaping.
Use a light touch when pressing. When you transfer the mixture to the pan to cool, do not press it down hard. You want the mixture to be thick enough to shape but not compacted. If you press too firmly, the treats will be hard and dense instead of light and chewy. I use the back of a spatula and just barely flatten it.
Keep your hands greased. I keep a small bowl of water nearby too. If the non-stick spray starts to wear off, I dip my fingers in the water and shake off the excess. The water creates a barrier between the sticky marshmallow and your skin. It works like magic.
Plan your timing. These treats are best made the same day you plan to serve them. They stay fresh for about 2 days at room temperature, but they are at their peak texture within the first 12 hours. If you are making them for a party, aim to make them in the morning or the night before.
I once tried to double the batch and make it in a single pot. Do not do that. The mixture was too much to stir properly, and the marshmallows melted unevenly. Stick to a single batch per saucepan, and if you need more, just make them in batches. It is faster than trying to clean up a sticky disaster.
Variations & Adaptations
One of the best things about this recipe is how easy it is to tweak. Here are some variations I have tried and loved.
Chocolate Pumpkin Treats: Add 1/4 cup of cocoa powder to the marshmallow mixture after it melts, and stir until combined. The chocolate flavor pairs beautifully with the marshmallow, and the orange color becomes a rich, dark orange that still looks like a pumpkin. My kids actually prefer this version now.
Gluten-Free Option: Rice Krispies are naturally gluten-free (check the box to be sure), so this recipe is already gluten-free as written. But if you want to switch it up, you can use a gluten-free crispy rice cereal like Nature’s Path. The texture is slightly different—a little more puffed—but it works great.
Peanut Butter Pumpkin: Stir in 1/4 cup of creamy peanut butter along with the marshmallows. The peanut butter adds a savory note that balances the sweetness. This version is a huge hit at Halloween parties where adults are looking for something less sugary.
Spooky Spider Variation: Instead of shaping them into pumpkins, shape the mixture into round balls and press two candy eyes into each one. Use black licorice strings for legs. These are perfect if you want to keep the same base recipe but change the look for a different Halloween theme.
Mini Pumpkin Bites: If you are serving a crowd, shape the mixture into smaller balls—about 1 tablespoon each. They are perfect for little hands and make the batch go further. I have brought these to school parties, and they disappear in minutes.
Serving & Storage Suggestions
These Easy Halloween Rice Krispie Treat Pumpkins are best served at room temperature. I like to arrange them on a large platter lined with orange or black napkins to make them look like a little pumpkin patch. If you are feeling extra festive, scatter some candy corn or fall-colored M&Ms around the platter.
They pair perfectly with a warm drink like our Homemade Pumpkin Spice Latte for a cozy fall afternoon treat. The combination of the sweet, crunchy pumpkin and the warm, spiced latte is pure comfort.
For storage, keep them in an airtight container at room temperature for up to 2 days. Do not refrigerate them—the cold air will make the treats dry and hard. If you need to store them longer, you can freeze them. Place the pumpkins in a single layer on a baking sheet and freeze for 1 hour, then transfer them to a freezer-safe bag. They will keep for up to 1 month. To thaw, just leave them at room temperature for about 30 minutes.
If you are making these ahead of time for a party, I recommend adding the pretzel stems and any decorative details right before serving. The pretzels can get a little soft if they sit in the marshmallow mixture for too long. I have made the pumpkins themselves a day ahead and added the stems the morning of the party with great results.
Nutritional Information & Benefits
Let us be honest—these are a treat, not a health food. But here is the nutritional breakdown for one pumpkin (based on 12 servings from a single batch):
- Calories: 175
- Fat: 4g
- Carbohydrates: 35g
- Sugar: 18g
- Protein: 1g
- Sodium: 180mg
The main ingredients—Rice Krispies and marshmallows—are mostly simple carbohydrates, which give you a quick energy boost. The butter adds a small amount of fat, which helps with satiety. If you are looking to make them slightly healthier, you can use a lower-sugar marshmallow or a whole-grain crispy rice cereal, but honestly, these are meant to be a fun, occasional indulgence.
For those with dietary restrictions, this recipe is naturally gluten-free (check your cereal box) and can be made dairy-free by using a plant-based butter alternative. I have used Earth Balance in the past, and it worked perfectly. The texture was slightly softer, but the flavor was still great.
I always remind myself that Halloween is about treats and fun, not about counting calories. These pumpkins are a special occasion dessert, and they bring so much joy that I think a little sugar is totally worth it.
Conclusion
These Easy Halloween Rice Krispie Treat Pumpkins have become a non-negotiable part of our October traditions. They are simple enough to make with kids, cute enough to impress at any party, and delicious enough that everyone reaches for seconds. The best part? You do not need to be a professional baker to pull them off. I burned my first batch, and I still ended up here, so trust me—if I can do it, you can too.
I love how they bring a little bit of homemade magic to the Halloween season without taking over my whole afternoon. Whether you are making them for a class party, a trunk-or-treat event, or just a fun weekend project with your kids, these pumpkins deliver every time. And honestly, watching my daughter carefully place each little pretzel stem into the top of her pumpkins is one of my favorite fall memories.
I would love to hear how yours turn out! Drop a comment below and let me know if you tried any of the variations or came up with your own twist. And if you are looking for more fall baking ideas, check out our Easy One Bowl Chocolate Chip Pumpkin Bread or these Perfect Pumpkin Cream Cheese Muffins for more seasonal goodness. Happy Halloween, and happy snacking!
Frequently Asked Questions
Can I use mini marshmallows instead of regular ones?
Yes, absolutely. Mini marshmallows melt faster and more evenly, which can actually make the process a little quicker. If you use mini marshmallows, you will need about 4 cups to replace one 10-ounce bag of regular marshmallows.
Why did my Rice Krispie treats turn out hard?
This usually happens when the mixture is pressed too firmly into the pan or when the marshmallows are overheated. Make sure you use low heat and press the mixture gently. If the treats are already hard, you can try microwaving them for 5-10 seconds to soften them slightly before shaping.
Can I make these ahead of time for a party?
Yes, you can make them up to 2 days ahead. Store them in an airtight container at room temperature. I recommend adding the pretzel stems and any decorative details the day of the party to keep them looking fresh and crisp.
How do I get the orange color to be vibrant?
Use gel food coloring instead of liquid. Gel is more concentrated and gives a brighter color without thinning the marshmallow mixture. Start with 15 drops and add more until you reach the shade you want. A little goes a long way.
Can I freeze these pumpkin treats?
Yes, they freeze well. Place them in a single layer on a baking sheet and freeze for 1 hour, then transfer to a freezer-safe bag. They will keep for up to 1 month. Thaw at room temperature for about 30 minutes before serving. The texture might be slightly softer after freezing, but they still taste great.
Pin This Recipe!
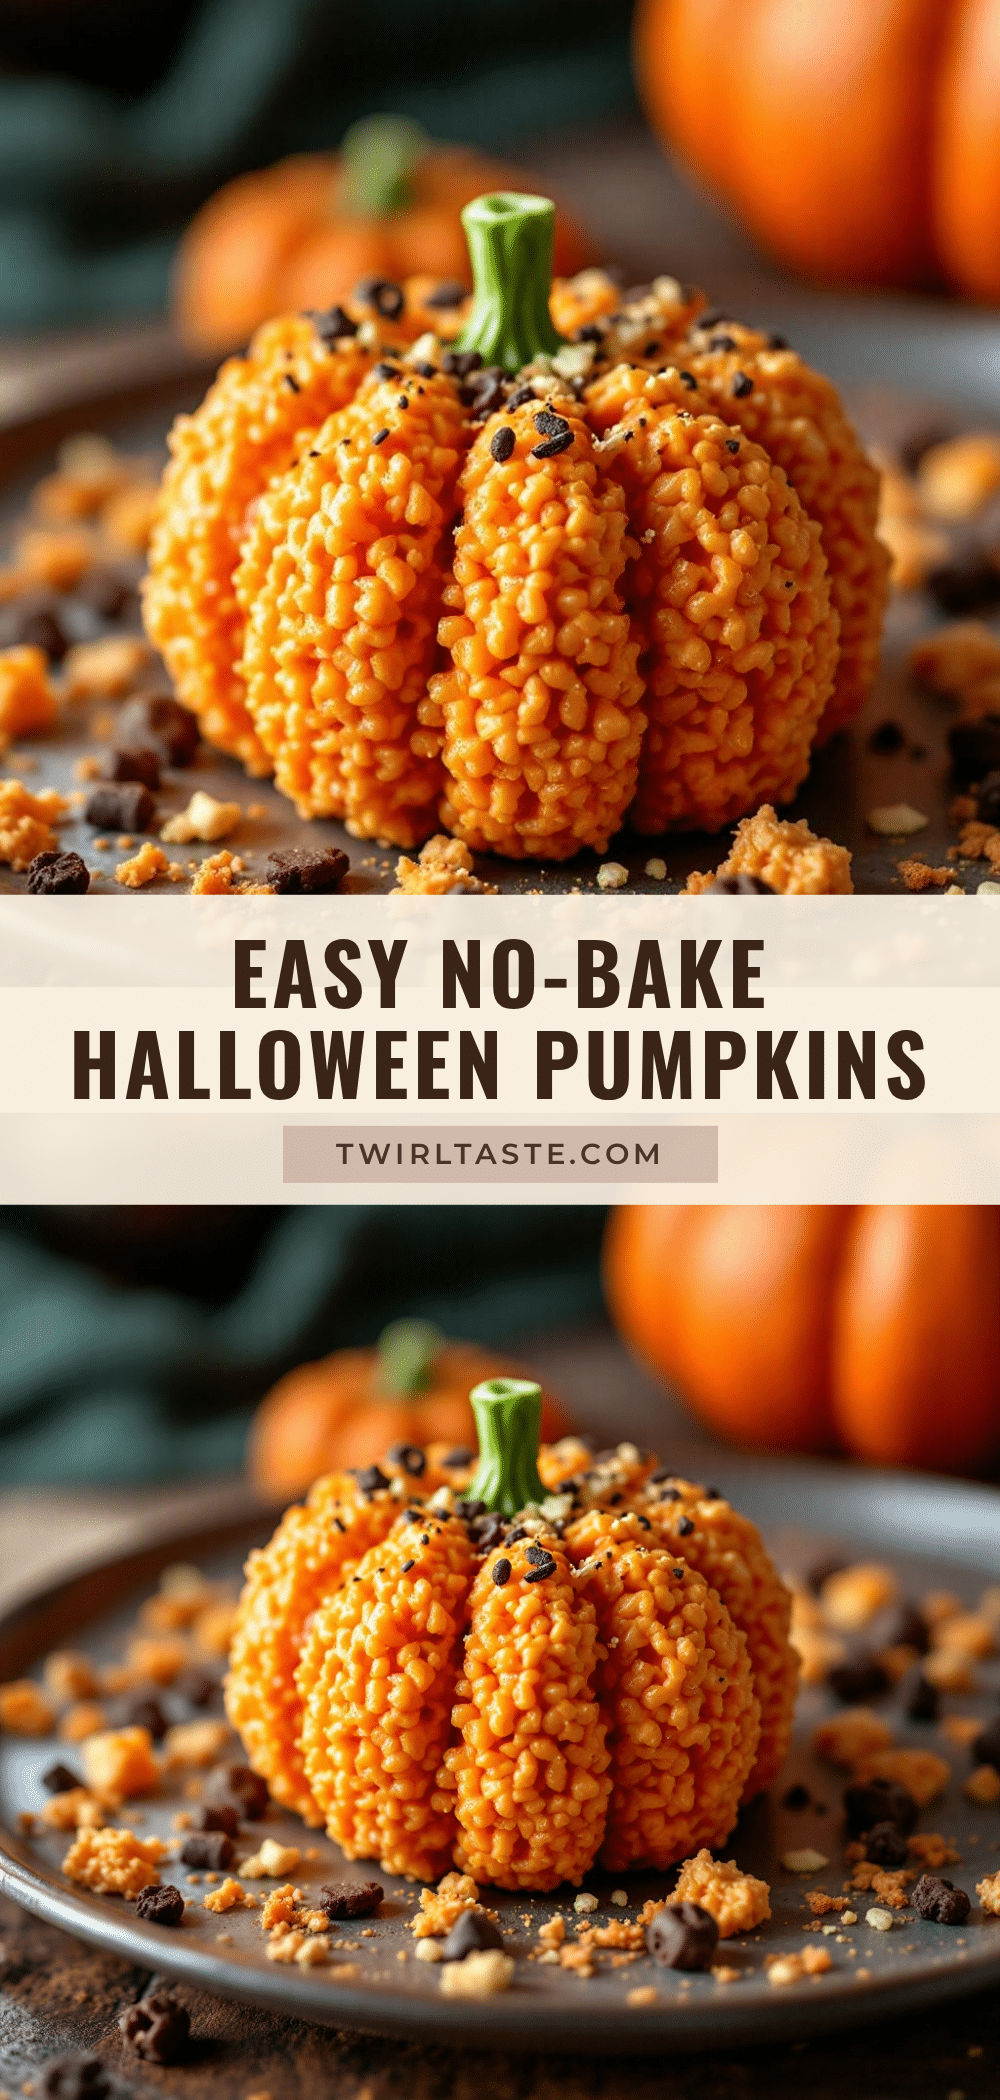
Easy Halloween Rice Krispie Treat Pumpkins
These cute and easy Halloween Rice Krispie Treat Pumpkins are made with simple ingredients and come together in about 20 minutes. Perfect for class parties, trunk-or-treat events, or a fun weekend project with kids.
- Prep Time: 20 minutes
- Cook Time: 5 minutes
- Total Time: 25 minutes
- Yield: 12 servings 1x
- Category: Dessert
- Cuisine: American
Ingredients
- 3 tablespoons unsalted butter
- 1 package (10 ounces) regular marshmallows
- 6 cups Rice Krispies cereal
- Orange gel food coloring
- Orange sanding sugar or sprinkles
- Pretzel sticks
- Green candy melts or green frosting
- Non-stick cooking spray
Instructions
- Prep your workspace: Line your 9×13-inch pan with parchment paper, leaving some overhang on the sides. Spray the parchment lightly with non-stick cooking spray. Set aside.
- Melt the butter: In your large saucepan, melt the 3 tablespoons of unsalted butter over medium-low heat. Do not rush this—medium-low is important. If the butter browns, it will change the flavor and make the treats taste nutty instead of sweet and buttery.
- Add the marshmallows: Once the butter is fully melted, add the entire package of marshmallows. Stir constantly with your rubber spatula until the marshmallows are completely melted and the mixture is smooth. This takes about 4-5 minutes. Keep the heat on low—do not turn it up. Patience here is everything.
- Add the orange color: Remove the saucepan from the heat. Add about 15-20 drops of orange gel food coloring (or more if you want a deeper shade). Stir until the color is evenly distributed. The mixture should look like a bright, vibrant orange—think Halloween pumpkin, not pastel.
- Fold in the cereal: Add the 6 cups of Rice Krispies cereal to the saucepan. Fold gently with your spatula until all the cereal is coated in the orange marshmallow mixture. Be careful not to crush the cereal—you want those puffs to stay intact for the best texture.
- Transfer to the pan: Scrape the mixture into your prepared 9×13 pan. Press it down gently with the back of your spatula (spray the spatula with non-stick spray first). Do not press too hard—you want a thick layer, not a compacted brick. Let it cool for about 5-10 minutes, just until it is cool enough to handle but still warm and pliable.
- Shape the pumpkins: Spray your hands generously with non-stick cooking spray. Scoop out about 2 tablespoons of the mixture and roll it into a ball. Then, gently pinch the top to create a slight point, and use your fingers to shape the bottom into a round pumpkin form. You want it to look like a mini pumpkin—rounded on the bottom, slightly tapered at the top. Place each shaped pumpkin on a piece of parchment paper.
- Add the orange coating: Pour some orange sanding sugar into a shallow bowl. Roll each shaped pumpkin in the sugar, coating it evenly. This gives them that beautiful sparkly orange look and adds a little crunch.
- Attach the stems: Break a pretzel stick into small pieces—about 1/2 inch each. Dip one end of the pretzel piece into melted green candy melts or green frosting, and press it gently into the top of the pumpkin. Hold for a few seconds until it stays in place. If you want to add a little leaf, pipe a small green leaf shape next to the stem using the same candy melts.
- Let them set: Place the finished pumpkins on a baking sheet lined with parchment paper. Let them sit at room temperature for about 15-20 minutes until the stems are secure and the treats are fully set.
Notes
Do not overwork the mixture when shaping; the more you handle it, the denser the treats get. Use low heat when melting marshmallows to avoid scorching. Keep hands greased with non-stick spray or water to prevent sticking. These treats are best made the same day you plan to serve them, but they stay fresh for about 2 days at room temperature. For freezing, place in a single layer on a baking sheet and freeze for 1 hour, then transfer to a freezer-safe bag for up to 1 month.
Nutrition
- Serving Size: 1 pumpkin
- Calories: 175
- Sugar: 18
- Sodium: 180
- Fat: 4
- Saturated Fat: 2
- Carbohydrates: 35
- Protein: 1
Keywords: Halloween, Rice Krispie treats, pumpkins, no-bake, easy, kid-friendly, fall, party treat


