Love this? Save it for later!
Share the inspiration with your friends
It was 5:15 PM on a Tuesday, and the house was already descending into that familiar, chaotic symphony of whining kids and barking dogs. I stared at the package of chicken, then at the clock, then at the half-empty jar of grated parmesan. There was no time to brine. There was no time to marinate overnight. There was just me, a little bit of desperation, and a craving for something crispy, garlicky, and undeniably comforting.
I threw the chicken into a hot pan with a splash of oil, hoping for the best. The sizzle was loud and promising. While the skin turned golden, I minced three cloves of garlic because, honestly, why do we bother with less? Then came the cheese. A heavy dusting of parmesan mixed with a little panko for extra crunch. I tossed it all together, letting it brown until the kitchen smelled like an Italian restaurant’s back alley—rich, savory, and slightly dangerous.
When I pulled the pan out, the steam hit my face, carrying that unmistakable scent of browned butter and toasted cheese. The kids came running. Not because they were hungry, but because they smelled victory. We dug in without plates, using crusty bread to scoop up the garlicky juices pooling at the bottom of the skillet. No one asked what day it was. No one complained about homework. For twenty minutes, the world was just crispy, cheesy, garlic chicken.
That night wasn’t about perfection. It was about survival, wrapped in a golden, crunchy crust. This Best Crispy Garlic Parmesan Chicken Thighs recipe was born from that exact moment of panic. It’s not fancy. It’s not complicated. It’s just really, really good. And honestly, it’s become my go-to when the clock is ticking and I need to feed the herd something that feels like a treat rather than a chore. You know how some recipes just stick? This one did.
Why You’ll Love This Recipe
Let’s be real for a second. Cooking chicken thighs can sometimes feel like a gamble. You want that juicy interior without the chewy, rubbery texture that makes you want to throw the pan out the window. I’ve spent years testing different cuts and methods, and I’ve learned that the key isn’t just heat—it’s the crust. This recipe delivers on that front, hard.
Here is why this specific version of crispy garlic parmesan chicken thighs has earned a permanent spot in my weekly rotation:
- Quick & Easy: From fridge to table in under 30 minutes. This is the ultimate weeknight savior when you’re running on empty.
- Simple Ingredients: You likely have everything right now. Chicken, garlic, cheese, oil, maybe some panko if you’re feeling fancy. No obscure spices from a trip to Morocco required.
- Perfect for Busy Weeknights: It’s forgiving. If you burn the garlic slightly, it still tastes good. If the chicken is a bit wet, just pat it harder. It’s hard to mess up.
- Crowd-Pleaser: Even the picky eaters at my table, who usually inspect their food like it’s a bomb threat, ask for seconds. The crunch factor is a game-changer for skeptical palates.
- Unbelievably Delicious: The combination of the salty, nutty parmesan and the pungent, sweet garlic creates a flavor profile that hits every right spot. It’s savory heaven.
What makes this different from the hundreds of other chicken thigh recipes out there? It’s the double-layer of crunch. Most recipes just season the chicken. This one coats it. The parmesan melts slightly, then re-hardens into a savory shell that cracks when you bite into it. Plus, using bone-in, skin-on thighs ensures the meat stays moist because the fat renders out slowly, basting the meat from the inside. It’s science, but it tastes like luck.
I remember trying a version of this years ago that used chicken breasts. Dry. Bland. A waste of good garlic. Switching to thighs changed everything. It’s the kind of meal that makes you close your eyes after the first bite and just sigh. It’s comfort food, but elevated by that garlic kick. It’s perfect for impressing guests without spending hours in the kitchen, or just for turning a Tuesday night into something worth looking forward to.
What Ingredients You Will Need
This recipe relies on a few high-quality staples to deliver that restaurant-quality crunch and flavor. You don’t need a fancy pantry, but you do need the right components. The magic here is in the ratio of garlic to cheese, so don’t be shy with the aromatics.
For the Chicken Base
- Chicken Thighs: 1.5 lbs (680g) of bone-in, skin-on thighs. I recommend buying these fresh rather than frozen if possible, as frozen skin often gets soggy. If you must use frozen, ensure they are completely thawed and patted dry. The skin is crucial for the crispiness.
- Neutral Oil: 2 tablespoons of avocado oil or vegetable oil. Avocado oil has a higher smoke point, which helps prevent burning when searing the skin. Olive oil works, but it can smoke faster at high heat.
For the Crispy Coating
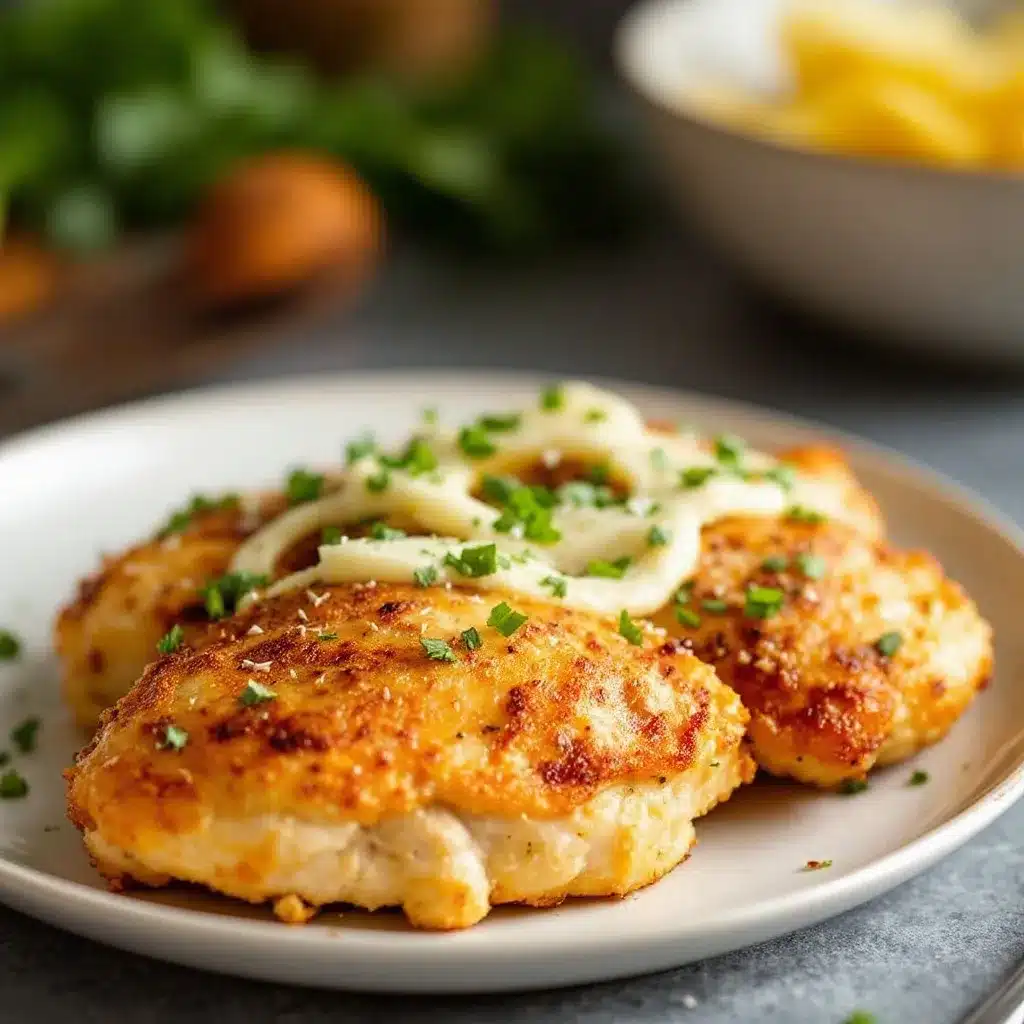
- Grated Parmesan Cheese: ½ cup (50g). I strongly recommend buying a wedge of Parmigiano-Reggiano and grating it yourself. Pre-grated cheese is coated in cellulose to prevent clumping, which stops it from melting and crisping properly. It makes a huge difference in texture.
- Panko Breadcrumbs: ¼ cup (25g). This is optional but highly recommended. Panko creates a shatteringly crisp crust that regular breadcrumbs can’t match. If you’re avoiding breadcrumbs, you can skip this, but the cheese alone might not stick as well.
- Garlic Powder: 1 teaspoon. This adds a consistent garlic flavor that sticks to the coating better than fresh garlic alone.
- Salt and Black Pepper: ½ teaspoon each. Season the coating well, as the cheese adds saltiness, but you need that pepper bite to balance it.
For the Garlic Sauce
- Fresh Garlic: 3-4 cloves, minced finely. Fresh is non-negotiable here. Powdered garlic in the sauce step will taste flat.
- Butter: 2 tablespoons. Butter adds the richness that oil lacks. It helps the garlic toast without burning as quickly.
- Lemon Juice: 1 teaspoon. Just a splash to cut through the richness of the cheese and fat. It brightens the whole dish.
- Fresh Parsley: 2 tablespoons, chopped. For color and a fresh herbal note. It’s not strictly necessary for flavor, but it makes the plate look alive.
If you’re looking to substitute, you can use chicken breasts, but reduce the cooking time by about 5-7 minutes to prevent drying them out. For a dairy-free option, use a nutritional yeast-based “parmesan” and olive oil instead of butter, though the texture will be slightly different.
Equipment Needed
You don’t need a lot of fancy gear for this, which is part of its charm. The most important tool is a heavy-bottomed skillet. Cast iron is my absolute favorite for this because it holds heat incredibly well, ensuring the chicken skin crisps evenly without hot spots. If you don’t have cast iron, a stainless steel skillet works great, but be prepared to watch the heat more closely to prevent sticking.
A large baking sheet is optional but helpful if you want to finish the chicken in the oven. This is useful if your thighs are particularly large or if you’re cooking a bigger batch. It prevents overcrowding in the pan, which steams the chicken instead of searing it. If you’re cooking for a crowd, splitting the batch between the pan and the oven is the way to go.
Don’t forget a sharp knife and a cutting board for mincing the garlic. A microplane or fine grater is essential for the parmesan if you’re grating it yourself. It creates a finer texture that adheres better to the chicken. A pair of tongs is also handy for flipping the chicken without piercing the skin and losing those precious juices. Keep it simple, keep it clean, and you’ll be fine.
Preparation Method
Getting this right starts before the heat even turns on. The preparation phase is all about moisture control and coating adhesion. If the chicken is wet, the coating slides off. If the coating is too thick, it burns before the chicken cooks. Here is how to nail it.
- Prep the Chicken (5 minutes): Pat the chicken thighs completely dry with paper towels. This is the most critical step. Remove any excess skin if it’s overly loose, but keep the main layer intact. Season the chicken generously with salt and pepper on both sides. Let them sit at room temperature while you prep the coating. This helps them cook more evenly.
- Make the Coating (2 minutes): In a shallow bowl, mix the grated parmesan, panko breadcrumbs (if using), and garlic powder. Add a pinch of black pepper. You want this mixture to be uniform. If using panko, consider pulsing it in a food processor once or twice to break it down slightly so it adheres better to the cheese.
- Dredge the Chicken (5 minutes): Take each thigh and press it firmly into the cheese mixture. Use your hands to press the coating onto the skin side. You want a thick, even layer. Don’t worry if it looks messy; it will crisp up. Place the coated thighs on a plate, skin-side up, to keep the coating intact.
- Sear the Skin (10 minutes): Heat the oil in your cast iron skillet over medium-high heat. Once the oil shimmers, place the chicken thighs skin-side down in the pan. Do not move them! Let them sear for 6-8 minutes. You’re looking for a deep golden-brown crust. If the coating starts to burn, lower the heat slightly. The fat from the skin will render out and fry the coating.
- Flip and Finish (10-15 minutes): Once the skin is crispy, flip the chicken. Cook for another 10-12 minutes. If you’re using large thighs, you can transfer the pan to a 400°F (200°C) oven to finish cooking through. Check the internal temperature; it should reach 165°F (74°C). If you’re not using an oven, cover the pan with a lid for the last 5 minutes to steam the meat gently while the skin stays crisp.
- Make the Garlic Sauce (2 minutes): Remove the chicken from the pan and set it aside on a warm plate. In the same pan, reduce heat to low. Add the butter and minced garlic. Sauté for 1-2 minutes until fragrant. Be careful not to burn the garlic. Stir in the lemon juice and parsley.
- Glaze and Serve: Pour the garlicky butter sauce over the chicken thighs. Let it bubble for 30 seconds to coat the meat. Serve immediately while the crust is still crunchy.
If the chicken isn’t cooked through after searing, don’t panic. Just lower the heat and cover the pan. The residual heat and trapped steam will finish the job. Just watch the bottom to ensure it doesn’t burn.
Cooking Tips & Techniques
I’ve burned more garlic than I care to admit, so let me save you the trouble. Garlic burns incredibly fast. When making the sauce, keep the heat low and move the garlic constantly. If it turns brown, toss it. Burnt garlic tastes bitter and ruins the whole dish. Fresh is best, but if you’re in a pinch, use high-quality jarred minced garlic, though fresh is superior.
Another common mistake is overcrowding the pan. If you put too many thighs in at once, the temperature of the oil drops, and the chicken steams instead of sears. This results in soggy skin. Cook in batches if necessary. It’s worth the extra ten minutes.
Patience is key with the sear. When you first put the chicken in, resist the urge to flip it. Let the Maillard reaction happen. That golden crust is where the flavor lives. If you lift it too early, the coating will stick to the pan. If it releases easily, it’s ready.
For consistent results, use a meat thermometer. Chicken thighs are forgiving, but overcooking them makes them tough. Pull them at 165°F (74°C). They will continue to cook slightly as they rest, so you don’t want to pull them too early.
Finally, let the chicken rest for 5 minutes after cooking. This allows the juices to redistribute. If you cut into it immediately, the juices run out, and the meat dries up. It’s a small step that makes a big difference.
Variations & Adaptations
This recipe is a solid foundation, but it’s flexible enough to adapt to your tastes or dietary needs. Here are a few ways I’ve tweaked it over time:
- Spicy Kick: Add ½ teaspoon of red pepper flakes to the cheese coating or mix a little cayenne pepper into the garlic sauce. It adds a nice heat that pairs well with the richness of the cheese.
- Herb-Crusted: Mix dried oregano or thyme into the panko mixture. This gives it a more classic Italian profile. Fresh thyme leaves also work well in the sauce.
- Gluten-Free: Simply omit the panko breadcrumbs. The parmesan crust will still form, though it will be thinner and more like a cheesy skin. Use almond flour instead of panko for a thicker, gluten-free crunch.
- Low-Carb: Skip the breadcrumbs entirely. The cheese and garlic powder alone create a delicious, crispy coating. This is great for keto diets.
- Veggie Swap: While chicken thighs are the star, you can use this same coating method for zucchini sticks or cauliflower florets. Just reduce the cooking time significantly.
I once tried this with chicken breasts, and while it was good, the texture wasn’t the same. The fat in the thighs is what makes it juicy. If you must use breasts, brine them in salt water for 30 minutes first to help them retain moisture.
Serving & Storage Suggestions
Serve these chicken thighs hot, right out of the pan. They pair beautifully with simple sides that can soak up the garlicky sauce. A creamy maple butternut squash soup is a perfect autumn companion, or a simple green salad with a vinaigrette to cut the richness. Mashed potatoes or crusty bread are also excellent choices.
For storage, let the chicken cool completely before placing it in an airtight container. It will keep in the refrigerator for up to 3 days. To reheat, avoid the microwave if you want to preserve the crunch. Reheat in a 350°F (175°C) oven for 10-15 minutes, or in an air fryer for 5 minutes. The air fryer is actually the best method for restoring that crispy texture.
You can also freeze the cooked chicken. Wrap it tightly in foil and place it in a freezer-safe bag. It will last for up to 2 months. Thaw in the refrigerator overnight before reheating. The flavors actually meld and deepen after a day or two, making leftovers surprisingly good.
Nutritional Information & Benefits
Chicken thighs are a great source of protein and iron. They contain more iron than chicken breasts, which is beneficial for energy levels. The skin adds healthy fats, which help you feel full and satisfied. However, the parmesan and butter do add some sodium and saturated fat, so enjoy in moderation.
Garlic is known for its immune-boosting properties and anti-inflammatory effects. Parmesan provides calcium and probiotics, though the heat of cooking may reduce the probiotic benefit. Overall, this is a balanced meal that provides sustained energy without the sugar crash of carb-heavy dishes.
For those watching sodium, you can reduce the salt in the coating and rely more on the natural saltiness of the parmesan. It’s a flexible recipe that can be adjusted to fit your dietary needs.
Conclusion
This Best Crispy Garlic Parmesan Chicken Thighs recipe is more than just dinner. It’s a reminder that the best meals often come from the simplest moments. It’s crispy, it’s garlicky, and it’s incredibly satisfying. I hope you try it and make it your own. Add some spice, swap the herbs, or just enjoy it as is. It’s a winner every time.
Don’t forget to leave a comment below and let me know how it turned out for you. Did you add extra garlic? Did the kids love it? I love hearing your stories and adaptations. Share this recipe with a friend who needs a quick, delicious weeknight idea. And if you’re looking for more easy dinner inspiration, check out my one-pan honey garlic chicken thighs for another variation.
Happy cooking! May your kitchen be fragrant and your plates empty.
Frequently Asked Questions
Can I use chicken breasts instead of thighs?
Yes, but the texture will be different. Chicken breasts are leaner and can dry out easily. If you use breasts, reduce the cooking time by about 5 minutes and watch them closely to ensure they don’t overcook.
Do I have to use panko breadcrumbs?
No, it’s optional. The parmesan cheese alone will create a crust. Panko just adds extra crunch. If you’re avoiding breadcrumbs, you can skip them or use almond flour for a gluten-free option.
How do I keep the chicken crispy when reheating?
Avoid the microwave. Reheat in an air fryer at 350°F (175°C) for 5 minutes, or in a conventional oven for 10-15 minutes. This helps restore the crispiness of the coating.
Can I make this ahead of time?
You can prep the chicken and coating ahead of time, but sear it just before serving. The coating will get soggy if it sits for too long. Cooked chicken can be stored in the fridge for up to 3 days.
What side dishes go best with this recipe?
Simple sides work best. Roasted vegetables, mashed potatoes, a green salad, or crusty bread are all excellent choices. You can also serve it with a creamy cucumber salad for a refreshing contrast.
Pin This Recipe!
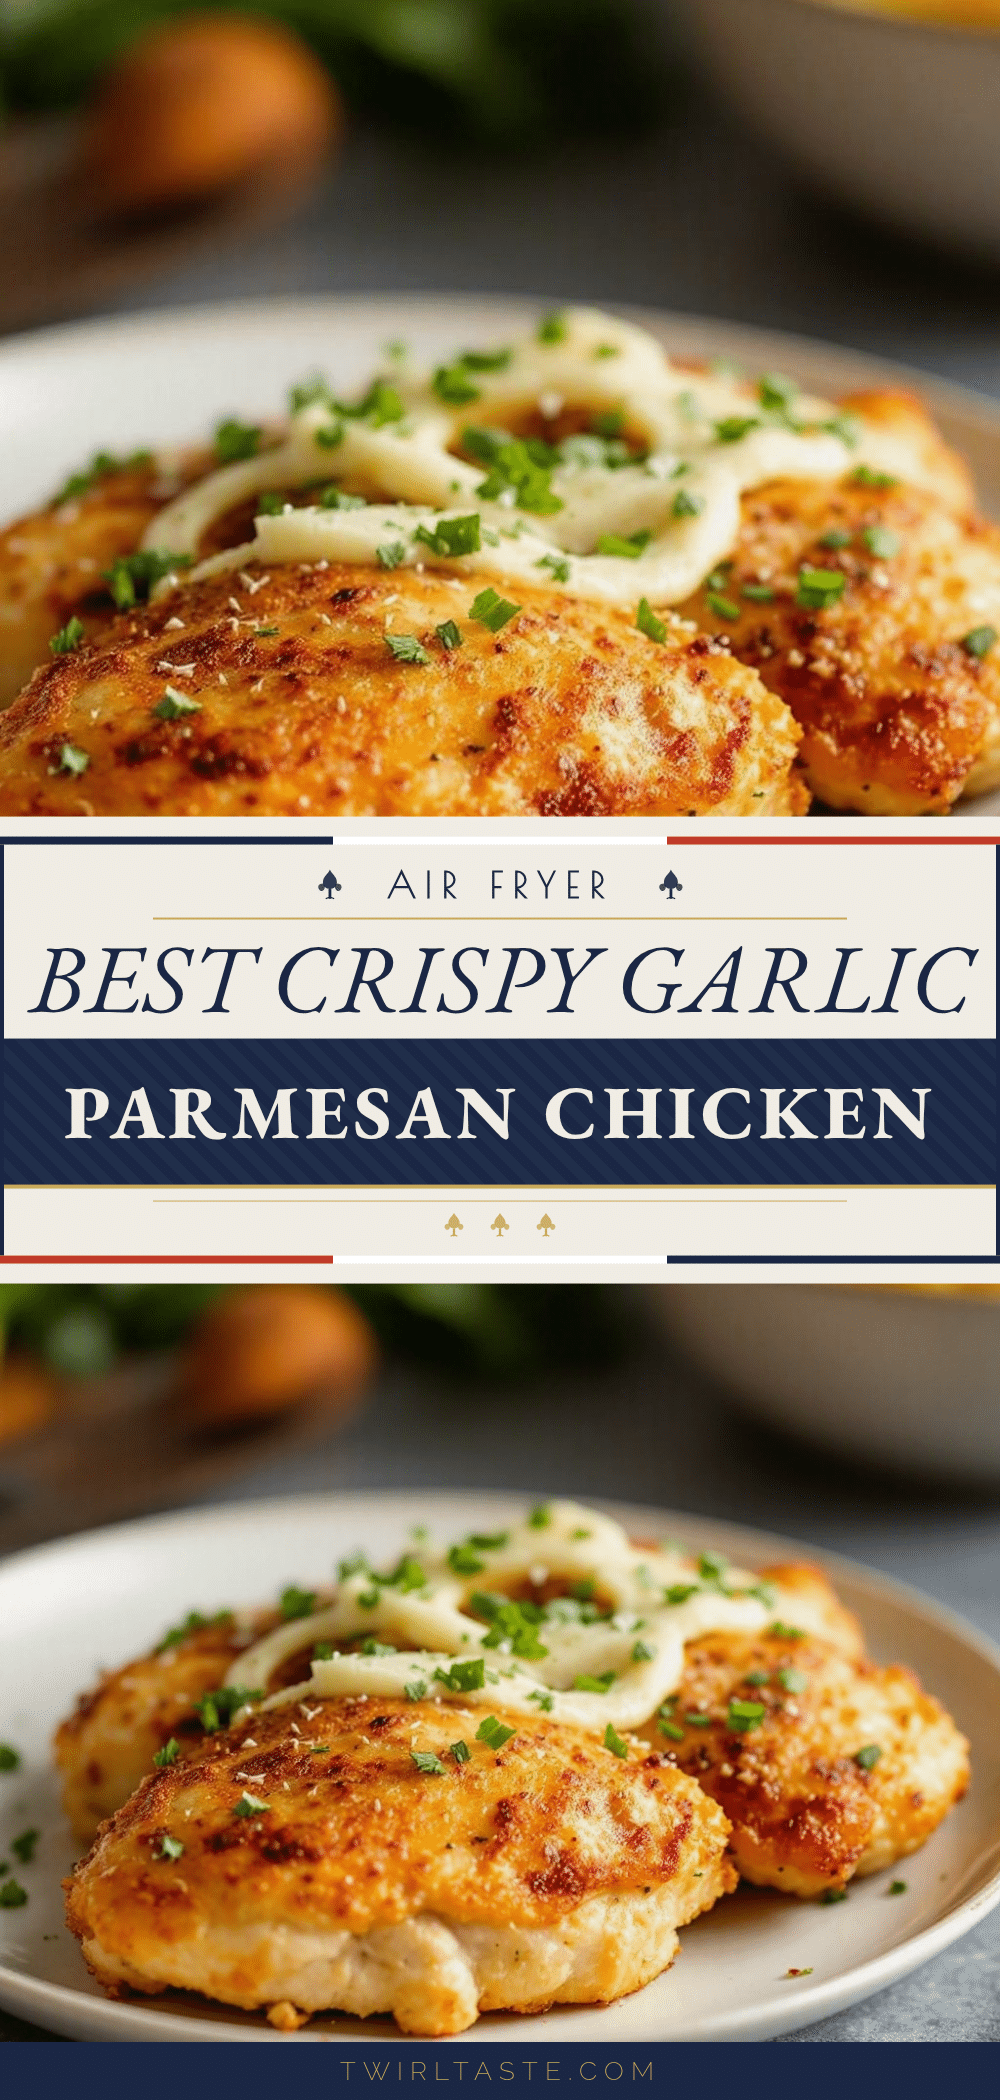
Best Crispy Garlic Parmesan Chicken Thighs

A quick and easy weeknight dinner featuring bone-in, skin-on chicken thighs coated in a crispy mixture of parmesan cheese and panko breadcrumbs, finished with a rich garlic butter sauce.
- Prep Time: 12 minutes
- Cook Time: 20 minutes
- Total Time: 32 minutes
- Yield: 4 servings 1x
- Category: Main Course
- Cuisine: Italian
Ingredients
- 1.5 lbs (680g) bone-in, skin-on chicken thighs
- 2 tablespoons neutral oil (avocado or vegetable)
- 1/2 cup (50g) grated Parmesan cheese
- 1/4 cup (25g) panko breadcrumbs
- 1 teaspoon garlic powder
- 1/2 teaspoon salt
- 1/2 teaspoon black pepper
- 3–4 cloves fresh garlic, minced
- 2 tablespoons butter
- 1 teaspoon lemon juice
- 2 tablespoons fresh parsley, chopped
Instructions
- Pat chicken thighs completely dry with paper towels and season generously with salt and pepper on both sides.
- In a shallow bowl, mix grated parmesan, panko breadcrumbs, garlic powder, and a pinch of black pepper.
- Press each chicken thigh firmly into the cheese mixture, coating the skin side evenly.
- Heat oil in a heavy-bottomed skillet (like cast iron) over medium-high heat until shimmering.
- Place chicken thighs skin-side down in the pan. Sear without moving for 6-8 minutes until deep golden-brown.
- Flip chicken and cook for another 10-12 minutes. If thighs are large, finish in a 400°F (200°C) oven until internal temperature reaches 165°F (74°C).
- Remove chicken from pan and set aside on a warm plate.
- Reduce heat to low. Add butter and minced garlic to the pan, sautéing for 1-2 minutes until fragrant.
- Stir in lemon juice and parsley to create the sauce.
- Pour the garlic butter sauce over the chicken, let bubble for 30 seconds, and serve immediately.
Notes
Ensure chicken is completely dry before coating to help the crust adhere. Do not overcrowd the pan to ensure proper searing. Garlic burns easily, so keep heat low when making the sauce. Let chicken rest for 5 minutes before serving to retain juices. For reheating, use an air fryer or oven to maintain crispiness.
Nutrition
- Serving Size: 1 chicken thigh with
- Calories: 450
- Sugar: 1
- Sodium: 680
- Fat: 32
- Saturated Fat: 12
- Carbohydrates: 6
- Fiber: 0.5
- Protein: 35
Keywords: chicken thighs, parmesan chicken, garlic chicken, crispy chicken, weeknight dinner, easy recipe, keto friendly, gluten-free option