Love this? Save it for later!
Share the inspiration with your friends
I did not trust brown butter in cookies. For years, I thought it was just a fancy word that pastry chefs used to charge extra for simple baked goods. It sounded like unnecessary work. You have to watch a pot of melting butter on the stove, right? And if you look away for ten seconds, it burns. And if it burns, you throw it away. That is a lot of risk for a chocolate chip cookie. I was perfectly happy with regular melted butter. Or even just softened butter. It worked fine. It was reliable. It didn’t require standing over the stove stirring like I was making risotto.
Then I tried a version at a local bakery that tasted different. Nutty. Deep. Almost savory in the best way possible. I asked the baker how she did it. She said she browned the butter. I laughed. I told her I didn’t have time for that. But I kept thinking about that cookie. It had a texture I couldn’t place. It was chewy, but not gummy. Crispy on the edges, soft in the middle. I finally bought a stainless steel pan and decided to give it a shot. I nearly set off my smoke alarm on the first try because I got distracted by a phone call.
That second attempt was better, but still too dark. It tasted bitter. I almost quit. But then I remembered the specific moment I ate that first cookie at the bakery. The smell of toasted nuts wafting up from the plate. I realized I wasn’t just looking for a cookie; I was looking for that specific, rich flavor profile that normal butter just couldn’t provide. So I went back. Third time was the charm. I kept the heat low and watched the foam settle. When I pulled it out, the color was like amber honey. The smell was incredible. I mixed it into my dough and waited. The result was hands down the best chewy brown butter chocolate chip cookies I have ever made. It wasn’t magic. It was just patience and paying attention. Now, I can’t bake any other way.
Why You’ll Love This Recipe
This recipe isn’t just another cookie sheet full of dough. It is the result of testing this brown butter technique about a dozen times to get the texture exactly right. I wanted something that tasted sophisticated but was easy enough for a Tuesday night. Here is why this batch stands out from the rest:
- Quick & Easy: Despite the extra step of browning the butter, the total active time is short. You get that complex flavor without spending hours in the kitchen. It is perfect for busy weeknights or when you need a last-minute dessert fix.
- Simple Ingredients: You likely already have everything in your pantry. Flour, sugar, eggs, butter, chocolate. No weird flours or hard-to-find extracts. Just wholesome basics done right.
- Perfect for Gifting: These cookies travel well. The dense, chewy texture holds up in tins, making them ideal for teacher gifts, neighborly gestures, or holiday treats.
- Crowd-Pleaser: Kids usually prefer the standard chocolate chip, but adults go crazy for the nutty depth. You will see empty plates in minutes.
- Unbelievably Delicious: The Maillard reaction in the browned butter creates a toffee-like note that pairs perfectly with the sweetness of the brown sugar. It is comfort food reimagined.
What makes this different from your grandma’s recipe is the moisture content. By browning the butter, you evaporate some of the water, which concentrates the flavor and helps create that signature chewy center. It is not just a variation; it is the upgrade your baking routine has been waiting for. It taps into that emotional craving for something that feels homemade and special, without the stress.
What Ingredients You Will Need
This recipe relies on a few key components to build structure and flavor. The quality of your butter matters here since it is the star of the show. I recommend using a high-quality European-style butter if you can find it, as the higher fat content yields a richer result. But standard unsalted butter works perfectly fine too.
- Unsalted Butter: 1 cup (2 sticks or 226 grams). This is the base. Unsalted is best so you can control the sodium level. You will brown this until it smells like hazelnuts.
- All-Purpose Flour: 2 ¼ cups (280 grams). This provides the structure. Do not use cake flour, or the cookies will spread too much and become cakey instead of chewy.
- Baking Soda: 1 teaspoon. This helps the cookies spread and brown. Make sure it is fresh, or they won’t rise properly.
- Salt: 1 teaspoon of flaky sea salt or fine table salt. Salt is crucial for balancing the sweetness. I like finishing them with extra flaky salt for a nice crunch.
- Brown Sugar: 1 cup (200 grams), packed. This is the main source of moisture and chew. Dark brown sugar has more molasses and will give a deeper flavor, but light brown sugar works too.
- Granulated Sugar: ½ cup (100 grams). This helps create the crispy edges. The combination of both sugars is key for that perfect texture.
- Eggs: 2 large eggs, room temperature. Room temperature eggs emulsify better into the butter mixture, creating a smoother dough.
- Vanilla Extract: 2 teaspoons. Use pure vanilla, not imitation. The flavor needs to stand up to the strong brown butter.
- Chocolate Chips: 2 cups (340 grams). I prefer a mix of semi-sweet and milk chocolate chips. Using high-quality baking chunks instead of chips can also give you better melt pockets.
If you need to substitute, you can use gluten-free flour blend, but add a teaspoon of xanthan gum if your blend doesn’t have it. For the eggs, flax eggs can work in a pinch, though the texture will be slightly denser. Always measure your flour correctly—spoon and level, don’t scoop, or your cookies might be dry.
Equipment Needed
You do not need a fancy kitchen to make these. A medium-sized stainless steel saucepan is essential for browning the butter. Light-colored pans are better because you can actually see the color change. A dark non-stick pan will hide the browning process, and you might burn it without realizing it.
You will also need a large mixing bowl. Glass or ceramic is nice because it doesn’t retain heat, but metal or plastic works fine. A wooden spoon or a sturdy spatula is all you need for mixing. Do not use an electric mixer for the butter and sugars; you want to cream them by hand or with a simple hand mixer to avoid overworking the dough, which can lead to tough cookies.
A baking sheet is required. I use half-sheet pans, but standard quarter sheets work too. Make sure you have parchment paper or silicone baking mats. These prevent sticking and promote even baking. If you bake directly on the metal, the bottoms will burn before the middles are cooked. A cooling rack is also important so the cookies don’t steam on the hot pan and get soggy.
Finally, an ice cream scoop or a cookie scoop is highly recommended. It ensures every cookie is the same size, so they bake evenly. It also speeds up the process immensely. If you don’t have one, just use two tablespoons per cookie, but be consistent.
Preparation Method
- Brown the Butter (5-7 minutes): Start by placing your 1 cup of unsalted butter in a medium stainless steel saucepan over medium heat. Let it melt completely. Once it is liquid, it will start to foam and crackle. Keep the heat at medium, not high. Stir constantly with a wooden spoon. You will see the foam subside and hear the sizzling quiet down. This is when the milk solids are toasting. It will smell like nuts. As soon as you see dark brown specks at the bottom and the smell is intense, remove it from the heat immediately. Pour it into a heat-proof bowl to stop the cooking. Let it cool until it is just warm to the touch, not hot. (Time: 7 minutes)
- Mix Dry Ingredients: In a medium bowl, whisk together the 2 ¼ cups of flour, 1 teaspoon of baking soda, and 1 teaspoon of salt. Whisking aerates the flour and ensures the leavening agent is evenly distributed. Set this aside. (Time: 2 minutes)
- Combine Sugars and Butter: In a large mixing bowl, add the cooled brown butter, 1 cup of brown sugar, and ½ cup of granulated sugar. Whisk them together vigorously for about two minutes. The mixture should look glossy and smooth. This step incorporates air and helps dissolve the sugar slightly. (Time: 2 minutes)
- Add Eggs and Vanilla: Crack in the 2 large eggs and add 2 teaspoons of vanilla extract. Whisk again until the mixture is uniform and slightly thickened. Scrape down the sides of the bowl to make sure everything is incorporated. (Time: 1 minute)
- Combine Wet and Dry: Pour the dry ingredient mixture into the wet mixture. Switch to a spatula or wooden spoon. Fold the ingredients together gently. Stop as soon as you no longer see streaks of flour. Overmixing develops gluten, which makes cookies tough. You want them tender. (Time: 1 minute)
- Fold in Chocolate: Pour in the 2 cups of chocolate chips. Fold them in until they are evenly distributed throughout the dough. (Time: 1 minute)
- Chill the Dough (Crucial Step): Cover the bowl with plastic wrap and refrigerate for at least 30 minutes, or up to 48 hours. This step hydrates the flour and solidifies the fat, which prevents the cookies from spreading too thin. If you skip this, you will get flat, greasy cookies. (Time: 30+ minutes)
- Preheat and Prep: Preheat your oven to 350°F (175°C). Line your baking sheets with parchment paper. (Time: 5 minutes)
- Scoop and Bake: Scoop dough balls onto the prepared sheets, spacing them about 2 inches apart. Bake for 10-12 minutes. The edges should be golden brown, but the centers should still look slightly soft and underdone. They will firm up as they cool. (Time: 12 minutes)
- Cool: Let the cookies sit on the hot baking sheet for 5 minutes. Then transfer them to a wire rack to cool completely. This allows the structure to set. (Time: 5 minutes)
Cooking Tips & Techniques
One of the biggest mistakes people make with brown butter cookies is using the butter while it is still hot. If you add hot butter to the sugar, it will melt the sugar into a syrup and change the texture completely. Always wait until the butter is just warm. You can speed this up by putting the bowl in the fridge for 10 minutes after browning.
Another common error is over-baking. These cookies continue to cook on the hot pan after you take them out of the oven. If you wait until they look fully done in the pan, they will be hard and crispy all the way through. You want that chewy center, so pull them when they look slightly undercooked in the middle. The edges should be set and golden, but the center should still look soft.
Chilling the dough is not optional if you want the best texture. I know it is tempting to bake them right away, but the flavor develops and the texture improves significantly after a rest. If you are in a huge rush, you can freeze the dough balls for 15 minutes, but the fridge is best. Also, measure your flour correctly. If you scoop the cup directly into the flour, you pack it down, and you end up with too much flour. This leads to dry, crumbly cookies. Spoon the flour into the cup and level it off with a knife.
Keep an eye on your oven temperature. Ovens vary. If your cookies are spreading too fast, your oven might be too hot. If they are piling up and not spreading, your oven might be too cool. Use an oven thermometer to check. Also, rotate your baking sheets halfway through baking if your oven has hot spots. This ensures even browning.
Variations & Adaptations
While the classic version is my favorite, there are many ways to tweak this recipe. You can add a half cup of chopped toasted pecans or walnuts for a crunch that complements the nutty butter. This is great if you want a more complex flavor profile.
For a seasonal twist, try adding 1 teaspoon of pumpkin pie spice or cinnamon to the dry ingredients. This pairs wonderfully with the brown butter. You could also swap half of the chocolate chips for white chocolate chips and add dried cranberries for a tart contrast. This is similar to the flavor profile found in brown butter pumpkin snickerdoodle cookies, offering a warm, spiced alternative.
If you want a healthier option, you can substitute half of the all-purpose flour with whole wheat pastry flour. This adds fiber and a slightly nuttier taste without making the cookies heavy. For a gluten-free version, use a 1-to-1 gluten-free flour blend that includes xanthan gum. The texture will be slightly more delicate but still delicious.
You can also change the chocolate. Use chopped bars of high-quality dark chocolate (70% cocoa) for a more sophisticated, less sweet cookie. Or use white chocolate chips for a sweeter, creamier treat. I once tried adding a pinch of cayenne pepper to the dough for a spicy kick, and it was surprisingly good. It adds a warmth that lingers. Feel free to experiment, but stick to the ratios for the dry and wet ingredients to maintain the chewy texture.
Serving & Storage Suggestions
These cookies are best served at room temperature. They are too soft to eat hot right out of the oven, but they are perfect after cooling on the rack. Serve them with a cold glass of milk, which is the classic pairing. A cup of black coffee or espresso also cuts through the richness of the brown butter nicely.
For storage, keep the cookies in an airtight container at room temperature for up to 5 days. Place a slice of bread in the container with the cookies; the bread will release moisture to keep the cookies soft and chewy. If you want to make them ahead, you can freeze the dough balls. Scoop them onto a baking sheet, freeze until solid, then transfer to a freezer bag. Bake from frozen, adding 1-2 minutes to the baking time.
Leftover baked cookies can also be frozen. Layer them between parchment paper in a freezer-safe container. They will last for up to 3 months. Thaw them at room temperature before serving. The flavor actually seems to meld and improve after a day or two, as the moisture redistributes evenly throughout the cookie.
Nutritional Information & Benefits
While these are definitely a treat, they are not devoid of nutrition. Butter provides fat-soluble vitamins like A, D, E, and K. Eggs are a great source of protein and choline, which is good for brain health. Chocolate contains antioxidants called flavonoids, which can be beneficial for heart health in moderation.
Each cookie contains approximately 180-200 calories, depending on the size. They are moderate in sugar and fat, so enjoy them as part of a balanced diet. For those with dietary restrictions, note that this recipe contains gluten, dairy, and eggs. It is not suitable for vegans or those with celiac disease without significant substitutions. However, the use of brown butter means less water content, so you might feel less bloated compared to regular butter cookies. It is a rich, satisfying indulgence.
Conclusion
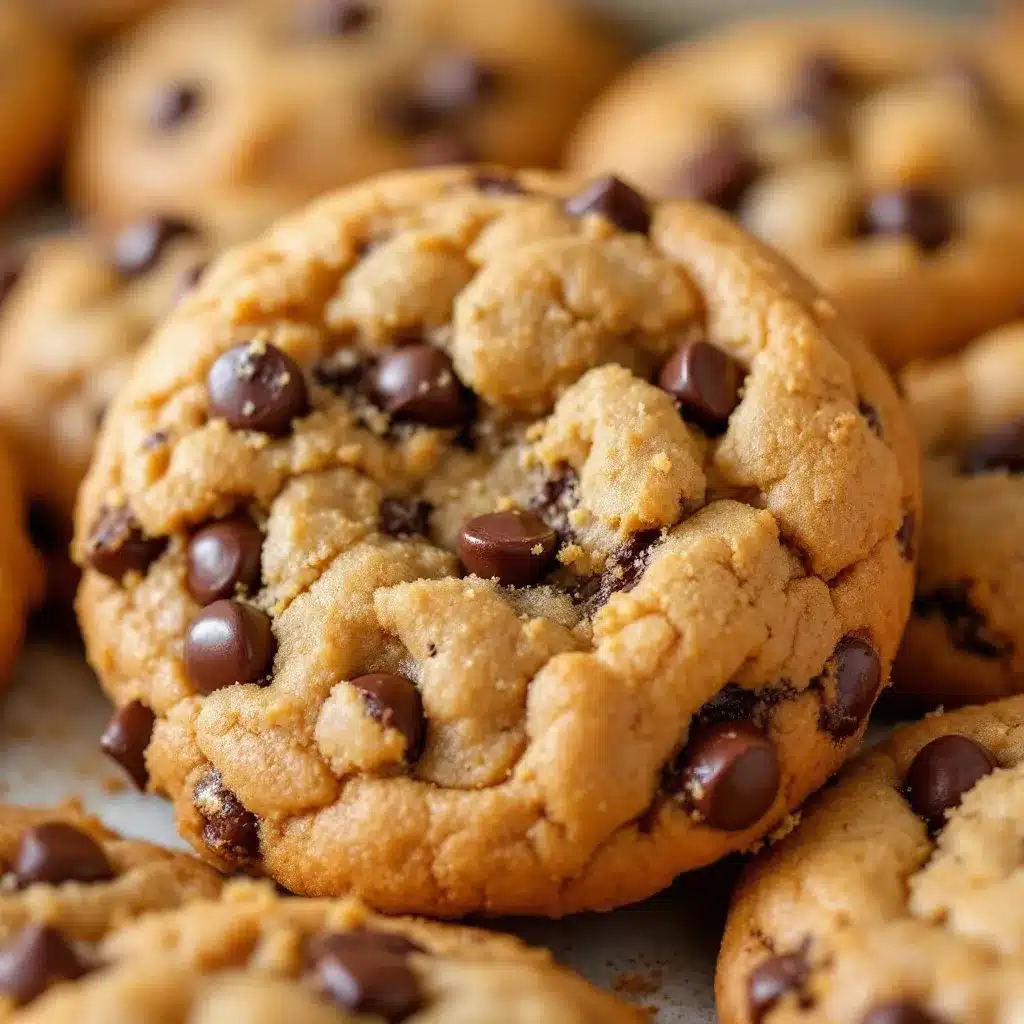
Making chewy brown butter chocolate chip cookies is worth the extra five minutes it takes to brown the butter. The flavor difference is night and day. These cookies have become a staple in my kitchen because they are reliable, impressive, and incredibly delicious. They strike the perfect balance between crispy edges and a gooey center. I hope you try this recipe and find it as rewarding as I have. Don’t be afraid to experiment with different chocolates or add-ins to make them your own. Let me know in the comments if you added nuts or spices, and share your photos! Happy baking!
Frequently Asked Questions
Why are my cookies flat?
This usually happens if the butter was too warm when mixed with the sugar, or if the dough was not chilled long enough. The fat melts too quickly in the oven before the structure sets. Always chill the dough for at least 30 minutes.
Can I use salted butter?
You can, but you should reduce the added salt in the recipe by half. Different brands of butter have different salt levels, so tasting the dough (if you are brave enough to skip the raw eggs) can help you decide.
How do I know when the butter is browned?
Look for golden-brown specks at the bottom of the pan and smell a nutty, toasted aroma. It should look like melted hazelnuts. Be careful not to let it turn dark brown or black, as it will taste burnt.
Can I freeze the baked cookies?
Yes, let them cool completely, then store them in an airtight container in the freezer for up to 3 months. Thaw at room temperature before eating.
What kind of chocolate is best?
A mix of semi-sweet and milk chocolate chips works well. For a more gourmet taste, use chopped chocolate bars, which create larger, melty pockets of chocolate.
Pin This Recipe!
Chewy Brown Butter Chocolate Chip Cookies: Best 20-Minute Recipe

These chewy brown butter chocolate chip cookies feature a nutty, deep flavor profile with crispy edges and a soft, gooey center. The recipe uses a brown butter technique to concentrate flavor and ensure the perfect texture.
- Prep Time: 20 minutes
- Cook Time: 12 minutes
- Total Time: 32 minutes
- Yield: Approximately 24 cookies 1x
- Category: Dessert
- Cuisine: American
Ingredients
- 1 cup (2 sticks or 226 grams) unsalted butter
- 2 ¼ cups (280 grams) all-purpose flour
- 1 teaspoon baking soda
- 1 teaspoon salt (flaky sea salt or fine table salt)
- 1 cup (200 grams) packed brown sugar
- ½ cup (100 grams) granulated sugar
- 2 large eggs, room temperature
- 2 teaspoons pure vanilla extract
- 2 cups (340 grams) chocolate chips (semi-sweet and milk mix recommended)
Instructions
- Brown the butter: Melt 1 cup unsalted butter in a medium stainless steel saucepan over medium heat. Stir constantly until the foam subsides, dark brown specks appear, and it smells like nuts (about 5-7 minutes). Remove from heat and pour into a heat-proof bowl to cool until just warm.
- Mix dry ingredients: In a medium bowl, whisk together 2 ¼ cups flour, 1 teaspoon baking soda, and 1 teaspoon salt. Set aside.
- Combine sugars and butter: In a large mixing bowl, whisk the cooled brown butter, 1 cup brown sugar, and ½ cup granulated sugar vigorously for about 2 minutes until glossy and smooth.
- Add eggs and vanilla: Whisk in 2 large eggs and 2 teaspoons vanilla extract until the mixture is uniform and slightly thickened.
- Combine wet and dry: Pour the dry ingredients into the wet mixture. Fold gently with a spatula or wooden spoon until no flour streaks remain. Do not overmix.
- Fold in chocolate: Add 2 cups chocolate chips and fold until evenly distributed.
- Chill the dough: Cover the bowl and refrigerate for at least 30 minutes (or up to 48 hours) to hydrate the flour and solidify the fat.
- Preheat and prep: Preheat oven to 350°F (175°C). Line baking sheets with parchment paper.
- Scoop and bake: Scoop dough balls onto prepared sheets, spacing them 2 inches apart. Bake for 10-12 minutes until edges are golden but centers look slightly soft.
- Cool: Let cookies sit on the hot baking sheet for 5 minutes, then transfer to a wire rack to cool completely.
Notes
Ensure butter is cooled to just warm before mixing with sugar to prevent melting the sugar into syrup. Chill dough for at least 30 minutes to prevent flat cookies. Measure flour by spooning and leveling, not scooping, to avoid dry cookies. Cookies continue to cook on the hot pan after removal from the oven.
Nutrition
- Serving Size: 1 cookie
- Calories: 190
- Sugar: 16
- Sodium: 150
- Fat: 10
- Saturated Fat: 6
- Carbohydrates: 24
- Fiber: 1
- Protein: 2
Keywords: brown butter cookies, chocolate chip cookies, chewy cookies, baking, dessert, homemade cookies, nutty flavor


