Love this? Save it for later!
Share the inspiration with your friends
By the fourth time I made these Easy Cheese Quesadilla Dippers in a single week, I had the timing down to a science—exactly two minutes and forty-five seconds per side in the skillet, just long enough to pour my coffee and wipe down the counter. The first time was a happy accident born from a leftover tortilla and a handful of shredded cheddar that needed using up. My son took one bite, looked at me like I’d just handed him gold, and asked if he could have them every single day. I laughed, thinking he’d forget by morning. He didn’t. And honestly? Neither did I.
These little dippers became my lunchbox secret weapon. They’re not fancy. They’re not complicated. But there’s something about the way the cheese gets all stretchy and the edges turn golden and crispy that makes them feel like a treat. I started cutting them into strips—perfect for tiny hands and even tinier dipping cups. Salsa, sour cream, a little blob of guacamole. Suddenly, my kid was eating a balanced lunch and actually finishing it. No crusts left behind. No sad, untouched sandwich corners. Just empty containers and a request for “the dippers, please.”
I’m not saying these Easy Cheese Quesadilla Dippers will change your life. But they might just change your lunchbox game. And honestly, that’s close enough.
Why You’ll Love This Recipe
- Quick & Easy: From fridge to lunchbox in under 10 minutes. Seriously. You can make these while your coffee brews or your kid finishes brushing their teeth.
- Simple Ingredients: You probably already have everything in your kitchen. Tortillas, cheese, a little butter or oil. That’s it. No fancy grocery trips required.
- Perfect for Lunchboxes: They hold up beautifully at room temperature, pack flat, and pair perfectly with small containers of dip. No more sad, soggy sandwiches.
- Crowd-Pleaser: I’ve yet to meet a kid who doesn’t love these. My niece, who normally picks at her lunch, ate an entire batch without looking up. My nephew asked for the recipe (he’s eight).
- Unbelievably Delicious: The contrast between the crispy, golden exterior and the gooey, melted cheese inside is pure comfort food magic. It’s simple, but it’s perfect.
What makes these different from any old quesadilla? It’s the method. I don’t just throw a tortilla in a pan. I let the cheese melt slowly over low heat so it gets perfectly stretchy, then I crank the heat at the end for that shatteringly crisp finish. It’s a small tweak, but it makes all the difference. This isn’t just another version—it’s the one I’ve tested and tweaked until it was lunchbox-ready.
And let’s be real—these aren’t just for kids. I’ve been known to make a batch for my own lunch, dipping them in salsa and pretending I’m five again. Some foods just hit different, you know?
What Ingredients You Will Need
This recipe uses the simplest of ingredients to deliver maximum satisfaction. You won’t need to hunt down anything unusual—just a few staples that do the heavy lifting.
- Flour tortillas (8-inch) – I prefer flour for its pliability and even browning. Corn tortillas work too, but they’re smaller and can crack when folded. Look for “street taco” size if you want mini dippers.
- Shredded cheddar cheese – Sharp cheddar gives the best flavor, but mild works fine too. Pre-shredded is okay in a pinch, but freshly shredded melts more evenly (the anti-caking coating on pre-shredded cheese can make it less creamy).
- Shredded Monterey Jack cheese – This adds incredible stretchiness. The combination of cheddar and Monterey Jack is my go-to—cheddar for flavor, Jack for that pull.
- Unsalted butter, softened – A thin layer on the outside of the tortilla is the secret to that golden, crispy crust. You can use salted butter, just skip any extra salt. I’ve also used mayonnaise in a pinch—it sounds weird, but it works.
- Optional: Salsa or sour cream for dipping – These are non-negotiable in my house. The dippers are great on their own, but the dip makes them an event.
- Optional: A pinch of garlic powder or cumin – Sprinkle this inside the quesadilla before cooking for a little extra warmth. My kids don’t notice it, but I do.
Ingredient Tips: I recommend using Mission brand tortillas for consistent texture—they don’t get gummy or tear easily. For the cheese, Tillamook sharp cheddar is my personal favorite. It melts beautifully and has a rich, nutty flavor that stands up to the crispy tortilla. If you’re packing these for lunch, let them cool completely before wrapping, or the steam will make them soggy.
Substitution Guidance: Need a dairy-free option? Use vegan shredded cheese and a dairy-free butter alternative. The texture won’t be quite as stretchy, but the flavor is still solid. For a gluten-free version, use gluten-free tortillas—just be gentle when flipping, as they can be more fragile.
Equipment Needed
- Non-stick skillet or cast iron pan (8-10 inch) – A non-stick skillet is easiest for beginners. Cast iron gives a better crust but requires a little more attention. I use my trusty 10-inch non-stick for everyday quesadillas.
- Spatula – A thin, flexible spatula makes flipping a breeze. I’ve broken too many quesadillas with a thick spatula—trust me on this.
- Butter knife – For spreading a thin layer of butter on the tortillas. You don’t need much—just enough to coat the surface lightly.
- Pizza cutter or sharp knife – For cutting the cooked quesadillas into dipper-sized strips. A pizza cutter gives clean, even cuts without dragging the cheese.
- Cutting board – Let the quesadilla rest for 30 seconds before cutting, or the cheese will ooze everywhere. I learned this the hard way.
- Bento box or lunch container with separate compartments – Keeps the dippers and dip from getting soggy. I love PlanetBox for this—they’re leak-proof and dishwasher safe.
Budget-Friendly Options: You don’t need fancy equipment. A basic non-stick pan from the grocery store works fine. If you don’t have a pizza cutter, a sharp chef’s knife does the job—just use a gentle sawing motion to avoid squishing the quesadilla.
Preparation Method
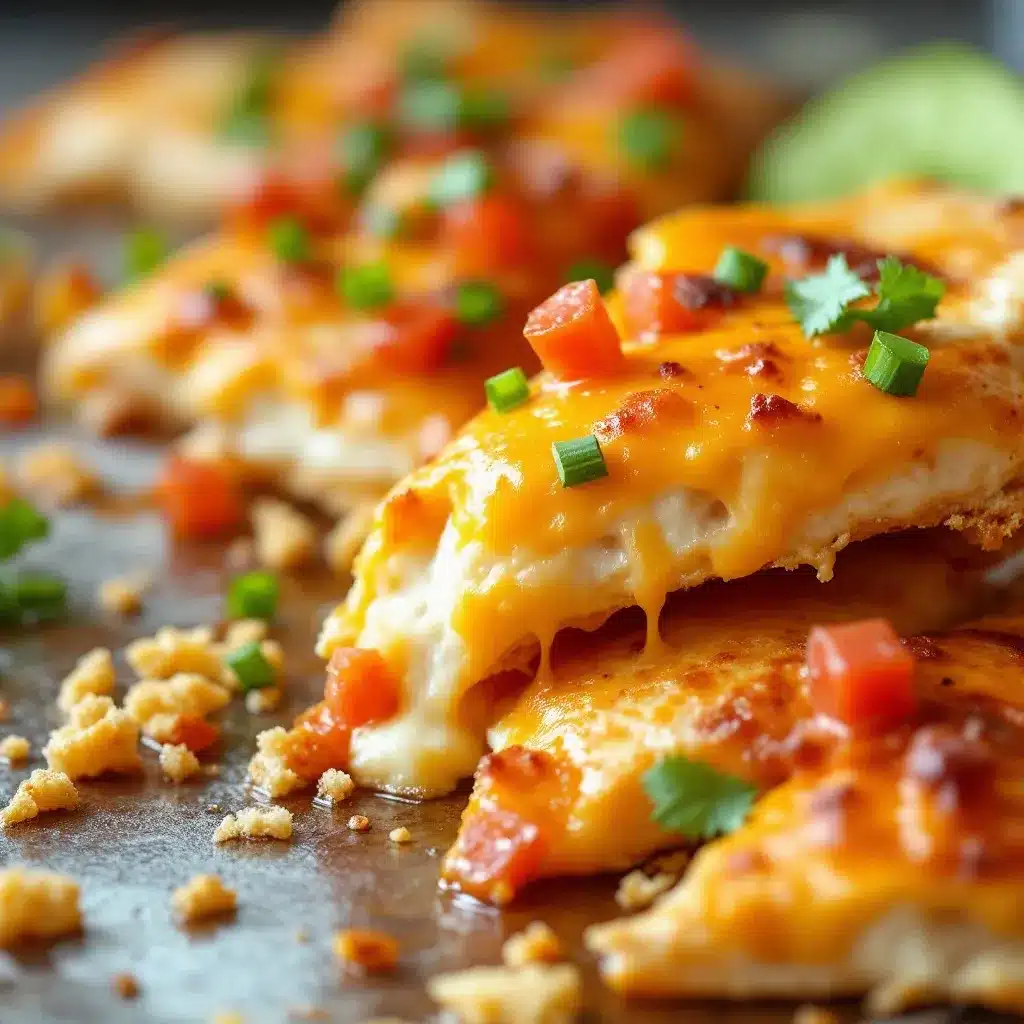
- Prepare your tortillas. Lay two tortillas flat on a clean work surface. Using a butter knife, spread a very thin layer of softened butter on one side of each tortilla. This is the side that will hit the pan—don’t skip it. The butter is what gives you that golden, crispy crust.
- Add the cheese. Flip one tortilla over (buttered side down) and sprinkle about 1/4 cup of the cheddar-Monterey Jack mixture evenly over the entire surface. Leave a small border around the edge—about 1/2 inch—so the cheese doesn’t ooze out when it melts. If you’re adding garlic powder or cumin, sprinkle it over the cheese now.
- Top and press. Place the second tortilla on top, buttered side up. Gently press down with your palm to seal the edges. Don’t worry if a little cheese peeks out—that’s the crispy edge everyone fights over.
- Heat the pan. Place your skillet over medium-low heat. Let it warm up for about 30 seconds. You want the pan hot but not screaming—if the butter sizzles aggressively when you add the quesadilla, the heat is too high.
- Cook the first side. Carefully slide the quesadilla into the pan. Cook for 2 minutes and 45 seconds (yes, I’ve timed it). You’ll know it’s ready when the bottom is golden brown and the cheese has started to melt around the edges. Don’t peek too much—let it do its thing.
- Flip carefully. Slide your spatula under the quesadilla and flip it in one confident motion. If the cheese has stuck to the pan a little, use the spatula to gently nudge it loose. Cook for another 2 minutes and 45 seconds, or until the bottom is golden and the cheese is fully melted and gooey.
- Check for doneness. The quesadilla should feel firm but slightly springy when pressed. If you see any unmelted cheese pockets, press down gently with the spatula and cook for another 30 seconds. The cheese should be stretchy, not liquid.
- Rest and cut. Transfer the quesadilla to a cutting board and let it rest for 30 seconds. This allows the cheese to set slightly so it doesn’t all ooze out when you cut it. Use a pizza cutter to slice it into 1-inch wide strips—about 6-8 strips per quesadilla.
- Cool completely. Let the strips cool on the cutting board for at least 5 minutes before packing. If you pack them warm, they’ll steam and lose their crispness. I’ve made this mistake more times than I care to admit.
- Pack for lunch. Arrange the strips in a single layer in your lunch container. Add a small container of salsa, sour cream, or guacamole for dipping. If you’re packing them the night before, store the dip separately and assemble in the morning.
Cooking Tips & Techniques
The biggest mistake I see people make is using high heat. I did it too, the first few times. The outside burns before the cheese has a chance to melt, and you end up with a sad, crunchy shell and a cold, unmelted center. Low and slow is the way. Medium-low heat gives the cheese time to get perfectly gooey while the tortilla turns golden and crisp. Patience, friend.
Another tip: don’t overstuff. I know it’s tempting to pile on the cheese, but too much filling makes the quesadilla hard to flip and causes the cheese to spill out into the pan. Stick to about 1/2 cup total per quesadilla. You want a thin, even layer that melts uniformly.
If you’re making multiple quesadillas, keep them warm in a 200°F oven. Place them on a baking sheet in a single layer, and they’ll stay crispy for up to 30 minutes. I do this when I’m making a batch for a lunchbox assembly line—it keeps everything ready to go.
For extra crispy edges, brush the pan with a tiny bit of butter before adding each quesadilla. This isn’t necessary if you’ve buttered the tortillas, but it adds an extra layer of crunch. I do this when I’m feeling fancy or when I want the dippers to hold up to a long car ride.
Don’t forget to let them cool. I know you’re in a rush. I’ve been there. But packing warm quesadillas is a recipe for soggy disaster. The steam trapped in the container softens the crust, and by lunchtime, you’ve got floppy, sad strips. Give them at least 5 minutes on the cutting board. Your future self will thank you.
One more thing: use a timer. I know it seems silly, but 2 minutes and 45 seconds is the sweet spot. Any longer and the edges get too dark. Any shorter and the cheese isn’t fully melted. Set a timer and don’t wander off. I’ve burned more quesadillas than I’d like to admit because I got distracted by a text message.
Variations & Adaptations
Black Bean and Corn Quesadilla Dippers: Add 2 tablespoons of rinsed black beans and 2 tablespoons of corn kernels to the cheese mixture before cooking. This adds fiber, protein, and a little sweetness. My kids don’t even notice the beans—they just think it’s extra cheesy.
Spicy Chicken Quesadilla Dippers: Mix 1/4 cup of shredded cooked chicken (rotisserie works great) with a pinch of chili powder and cumin. Layer it over the cheese before cooking. This turns the dippers into a full meal. I’ve used leftover honey garlic chicken in these before, and it was fantastic—the sweet-savory combo with the melty cheese was next-level.
Veggie-Packed Dippers: Finely dice a handful of bell peppers, spinach, or mushrooms and sauté them briefly before adding to the quesadilla. Squeeze out any excess moisture first, or the quesadilla will get soggy. My go-to combo is red bell pepper and baby spinach—it adds color and nutrients without changing the flavor profile too much.
Dairy-Free Version: Use vegan cheddar shreds and a dairy-free butter alternative. The texture won’t be as stretchy, but the flavor is still solid. I like Daiya brand for melting—it’s not perfect, but it gets the job done.
Gluten-Free Version: Use gluten-free tortillas. They’re a little more fragile, so handle them gently. I like the Siete brand almond flour tortillas—they hold up well and have a nice flavor.
Air Fryer Method: Preheat your air fryer to 350°F. Place the assembled quesadilla in the basket and cook for 4-5 minutes, flipping halfway through. The result is extra crispy without any oil. I do this when I’m making a single serving and don’t want to dirty a pan.
Dip Variations: Beyond salsa and sour cream, try ranch dressing, honey mustard, or even a mango avocado salsa for a sweet-savory twist. The dippers are endlessly customizable—that’s the beauty of them.
Serving & Storage Suggestions
Serving Temperature: These dippers are best served warm, but they hold up surprisingly well at room temperature. I’ve packed them for lunchboxes, picnics, and road trips, and they’ve never disappointed. If you’re serving them at home, let them cool for 2-3 minutes before cutting—the cheese will be molten hot right out of the pan.
Presentation Ideas: Arrange the strips in a fan pattern in a bento box or on a plate. Add a small container of dip in the center—salsa, sour cream, or guacamole all work beautifully. For a fun touch, use a cookie cutter to cut the quesadillas into shapes before cooking. Star-shaped dippers are a huge hit with my kids.
Complementary Dishes: Pair these dippers with a simple side of chicken and rice bowl for a balanced lunch, or serve them alongside a bowl of creamy tomato soup for a cozy dinner. They’re also great as a snack with a side of fresh fruit or veggie sticks.
Storage Instructions: Store leftover strips in an airtight container in the refrigerator for up to 3 days. To reheat, place them in a dry skillet over medium heat for 1-2 minutes per side, or pop them in the air fryer at 350°F for 2-3 minutes. The microwave works in a pinch, but the tortilla will lose its crispness.
Freezer Instructions: Cooked and cooled quesadilla strips freeze beautifully. Place them in a single layer on a baking sheet and freeze until solid, then transfer to a freezer-safe bag. They’ll keep for up to 2 months. Reheat directly from frozen in a skillet or air fryer—no need to thaw first. I make double batches on the weekend and freeze half for busy mornings.
How Flavors Develop: These dippers are best fresh, but I’ve noticed that the flavors meld together nicely after a few hours in the fridge. The cheese sets up a bit, making them even easier to pack and eat on the go. They’re not quite as crispy, but they’re still delicious.
Nutritional Information & Benefits
Estimated Nutritional Values (per serving of 4 strips with 1/4 cup cheese):
- Calories: 220-250
- Protein: 10-12g
- Carbohydrates: 18-20g
- Fat: 12-14g
- Fiber: 1-2g
- Calcium: 200-250mg
Health Benefits: These dippers are a good source of protein and calcium, thanks to the cheese. The tortillas provide carbohydrates for energy, making them a balanced option for active kids (and adults!). If you use whole wheat tortillas, you’ll get an extra boost of fiber. The cheese also contains vitamin D and phosphorus, which support bone health.
Dietary Considerations: This recipe is naturally vegetarian and can be made gluten-free or dairy-free with simple substitutions. It’s also nut-free and egg-free, making it a safe option for school lunchboxes. If you’re watching sodium, opt for low-sodium cheese and skip the added salt.
Potential Allergens: This recipe contains dairy (cheese, butter) and gluten (tortillas). Check your tortilla labels for potential cross-contamination if you have severe allergies.
Personal Wellness Perspective: I love that these dippers feel like a treat but aren’t loaded with processed ingredients. They’re simple, real food that my kids actually eat. And honestly, that’s a win in my book. I’d rather them eat a cheese quesadilla with a side of veggies than a packaged snack with a list of ingredients I can’t pronounce.
Conclusion
These Easy Cheese Quesadilla Dippers aren’t going to win any culinary awards. They’re not fancy or complicated. But they are reliable, delicious, and endlessly adaptable. They’re the kind of recipe you’ll come back to again and again—not because you have to, but because they just work. And when your kid comes home with an empty lunchbox and a smile, you’ll know you’ve found something special.
I encourage you to make these your own. Add your family’s favorite fillings, experiment with different cheeses, or try a new dip every week. The beauty of this recipe is that it’s a blank canvas—you can’t really mess it up. And if you do? Well, that’s what extra cheese is for.
I’d love to hear how these turn out for you. Drop a comment below and tell me your favorite dipper combination, or tag me in your lunchbox photos. Happy cooking, and here’s to more lunches that actually get eaten!
Frequently Asked Questions
Can I make these quesadilla dippers ahead of time?
Absolutely! Cook and cool the strips completely, then store them in an airtight container in the refrigerator for up to 3 days. Reheat in a skillet or air fryer for best results. You can also freeze them for up to 2 months—just reheat directly from frozen.
What’s the best cheese for quesadilla dippers?
I recommend a combination of sharp cheddar and Monterey Jack. Cheddar provides bold flavor, while Monterey Jack gives that perfect stretchy texture. You can also use Colby Jack, mozzarella, or pepper jack for a little heat.
How do I keep the dippers from getting soggy in the lunchbox?
The key is to let them cool completely before packing. Warm quesadillas create steam, which softens the tortilla. Also, store the dip in a separate container and add it just before serving. A bento box with compartments is perfect for this.
Can I use corn tortillas instead of flour?
You can, but corn tortillas are smaller and more fragile. They tend to crack when folded and don’t hold up as well to the filling. If you use corn, warm them slightly before filling to make them more pliable, and use less cheese to prevent breakage.
Are these dippers healthy enough for a kids’ lunchbox?
They’re a balanced option! The tortillas provide carbohydrates for energy, and the cheese offers protein and calcium. Pair them with fruit, veggies, or a side of dip for a complete meal. You can also use whole wheat tortillas and low-fat cheese to boost the nutritional profile.
Pin This Recipe!
Easy Cheese Quesadilla Dippers Best Kids Lunchbox Idea

These Easy Cheese Quesadilla Dippers are a quick and simple lunchbox solution, featuring crispy golden tortillas filled with gooey melted cheese. Perfect for kids and adults alike, they pair beautifully with salsa, sour cream, or guacamole for a balanced, crowd-pleasing meal.
- Prep Time: 5 minutes
- Cook Time: 6 minutes
- Total Time: 11 minutes
- Yield: 4 servings 1x
- Category: Lunch
- Cuisine: Mexican-American
Ingredients
- 2 (8-inch) flour tortillas
- 1/4 cup shredded cheddar cheese
- 1/4 cup shredded Monterey Jack cheese
- 1 tablespoon unsalted butter, softened
- Optional: salsa or sour cream for dipping
- Optional: pinch of garlic powder or cumin
Instructions
- Lay two tortillas flat on a clean work surface. Spread a very thin layer of softened butter on one side of each tortilla.
- Flip one tortilla over (buttered side down) and sprinkle about 1/4 cup of the cheddar-Monterey Jack mixture evenly over the entire surface, leaving a 1/2-inch border. If using, sprinkle garlic powder or cumin over the cheese.
- Place the second tortilla on top, buttered side up. Gently press down with your palm to seal the edges.
- Place a non-stick skillet over medium-low heat and let it warm for 30 seconds.
- Carefully slide the quesadilla into the pan. Cook for 2 minutes and 45 seconds, until the bottom is golden brown and the cheese starts to melt around the edges.
- Flip the quesadilla carefully with a spatula and cook for another 2 minutes and 45 seconds, until the bottom is golden and the cheese is fully melted and gooey.
- Check for doneness: the quesadilla should feel firm but slightly springy. If there are unmelted cheese pockets, press down gently with the spatula and cook for another 30 seconds.
- Transfer the quesadilla to a cutting board and let it rest for 30 seconds. Use a pizza cutter to slice it into 1-inch wide strips (about 6-8 strips per quesadilla).
- Let the strips cool on the cutting board for at least 5 minutes before packing.
- Arrange the strips in a single layer in a lunch container. Add a small container of salsa, sour cream, or guacamole for dipping.
Notes
Let the quesadillas cool completely before packing to prevent sogginess. For extra crispy edges, brush the pan with a tiny bit of butter before adding each quesadilla. Use a timer to achieve the perfect 2 minutes and 45 seconds per side. Store leftover strips in an airtight container in the refrigerator for up to 3 days; reheat in a skillet or air fryer.
Nutrition
- Serving Size: 4 strips
- Calories: 235
- Sugar: 1
- Sodium: 350
- Fat: 13
- Saturated Fat: 7
- Carbohydrates: 19
- Fiber: 1
- Protein: 11
Keywords: quesadilla dippers, cheese quesadilla, kids lunchbox, easy lunch, quick snack, tortilla, cheddar, Monterey Jack


