Love this? Save it for later!
Share the inspiration with your friends
Third time in as many weeks and I finally stopped adding extra topping. Something about a small-batch pumpkin dump cake just begs you to pile on the pecans and swirl in extra caramel—like the pan itself is too small to hold all that fall ambition. But the third time, I let it be. I used exactly what the recipe called for, didn’t peek at the oven every five minutes, and when it came out golden and bubbling at the edges, I understood what I’d been missing. It wasn’t about making it more. It was about making it right.
I found myself making this on a random Tuesday night, not for company, not for a holiday—just because the air had that crisp edge and I wanted something warm that didn’t require a whole sheet pan of dessert staring at me for a week. That’s the thing about small-batch recipes, right? They let you have the moment without the commitment.
There’s something honest about a dump cake that doesn’t pretend to be fancy. It’s not layered, it’s not fussed over—you literally dump the ingredients in the pan and let the oven do the heavy lifting. And when you scale it down to just four servings, it becomes this perfectly portioned little secret. I keep coming back to it because it’s the kind of dessert that feels like a hug, but one you can finish before it goes stale.
This recipe stuck because it taught me that sometimes the best things come in small pans.
Why You’ll Love This Recipe
Listen, I’ve tested more pumpkin desserts than I care to count, and this one keeps earning a spot on my counter. It’s not because it’s complicated—it’s actually the opposite. This small-batch pumpkin dump cake works because it respects your time and your craving.
- Quick & Easy: From start to oven in under 10 minutes. No mixer, no sifting, no fuss.
- Simple Ingredients: You probably have most of these in your pantry right now. No special trips to the store.
- Perfect for Fall Cravings: When you want pumpkin spice everything but don’t need a full 9×13 pan staring at you for days.
- Crowd-Pleaser: I brought this to a small dinner party and everyone asked for the recipe. It disappeared faster than the fancy tart.
- Unbelievably Delicious: The contrast between the soft, spiced pumpkin layer and the buttery, crunchy cake topping is pure comfort.
What makes this different from other pumpkin dump cakes? It’s scaled down intentionally, so every spoonful has the perfect ratio of pumpkin to cake topping. No dry edges, no skimpy filling. Plus, I’ve tested it with both homemade pumpkin purée and canned—both work, but I’ll share my preference below. It’s the kind of dessert that makes you close your eyes after the first bite, and honestly, isn’t that what fall baking is all about?
This isn’t just another pumpkin recipe. It’s the one you’ll make on a quiet evening when you want something warm and sweet without the production. It’s comfort food scaled to fit your life.
What Ingredients You Will Need
This recipe uses simple, wholesome ingredients to deliver that classic pumpkin dump cake flavor without the fuss. Most of these are pantry staples, especially if you’re already in fall baking mode.
- Pumpkin Purée (1 cup / 240g): I prefer Libby’s canned pumpkin for consistent texture and flavor. If using homemade, make sure to drain any excess liquid first. (Pro tip: don’t accidentally grab pumpkin pie filling—you want 100% pumpkin purée.)
- Evaporated Milk (1/2 cup / 120ml): This gives the pumpkin layer a rich, creamy texture without being too heavy. Regular milk will work in a pinch, but the texture won’t be quite as luscious.
- Granulated Sugar (1/3 cup / 65g): Just enough sweetness to balance the earthiness of the pumpkin. You can reduce this slightly if you prefer a less sweet dessert.
- Large Egg (1): Helps bind the pumpkin filling and gives it structure. Room temperature works best.
- Pumpkin Pie Spice (1 teaspoon): The backbone of fall flavor. If you don’t have a pre-mixed blend, use 1/2 teaspoon cinnamon, 1/4 teaspoon ginger, 1/8 teaspoon nutmeg, and a pinch of cloves.
- Vanilla Extract (1/2 teaspoon): Enhances all the warm spices and adds depth. Pure vanilla extract makes a difference here.
- Yellow Cake Mix (1 cup / about 4 oz / 115g): This is the “dump” part of the dump cake. I use Duncan Hines or Betty Crocker. One cup is roughly half a standard box mix. Store the remaining mix for another batch.
- Unsalted Butter (1/4 cup / 4 tablespoons / 57g): Melted and poured over the dry cake mix. It creates that signature buttery, crunchy topping. Salted butter works too—just reduce any added salt.
- Chopped Pecans (optional, 1/4 cup / 30g): Adds a lovely crunch. Walnuts work great too, or leave them out if you prefer a smoother texture.
Equipment Needed
You don’t need a fancy kitchen to pull this off. Here’s what you’ll need:
- 8×8 or 9×9 Baking Dish: This is the perfect size for a small-batch recipe. An 8-inch square pan gives you thicker layers, while a 9-inch pan spreads it out a bit more. Both work beautifully.
- Mixing Bowl: Any medium bowl will do. I use a glass one so I can see if everything’s combined.
- Whisk or Fork: For mixing the pumpkin filling. Nothing fancy needed.
- Measuring Cups and Spoons: Standard set—you’ll need dry and liquid measures.
- Spatula: For spreading the pumpkin layer evenly.
- Small Saucepan or Microwave-Safe Bowl: To melt the butter. I usually just pop it in the microwave for 30 seconds.
That’s it. No stand mixer, no food processor, no specialty pans. This is the kind of recipe that proves you don’t need a lot of gear to make something delicious.
Preparation Method
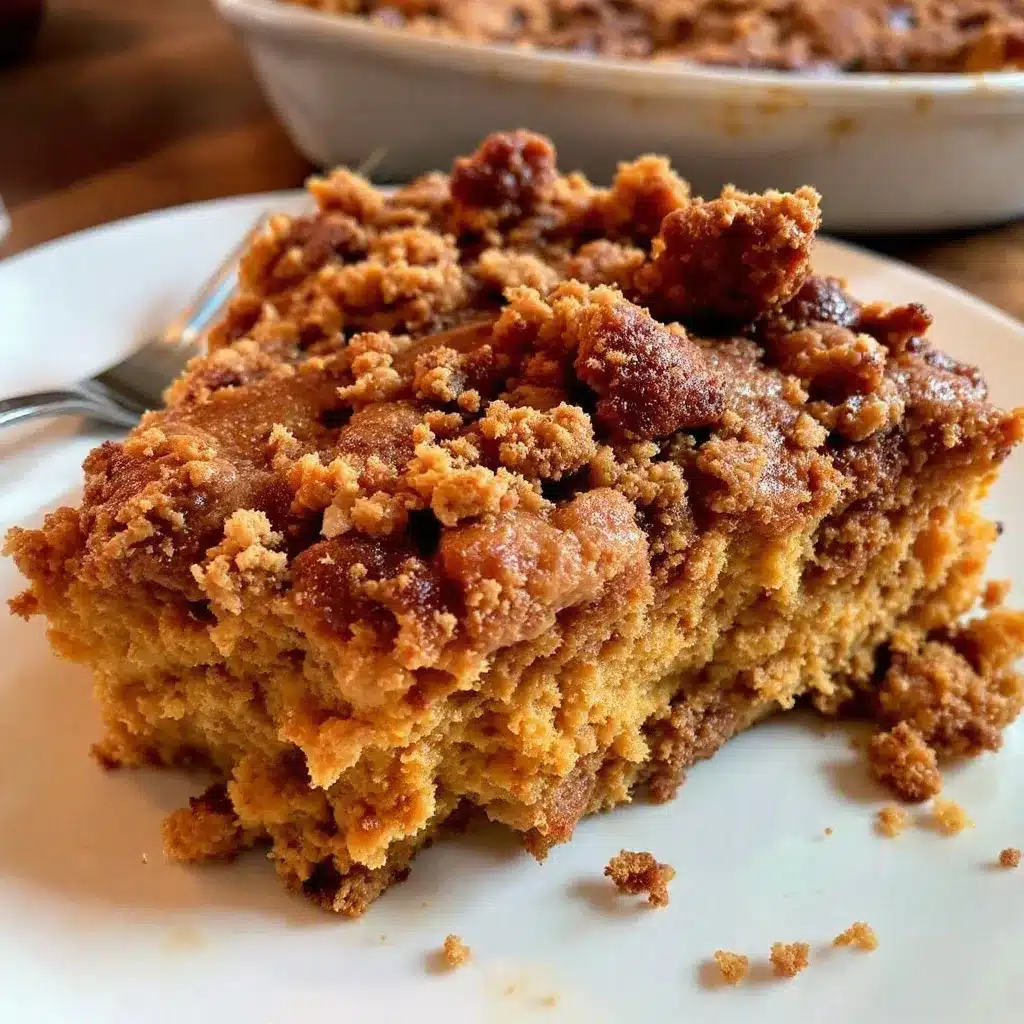
Alright, let’s get to it. This comes together so fast you’ll barely believe it.
- Preheat your oven to 350°F (175°C). While it’s heating, lightly grease your 8×8 or 9×9 baking dish with butter or non-stick spray. I use butter because it adds a little flavor to the edges.
- Make the pumpkin filling. In a medium bowl, whisk together 1 cup pumpkin purée, 1/2 cup evaporated milk, 1/3 cup granulated sugar, 1 large egg, 1 teaspoon pumpkin pie spice, and 1/2 teaspoon vanilla extract. Whisk until smooth and well combined. It should look like a thick, creamy custard. (If it seems too thin, don’t worry—it’ll set up beautifully in the oven.)
- Pour the filling into the prepared dish. Use your spatula to spread it evenly to the edges. Take a moment to make sure it’s level—this helps the cake topping bake evenly.
- Sprinkle the dry cake mix over the pumpkin layer. Measure out 1 cup of yellow cake mix and sprinkle it evenly over the filling. Don’t stir it in! The magic of a dump cake is that the dry mix sits on top and forms that signature crunchy crust. Just scatter it as evenly as you can.
- Drizzle the melted butter over the cake mix. Melt 1/4 cup (4 tablespoons) of unsalted butter and drizzle it as evenly as possible over the dry cake mix. Try to cover as much of the surface as you can—it helps the topping bake into that golden, buttery crust.
- Add pecans (if using). Sprinkle 1/4 cup of chopped pecans over the top. They’ll toast up beautifully in the oven and add a lovely crunch.
- Bake for 30-35 minutes. The top should be golden brown and the pumpkin filling should be bubbling up around the edges. A toothpick inserted into the cake topping should come out mostly clean—the filling underneath will still be soft. Let it cool in the pan for at least 10-15 minutes before serving. It sets up as it cools.
One thing I learned the hard way: don’t skip the cooling time. I was impatient the first time and ended up with a soupy mess. That 10-minute rest makes all the difference.
Cooking Tips & Techniques
I’ve made this small-batch pumpkin dump cake enough times to have a few tricks up my sleeve. Here’s what I’ve learned:
Don’t overmix the pumpkin layer. Just whisk until everything comes together. Overmixing can incorporate too much air, which creates bubbles in the filling as it bakes. You want a smooth, dense custard, not a fluffy one.
Use room temperature ingredients. I know, I know—everyone says this. But with pumpkin dump cake, it actually matters. A cold egg can seize up the mixture and make it harder to spread evenly. Let your egg and evaporated milk sit out for about 15 minutes before you start.
Watch your oven temperature. I’ve had ovens that run hot and ovens that run cold. Start checking at the 28-minute mark. The top should be a deep golden brown, and you should see the pumpkin filling gently bubbling around the edges. If the top is browning too fast, tent it loosely with foil for the last 5-10 minutes.
Let it rest. I cannot stress this enough. The filling needs time to set. If you cut into it too soon, it’ll be runny and disappointing. Give it at least 10-15 minutes, and honestly, it’s even better after 20-30 minutes. The texture firms up perfectly.
Make it ahead. This is actually one of those desserts that tastes even better the next day. The flavors meld together, and the topping softens slightly into this amazing buttery crumble. If you’re planning ahead, bake it the day before and reheat individual servings in the microwave for about 20 seconds.
Variations & Adaptations
One of the best things about this small-batch pumpkin dump cake is how easy it is to customize. Here are some of my favorite variations:
- Gluten-Free Version: Use a gluten-free yellow cake mix. I’ve tried several brands, and King Arthur Flour’s gluten-free yellow cake mix works beautifully. The texture is almost identical to the regular version.
- Dairy-Free Adaptation: Substitute the evaporated milk with full-fat coconut milk (from a can, not the carton) and use a dairy-free butter alternative like Miyoko’s or Earth Balance. The coconut milk adds a subtle tropical note that actually pairs nicely with the pumpkin.
- Spice It Up: Add 1/4 teaspoon of cardamom or a pinch of black pepper to the pumpkin filling. Cardamom adds an unexpected floral warmth, and black pepper (yes, really) enhances the other spices without making it spicy.
- Caramel Swirl: Drizzle 2-3 tablespoons of caramel sauce over the cake mix before adding the butter. It creates these little pockets of gooey sweetness throughout the topping. I do this when I’m feeling extra indulgent.
- Chocolate Pumpkin: Use a chocolate cake mix instead of yellow. It sounds weird, but chocolate and pumpkin are actually a fantastic combination. The rich chocolate balances the earthy pumpkin perfectly.
I once tried a version with a crumble topping instead of the cake mix—just flour, brown sugar, butter, and oats. It was delicious, but honestly, the cake mix version is simpler and has that nostalgic flavor that makes dump cakes so comforting.
Serving & Storage Suggestions
This small-batch pumpkin dump cake is best served warm, but it’s honestly good at any temperature. Here’s how I like to serve it:
Warm with ice cream. A scoop of vanilla bean ice cream melting over the top is the classic pairing. The cold creaminess against the warm, buttery cake is pure magic. If you’re feeling fancy, try cinnamon or caramel ice cream instead.
With a dollop of whipped cream. Homemade whipped cream takes about 2 minutes and makes this feel like a special occasion. Just whip 1/2 cup heavy cream with a tablespoon of powdered sugar and a splash of vanilla until soft peaks form.
Drizzled with caramel sauce. Store-bought is fine, but if you have a few extra minutes, warm up some store-bought caramel with a pinch of flaky sea salt. It takes it to another level.
Storage: Cover the baking dish tightly with foil or plastic wrap and store in the refrigerator for up to 4 days. The topping will soften slightly, but it’s still delicious.
Reheating: Microwave individual servings for 20-30 seconds. For a larger portion, reheat in a 300°F oven for about 10 minutes. The topping crisps back up nicely in the oven.
Freezing: This freezes surprisingly well. Let it cool completely, then wrap the entire dish in plastic wrap and foil. Freeze for up to 3 months. Thaw overnight in the refrigerator and reheat as directed above.
One thing I love about this recipe is that the flavors actually deepen after a day in the fridge. The spices meld together, and the pumpkin filling becomes even more luscious. It’s one of those rare desserts that’s almost better as leftovers.
Nutritional Information & Benefits
While this is definitely a treat, there are a few redeeming qualities worth mentioning. Per serving (based on 4 servings):
- Calories: Approximately 320-350
- Fat: 15-18g (mostly from butter and pecans)
- Carbohydrates: 42-45g
- Protein: 4-5g
- Fiber: 2-3g (thanks to the pumpkin)
- Sugar: 28-30g
Pumpkin is the star here, and it’s packed with vitamin A (in the form of beta-carotene), which supports eye health and immune function. It’s also a good source of fiber, which helps with digestion and keeps you feeling satisfied.
Pecans add healthy fats, magnesium, and a little protein. They’re also rich in antioxidants, so that optional topping is actually doing some good.
Dietary Considerations: This recipe can be made gluten-free and dairy-free with simple substitutions (see variations above). It’s not low-carb, but the portion size is small enough that it can fit into a balanced diet.
Allergens: Contains wheat (cake mix), dairy (butter, evaporated milk), eggs, and tree nuts (pecans). Adjust as needed for dietary restrictions.
I’m not here to pretend this is health food—it’s dessert, and it’s meant to be enjoyed. But knowing that pumpkin brings some nutritional value to the table makes that second serving feel a little less guilty.
Conclusion
This small-batch pumpkin dump cake is the kind of recipe that earns a permanent spot in your fall rotation. It’s quick, it’s forgiving, and it delivers that warm, spiced, buttery comfort we all crave when the weather turns cool. Whether you’re baking for yourself, a small gathering, or just because you need a little pumpkin in your life, this recipe delivers every time.
I love that I can make it on a whim without committing to a giant pan of dessert. I love that it tastes like something I spent hours on, when really it took ten minutes of hands-on time. And I love that I can customize it based on what I have in my pantry or what I’m craving that day.
If you try this recipe—and I really hope you do—let me know how it turns out. Did you add pecans? Drizzle caramel? Use a different cake mix? I’d love to hear your variations. Drop a comment below or tag me in your photos. Happy fall baking, friends. You deserve this warm, buttery hug in a bowl.
Frequently Asked Questions
Can I use pumpkin pie filling instead of pumpkin purée?
I wouldn’t recommend it. Pumpkin pie filling already has sugar and spices added, which will throw off the balance of this recipe. Stick with 100% pumpkin purée for the best results. If you only have pie filling, reduce the sugar and spice in the recipe by half, but honestly, it’s easier to just grab a can of purée.
Can I double this recipe?
Absolutely! Double all the ingredients and bake it in a standard 9×13-inch pan. You’ll need to increase the baking time to about 40-45 minutes. Keep an eye on it—the top should be golden brown and the filling should be bubbling at the edges. This is perfect for when you need a full-size dessert for a crowd.
Why is my dump cake runny in the middle?
This usually happens for one of two reasons: you didn’t let it cool long enough, or your pumpkin purée had too much liquid. If you’re using homemade pumpkin purée, make sure to drain it in a fine-mesh strainer or press it through a clean kitchen towel to remove excess water. Also, don’t skip the cooling time—it needs at least 10-15 minutes to set properly.
Can I make this in a slow cooker?
I haven’t tried it personally, but I’ve heard mixed results. The topping doesn’t get as crispy in a slow cooker because it traps moisture. If you want to try, use a 2-quart slow cooker, cook on low for 2-3 hours, and then remove the lid for the last 30 minutes to help the topping dry out a bit. Honestly, the oven version is so quick that I’d stick with that.
What’s the best way to reheat leftovers?
For individual servings, the microwave is your friend—20-30 seconds on high brings it back to warm, gooey perfection. If you’re reheating the whole dish, pop it in a 300°F oven for about 10 minutes. The topping crisps back up, and the filling gets warm and luscious. If you have a toaster oven, that works great too.
Pin This Recipe!
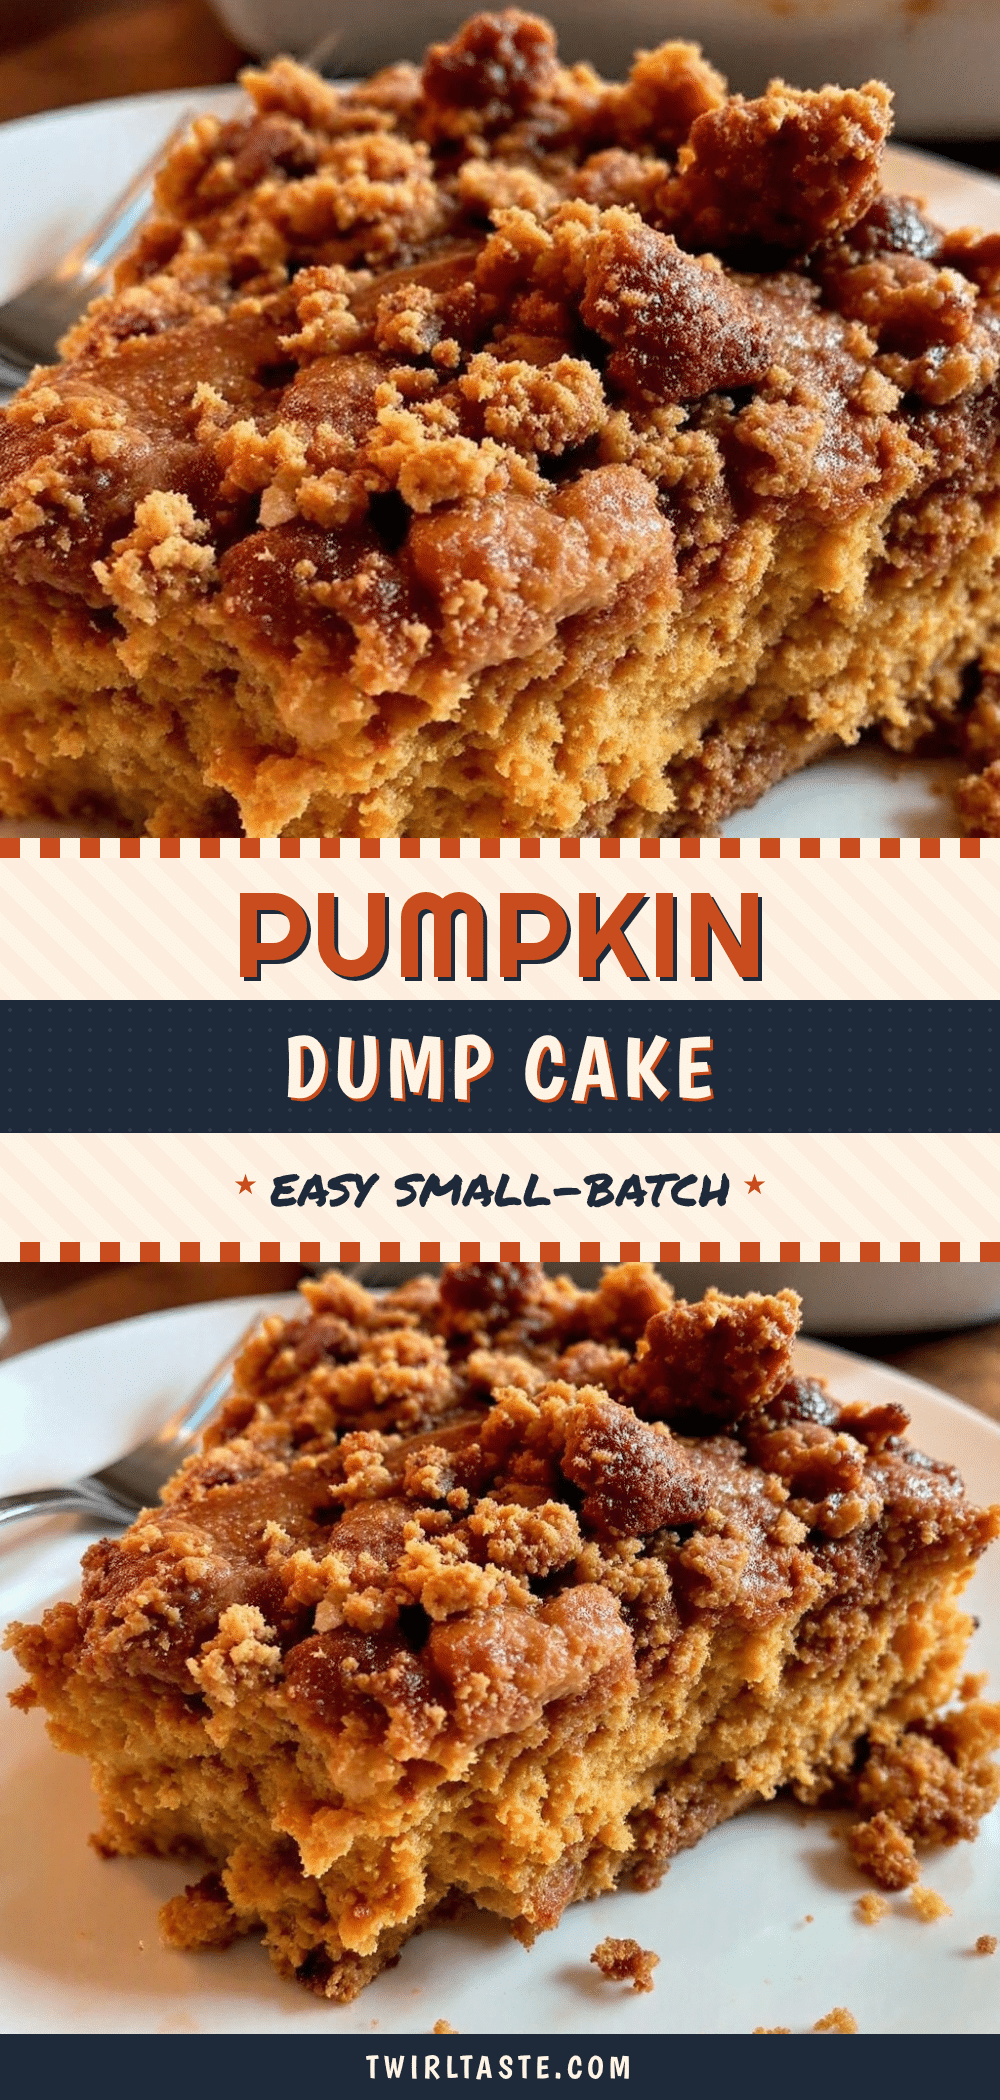
Easy Small-Batch Pumpkin Dump Cake (Best 4-Serving Dessert)
A perfectly portioned small-batch pumpkin dump cake that delivers warm, spiced, buttery comfort in just 4 servings. Quick to prepare with simple pantry ingredients, this dessert is ideal for fall cravings without the commitment of a full-size pan.
- Prep Time: 10 minutes
- Cook Time: 30-35 minutes
- Total Time: 40-45 minutes
- Yield: 4 servings 1x
- Category: Dessert
- Cuisine: American
Ingredients
- 1 cup (240g) pumpkin purée
- 1/2 cup (120ml) evaporated milk
- 1/3 cup (65g) granulated sugar
- 1 large egg
- 1 teaspoon pumpkin pie spice
- 1/2 teaspoon vanilla extract
- 1 cup (about 4 oz / 115g) yellow cake mix
- 1/4 cup (4 tablespoons / 57g) unsalted butter, melted
- 1/4 cup (30g) chopped pecans (optional)
Instructions
- Preheat your oven to 350°F (175°C). Lightly grease an 8×8 or 9×9 baking dish with butter or non-stick spray.
- In a medium bowl, whisk together 1 cup pumpkin purée, 1/2 cup evaporated milk, 1/3 cup granulated sugar, 1 large egg, 1 teaspoon pumpkin pie spice, and 1/2 teaspoon vanilla extract until smooth and well combined.
- Pour the pumpkin filling into the prepared dish and spread evenly to the edges with a spatula.
- Sprinkle 1 cup of yellow cake mix evenly over the pumpkin layer. Do not stir.
- Drizzle 1/4 cup melted unsalted butter as evenly as possible over the dry cake mix.
- Sprinkle 1/4 cup chopped pecans over the top (if using).
- Bake for 30-35 minutes, until the top is golden brown and the filling is bubbling at the edges. Let cool in the pan for at least 10-15 minutes before serving.
Notes
Don’t skip the cooling time—it needs at least 10-15 minutes to set properly. For best results, use room temperature ingredients. If using homemade pumpkin purée, drain excess liquid first. The flavors deepen after a day in the fridge.
Nutrition
- Serving Size: 1 serving (1/4 of re
- Calories: 320350
- Sugar: 2830
- Sodium: 250300
- Fat: 1518
- Saturated Fat: 810
- Carbohydrates: 4245
- Fiber: 23
- Protein: 45
Keywords: pumpkin dump cake, small-batch dessert, fall dessert, easy pumpkin recipe, 4-serving dessert, pumpkin cake


