Love this? Save it for later!
Share the inspiration with your friends
The uneven, jagged edge of a cracker snapping under your thumb is what matters most. That sharp, audible break is the real start of the meal. Honestly, most people focus too much on the cheese selection or the wine pairing. They obsess over which grapes look pretty next to which salami. But the truth is, it’s the texture contrast that keeps you coming back. You know that feeling when you bite into something salty and soft, followed immediately by something sweet and crisp? That specific sequence is why this charcuterie board for two works so well.
I used to think building a board was about looking like a Pinterest board. I’d spend hours arranging olives in perfect circles. It looked nice in photos, sure. But eating it felt stiff. Too planned. Too serious. Then I realized the best part wasn’t the arrangement. It was the chaos of grabbing pieces. The messy fingers. The way two people lean in, reaching for the same fig at the same time. That moment of connection is the whole point.
This isn’t about feeding a crowd. It’s about slowing down. It’s about taking ten minutes to put together something that feels indulgent but doesn’t require standing over a stove. You can make this perfect charcuterie board for two on a Tuesday night. No special occasion needed. Just good food and good company.
I’ve learned that less is actually more when it comes to pairing. You don’t need five types of cheese. You need one sharp, one soft, and one weird. That’s the secret. The weird one is usually the favorite. Maybe it’s a blue cheese that smells a bit strong. Or a quince paste that tastes like candy. These small, deliberate choices make the board feel curated. Not cheap. Not rushed. Just right.
The best part is the flexibility. You can swap out the meats based on what’s on sale. You can use whatever fruit is in season. It’s forgiving. If you run out of crackers, bread works. If you don’t have honey, jam works. The structure holds up. It’s sturdy. And that stability lets you relax. You can actually talk while you eat. You don’t have to rush to get food on plates. It’s just there. Waiting for you.
Why You’ll Love This Recipe
Let’s face it, cooking dinner every night can get exhausting. Sometimes you just want something that feels fancy but takes zero effort. This charcuterie board hits that sweet spot perfectly. It’s not just good—it is the kind of meal that makes you close your eyes after the first bite. It’s comfort food reimagined—healthier, faster, but with the same soul-soothing satisfaction. Here is why this setup works so well for couples and small groups:
- Zero Cooking Required: This comes together in under 15 minutes. There is no chopping, no sautéing, no heating up the oven. It is perfect for busy weeknights when you’re too tired to cook but too hungry to order takeout.
- Simple Ingredients: No fancy grocery trips needed. You likely already have half the items in your pantry. The rest are standard staples you can grab at any local market. It relies on quality, not complexity.
- Perfect for Date Night: Great for cozy dinners at home. It creates a relaxed atmosphere where the focus is on conversation and connection, not on managing a hot meal.
- Crowd-Pleaser: Always gets rave reviews from kids and adults alike. Even picky eaters usually find something they like on a board. There is a piece for everyone.
- Unbelievably Delicious: The texture and flavor combo is next-level comfort food. The mix of salty, sweet, creamy, and crunchy keeps your palate interested from the first bite to the last.
- Customizable for Any Taste: Whether you prefer spicy salami or mild brie, you can tailor this board to your exact preferences. It’s not just another version—it’s your best version.
What makes this recipe different from the rest is the intentional pairing. Most people just throw random items on a plate. This method encourages you to think about how flavors interact. For example, pairing a sharp cheddar with a sweet fig jam creates a flavor explosion that you wouldn’t get from eating them separately. It’s a small technique, but it changes everything. It turns a simple snack into a memorable experience.
This recipe isn’t just about feeding your stomach. It’s about creating a moment. It’s perfect for impressing guests without stress, or turning a simple meal into something memorable. You can pair it with a glass of wine, or just enjoy it with coffee. It’s versatile. It’s reliable. And it always delivers.
What Ingredients You Will Need
This recipe uses simple, wholesome ingredients to deliver bold flavor and satisfying texture without the fuss. The goal here is balance. You want a mix of textures and flavors that complement each other. You don’t need expensive, imported items to make this work. Good, accessible ingredients are all you need.
- For the Cheeses:
- Hard cheese: Aged cheddar or Manchego (adds a sharp, crumbly texture). I recommend Cabot for best texture.
- Soft cheese: Brie or Camembert (adds a creamy, rich mouthfeel).
- Blue cheese: Gorgonzola or Roquefort (adds a pungent, salty kick).
- For the Meats:
- Cured meat: Salami or prosciutto (adds saltiness and chew).
- Optional meat: Chorizo or summer sausage (adds spice and variety).
- For the Crunch:
- Crackers: Water crackers or baguette slices (neutral base for toppings).
- Nuts: Almonds or walnuts (adds crunch and healthy fats).
- For the Sweetness:
- Fresh fruit: Grapes or sliced apples (adds freshness and acidity).
- Dried fruit: Apricots or figs (adds chewiness and natural sugar).
- Spread: Honey or fig jam (adds viscosity and sweetness).
- For the Savory Bite:
- Pickles: Cornichons or olives (adds acidity to cut through the fat).
- Chocolate: Dark chocolate squares (adds a dessert-like finish).
When selecting cheeses, look for firm, small-curd varieties for the hard cheese to ensure it slices cleanly. For the soft cheese, make sure it is ripe but not runny. If you are buying prosciutto, look for thin slices that drape easily. For nuts, toasted almonds add a deeper flavor than raw ones. In summer, swap in fresh berries instead of dried fruit for a lighter taste.
You can substitute ingredients freely. Use almond flour crackers for a gluten-free option. Swap Greek yogurt with dairy-free coconut yogurt if needed, though that doesn’t fit this board style. Use almond milk if you need a drink pairing. The key is to keep the ratios balanced. Don’t overload one category. Aim for three cheeses, two meats, and three types of crunch or sweet items. This keeps the board from looking cluttered. It also ensures every bite has variety.
Equipment Needed
You don’t need fancy tools to build a great charcuterie board. The right setup makes the process easier and the final result look more polished. Here is what you will need:
- Large Platter or Board: A wooden board, marble slab, or large ceramic plate. Wood adds warmth. Marble keeps cheese cool. Choose based on your style.
- Small Bowls: For jams, nuts, or olives. Small ramekins or ceramic bowls work best. They prevent the board from getting messy.
- Cheese Knives: A standard knife for hard cheese, a wire cheese slicer for soft cheese, and a small fork for blue cheese. I suggest buying a dedicated set; it makes serving easier.
- Serving Tongs: Small tongs for picking up crackers or nuts. Keeps fingers clean.
- Small Spoons: For drizzling honey or spreading jam. Tiny honey dippers are cute but regular teaspoons work fine.
If you don’t have small bowls, you can use empty jar lids or even folded napkins to hold items. Budget-friendly options include using your existing dinner plates as a base. Just wipe them clean first. For the board, a large cutting board from your kitchen works perfectly. No need to buy a special item.
Maintain your wooden boards by washing them with warm water and mild soap. Dry them immediately. Oil them occasionally with food-safe mineral oil to prevent cracking. Marble is easier to clean but can stain from acidic fruits. Wipe it down right after use. If you use a ceramic plate, it is dishwasher safe. Just be careful with the edge. These tools are simple. They don’t need much care. The focus is on the food, not the hardware.
Preparation Method
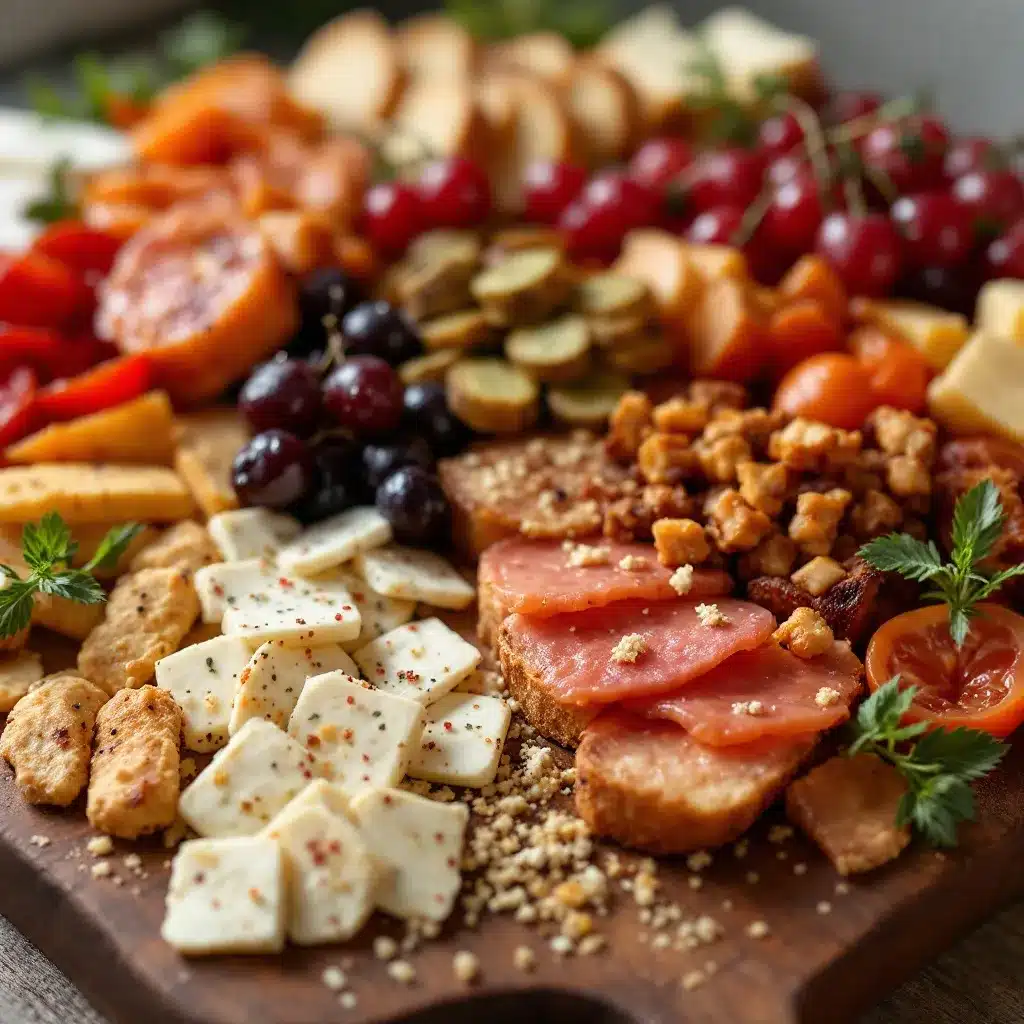
Building the board is a process of layering. You start with the big items and fill in the gaps. Here is how to do it step by step.
- Prepare the Cheese (5 minutes): Take your cheeses out of the fridge 20 minutes before serving. This allows them to reach room temperature. Cold cheese loses flavor. Cut the hard cheese into cubes or slices. Cut the soft cheese in half or leave it whole. Place them on the board first. Sensory cue: The cheese should look soft and inviting.
- Add the Meats (5 minutes): Fold the salami or prosciutto into loose rolls or folds. Don’t lay them flat. Folds add volume and visual interest. Place them near the cheeses. Tip: Roll them loosely so they are easy to pick up.
- Place the Crackers and Bread (3 minutes): Arrange crackers in a stack or fan them out. Place bread slices nearby. Warning: Leave space between items. Don’t crowd the board.
- Add Nuts and Dried Fruit (3 minutes): Scatter nuts in small piles. Place dried fruit near the cheeses they pair with. Sensory cue: Look for color contrast. Red apricots next to white cheese pops.
- Fill the Gaps with Fresh Fruit and Pickles (3 minutes): Place grapes, apple slices, or olives in the empty spaces. Tip: Use grapes to fill small holes. They are perfect for this.
- Add Spreads and Chocolate (2 minutes): Spoon jam or honey into small bowls. Place them on the board. Add chocolate squares at the end. Sensory cue: The honey should glisten in the light.
- Final Check (2 minutes): Step back and look at the board. Is it balanced? Add more nuts if needed. Adjust items for better flow. Personal tip: I always add a sprig of rosemary or thyme for color. It makes the board look fresh.
This process takes about 15-20 minutes total. It is not complicated. It is just about placement. The goal is to create a path for the eye. Start at one corner and move around the board. Ensure every section has a mix of flavors. If you have too much cheese, add more crackers. If you have too much meat, add more fruit. Balance is key.
Troubleshooting: If the cheese is too hard to cut, warm it slightly in the microwave for 10 seconds. If the fruit is browning, squeeze a little lemon juice on it. If the board looks empty, add more nuts. These small adjustments make a big difference. The final result should look abundant but organized. It should invite you to eat.
Cooking Tips & Techniques
Building a charcuterie board is an art, but it relies on simple techniques. Here are some tips to make your board look professional and taste better.
- Room Temperature is Key: Always let cheese sit out for 20-30 minutes before serving. Cold cheese tastes bland. Room temperature cheese releases its full aroma and flavor. This is the most important tip.
- Cut for Ease: Cut cheese into bite-sized pieces. People don’t want to cut their own food while socializing. Pre-cut everything. Use cubes, triangles, or slices. Make it easy to grab.
- Layer for Height: Don’t lay everything flat. Stack crackers. Roll meat. Place bowls on small stands or books to create height. Height adds visual appeal. It makes the board look dynamic.
- Use the “Rule of Three”: Aim for three types of cheese, three types of crunch, and three types of sweet. This creates variety without overwhelming the eye. It’s a simple guideline that works every time.
- Pair Flavors Intentionally: Place complementary items next to each other. Put honey near the blue cheese. Put figs near the cheddar. This guides the eater to try interesting combinations. It enhances the experience.
- Keep it Fresh: Add fresh fruit and greens last. They can wilt or brown if left out too long. Add them just before serving. This keeps the board looking vibrant and appetizing.
Common mistakes include overcrowding the board. Leave space between items. Empty space is just as important as full space. It allows the eye to rest. Another mistake is using too many similar items. Don’t put two types of salami next to each other unless they are very different. Variety is the goal.
I once made a board with five types of cheese. It was a disaster. Too rich. Too heavy. Now I stick to three. One sharp, one soft, one blue. It’s the perfect balance. It lets each flavor shine without competing. This technique has saved me from making boring boards. It keeps the focus on quality over quantity.
Timing is also crucial. Start building the board 15 minutes before guests arrive. This gives you time to adjust. If you wait until the last minute, the cheese will be cold. The fruit might be bruised. Plan ahead. It makes the whole process smoother. And it lets you enjoy the board yourself.
Variations & Adaptations
This charcuterie board is flexible. You can adapt it to fit different dietary needs or tastes. Here are some variations to try:
- Vegetarian Option: Skip the meat. Add more cheeses, nuts, and roasted vegetables. Grilled portobello mushrooms or roasted eggplant slices work well. They add a savory, meaty texture without the animal products.
- Gluten-Free Option: Use gluten-free crackers or rice cakes. Ensure the cured meats are certified gluten-free. Most are, but some have fillers. Check labels. Almonds and walnuts are naturally gluten-free.
- Dairy-Free Option: Use dairy-free cheeses if needed. Add more nuts, seeds, and fresh fruit. Hummus or avocado spread can replace cheese for a creamy element. It’s a lighter option but still satisfying.
- Spicy Twist: Add spicy chorizo or jalapeño slices. Pair with pepper jack cheese. Drizzle with hot honey. This adds a kick that wakes up the palate. Great for those who like heat.
- Seasonal Fruit Swap: In summer, use fresh berries, peaches, or grapes. In fall, use apples, pears, and figs. In winter, use dried fruits and nuts. Adjust based on what is fresh and available. It keeps the board relevant and tasty.
I personally love adding a spicy element. It cuts through the richness of the cheese. It adds excitement. But if you are serving kids, skip the spice. Stick to mild cheeses and sweet fruits. The board can be tailored to your audience.
For allergen substitutions, use sunflower seeds instead of nuts. Use oat crackers instead of wheat. The structure of the board remains the same. Only the ingredients change. This makes it inclusive. Everyone can enjoy it.
Another variation is to theme the board. A “Mediterranean” board uses feta, olives, and hummus. A “French” board uses brie, fig jam, and baguette. A “American” board uses cheddar, apple slices, and pretzels. Themes make it fun. They give you a direction. They simplify the selection process.
Serving & Storage Suggestions
Serve the board at room temperature. This enhances the flavor. Provide small plates and napkins. Encourage guests to build their own bites. This interactive element adds to the fun. It makes the meal more engaging.
Pair the board with a light wine, beer, or sparkling water. A crisp white wine or a light red works well. Avoid heavy drinks that overwhelm the palate. The goal is to complement the food, not compete with it.
For storage, keep unused items in the fridge. Cheese should be wrapped in parchment paper, not plastic. Plastic makes cheese sweat. It affects the texture. Nuts and crackers can be stored in airtight containers. Fresh fruit should be kept separate until serving.
Reheating is not recommended for charcuterie. It is best served cold or at room temperature. If you have leftovers, enjoy them the next day. The flavors may change slightly, but it is still good. Honey and jam can be reused. Just cover them tightly.
Flavors develop over time. The cheese softens. The crackers absorb humidity. So it’s best to eat the board within a few hours. Don’t make it too far in advance. Freshness is key.
I usually make the board right before guests arrive. This ensures everything is fresh. It also lets me enjoy a piece or two while I prepare. It’s a nice treat. It sets the tone for the meal.
Nutritional Information & Benefits
A charcuterie board is not a balanced meal in the traditional sense. It is an appetizer or snack. But it has nutritional benefits. Cheese provides protein and calcium. Nuts offer healthy fats and fiber. Fruit adds vitamins and antioxidants. Meat provides protein.
However, it is high in sodium and saturated fat. Enjoy it in moderation. It is not a daily staple. It is a special treat.
For dietary considerations, this board can be gluten-free, dairy-free, or low-carb with adjustments. It is flexible.
I view this board as a way to slow down. It is not about filling up. It is about savoring. It encourages mindful eating. You pay attention to each bite. You notice the textures. You appreciate the flavors. This mindfulness is beneficial for your well-being. It connects you to your food.
Conclusion
This perfect charcuterie board for two is more than just food. It is an experience. It is a way to connect. It is simple, yet elegant. It requires no cooking skills. Just a little planning.
I love this recipe because it is forgiving. You can’t mess it up. You can swap ingredients. You can change flavors. It always works. It is reliable.
Try it tonight. Gather your favorite items. Put them on a board. Share it with someone you love. Or share it with yourself. It is a treat for the senses.
Please leave a comment below. Tell me what you put on your board. Share your variations. I love hearing from you.
And if you enjoyed this, check out our easy cozy maple butternut squash soup for a warm, comforting meal. Or try our creamy slow cooker white chicken chili for a hearty dinner.
Enjoy every bite.
FAQs
How far in advance can I make the charcuterie board?
You can prepare most items 2-3 hours in advance. Add fresh fruit and greens just before serving. This keeps the board looking fresh and vibrant.
Can I use this board for a large group?
Yes, but scale up the ingredients. Double or triple the amounts. Use a larger board. The principles remain the same. Balance is key.
What wine pairs best with this board?
A crisp white wine like Sauvignon Blanc or a light red like Pinot Noir works well. Avoid heavy, tannic wines. They can clash with the cheese.
How do I store leftover cheese?
Wrap cheese in parchment paper or wax paper. Place it in a container. Refrigerate. Do not use plastic wrap. It affects the texture.
Can I make this board vegetarian?
Yes, simply omit the meat. Add more cheeses, nuts, and roasted vegetables. It is still delicious and satisfying.
Pin This Recipe!
Perfect Charcuterie Board for 2: Best Easy Cheese Board Ideas
A simple, no-cook charcuterie board designed for two people that emphasizes texture contrast and intentional flavor pairing. It requires zero cooking skills and comes together in under 15 minutes, making it perfect for date nights or casual gatherings.
- Prep Time: 15 minutes
- Cook Time: 0 minutes
- Total Time: 15 minutes
- Yield: 2 servings
- Category: Appetizer
- Cuisine: American
Ingredients
- Hard cheese (e.g., Aged cheddar or Manchego)
- Soft cheese (e.g., Brie or Camembert)
- Blue cheese (e.g., Gorgonzola or Roquefort)
- Cured meat (e.g., Salami or prosciutto)
- Optional meat (e.g., Chorizo or summer sausage)
- Crackers (e.g., Water crackers) or baguette slices
- Nuts (e.g., Almonds or walnuts)
- Fresh fruit (e.g., Grapes or sliced apples)
- Dried fruit (e.g., Apricots or figs)
- Spread (e.g., Honey or fig jam)
- Pickles (e.g., Cornichons or olives)
- Dark chocolate squares
Instructions
- Take cheeses out of the fridge 20 minutes before serving to reach room temperature.
- Cut hard cheese into cubes or slices; cut soft cheese in half or leave whole. Place cheeses on the board first.
- Fold cured meats into loose rolls or folds to add volume and place them near the cheeses.
- Arrange crackers in a stack or fan them out, leaving space between items.
- Scatter nuts in small piles and place dried fruit near the cheeses they pair with.
- Fill empty gaps with fresh fruit (grapes, apple slices) and pickles.
- Spoon jam or honey into small bowls and place them on the board.
- Add chocolate squares at the end.
- Step back to check balance and adjust items for better flow and visual appeal.
Notes
Let cheese sit out for 20-30 minutes before serving to enhance flavor. Cut cheese into bite-sized pieces for ease. Use the ‘Rule of Three’ for variety (3 cheeses, 3 crunchs, 3 sweets). Add fresh fruit and greens last to prevent wilting. Store unused cheese in parchment paper, not plastic.
Nutrition
- Serving Size: 2 servings
- Calories: 450
- Sugar: 15
- Sodium: 800
- Fat: 32
- Saturated Fat: 14
- Carbohydrates: 25
- Fiber: 3
- Protein: 18
Keywords: charcuterie board, cheese board, date night ideas, no cook recipe, appetizer for two, easy entertaining, cheese pairing, snack ideas


