Love this? Save it for later!
Share the inspiration with your friends
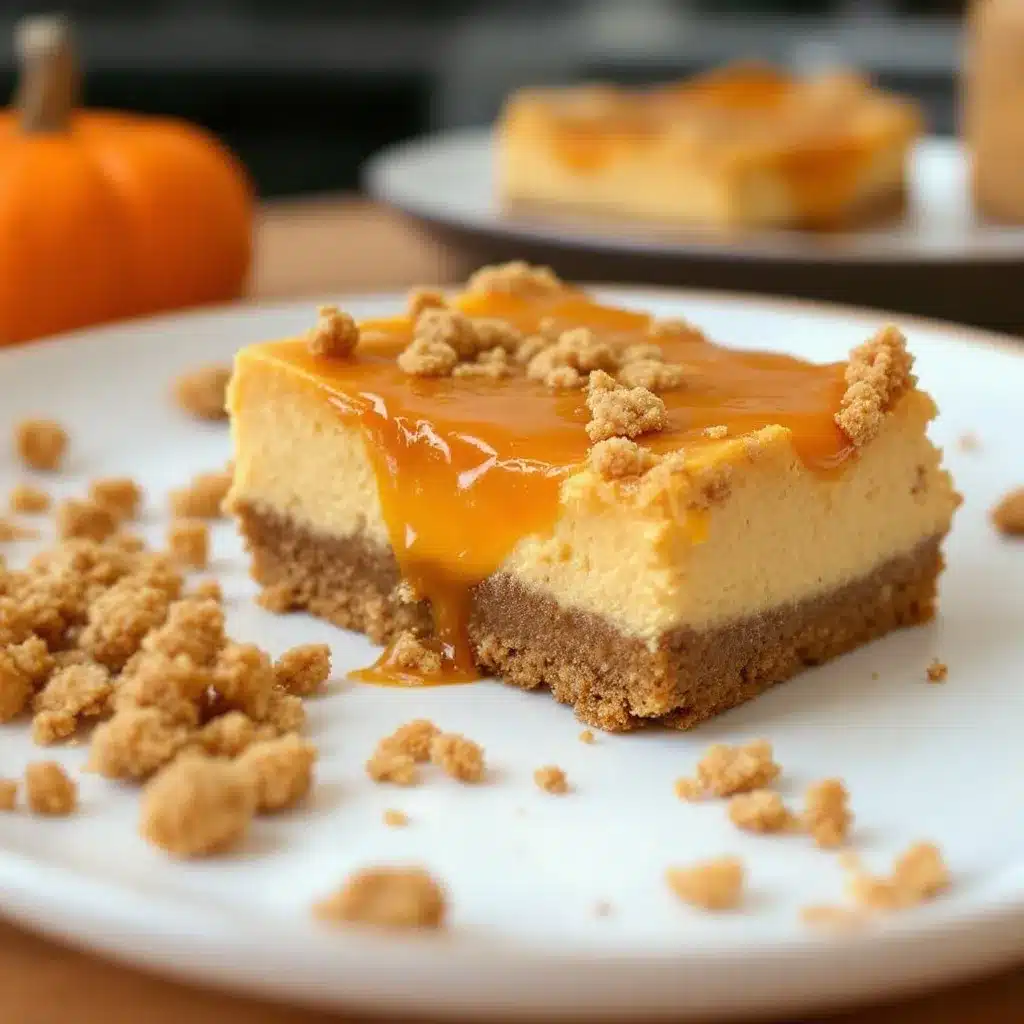
The crackle of a gingersnap crust under the tines of a fork. That’s the first thing I think about when I picture these Perfect Pumpkin Cheesecake Bars. It’s not the creamy, tangy-sweet filling or the way the pumpkin swirls into the cheesecake like a slow-motion sunset. It’s that initial, decisive snap of spice and crunch. That sound is the whole point.
I was standing in my kitchen last October, staring at a can of pumpkin puree that had been in my pantry since the previous Thanksgiving. I had a block of cream cheese, a bag of gingersnaps, and absolutely no desire to make a full, fussy cheesecake in a water bath. The idea for these bars hit me like a rogue wave — what if I took the easiest possible gingersnap crust, the creamiest no-fuss cheesecake, and married them with that deep, earthy pumpkin flavor? No springform pan, no cracking anxiety, just pure, unadulterated fall comfort in a square.
Honestly, the first batch was a little too sweet. The second batch? The crust was too thick. But the third time, I got it right. The gingersnap crust is sturdy enough to hold a slice, but it shatters beautifully when you bite into it. The pumpkin cheesecake layer is dense but silky, with just enough spice to warm you from the inside out. These bars are the kind of dessert you make when you want to impress people but also want to eat half the pan yourself while standing in front of the fridge. And I’m not here to judge.
This recipe has become my fall baking anchor. It’s the thing I bring to Friendsgiving, the thing I pack for a weekend cabin trip, the thing I make just because the air got cold and I needed something to do with my hands. Trust me, you’re going to want this one in your back pocket.
Why You’ll Love This Recipe
Let’s be real — there are a million pumpkin cheesecake recipes out there. But these Perfect Pumpkin Cheesecake Bars with Gingersnap Crust are different. I’ve tested this recipe six times to get the balance just right, and I can tell you with confidence: this is the one.
- Quick & Easy: No water bath. No springform pan. No complicated steps. These bars come together in about 30 minutes of active prep time, then the oven does the rest. Perfect for a busy weeknight baking session or a last-minute holiday dessert.
- Simple Ingredients: You probably have most of these in your kitchen right now. Cream cheese, pumpkin puree, eggs, sugar, and a box of store-bought gingersnaps. No fancy grocery store runs required.
- Perfect for Fall Gatherings: Whether it’s a Thanksgiving potluck, a Halloween party, or just a cozy Sunday afternoon, these bars are the star of the show. They travel well, slice cleanly, and look gorgeous on a plate.
- Crowd-Pleaser: I’ve served these to kids, adults, and self-proclaimed pumpkin haters. They disappear every single time. The gingersnap crust wins over the skeptics, and the creamy cheesecake keeps everyone coming back for seconds.
- Unbelievably Delicious: The texture is what gets me. The crust is crunchy and spicy, the filling is luscious and smooth, and the whole thing tastes like autumn distilled into a single bite. It’s the kind of dessert that makes you close your eyes after the first bite.
What makes this recipe different from the rest? It’s the ratio. Most pumpkin cheesecake bars are either too dense or too fluffy. I spent hours tweaking the amount of pumpkin puree versus cream cheese to get that perfect, sliceable-yet-creamy consistency. And the gingersnap crust isn’t just a suggestion — it’s the backbone of the whole operation. The molasses and ginger in the cookies complement the pumpkin spice in a way that a standard graham cracker crust just can’t touch.
These bars are comfort food reimagined — familiar enough to feel nostalgic, but elevated enough to feel special. You’re going to love them.
What Ingredients You Will Need
This recipe uses simple, wholesome ingredients to create something truly spectacular. The magic is in the combination of textures and flavors, and each component plays a critical role. Here’s everything you’ll need to make these Perfect Pumpkin Cheesecake Bars with Gingersnap Crust.
For the Gingersnap Crust
- 2 cups (about 8 oz) gingersnap cookies, finely crushed — I use Nabisco Ginger Snaps, but any brand works. You want them crushed into fine crumbs, almost like sand. A food processor makes this effortless, but a rolling pin and a zip-top bag work in a pinch. (Pro tip: pulse the cookies in the food processor until they are uniformly fine — no big chunks.)
- 5 tablespoons unsalted butter, melted — Use real butter here, not margarine. The butter binds the crumbs and adds richness. Let it cool slightly before mixing so it doesn’t steam the crumbs.
- 2 tablespoons granulated sugar — Just a little extra sweetness to balance the spicy ginger.
- ¼ teaspoon salt — This might seem odd for a sweet crust, but salt sharpens all the flavors. Trust me.
For the Pumpkin Cheesecake Filling
- 16 oz (two 8-oz blocks) cream cheese, softened to room temperature — This is non-negotiable. Cold cream cheese will give you a lumpy filling. Leave it on the counter for at least an hour before you start. I recommend Philadelphia brand for the creamiest results.
- 1 cup granulated sugar — Standard white sugar. It dissolves cleanly and doesn’t compete with the pumpkin spice.
- 1 cup pumpkin puree — Not pumpkin pie filling. Make sure you grab 100% pure pumpkin puree. Libby’s is my go-to. (If you’re feeling ambitious, you can roast and puree your own sugar pumpkin, but canned is perfectly fine.)
- 3 large eggs, room temperature — Room temperature eggs incorporate more smoothly into the batter, creating a silkier texture. If you’re in a hurry, place the eggs in a bowl of warm water for 5 minutes.
- 1 teaspoon vanilla extract — Pure vanilla extract, not imitation. It adds warmth and depth.
- 1 teaspoon pumpkin pie spice — Store-bought is fine, but you can make your own by mixing ½ teaspoon cinnamon, ¼ teaspoon ginger, ⅛ teaspoon nutmeg, and ⅛ teaspoon cloves.
- ½ teaspoon ground cinnamon — For an extra layer of cozy flavor.
- ¼ teaspoon salt — Again, salt balances the sweetness and enhances the spice.
For the Optional Topping
- ½ cup sour cream — This is completely optional, but I love a thin layer of sour cream on top before baking. It creates a beautiful, tangy finish that contrasts with the sweet pumpkin. (Use full-fat for the best texture.)
- Caramel sauce, for drizzling — A drizzle of store-bought or homemade caramel takes these bars over the top. I’ve been known to use the jarred kind in a pinch, and it’s still delicious.
- Fresh whipped cream, for serving — Because everything is better with whipped cream.
If you’re looking for another easy fall dessert that uses simple ingredients, you should check out my cozy caramel apple cinnamon roll bundt cake. It’s got that same “wow” factor with minimal effort.
Equipment Needed
You don’t need a professional pastry kitchen to make these Perfect Pumpkin Cheesecake Bars. Here’s what you’ll need:
- 9×13-inch baking pan — A metal or glass pan works. I prefer metal because it conducts heat more evenly and gives you a cleaner edge on the crust. If you only have glass, reduce the oven temperature by 25°F and watch the edges.
- Parchment paper — This is your best friend. Line the pan with parchment paper, leaving an overhang on two sides. This creates a sling that lets you lift the entire block of bars out of the pan for clean slicing. (I’ve ruined too many pans of bars trying to scoop them out — learn from my mistakes.)
- Food processor — For crushing the gingersnaps into fine crumbs. A rolling pin and a zip-top bag work, but a food processor is faster and gives you a more consistent texture.
- Large mixing bowls — One for the crust mixture, one for the cheesecake filling.
- Electric hand mixer or stand mixer — You can mix the filling by hand with a whisk, but a mixer makes it much easier to get that silky, lump-free texture. I use my stand mixer with the paddle attachment.
- Rubber spatula — For scraping down the sides of the bowl and spreading the batter evenly.
- Measuring cups and spoons — Accuracy matters in baking, especially with the spices.
- Sharp knife — For slicing the bars cleanly after they’ve chilled. A chef’s knife works great, but a long serrated knife is even better.
If you don’t have a food processor, you can place the gingersnaps in a sturdy zip-top bag and crush them with a rolling pin. It’s a little more work, but it’s a great way to release some stress. I’ve done it many times.
Preparation Method
Let’s make these Perfect Pumpkin Cheesecake Bars with Gingersnap Crust. Follow these steps carefully, and you’ll have a dessert that looks like it came from a bakery.
Step 1: Preheat and Prep the Pan (5 minutes)
Preheat your oven to 350°F (175°C). Line a 9×13-inch baking pan with parchment paper, leaving a 2-inch overhang on the long sides. This will allow you to lift the bars out later. Lightly spray the parchment with non-stick cooking spray — just a quick spritz.
Step 2: Make the Gingersnap Crust (10 minutes)
Place the gingersnap cookies in a food processor and pulse until they become fine crumbs. You should have about 2 cups of crumbs. Transfer the crumbs to a medium mixing bowl. Add the melted butter, granulated sugar, and salt. Stir with a fork until the mixture looks like wet sand and holds together when you squeeze it.
Pour the crumb mixture into the prepared pan. Press it down firmly and evenly using the bottom of a measuring cup or a flat-bottomed glass. Make sure you get into the corners. The crust should be compact, not fluffy. Bake the crust for 10 minutes, then remove it from the oven and set it aside to cool slightly while you make the filling. (The crust will continue to firm up as it cools.)
Step 3: Make the Pumpkin Cheesecake Filling (15 minutes)
In a large mixing bowl, beat the softened cream cheese with an electric hand mixer or stand mixer on medium speed until it’s smooth and creamy — about 2 minutes. Scrape down the sides of the bowl with a rubber spatula. Add the granulated sugar and beat until combined, about 1 minute more.
Add the pumpkin puree, vanilla extract, pumpkin pie spice, cinnamon, and salt. Beat on low speed until just combined. (Don’t overmix — you don’t want to incorporate too much air into the filling, which can cause cracks.)
Add the eggs one at a time, beating on low speed after each addition until just incorporated. Scrape down the bowl between each egg. The batter should be smooth, thick, and a gorgeous deep orange color. Give it a final stir by hand with the spatula to make sure everything is evenly mixed.
Step 4: Assemble the Bars (5 minutes)
Pour the pumpkin cheesecake filling over the pre-baked crust. Use the rubber spatula to spread it into an even layer, making sure it reaches all four corners. Gently tap the pan on the counter a few times to release any air bubbles.
If you’re using the sour cream topping, spread it gently over the top of the filling in a thin, even layer. This step is optional, but I highly recommend it for that extra tangy finish.
Step 5: Bake the Bars (40-45 minutes)
Place the pan in the preheated oven and bake for 40 to 45 minutes. The edges should look set and slightly puffed, but the center should still have a slight jiggle when you gently shake the pan. (Think of it like a firm Jell-O.) The surface should be matte, not wet.
Here’s the tricky part — if you overbake the bars, they will crack. So pull them out when the center is still a little wobbly. They will continue to set as they cool. Remove the pan from the oven and place it on a wire rack to cool completely at room temperature. This takes about 1 to 2 hours.
Step 6: Chill and Slice (4 hours minimum, overnight is best)
Once the bars have cooled to room temperature, cover the pan with plastic wrap and refrigerate for at least 4 hours. Overnight is even better. This step is crucial — the bars need time to fully set so they slice cleanly. If you try to cut them too early, you’ll end up with a delicious but messy pile of pumpkin cheesecake rubble.
When you’re ready to serve, use the parchment paper sling to lift the entire block of bars out of the pan. Place it on a cutting board. Use a sharp knife to slice the bars into squares. For clean cuts, wipe the knife clean with a damp paper towel between each slice. You can cut them into 12 large bars or 24 smaller bite-sized squares.
Drizzle with caramel sauce and top with a dollop of fresh whipped cream if you’re feeling fancy. Serve cold or at room temperature — both are fantastic.
Cooking Tips & Techniques
Over the years, I’ve made a lot of cheesecake bars. And I’ve made a lot of mistakes. Here are the lessons I’ve learned so you don’t have to learn them the hard way.
Don’t overmix the filling. This is the number one cause of cracks in cheesecake. When you beat too much air into the batter, it expands in the oven and then collapses, leaving you with a canyon across the top. Mix on low speed and stop as soon as the ingredients are combined. A few small lumps are better than a cracked surface.
Use room temperature ingredients. Cold cream cheese and cold eggs create a lumpy, curdled-looking batter. I know it’s tempting to just throw everything together straight from the fridge, but trust me — letting your ingredients come to room temperature for an hour makes a world of difference. The batter will be silky smooth, and the texture will be infinitely better.
Press the crust firmly. A loose crust will crumble when you try to slice the bars. Use the bottom of a measuring cup to really compact the crumbs into the pan. I press down hard, especially in the corners. The pre-baking step also helps the crust hold together.
Watch the edges. If the edges of the cheesecake start to brown too quickly, the bars are overbaking. Every oven runs a little differently, so start checking at the 35-minute mark. The center should jiggle, but the edges should be set. If your oven runs hot, you can place a baking sheet on the rack below to diffuse the heat.
Be patient with the chilling time. I know it’s hard to wait, especially when your kitchen smells like heaven. But these bars need at least 4 hours in the fridge to set properly. I’ve made the mistake of cutting them after 2 hours, and they were a sloppy, delicious mess. Overnight chilling gives you those perfect, clean slices that look like they belong in a bakery window.
One more thing — if you’re making these for a holiday gathering, you can prepare them up to 3 days in advance. They actually get better after a day or two in the fridge as the flavors meld together. Just keep them covered tightly with plastic wrap.
If you love fall baking as much as I do, you’ll also enjoy my tender brown butter pumpkin cream cheese swirl muffins. They use a similar flavor profile but in muffin form — perfect for breakfast or a quick snack.
Variations & Adaptations
One of the best things about this recipe is how flexible it is. Here are some of my favorite ways to switch it up.
Gluten-Free Version: Use gluten-free gingersnap cookies for the crust. Most major brands offer a gluten-free option, or you can make your own with almond flour, brown sugar, and ginger. The filling is naturally gluten-free, so this swap is easy.
Dairy-Free Version: Use dairy-free cream cheese (I like Kite Hill or Miyoko’s) and a vegan butter substitute for the crust. The texture will be slightly softer, but the flavor is still incredible. You can also use coconut cream instead of sour cream for the topping.
Pumpkin Spice Latte Twist: Add 1 tablespoon of instant espresso powder dissolved in 1 tablespoon of hot water to the cheesecake filling. This gives the bars a subtle coffee flavor that pairs beautifully with the pumpkin and spice. It’s like a PSL in bar form.
Chocolate Lover’s Version: Melt 4 ounces of semi-sweet chocolate and swirl it into the cheesecake filling before baking. The chocolate and pumpkin combination is surprisingly good — rich, earthy, and decadent. I’ve also added mini chocolate chips to the crust for extra crunch.
Maple Pecan Version: Substitute ¼ cup of the granulated sugar with maple syrup. Top the baked and cooled bars with chopped pecans and a drizzle of maple glaze (1 cup powdered sugar mixed with 2 tablespoons maple syrup and a splash of milk). This is my personal favorite variation for Thanksgiving.
Low-Sugar Option: Reduce the sugar in the filling to ¾ cup and use a sugar substitute like monk fruit sweetener in the crust. The bars will be less sweet, but the pumpkin and spice flavors will shine through more clearly.
For another easy fall dessert that’s perfect for a crowd, try my cozy pumpkin chai latte cupcakes with spiced cream cheese frosting. They’re a little more work than these bars, but they’re absolutely worth it.
Serving & Storage Suggestions
These Perfect Pumpkin Cheesecake Bars are incredibly versatile when it comes to serving. Here’s how I like to do it.
Serving Temperature: I prefer these bars straight from the fridge — cold and firm, with that satisfying snap from the crust. But they’re also wonderful at room temperature, especially if you let them sit out for about 15 minutes. The filling becomes softer and more luscious. Try both and see which you prefer.
Presentation: For a beautiful presentation, drizzle the bars with caramel sauce and sprinkle a tiny pinch of flaky sea salt on top. Add a dollop of fresh whipped cream and a dusting of cinnamon. If you’re serving them on a platter, arrange them in a single layer with a little space between each bar — it looks more intentional.
Complementary Dishes: These bars pair beautifully with a hot cup of coffee or a spiced chai latte. For a full fall dessert spread, serve them alongside my maple pumpkin cold foam iced coffee. The cold, creamy coffee is the perfect contrast to the dense, rich cheesecake bars.
Storage: Store the bars in an airtight container in the refrigerator for up to 5 days. Place a sheet of parchment paper between layers if you’re stacking them. They will stay fresh and delicious for the entire time — though I doubt they’ll last that long.
Freezing: These bars freeze beautifully. Once they’ve chilled and been sliced, arrange the bars in a single layer on a baking sheet and freeze until solid (about 2 hours). Then transfer them to a freezer-safe container or zip-top bag, separating layers with parchment paper. They will keep for up to 3 months. To thaw, transfer the bars to the refrigerator overnight. You can also microwave a frozen bar for about 20 seconds for a quick, melty treat.
Reheating: I don’t usually reheat these bars, but if you want a warm dessert, you can microwave a single bar for 15 to 20 seconds. The crust will soften slightly, and the filling will become warm and gooey. It’s a completely different experience — and a very good one.
Nutritional Information & Benefits
Let’s be honest — these are a treat. But they’re made with real ingredients, and there are some surprising nutritional benefits hidden in that creamy, spiced filling.
Estimated Nutritional Values (per bar, based on 12 servings):
| Nutrient | Amount |
|---|---|
| Calories | 385 |
| Total Fat | 24g |
| Saturated Fat | 14g |
| Cholesterol | 105mg |
| Sodium | 310mg |
| Total Carbohydrates | 38g |
| Dietary Fiber | 2g |
| Sugars | 26g |
| Protein | 6g |
| Vitamin A | 85% DV |
| Calcium | 6% DV |
| Iron | 8% DV |
Health Benefits: Pumpkin is packed with vitamin A, which is great for your eyes and immune system. It’s also rich in fiber and antioxidants. Cream cheese provides calcium and protein, and the eggs add a good dose of B vitamins. The ginger in the gingersnaps is known for its anti-inflammatory properties. So while these bars are definitely a dessert, they’re not empty calories.
Dietary Considerations: This recipe contains gluten, dairy, and eggs. It can be adapted to be gluten-free and dairy-free (see the Variations section). It is not suitable for a vegan diet without significant modifications.
Personal Wellness Perspective: I believe in balance. These bars are a celebration food — something you make for a special occasion or a cozy weekend treat. They’re not an everyday snack, and that’s okay. Savor them, share them, and enjoy every single bite without guilt.
Conclusion
These Perfect Pumpkin Cheesecake Bars with Gingersnap Crust are everything I want in a fall dessert. They’re rich but not heavy, sweet but balanced, and they have that incredible contrast between the crunchy, spicy crust and the silky, creamy filling. They’re the kind of dessert that makes people close their eyes and say “mm” after the first bite.
I hope you make these bars and make them your own. Maybe you’ll add a swirl of chocolate, or a drizzle of maple glaze, or a sprinkle of toasted pecans. Maybe you’ll serve them at Thanksgiving and watch them disappear in minutes. Maybe you’ll make them on a quiet Sunday afternoon just because the air feels like fall.
Whatever you do, don’t skip the chilling step. And don’t be afraid to eat one straight from the fridge at midnight — I won’t tell anyone.
If you try this recipe, I’d love to hear about it. Leave a comment below and tell me how they turned out. Did you add a twist? Did your family devour them? Did you hide the last piece for yourself? (I support that decision.) Share your photos on social media and tag me — I want to see your beautiful bars.
Happy baking, friends. Here’s to a season full of warm spices, good company, and really, really good dessert.
Frequently Asked Questions
Can I use a different type of cookie for the crust?
Absolutely. If you don’t have gingersnaps, you can use graham crackers, vanilla wafers, or even shortbread cookies. Just keep in mind that the flavor will change. Gingersnaps add a distinct spicy warmth that complements the pumpkin perfectly, but other cookies will still give you a delicious crust.
Why did my cheesecake bars crack on top?
Cracks usually happen for one of two reasons: overmixing the batter (which incorporates too much air) or overbaking. To prevent cracks, mix the filling on low speed and stop as soon as the ingredients are combined. Also, pull the bars out of the oven when the center still has a slight jiggle — they will continue to set as they cool.
Can I make these bars in a different size pan?
Yes, but you’ll need to adjust the baking time. If you use an 8×8-inch pan, the bars will be thicker, so you’ll need to bake them for about 50 to 55 minutes. If you use a 9-inch round springform pan, bake for 45 to 50 minutes. Keep an eye on the center — it should still jiggle slightly when you pull it out.
Do I have to use the sour cream topping?
Not at all. The sour cream topping is optional, but I love it because it adds a tangy contrast to the sweet, spiced filling. If you skip it, the bars will still be delicious. You can also substitute the sour cream with a thin layer of Greek yogurt for a similar effect.
Can I use fresh pumpkin instead of canned?
Yes, but you’ll need to roast and puree the pumpkin first. Make sure you strain the puree through a cheesecloth or a fine-mesh sieve to remove excess water. Fresh pumpkin puree has a higher water content than canned, which can make the filling too soft. If you’re using fresh, reduce the eggs by one and add 1 tablespoon of cornstarch to help stabilize the filling.
Pin This Recipe!
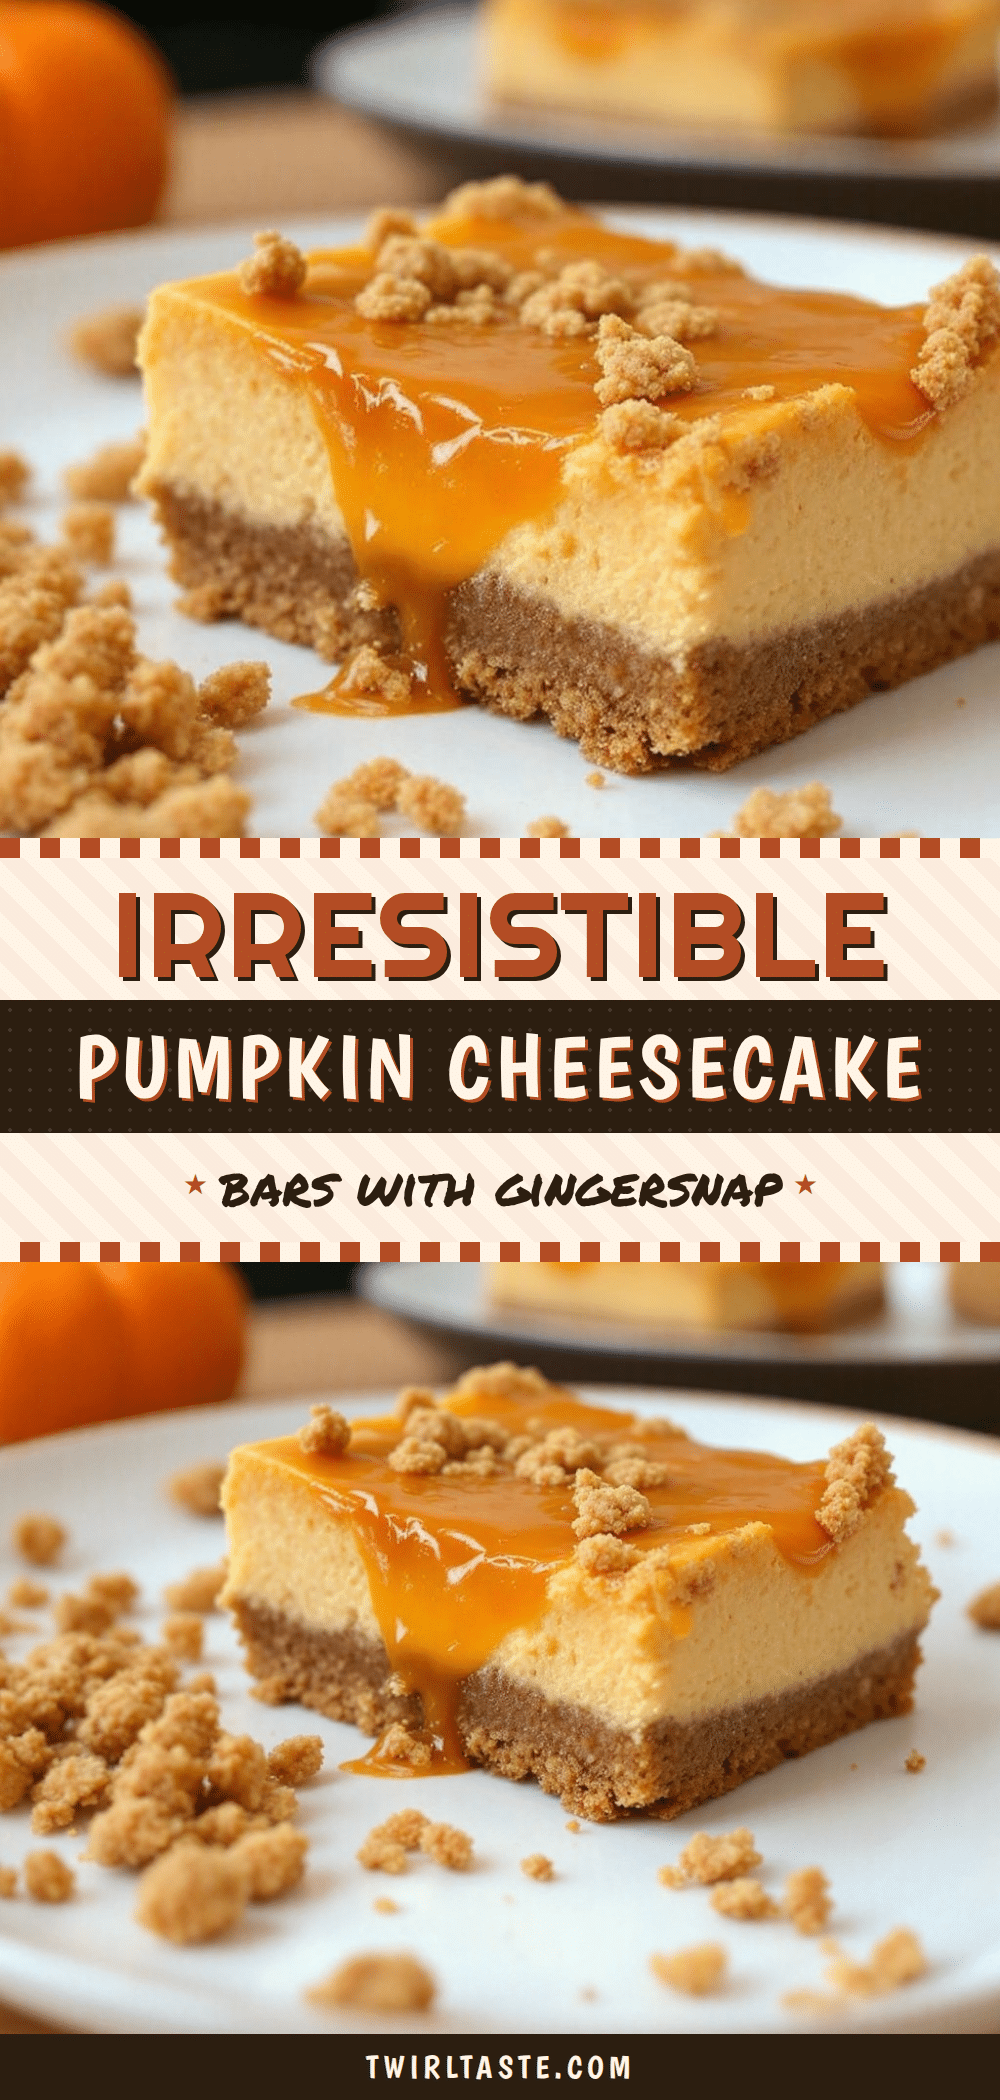
Perfect Pumpkin Cheesecake Bars: Easy Gingersnap Crust Recipe
These Perfect Pumpkin Cheesecake Bars feature a crunchy, spicy gingersnap crust and a creamy, tangy-sweet pumpkin cheesecake filling. No water bath, no springform pan—just an easy, crowd-pleasing fall dessert that slices cleanly and tastes like autumn.
- Prep Time: 30 minutes
- Cook Time: 45 minutes
- Total Time: 5 hours 15 minutes (includes chilling)
- Yield: 12 servings 1x
- Category: Dessert
- Cuisine: American
Ingredients
- 2 cups (about 8 oz) gingersnap cookies, finely crushed
- 5 tablespoons unsalted butter, melted
- 2 tablespoons granulated sugar
- ¼ teaspoon salt
- 16 oz (two 8-oz blocks) cream cheese, softened to room temperature
- 1 cup granulated sugar
- 1 cup pumpkin puree (not pumpkin pie filling)
- 3 large eggs, room temperature
- 1 teaspoon vanilla extract
- 1 teaspoon pumpkin pie spice
- ½ teaspoon ground cinnamon
- ¼ teaspoon salt
- ½ cup sour cream (optional)
- Caramel sauce, for drizzling (optional)
- Fresh whipped cream, for serving (optional)
Instructions
- Preheat oven to 350°F (175°C). Line a 9×13-inch baking pan with parchment paper, leaving a 2-inch overhang on the long sides. Lightly spray with non-stick cooking spray.
- Make the crust: Pulse gingersnap cookies in a food processor until fine crumbs. Transfer to a bowl and stir in melted butter, 2 tablespoons sugar, and ¼ teaspoon salt until mixture resembles wet sand. Press firmly into the prepared pan. Bake for 10 minutes, then set aside to cool slightly.
- Make the filling: In a large bowl, beat softened cream cheese with an electric mixer on medium speed until smooth, about 2 minutes. Add 1 cup sugar and beat until combined, about 1 minute. Add pumpkin puree, vanilla, pumpkin pie spice, cinnamon, and ¼ teaspoon salt; beat on low until just combined. Add eggs one at a time, beating on low after each until just incorporated. Scrape down bowl as needed.
- Pour filling over pre-baked crust and spread evenly. If using, spread sour cream gently over the top. Tap pan on counter to release air bubbles.
- Bake for 40-45 minutes, until edges are set and center jiggles slightly. Cool completely on a wire rack (1-2 hours).
- Cover and refrigerate for at least 4 hours, preferably overnight. Use parchment sling to lift bars out, then slice into squares with a sharp knife. Drizzle with caramel sauce and top with whipped cream if desired.
Notes
Don’t overmix the filling to prevent cracks. Use room temperature cream cheese and eggs for a smooth batter. Press the crust firmly. Chill at least 4 hours (overnight is best) for clean slices. Bars can be stored in the refrigerator for up to 5 days or frozen for up to 3 months.
Nutrition
- Serving Size: 1 bar
- Calories: 385
- Sugar: 26
- Sodium: 310
- Fat: 24
- Saturated Fat: 14
- Carbohydrates: 38
- Fiber: 2
- Protein: 6
Keywords: pumpkin cheesecake bars, gingersnap crust, fall dessert, easy cheesecake bars, pumpkin dessert, Thanksgiving dessert


