Love this? Save it for later!
Share the inspiration with your friends
It is 6:00 AM on a Saturday in July, and the only thing I want is a slice of rainbow birthday cake with sprinkle buttercream. The house is still sleeping. You can hear the distant hum of the refrigerator and the faint chirping of sparrows outside the kitchen window. The air is cool, carrying that specific, heavy sweetness of early summer. I am standing alone at the counter, flour dusting my apron like snow. This isn’t about a party. It isn’t about guests or candles or the noise of children running through the hall. It is about the quiet ritual of making something bright in a world that often feels gray.
I mix the batter. The vanilla extract hits the air, sharp and comforting. I divide the dough into six bowls. Red. Orange. Yellow. Green. Blue. Purple. Each color feels like a small secret. I pour them into the pans, one layer at a time. The kitchen smells like warm sugar and butter. It is a slow process. You have to wait for each layer to cool. You have to be patient. There is no rushing this kind of joy.
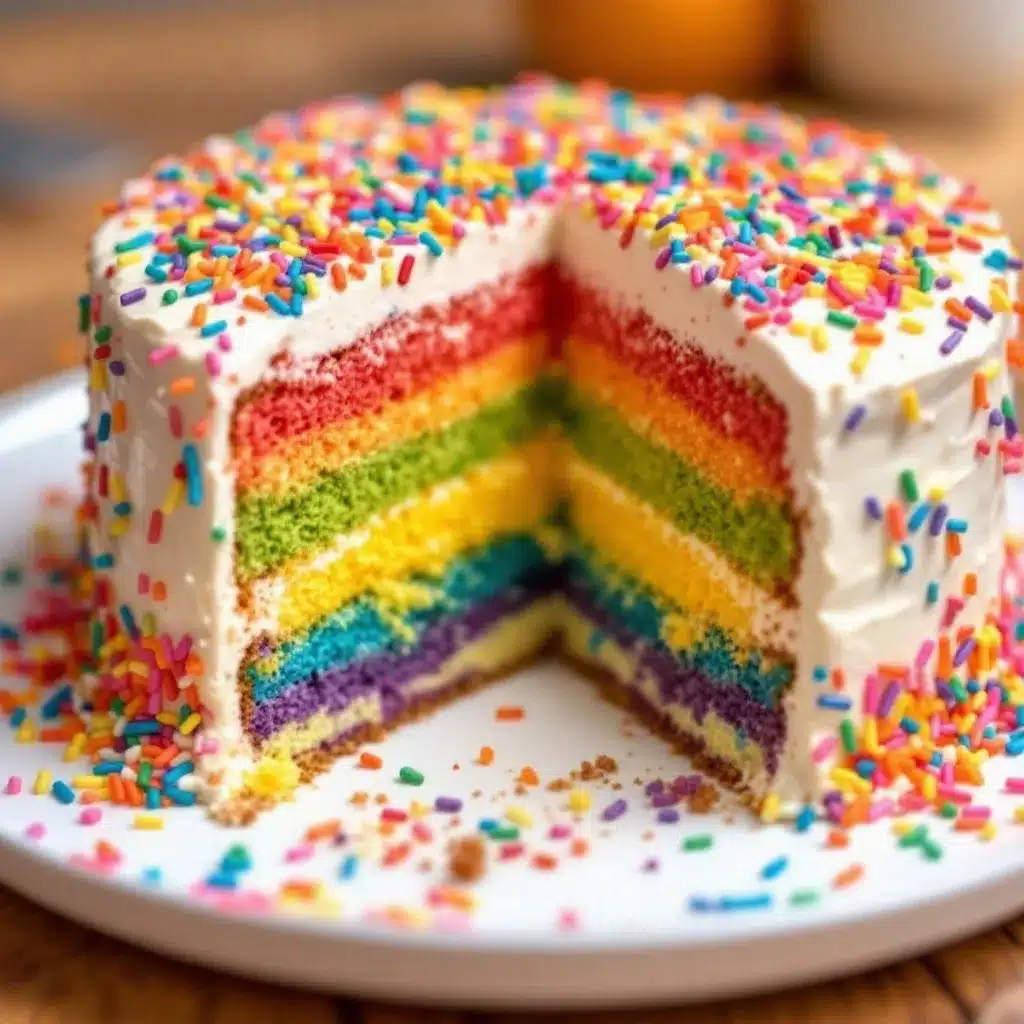
When the cake finally comes together, it is vibrant. It is loud in a quiet room. I cut a small piece from the edge, the part that gets crispy. The texture is soft, almost cloud-like. The buttercream is thick and creamy, studded with tiny bursts of color. I close my eyes. It tastes like childhood, but better. It tastes like peace. This recipe has been my anchor for years. It reminds me that simple things, when made with care, can hold a lot of light.
Why You’ll Love This Recipe
Let’s be honest for a second. Most rainbow cakes are dry. They are dense, or the colors bleed into each other, turning into a muddy brown mess. I have spent years fixing this. I have tested dozens of variations to get this best rainbow birthday cake with sprinkle buttercream just right. It is not just a pretty dessert; it is a masterclass in moisture and flavor balance. Here is why this cake stands out from the rest:
- Unbelievably Moist Texture: The secret isn’t just oil or butter; it is the balance of buttermilk and sour cream. This keeps the crumb tender for days, even without fancy preservatives. It stays soft, not dry.
- Vibrant, True Colors: I use gel food coloring, not liquid. Liquid watered down the batter and made the colors pale. Gel gives you that intense, true rainbow look without changing the consistency. It is a game-changer, honestly.
- Simple, Pantry Ingredients: You likely have everything you need right now. Flour, sugar, eggs, butter, buttermilk. No weird, hard-to-find additives. This is accessible baking for everyone.
- Perfect for Any Occasion: While it is called a birthday cake, it works for anniversaries, graduations, or just because. It brings joy. It is a crowd-pleaser that gets rave reviews from kids and adults alike.
- Flavor That Isn’t Just Sweet: The vanilla bean paste and a pinch of salt cut through the sugar. It tastes like a real cake, not just a sugar bomb. It is comfort food reimagined.
This recipe isn’t just good—it is the kind that makes you close your eyes after the first bite. It is the kind of cake that feels like a hug. I remember making this for my niece’s fifth birthday. She didn’t care about the layers. She just wanted the sprinkles. But seeing her face light up when she saw the colors? That is why I bake. It is about connection. It is about turning a simple afternoon into a memory. This cake is my best version. It is reliable, beautiful, and deeply satisfying.
What Ingredients You Will Need
This recipe uses simple, wholesome ingredients to deliver bold flavor and satisfying texture without the fuss. The key to a successful rainbow cake is quality. You want ingredients that bring out the best in each other. Here is what you need to gather before you start mixing.
For the Cake Layers
- All-Purpose Flour: 3 cups (375g). Sifted to remove lumps. I prefer Bleached All-Purpose Flour for a tender crumb.
- Granulated Sugar: 1 ½ cups (300g). Do not reduce the sugar; it helps with moisture and browning.
- Baking Powder: 1 tablespoon. Fresh is crucial for the rise. Check the date on your can.
- Baking Soda: 1 teaspoon. Helps the cake brown and rise further.
- Salt: 1 teaspoon. Enhances the vanilla flavor. Use fine sea salt.
- Unsalted Butter: 1 cup (226g), softened to room temperature. This adds richness and structure.
- Large Eggs: 4 large eggs, room temperature. Cold eggs can cause the butter to seize up.
- Vanilla Extract: 2 teaspoons. High-quality vanilla makes a huge difference. I use McCormick Pure Vanilla.
- Buttermilk: 1 ½ cups (360ml). Room temperature. If you don’t have it, mix milk with lemon juice and let it sit for 10 minutes.
- Sour Cream: ½ cup (120g). Adds tang and keeps the cake moist. Full fat is best.
- Gel Food Coloring: Red, Orange, Yellow, Green, Blue, Purple. Use a gel paste, not liquid. Liquid changes the batter consistency.
For the Sprinkle Buttercream
- Unsalted Butter: 2 cups (454g), softened. Must be soft but not melted.
- Confectioners’ Sugar: 6-7 cups (750g). Sifted to avoid lumps in your frosting.
- Heavy Cream: 3-4 tablespoons. Adjust for consistency.
- Vanilla Extract: 1 tablespoon. Or vanilla bean paste for speckles.
- Salt: ½ teaspoon. Balances the sweetness.
- Rainbow Sprinkles: ½ cup. Jimmies hold up better than nonpareils in buttercream.
Substitution Notes
If you need a gluten-free option, you can use a 1:1 gluten-free flour blend. However, the texture might be slightly denser. For a dairy-free version, swap the butter for high-quality vegan butter and use coconut yogurt instead of sour cream. The colors will still pop.
Equipment Needed
You do not need a fancy kitchen to make this cake. However, having the right tools makes the process much smoother.
- 6-Inch Round Cake Pans: You need three 6-inch pans or two 8-inch pans. Three 6-inch pans give you taller, more dramatic layers. Grease and line the bottoms with parchment paper.
- Electric Mixer: A stand mixer or hand mixer is essential. Creaming the butter and sugar takes effort. Doing it by hand is possible but tiring.
- Mixing Bowls: You need at least five small bowls for dividing the batter and coloring it.
- Spatula: A silicone spatula is great for scraping the bowls clean and folding in the flour.
- Cooling Rack: Essential for cooling the layers evenly. Let them cool completely before frosting, or the buttercream will melt.
- Offset Spatula: Makes frosting the sides and top much easier. It helps create a smooth finish.
- Bench Scraper: Helps smooth the frosting on the sides for a professional look.
If you do not have 6-inch pans, you can use 8-inch pans. The bake time will be slightly longer, so keep an eye on them. Budget-friendly option: You can use glass Pyrex pie dishes if you are in a pinch, but metal pans bake more evenly.
Preparation Method
Step 1: Prep Your Pans and Oven
Preheat your oven to 350°F (175°C). This is the standard temperature for even baking. Grease your cake pans with butter or non-stick spray. Line the bottoms with parchment paper circles. This ensures the cake releases easily and doesn’t stick. Dust the pans with a little flour, tapping out the excess. Set aside.
Step 2: Mix the Dry Ingredients
In a large mixing bowl, whisk together the flour, baking powder, baking soda, and salt. Whisking ensures that the leavening agents are distributed evenly. This prevents bitter spots and ensures the cake rises uniformly. Set this bowl aside.
Step 3: Cream the Butter and Sugar
In the bowl of your stand mixer, beat the softened butter and granulated sugar on medium-high speed for about 3-4 minutes. The mixture should look pale and fluffy. This step incorporates air into the batter, which helps the cake rise. Scrape down the sides of the bowl with a spatula to ensure everything is mixed.
Step 4: Add Eggs and Vanilla
Add the eggs one at a time, beating well after each addition. Add the vanilla extract. The mixture might look slightly curdled at this point, which is normal. Do not worry. It will come together when you add the wet ingredients.
Step 5: Combine Wet and Dry Ingredients
Reduce the mixer speed to low. Add the dry ingredients in three parts, alternating with the buttermilk and sour cream. Start and end with the dry ingredients. Mix until just combined. Overmixing can make the cake tough. Stop as soon as you see no more streaks of flour.
Step 6: Divide and Color the Batter
Weigh your batter and divide it into six equal parts. This is crucial for even layers. If you do not have a scale, estimate carefully. Place each portion into a separate bowl. Add gel food coloring to each bowl. Use a toothpick or a small amount of paste. Mix until the color is uniform. You want vibrant, true colors. Cover the bowls and refrigerate for 15 minutes. This thickens the batter and makes it easier to handle.
Step 7: Bake the Layers
Pour the batter into your prepared pans. Bake for 20-25 minutes for 6-inch pans, or 25-30 minutes for 8-inch pans. The cakes are done when a toothpick inserted into the center comes out clean. Do not overbake. The edges should pull away slightly from the pan.
Step 8: Cool Completely
Let the cakes cool in the pans for 10 minutes. Then, turn them out onto a wire rack. Let them cool completely to room temperature. This is non-negotiable. If the cakes are warm, the buttercream will melt and slide off.
Step 9: Make the Buttercream
Beat the softened butter until creamy. Add the sifted confectioners’ sugar, one cup at a time. Add the heavy cream, vanilla, and salt. Beat on high speed for 3-4 minutes until fluffy. Fold in the rainbow sprinkles.
Step 10: Assemble the Cake
Place one layer on a cake board or plate. Spread a generous layer of buttercream on top. Add the next layer. Repeat until all layers are stacked. Frost the top and sides. Use a bench scraper to smooth the sides. Decorate with extra sprinkles on top.
Cooking Tips & Techniques
I have made many mistakes in my time baking. One of the biggest is using cold eggs. Cold eggs can cause the butter to seize, creating a curdled look. Always let your eggs and dairy sit out for an hour before baking. It makes a huge difference in the texture.
Another common mistake is overmixing the batter after adding the flour. Once you add the flour, mix only until combined. Overmixing develops gluten, which makes the cake dense and chewy instead of tender and soft. Be gentle.
When coloring the batter, use gel food coloring. Liquid food coloring contains water, which can throw off the batter ratio. Gel coloring is more potent and does not add extra liquid. Start with a small amount. You can always add more, but you cannot take it out.
Timing is everything. If you are baking multiple batches, keep the oven temperature stable. Do not open the oven door too often. This causes the temperature to drop and can make the cakes collapse. Use an oven thermometer to check your actual oven temperature, as many ovens are off by 25 degrees.
For the buttercream, make sure your butter is at the right temperature. If it is too soft, the frosting will be greasy. If it is too hard, it will be lumpy. It should be soft enough to leave an indent when you press it, but not melting.
Variations & Adaptations
This recipe is versatile. You can adapt it to fit your needs or preferences. Here are a few ideas:
- Gluten-Free Option: Use a 1:1 gluten-free flour blend. Add a teaspoon of xanthan gum if your blend does not include it. This helps with structure.
- Dairy-Free Option: Swap the butter for vegan butter sticks (not tubs). Use coconut yogurt or oat milk yogurt instead of sour cream. Use oat milk or almond milk with lemon juice for the buttermilk substitute.
- Flavor Variations: Instead of vanilla, try almond extract for a nutty flavor. Or add a tablespoon of lemon zest to the batter for a citrusy twist.
- Mini Cakes: You can make mini cupcakes with this batter. Bake for 15-18 minutes. They are perfect for parties and individual servings.
- Seasonal Colors: Change the colors to match the season. Green and brown for fall, red and green for Christmas, pastel colors for Easter.
I once made a version with red velvet coloring but kept the vanilla flavor. It was surprisingly popular. The colors don’t have to match the flavor. That is part of the fun.
Serving & Storage Suggestions
This cake is best served at room temperature. Cold buttercream can be hard and waxy. Let the cake sit out for 30 minutes before serving. It pairs well with a cup of coffee or tea. You can also serve it with fresh berries on the side to cut the sweetness.
Storage: Store the cake in an airtight container at room temperature for up to 3 days. If your kitchen is very hot, store it in the refrigerator. Bring it to room temperature before serving.
Freezing: You can freeze the unfrosted cake layers. Wrap them tightly in plastic wrap and then in aluminum foil. They will keep for up to 2 months. Thaw them overnight in the refrigerator before frosting.
Reheating: You do not need to reheat the cake. But if you want a warm slice, you can microwave it for 10 seconds. It will be soft and moist.
The flavors develop over time. The cake tastes even better the next day as the moisture settles into the crumb. It is a great make-ahead dessert.
Nutritional Information & Benefits
While this cake is a treat, it is made with real ingredients. Here is an approximate nutritional value per slice (1/12 of the cake):
- Calories: 450 kcal
- Carbohydrates: 65g
- Protein: 5g
- Fat: 20g
- Fiber: 1g
- Sugar: 45g
The cake contains eggs, which provide protein. The butter and sour cream add healthy fats. If you use whole milk buttermilk, you get calcium. For those with dietary restrictions, the gluten-free and dairy-free adaptations make this cake accessible to more people. Just be mindful of the sugar content. It is a dessert, after all. Enjoy it in moderation.
From a wellness perspective, baking can be a form of self-care. The process of creating something beautiful is rewarding. It slows you down. It connects you to the ingredients. It is a break from the digital world. That is a benefit in itself.
Conclusion
Making the best rainbow birthday cake with sprinkle buttercream is a labor of love. It takes time, but the result is worth it. The vibrant colors bring joy. The soft texture brings comfort. The buttercream brings sweetness. This cake is more than just food. It is a celebration of simple pleasures.
I hope you try this recipe. I hope you find your own quiet ritual in the kitchen. Customize it to your taste. Add your own colors. Share it with someone you love. I would love to hear how it turns out for you. Leave a comment below with your thoughts or photos of your creation. Let’s inspire each other.
Happy baking. May your kitchen be filled with light and your heart be full.
Frequently Asked Questions
Can I use liquid food coloring instead of gel?
It is not recommended. Liquid food coloring adds extra water to the batter, which can affect the texture and make the colors pale. Gel food coloring is more concentrated and does not change the batter consistency.
How do I store leftover rainbow cake?
Store the cake in an airtight container at room temperature for up to 3 days. If your kitchen is hot, store it in the refrigerator. Bring it to room temperature before serving for the best texture.
Can I freeze the cake layers?
Yes, you can freeze the unfrosted cake layers. Wrap them tightly in plastic wrap and then in aluminum foil. They will keep for up to 2 months. Thaw them overnight in the refrigerator before frosting.
What if I don’t have buttermilk?
You can make a buttermilk substitute by adding 1 tablespoon of lemon juice or white vinegar to 1 cup of milk. Let it sit for 10 minutes until it curdles slightly. This works perfectly in this recipe.
Can I make this cake in a 9×13 pan?
You can, but the bake time will be shorter. Check the cake after 20 minutes. The texture will be slightly different, as it will be a single layer instead of stacked layers. It is still delicious, though.
Pin This Recipe!
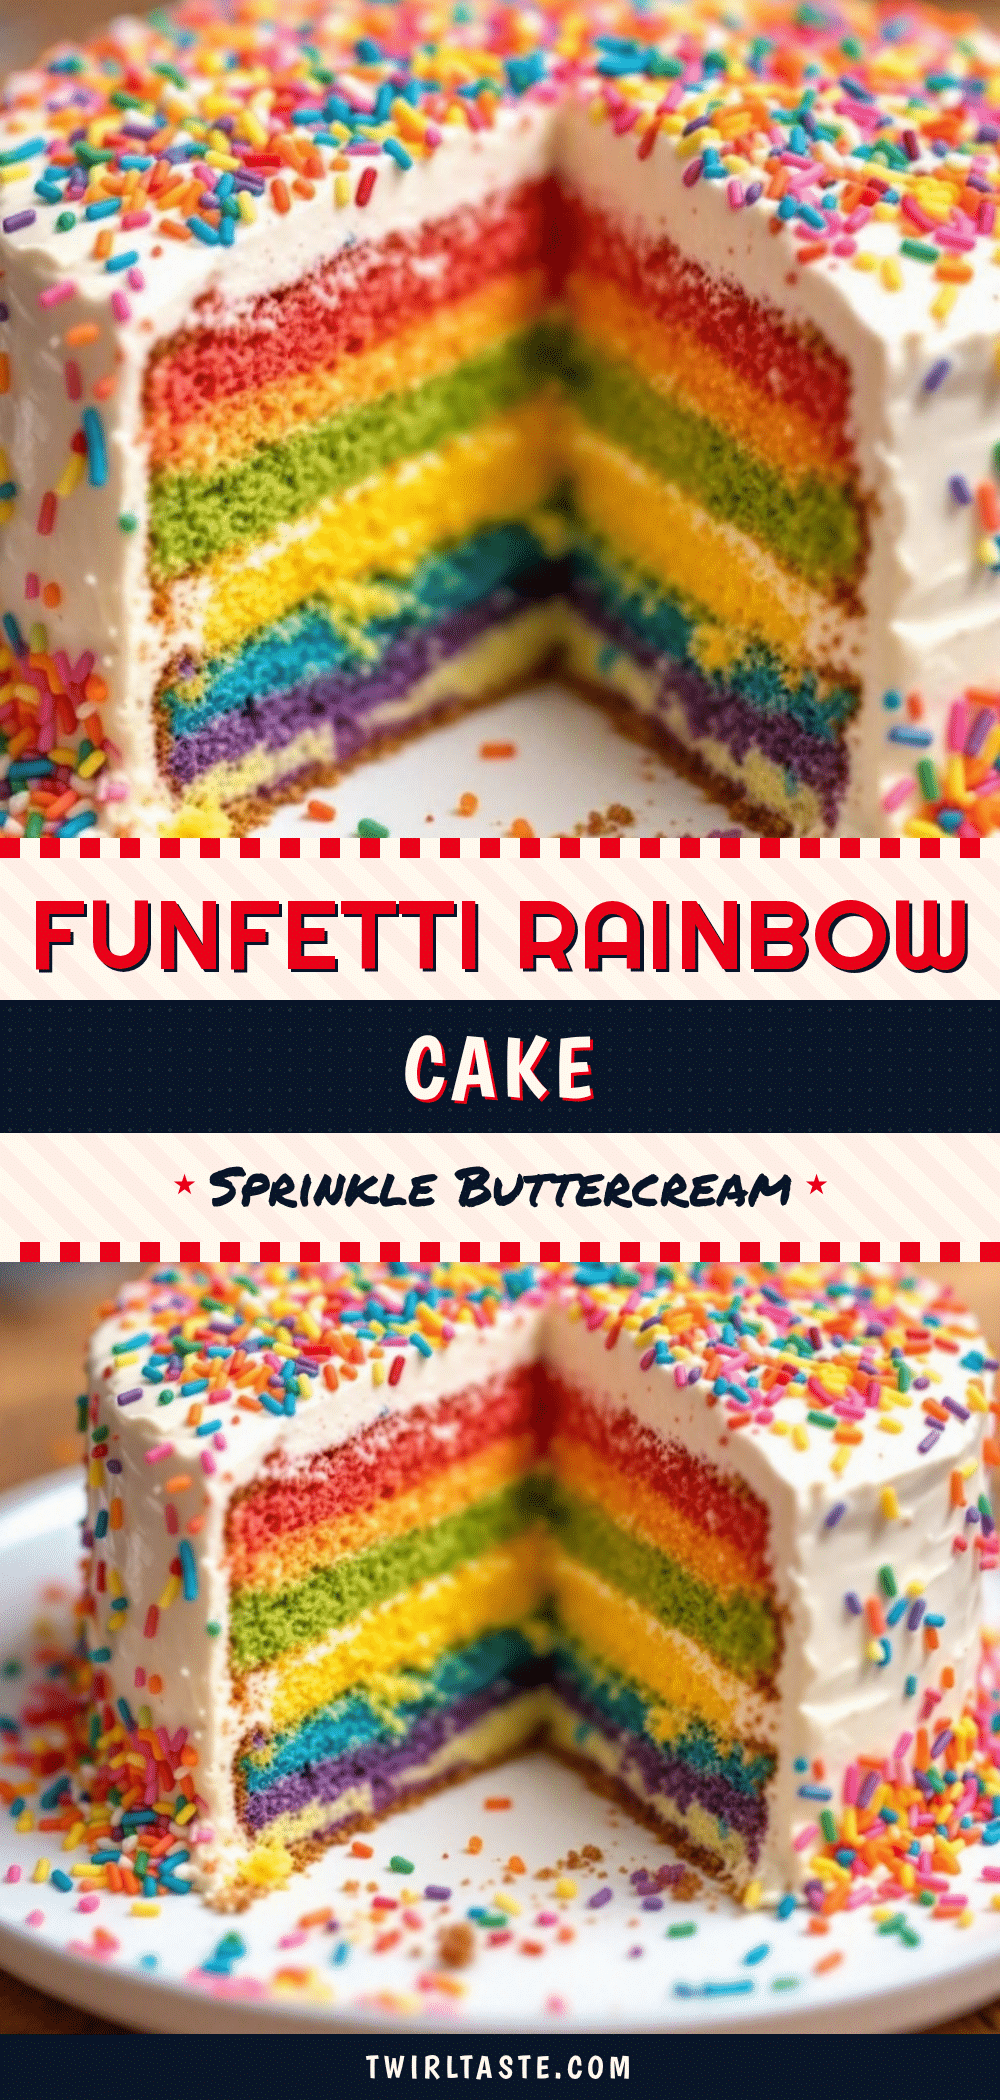
Rainbow Birthday Cake: Easy Homemade Sprinkle Buttercream
A vibrant, moist rainbow birthday cake with colorful layers and creamy sprinkle buttercream. This recipe uses simple pantry ingredients and gel food coloring for true, vivid colors without altering the batter consistency.
- Prep Time: 45 minutes
- Cook Time: 25 minutes
- Total Time: 1 hour 10 minutes
- Yield: 12 servings 1x
- Category: Dessert
- Cuisine: American
Ingredients
- 3 cups (375g) All-Purpose Flour, sifted
- 1 ½ cups (300g) Granulated Sugar
- 1 tablespoon Baking Powder
- 1 teaspoon Baking Soda
- 1 teaspoon Salt
- 1 cup (226g) Unsalted Butter, softened to room temperature
- 4 large Eggs, room temperature
- 2 teaspoons Vanilla Extract
- 1 ½ cups (360ml) Buttermilk, room temperature
- ½ cup (120g) Sour Cream, full fat
- Gel Food Coloring (Red, Orange, Yellow, Green, Blue, Purple)
- 2 cups (454g) Unsalted Butter, softened for frosting
- 6–7 cups (750g) Confectioners’ Sugar, sifted
- 3–4 tablespoons Heavy Cream
- 1 tablespoon Vanilla Extract or vanilla bean paste
- ½ teaspoon Salt
- ½ cup Rainbow Sprinkles
Instructions
- Preheat oven to 350°F (175°C). Grease three 6-inch round cake pans (or two 8-inch pans) and line bottoms with parchment paper. Dust with flour.
- In a large bowl, whisk together flour, baking powder, baking soda, and salt.
- In a stand mixer, beat softened butter and granulated sugar on medium-high speed for 3-4 minutes until pale and fluffy. Scrape down sides.
- Add eggs one at a time, beating well after each addition. Mix in vanilla extract.
- Reduce mixer speed to low. Add dry ingredients in three parts, alternating with buttermilk and sour cream. Start and end with dry ingredients. Mix until just combined.
- Divide batter into six equal parts. Add gel food coloring to each part and mix until uniform. Refrigerate for 15 minutes.
- Pour batter into prepared pans. Bake for 20-25 minutes (for 6-inch pans) or 25-30 minutes (for 8-inch pans) until a toothpick comes out clean.
- Cool cakes in pans for 10 minutes, then turn out onto a wire rack to cool completely.
- For buttercream, beat softened butter until creamy. Gradually add sifted confectioners’ sugar, heavy cream, vanilla, and salt. Beat on high for 3-4 minutes until fluffy. Fold in sprinkles.
- Assemble cake by stacking layers with generous amounts of buttercream between each layer. Frost top and sides, smoothing with a bench scraper. Decorate with extra sprinkles.
Notes
Ensure all dairy and eggs are at room temperature to prevent the butter from seizing. Use gel food coloring instead of liquid to maintain batter consistency and achieve vibrant colors. Do not overmix the batter after adding flour to keep the cake tender. Cool cakes completely before frosting to prevent the buttercream from melting.
Nutrition
- Serving Size: 1 slice (1/12 of the
- Calories: 450
- Sugar: 45
- Sodium: 350
- Fat: 20
- Saturated Fat: 12
- Carbohydrates: 65
- Fiber: 1
- Protein: 5
Keywords: rainbow cake, birthday cake, sprinkle buttercream, homemade cake, moist cake, gel food coloring, vanilla cake, party dessert


