Love this? Save it for later!
Share the inspiration with your friends
I did not trust white frosting on chocolate cake. It sounded like a culinary mistake, a clash of textures that would leave you with a mouthful of dry crumbs and cold, sweet goo. I’ve spent years perfecting my crispy baked buffalo cauliflower bites and savory mains, but baking? Baking felt like a foreign language I’d never quite learn. So when I decided to make these cute chocolate ghost cupcakes for Halloween, I was already preparing to fail. I thought the contrast between the dark, rich cocoa and the stark white vanilla would be jarring. I imagined the frosting sliding right off the side, a sad, white smear on a dark base.
But then I tried the first one. Honestly, I thought it sounded like a mistake until I took that first bite. The chocolate cake was so moist it practically melted on the tongue, while the vanilla frosting was light, airy, and just sweet enough to cut through the bitterness of the cocoa. It wasn’t a clash; it was a harmony. The texture of the ghost shape, smooth and slightly wobbly, added a playful element that made the whole experience feel less like eating and more like playing. I wasn’t just eating a cupcake; I was interacting with a little edible sculpture.
I remember standing in my kitchen, flour on my nose, staring at my creation. It looked ridiculous. It looked perfect. The way the white frosting pooled and dripped down the sides mimicked the classic sheet ghost trope, but with a softness that was undeniably delicious. I didn’t expect to be won over by a Halloween treat, especially one that seemed so simple. Yet, here I was, scraping the last bit of frosting off my fingers, wondering how I had ever doubted the power of a little culinary spookiness.
It wasn’t just about the taste, though that was undeniable. It was about the surprise. I had expected a dry, dense cake and a stiff, sugary icing. Instead, I got something tender, flavorful, and surprisingly elegant in its simplicity. The doubt I held about combining these two distinct flavors had completely evaporated. I realized then that some of the best recipes aren’t the most complicated ones, but the ones that play with expectations in the most delightful way.
Now, every October, this recipe is the first thing I pull out of my notebook. It’s become a ritual, a small moment of joy in a busy season. I still remember that first bite, the crunch of the edible eyes, and the soft surrender of the cake. It taught me that sometimes, you just have to trust the process, even when your inner critic is screaming that it’s a bad idea. And honestly? It was the best bad idea I ever had.
Why You’ll Love This Recipe
There is a specific kind of magic that happens when you combine dark chocolate with vanilla. It’s not just about the flavors; it’s about the experience. This recipe for cute chocolate ghost cupcakes isn’t just another Halloween treat; it’s a test of patience, creativity, and flavor balance that I’ve refined over many spooky seasons. I’ve tested dozens of variations, from adding red food coloring to the batter for a bloody theme to using buttercream instead of royal icing, and this version remains the gold standard. It’s the kind of recipe that makes you close your eyes after the first bite and just smile.
Here is why this recipe stands out from the crowd:
* **Quick & Easy**: While the decorating takes a bit of time, the actual baking process is straightforward. You can have these in the oven in under 30 minutes, making them perfect for last-minute party planning or a spontaneous Halloween night in.
* **Simple Ingredients**: You likely already have everything you need in your kitchen. Flour, sugar, cocoa powder, eggs, and vanilla are pantry staples. No fancy grocery trips needed for this one.
* **Perfect for Halloween**: Whether you’re hosting a trick-or-treat party or just want a spooky snack for yourself, these cupcakes fit the theme perfectly without being overly childish. They strike a balance between cute and cool.
* **Crowd-Pleaser**: Kids love the ghost shape, and adults love the rich chocolate flavor. It’s a rare dessert that satisfies both demographics without compromise.
* **Unbelievably Delicious**: The texture of the cake is tender and crumbly, while the frosting is smooth and creamy. The combination is next-level comfort food that feels special.
What makes this recipe different is the technique used for the frosting. Instead of a heavy, dense buttercream, I use a lighter, whipped vanilla frosting that holds its shape but doesn’t overwhelm the delicate chocolate cake. It’s a creative twist that ensures the ghost looks ethereal rather than solid. Also, the use of edible eyes adds a professional touch that elevates the presentation, making it look like it came from a high-end bakery rather than a home kitchen.
This recipe isn’t just good—it is the kind that makes you feel like a baking pro, even if you’re a beginner. It’s comfort food reimagined with a spooky twist. Perfect for impressing guests without stress, or turning a simple Tuesday dinner into something memorable. I’ve also found that these pair beautifully with a glass of cold milk or a cup of hot coffee. If you’re looking for other easy Halloween treats, you might also enjoy these easy spooky witch finger cookies, which offer a similar level of fun and flavor.
What Ingredients You Will Need
This recipe uses simple, wholesome ingredients to deliver bold flavor and satisfying texture without the fuss. The key to a great chocolate ghost cupcake is balancing the richness of the chocolate with the lightness of the vanilla. I’ve selected ingredients that are easy to find and affordable, ensuring that you can make this recipe without breaking the bank or hunting for obscure items. Most of these are pantry staples, which is half the battle won.
Here is what you’ll need to get started:
* **All-purpose flour**: The base of your cake. I recommend using a trusted brand like King Arthur for consistent results.
* **Granulated sugar**: Provides sweetness and helps create a tender crumb.
* **Unsweetened cocoa powder**: Use a high-quality cocoa powder for deep chocolate flavor. Hershey’s is a reliable choice.
* **Baking powder and baking soda**: These leavening agents help the cupcakes rise and become fluffy.
* **Salt**: Enhances the chocolate flavor and balances the sweetness.
* **Eggs**: Large eggs at room temperature bind the ingredients together.
* **Buttermilk**: Adds moisture and tang, keeping the cake soft. If you don’t have buttermilk, you can make a substitute with milk and vinegar.
* **Vegetable oil**: Keeps the cake moist longer than butter would.
* **Vanilla extract**: Pure vanilla extract makes a huge difference in flavor.
* **Unsalted butter, softened**: For the frosting, providing richness and structure.
* **Powdered sugar**: Creates the smooth texture of the frosting.
* **Heavy cream**: Helps adjust the consistency of the frosting.
* **Vanilla extract**: For the frosting, adding aromatic flavor.
* **Edible eyes**: These are essential for the ghost look. You can find them at most craft or baking stores.
I recommend using organic eggs if possible, as they often have richer yolks and better flavor. For the cocoa powder, avoid Dutch-processed cocoa if you want a brighter chocolate taste, as it is more alkaline. If you need a dairy-free option, you can swap the butter in the frosting with a high-quality vegan butter alternative. The buttermilk can also be replaced with almond milk mixed with lemon juice for a dairy-free version.
Look for firm, fresh eggs for the best rise. In summer, you might want to chill your eggs before using them to prevent the butter in the frosting from melting. For the edible eyes, I’ve found that smaller eyes work better for a cute ghost look, while larger eyes can look a bit scary. I always buy a variety pack just in case.
You can also customize the frosting color slightly by adding a drop of gray food coloring for a more realistic ghost effect, but pure white is classic and elegant. If you’re feeling adventurous, you can add a pinch of cinnamon to the cake batter for a warm, spicy note that pairs well with the chocolate.
Equipment Needed
To make these cute chocolate ghost cupcakes, you’ll need a few basic kitchen tools. You don’t need anything fancy, but having the right equipment makes the process much smoother.
* **Cupcake pan**: Standard 12-cup muffin tin. I prefer non-stick pans for easy removal.
* **Cupcake liners**: White liners work best to hide the chocolate color if any leaks out, but black liners add a spooky touch.
* **Mixing bowls**: Two large bowls for dry and wet ingredients.
* **Whisk or electric mixer**: For combining ingredients smoothly. An electric mixer saves time and ensures a light texture.
* **Measuring cups and spoons**: Essential for accurate measurements.
* **Cooling rack**: Allows cupcakes to cool evenly without getting soggy.
* **Piping bag or ziplock bag**: For applying the frosting. A ziplock bag with the corner cut off works just as well as a professional piping bag.
* **Offset spatula**: Helps in smoothing the frosting if you’re not piping.
If you don’t have a piping bag, a heavy-duty ziplock bag is a great budget-friendly alternative. Just fill it with frosting, twist the top, and snip off a small corner. For the cupcake pan, I recommend buying a high-quality non-stick one, as it will last for years. Avoid thin, flimsy pans that can warp in the oven.
Maintain your tools by washing them immediately after use. This prevents frosting from hardening in the piping bag, which can be a nightmare to clean later. If you’re using an electric mixer, make sure the beaters are clean and dry to ensure the frosting whips properly.
Preparation Method
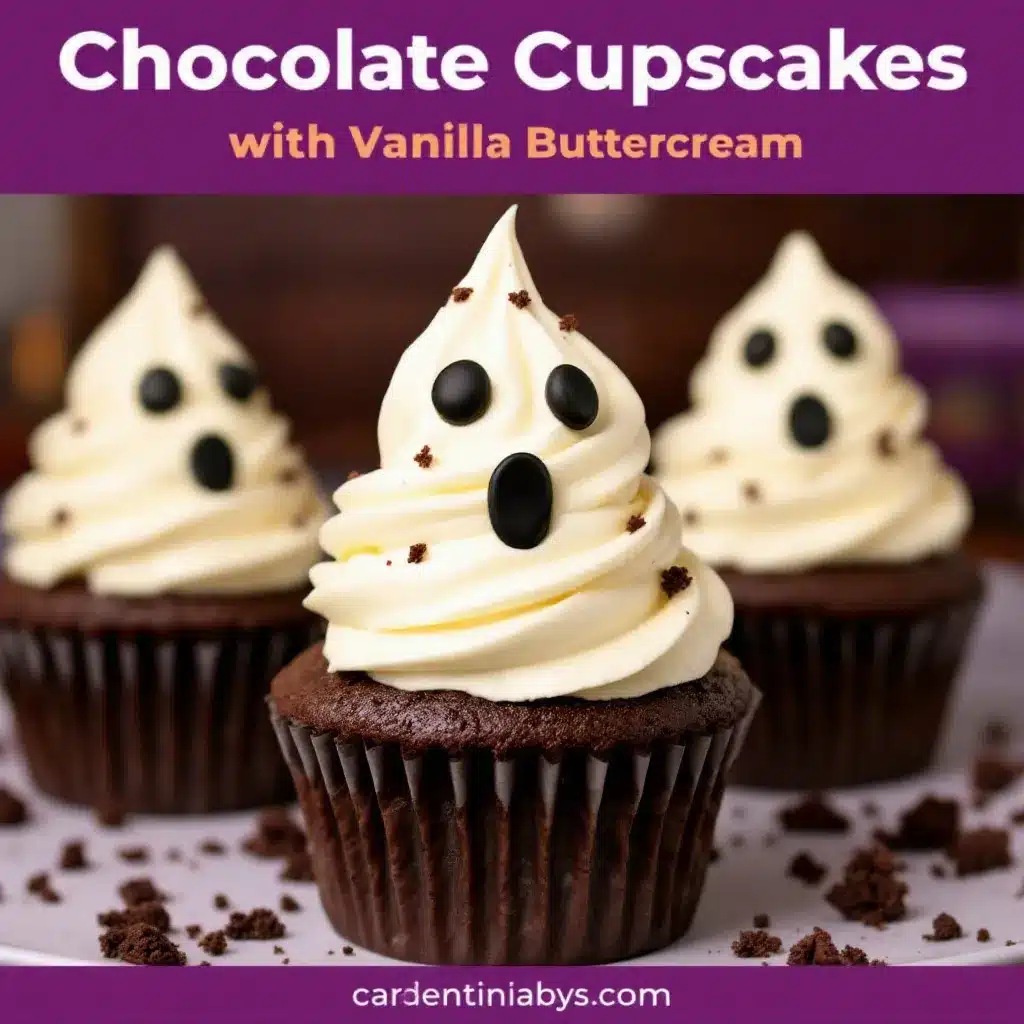
Making these cute chocolate ghost cupcakes is easier than you think. Here is a step-by-step guide to getting it right.
1. **Preheat and Prep**: Preheat your oven to 350°F (175°C). Line your cupcake pan with liners. This takes about 5 minutes.
2. **Mix Dry Ingredients**: In a large bowl, whisk together the flour, sugar, cocoa powder, baking powder, baking soda, and salt. Ensure there are no lumps. This takes about 3 minutes.
3. **Mix Wet Ingredients**: In another bowl, whisk the eggs, buttermilk, vegetable oil, and vanilla extract until smooth. This takes about 2 minutes.
4. **Combine**: Gradually add the wet ingredients to the dry ingredients. Mix until just combined. Do not overmix, or the cupcakes will be tough. This takes about 3 minutes.
5. **Fill Liners**: Divide the batter evenly among the cupcake liners, filling them about two-thirds full. This takes about 5 minutes.
6. **Bake**: Bake for 18-20 minutes, or until a toothpick inserted into the center comes out clean. This takes about 20 minutes.
7. **Cool**: Let the cupcakes cool in the pan for 5 minutes, then transfer to a cooling rack to cool completely. This takes about 30 minutes.
8. **Make Frosting**: In a large bowl, beat the softened butter until creamy. Add powdered sugar gradually, then add heavy cream and vanilla. Beat on high until fluffy. This takes about 5 minutes.
9. **Frost**: Pipe or spread the frosting onto the cooled cupcakes to create a ghost shape. Leave a slightly rounded top and let it drip down the sides. This takes about 10 minutes.
10. **Add Eyes**: Place edible eyes on the frosting while it is still soft so they stick. This takes about 5 minutes.
Total time: About 1 hour 20 minutes.
Troubleshooting tip: If the batter is too thick, add a tablespoon of buttermilk. If the frosting is too thin, add more powdered sugar. If the cupcakes are domed, you can trim the tops with a serrated knife before frosting.
Cooking Tips & Techniques
To ensure your cute chocolate ghost cupcakes turn out perfectly, here are some professional tips and techniques I’ve learned over the years.
* **Room Temperature Ingredients**: Make sure your eggs, buttermilk, and butter are at room temperature. This helps them emulsify better, resulting in a smoother batter and fluffier frosting.
* **Don’t Overmix**: Once you combine the wet and dry ingredients, mix only until no dry flour remains. Overmixing develops gluten, which leads to tough cupcakes.
* **Check Your Oven**: Ovens can vary in temperature. Use an oven thermometer to ensure your oven is at the correct temperature. This prevents underbaking or burning.
* **Cool Completely**: Never frost warm cupcakes. The heat will melt the frosting and make it slide off. Use a cooling rack to speed up the process.
* **Frosting Consistency**: If your frosting is too stiff, add a teaspoon of heavy cream at a time. If it’s too runny, add more powdered sugar. You want it to hold its shape but still be spreadable.
* **Ghost Shape**: To create the ghost shape, start with a dollop of frosting on top and let it drip down the sides. Use a spoon or your finger to smooth the drips if needed.
I once tried to frost cupcakes while they were still warm, and it was a disaster. The frosting melted into a puddle, and I had to start over. Lesson learned: patience is key. Another tip is to chill the cupcakes for 15 minutes before frosting. This helps the frosting set faster and makes it easier to work with.
For consistency, use a cookie scoop to portion out the batter. This ensures all cupcakes are the same size and bake evenly. It also saves time and reduces mess.
Variations & Adaptations
While the classic chocolate and vanilla combination is timeless, there are many ways to adapt this recipe to suit different tastes or dietary needs.
* **Gluten-Free**: Substitute the all-purpose flour with a 1:1 gluten-free flour blend. This works perfectly and maintains the texture.
* **Dairy-Free**: Use dairy-free milk and butter alternatives for both the cake and frosting. Coconut oil can be used instead of vegetable oil for a subtle coconut flavor.
* **Vegan**: Replace eggs with flax eggs (1 tablespoon ground flaxseed mixed with 3 tablespoons water per egg) and use dairy-free butter and milk.
* **Red Velvet Twist**: Add a tablespoon of red food coloring to the batter for a spooky red velvet ghost cupcake. This pairs beautifully with cream cheese frosting.
* **Pumpkin Spice**: Add a teaspoon of pumpkin pie spice to the dry ingredients for a fall-themed variation. This pairs well with the chocolate and vanilla flavors.
I once made these cupcakes with pumpkin spice for a Thanksgiving party, and they were a hit. The warm spices complemented the chocolate in a surprising way. If you’re making these for kids, you can skip the edible eyes and use candy melts or chocolate chips for a safer option.
For a richer chocolate flavor, add a quarter cup of chocolate chips to the batter. This creates pockets of melted chocolate that are irresistible. You can also add a swirl of peanut butter to the frosting for a salty-sweet combination.
Serving & Storage Suggestions
These cute chocolate ghost cupcakes are best served at room temperature, allowing the flavors to fully develop. They are perfect for Halloween parties, trick-or-treat bags, or as a spooky snack during a movie night.
For storage, keep the cupcakes in an airtight container at room temperature for up to 3 days. If you need to store them longer, refrigerate them for up to 5 days. Bring them to room temperature before serving for the best texture.
You can also freeze the unfrosted cupcakes for up to 2 months. Wrap them tightly in plastic wrap and then in aluminum foil. Thaw them at room temperature before frosting.
The flavors develop over time, with the chocolate becoming richer and the frosting settling into the cake. This makes them even better the next day. If you’re making them ahead of time, I recommend frosting them the day before to allow the frosting to set.
Pair these cupcakes with a glass of cold milk or a cup of hot coffee. They also go well with a spooky cocktail or mocktail. For a complete Halloween menu, serve them alongside my adorable halloween mummy sugar cookies for a variety of spooky treats.
Nutritional Information & Benefits
Each cute chocolate ghost cupcake contains approximately 250 calories, with 12g of fat, 35g of carbohydrates, and 4g of protein. The recipe is not specifically designed for dietary restrictions, but modifications can be made for gluten-free, dairy-free, or vegan diets.
The chocolate in the cake provides antioxidants, while the vanilla adds flavor without extra calories. The eggs provide protein and essential vitamins. If you use dark chocolate cocoa powder, you’ll get an additional boost of antioxidants.
Be aware that the cupcakes contain gluten, dairy, and eggs. Those with allergies should use the suggested substitutions. From a wellness perspective, these cupcakes are a treat, best enjoyed in moderation. They are a fun way to celebrate the season and enjoy a sweet indulgence.
Conclusion
These cute chocolate ghost cupcakes are a must-try for any Halloween enthusiast. They are easy to make, delicious to eat, and fun to decorate. I love this recipe because it combines simple ingredients with a creative presentation, resulting in a dessert that is both comforting and exciting.
I encourage you to customize the recipe to suit your preferences. Try adding different spices, colors, or fillings to make it your own. This recipe has become a staple in my kitchen, and I hope it becomes one in yours too.
Please leave a comment below with your thoughts or share your creations on social media. I love seeing how you adapt the recipe. Happy baking, and happy Halloween!
Frequently Asked Questions
Can I make the cupcakes ahead of time?
Yes, you can bake the cupcakes up to 2 days in advance and store them in an airtight container. Frost them the day before or on the day of serving for the best results.
What if I don’t have buttermilk?
You can make a buttermilk substitute by adding 1 tablespoon of lemon juice or white vinegar to 1 cup of milk. Let it sit for 5 minutes before using.
Can I use milk chocolate instead of cocoa powder?
It’s not recommended, as milk chocolate contains more sugar and fat, which can alter the texture and sweetness of the cake. Stick with unsweetened cocoa powder for the best results.
How do I store the leftover cupcakes?
Store them in an airtight container at room temperature for up to 3 days. For longer storage, refrigerate for up to 5 days or freeze for up to 2 months.
Can I use a different frosting?
Yes, you can use cream cheese frosting, chocolate frosting, or even a whipped ganache. The ghost shape works well with any thick frosting that holds its shape.
Pin This Recipe!
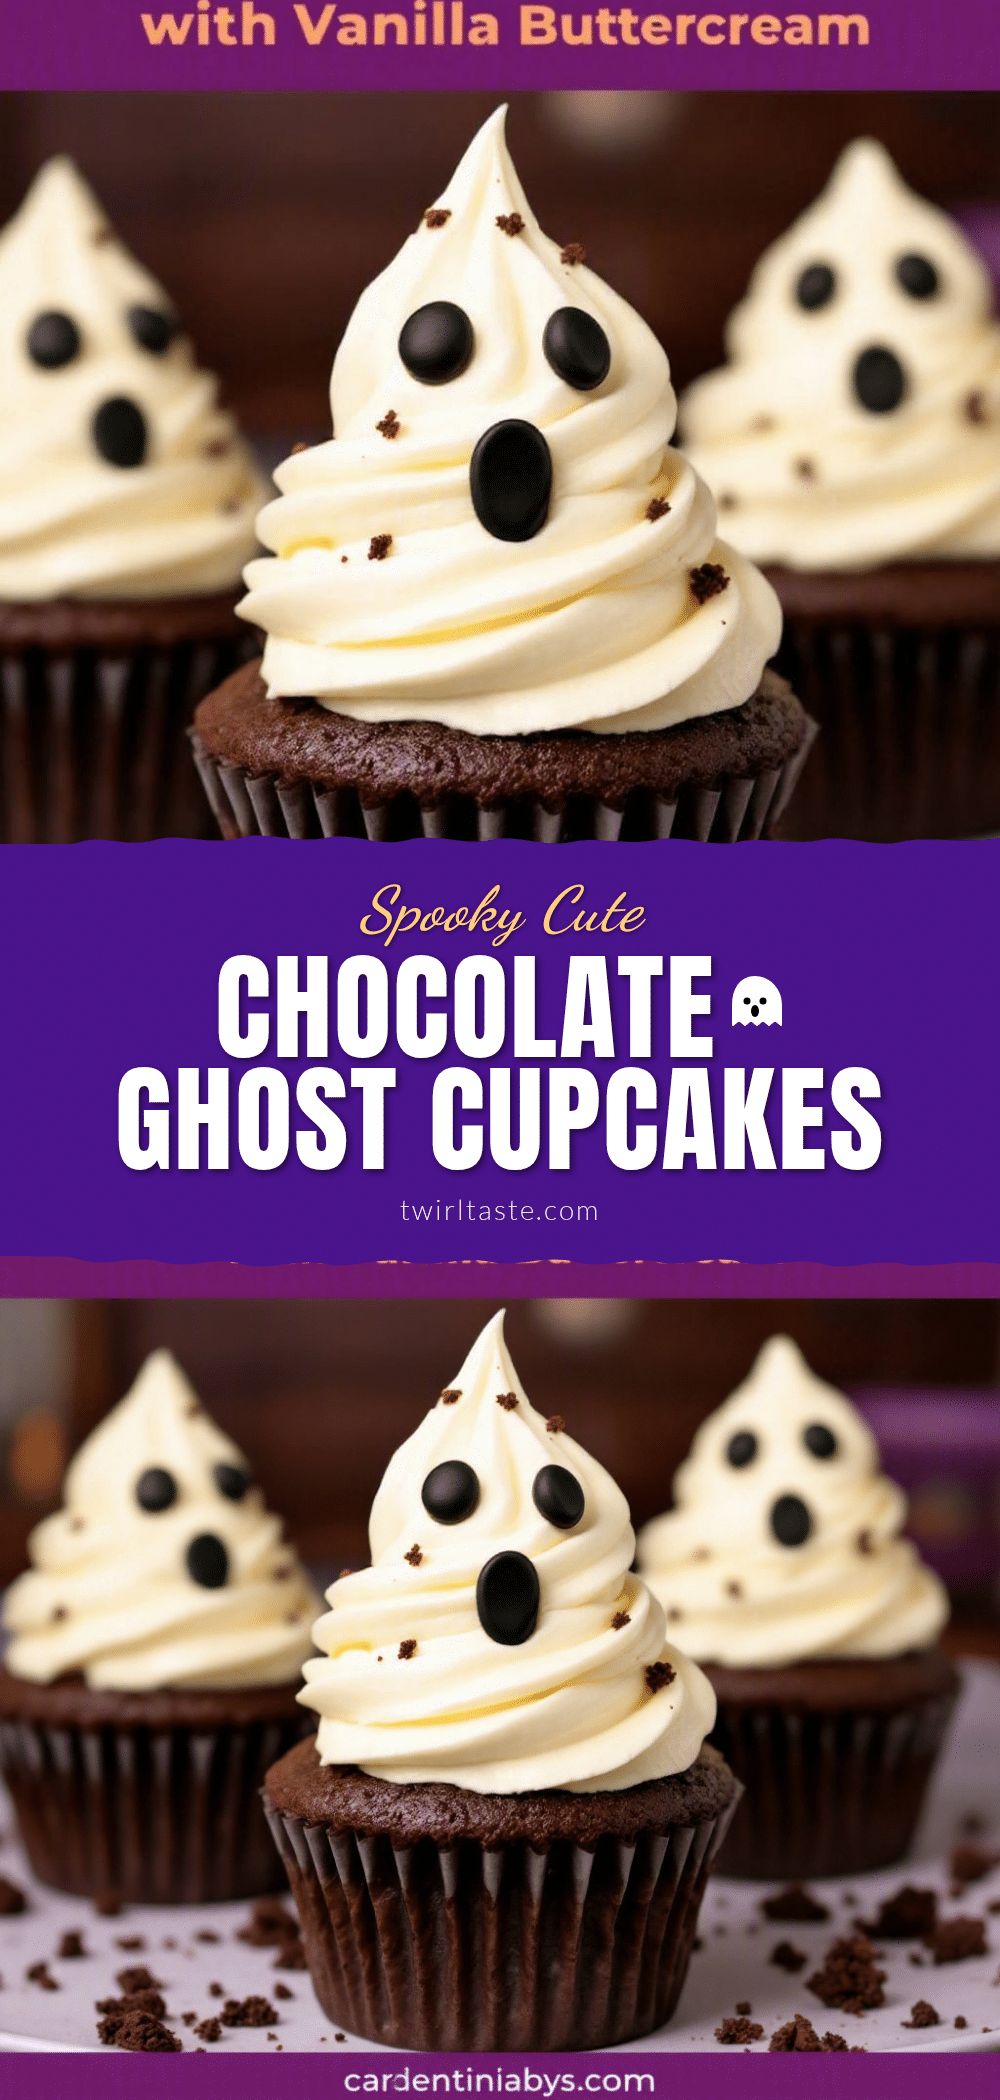
Cute Chocolate Ghost Cupcakes: Easy Halloween Treat
These cute chocolate ghost cupcakes feature a moist, rich chocolate cake base topped with a light, airy vanilla frosting shaped like a classic sheet ghost. Perfect for Halloween parties or spooky snacks, they are easy to make and crowd-pleasing.
- Prep Time: 30 minutes
- Cook Time: 20 minutes
- Total Time: 1 hour 20 minutes
- Yield: 12 servings 1x
- Category: Dessert
- Cuisine: American
Ingredients
- 1 cup all-purpose flour
- 1 cup granulated sugar
- 1/2 cup unsweetened cocoa powder
- 1 teaspoon baking powder
- 1/2 teaspoon baking soda
- 1/2 teaspoon salt
- 2 large eggs, room temperature
- 1 cup buttermilk
- 1/2 cup vegetable oil
- 1 teaspoon vanilla extract
- 1/2 cup unsalted butter, softened
- 2–3 cups powdered sugar
- 2–3 tablespoons heavy cream
- 1 teaspoon vanilla extract (for frosting)
- Edible eyes
Instructions
- Preheat oven to 350°F (175°C) and line a 12-cup muffin tin with cupcake liners.
- In a large bowl, whisk together flour, sugar, cocoa powder, baking powder, baking soda, and salt.
- In a separate bowl, whisk eggs, buttermilk, vegetable oil, and vanilla extract until smooth.
- Gradually add wet ingredients to dry ingredients and mix until just combined.
- Divide batter evenly among liners, filling them about two-thirds full.
- Bake for 18-20 minutes or until a toothpick inserted into the center comes out clean.
- Cool in the pan for 5 minutes, then transfer to a cooling rack to cool completely.
- Beat softened butter until creamy, then gradually add powdered sugar, heavy cream, and vanilla. Beat on high until fluffy.
- Pipe or spread frosting onto cooled cupcakes to create a ghost shape, letting it drip down the sides.
- Place edible eyes on the frosting while it is still soft.
Notes
Ensure ingredients are at room temperature for best results. Do not overmix the batter to avoid tough cupcakes. Cool cupcakes completely before frosting to prevent melting. For dairy-free options, use plant-based butter and milk. For gluten-free, use a 1:1 gluten-free flour blend.
Nutrition
- Serving Size: 1 cupcake
- Calories: 250
- Sugar: 28
- Sodium: 150
- Fat: 12
- Saturated Fat: 5
- Carbohydrates: 35
- Fiber: 2
- Protein: 4
Keywords: Halloween, cupcakes, chocolate, ghost, easy baking, dessert, party food, spooky treats


