Love this? Save it for later!
Share the inspiration with your friends
Flour dusted my nose and I was staring at a stick of butter that had been sitting out since Tuesday. The clock on the microwave blinked 11:47 PM. Tomorrow was Halloween. The house was silent except for the hum of the refrigerator and the distant, eerie caw of a crow outside the window. I had promised the kids—well, my teenage nephew who was visiting—that we’d make “something spooky” for the school party. Something that wasn’t store-bought. Something that wouldn’t make me look like I’d given up on life.
I looked at the pantry. Empty shelves. Just a bag of flour, some sugar, and a jar of almond paste that I’d bought three years ago for a recipe I’d never actually tried. And then I saw them. The almonds. Whole, raw, and slightly dusty. An idea hit me like a cold splash of water. What if they looked like fingers? Long, knobby, pale fingers with dark nails?
It wasn’t planned. It was panic baking. I grabbed a bowl, dumped in the flour, cut in the butter with my fingers because I didn’t feel like washing a mixer, and started shaping. I rolled the dough into logs, tapered at one end. I pressed a sliver of almond into the tip of each one. I used a knife to score the knuckles. It was messy. It was ridiculous. But as they baked, the smell of vanilla and toasted almonds filled the kitchen, chasing away the weird shadows in the corner.
When they came out, golden brown and crisp, I felt a strange sense of accomplishment. They weren’t just cookies. They were little edible works of horror. My nephew looked at them, then at me, and said, “Okay, that’s actually cool.” That’s the thing about these cookies. They’re not perfect. They’re a little crooked. They’re crispy in a way that feels almost dangerous. But they are the perfect way to turn a last-minute panic into a memory. You know, that moment when you realize you actually made something amazing out of nothing? That’s why I keep coming back to this recipe. It’s simple, it’s scary, and it’s surprisingly easy.
Why You’ll Love This Recipe
Let’s be honest for a second. Halloween treats usually fall into two camps: either they are incredibly complex sugar sculptures that require a degree in pastry arts, or they are just chocolate bars with a sticker on them. This recipe sits in that perfect, delicious middle ground. It’s a shortbread-style cookie, which means it’s buttery, crisp, and holds its shape beautifully. But the real magic is in the presentation.
Here is why these witch’s fingers are going to become your new Halloween staple:
* **Quick & Easy**: You don’t need to chill the dough for hours. Honestly, you can have these in the oven in about 15 minutes from start to finish. That is perfect for busy weeknights or when you realize you need a treat an hour before you leave the house.
* **Simple Ingredients**: You likely already have everything in your kitchen. Flour, butter, sugar, an egg, and almonds. No fancy grocery trips needed. No obscure spices you’ll use once a year.
* **Perfect for Halloween Parties**: Whether it’s a school bake sale, a neighborhood trick-or-treat drop-off, or a spooky dinner party, these cookies always get a reaction. They are visually striking without being intimidating.
* **Crowd-Pleaser**: Kids love the “gross” factor of fingers, and adults love the taste of a classic shortbread. It’s a win-win. Even the pickiest eaters usually give these a try because they look more interesting than they taste.
* **Unbelievably Delicious**: The texture is key here. We want them crispy, not chewy. The almond nail adds a nice crunch that contrasts with the tender cookie. It’s a flavor combo that feels elevated, even though it’s basically comfort food.
What makes this recipe different from the rest? It’s the technique. Most finger cookie recipes use a lot of egg white to make them shiny, which can make them cakey. We use just a whole egg and a touch of almond extract to keep the flavor intense and the texture crisp. It’s not just another version—it’s the best version. This recipe isn’t just good; it is the kind that makes you close your eyes after the first bite and think, “I should make this more often.” It’s comfort food reimagined for the spookiest night of the year. Perfect for impressing guests without stress, or turning a simple afternoon baking session into something memorable.
If you are looking for more spooky treats, you might also enjoy our classic spooky witch finger cookies or these adorable mummy sugar cookies.
What Ingredients You Will Need
This recipe uses simple, wholesome ingredients to deliver bold flavor and satisfying texture without the fuss. The beauty of shortbread-based cookies is that the quality of your ingredients really shines through. Since there are only six main components, you want to make sure you pick the good stuff.
* **Unsalted Butter**: Softened to room temperature. This is crucial. If your butter is too cold, it won’t cream properly with the sugar, and your cookies will be dense. If it’s too warm, they’ll spread too much. I recommend using a high-quality European-style butter for the richest flavor.
* **Granulated White Sugar**: This provides the sweetness and helps create that crisp edge. Brown sugar can make them chewy, so stick to white for that signature snap.
* **All-Purpose Flour**: The base of the cookie. Don’t try to swap this for cake flour unless you want a softer, more tender result. We want structure here.
* **Baking Powder**: Just a teaspoon. This gives a tiny bit of lift so they aren’t rock-hard, but not so much that they lose their shape.
* **Salt**: A half-teaspoon of kosher salt balances the sweetness and brings out the nutty flavor of the almonds.
* **Egg**: One large egg, room temperature. This binds everything together.
* **Almond Extract**: This is the secret weapon. It tastes like marzipan and smells incredible. Use pure almond extract, not the artificial stuff, or it will taste like chemical perfume.
* **Whole Raw Almonds**: These are your “fingers.” Look for uniform, medium-sized almonds. They should be raw and unsalted. I prefer buying them in the bulk bin to save money.
* **Vanilla Extract**: Just a splash to round out the flavor profile.
You can substitute the almonds with slivered almonds if you prefer a smaller nail, but whole almonds give the best visual impact. For a gluten-free option, you can use a 1:1 gluten-free flour blend, though the texture might be slightly more crumbly.
Equipment Needed
You don’t need a fancy kitchen to make these cookies. Here is what you’ll need:
* **Mixing Bowls**: Two medium-sized bowls. One for dry ingredients, one for wet.
* **Electric Hand Mixer or Stand Mixer**: While you can do this by hand, a mixer makes creaming the butter and sugar much easier and faster. If you don’t have one, a sturdy wooden spoon works, but you’ll need some arm strength.
* **Baking Sheets**: Two standard-sized baking sheets.
* **Parchment Paper**: This is non-negotiable. It prevents sticking and makes cleanup a breeze. You don’t need to grease the pans if you use parchment.
* **Pastry Brush**: Optional, but helpful for brushing the egg wash over the cookies before baking.
* **Knife**: A sharp paring knife is perfect for scoring the knuckles into the dough.
If you don’t have parchment paper, you can use silicone baking mats, but they can sometimes cause cookies to spread slightly more. Budget-friendly option: Just use a clean, unlined baking sheet and grease it well with butter or cooking spray.
Preparation Method
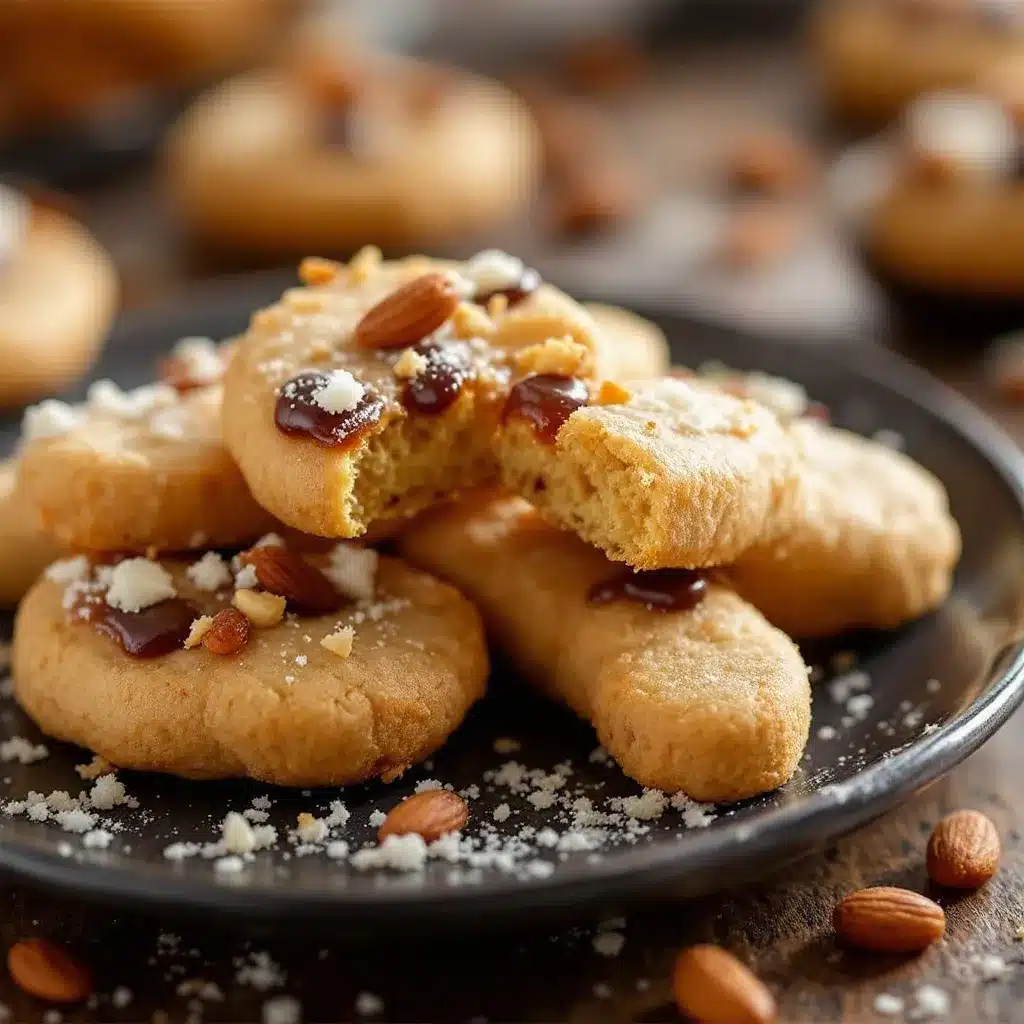
Here is how to bring your spooky creations to life. It’s easier than you think.
1. **Preheat and Prep**: Preheat your oven to 350°F (175°C). Line your baking sheets with parchment paper. This takes about 2 minutes.
2. **Mix Dry Ingredients**: In a medium bowl, whisk together the flour, baking powder, and salt. Set aside. This ensures the leavening agent is evenly distributed.
3. **Cream Butter and Sugar**: In a large bowl, beat the softened butter and granulated sugar together on medium speed until light and fluffy. This should take about 2-3 minutes. The mixture should look pale and airy. If your butter is still cold, keep beating.
4. **Add Wet Ingredients**: Beat in the egg and the almond extract (and vanilla, if using) until just combined. The mixture might look slightly curdled, which is normal.
5. **Combine**: Gradually add the dry ingredients to the wet ingredients. Mix on low speed until a dough forms. Do not overmix. The dough should be soft but hold together when pinched.
6. **Shape the Dough**: Scoop about 1 tablespoon of dough. Roll it between your palms to form a log shape. Taper one end to look like a fingertip. The log should be about 3-4 inches long.
7. **Add the Nail**: Press a whole almond into the tapered end of the dough. Press it in firmly so it stays attached during baking.
8. **Score the Knuckles**: Use the tip of a knife to gently press lines into the dough to create the appearance of knuckles. Do this about 2-3 times along the length of the “finger.” Be gentle so you don’t break the dough.
9. **Chill (Optional but Recommended)**: Place the shaped cookies on the baking sheet and refrigerate for 15-20 minutes. This helps them hold their shape in the oven. If you’re in a rush, you can skip this, but they may spread slightly more.
10. **Bake**: Bake for 12-15 minutes, or until the edges are lightly golden brown. The centers should still look slightly soft.
11. **Cool**: Let the cookies cool on the baking sheet for 5 minutes before transferring them to a wire rack. They will crisp up as they cool.
Cooking Tips & Techniques
Getting the texture right is the hardest part of these cookies. Here are some tips from my own kitchen failures:
* **Butter Temperature**: I cannot stress this enough. If your butter is too soft, the cookies will spread into puddles. If it’s too hard, they’ll be dense bricks. Aim for butter that leaves a slight indent when you press it with your finger.
* **Don’t Overbake**: These cookies continue to cook on the hot pan after you take them out of the oven. If you wait until they are hard in the oven, they will be rock-hard when cooled. Pull them when they are just barely golden at the edges.
* **Almond Placement**: Make sure the almond is pressed in deep enough. I’ve had almonds fall off in the oven before, which is a sad sight. Press them in until you feel resistance.
* **Uniformity**: Try to make the cookies the same size. If they are different sizes, they will bake at different rates. Use a small ice cream scoop for consistent sizing.
* **Cooling Rack**: Always transfer to a wire rack. If you leave them on the hot pan, the bottoms will steam and become soggy. You want them crispy all the way through.
Variations & Adaptations
While the classic almond version is my favorite, there are plenty of ways to twist this recipe:
* **Chocolate Dipped**: Once the cookies are completely cooled, dip the “fingertip” (the almond part) in melted dark chocolate. It looks like a bloody nail or just adds a rich chocolate crunch.
* **Pumpkin Spice**: Add 1 teaspoon of pumpkin pie spice to the dry ingredients. This gives them a fall flavor that pairs well with the almonds.
* **Gluten-Free**: Swap the all-purpose flour for a high-quality 1:1 gluten-free flour blend. Add an extra teaspoon of xanthan gum if your blend doesn’t include it.
* **Nut-Free**: For school-safe treats, you can skip the almonds entirely. You can use a small piece of licorice or a chocolate chip to represent the nail. It won’t look as realistic, but it’s still fun.
* **Flavor Twist**: Swap the almond extract for lemon extract. Lemon and almond is a classic combination that tastes fresh and bright.
I once tried making these with hazelnuts, and while they tasted great, the shape didn’t look as much like a finger. Stick with almonds for the best visual effect.
Serving & Storage Suggestions
These cookies are best served at room temperature. They don’t need to be warmed up, as the crispness is their best feature.
* **Presentation**: Arrange them on a platter with a black or dark blue background to make them pop. You can add some dried lavender or edible flowers for a spooky-chic vibe.
* **Pairing**: They go wonderfully with a cup of black coffee or a glass of cold milk. For a Halloween party, serve them with a side of apple cider or a spooky red punch.
* **Storage**: Store in an airtight container at room temperature for up to 5 days. They actually get crispier after a day or two, which is perfect if you’re prepping ahead.
* **Freezing**: You can freeze the unbaked dough logs for up to 3 months. Just thaw them in the fridge before shaping and baking. You can also freeze the baked cookies for up to 2 months.
* **Reheating**: If they lose their crunch, you can reheat them in the oven at 300°F for 5 minutes.
The flavors develop over time, especially if you add a chocolate dip. The chocolate sets and becomes even more flavorful after a day in the fridge.
Nutritional Information & Benefits
Here is an estimated nutritional breakdown per cookie (based on 24 cookies):
* **Calories**: 110 kcal
* **Fat**: 6g
* **Carbohydrates**: 12g
* **Protein**: 2g
* **Fiber**: 0.5g
* **Sugar**: 6g
These cookies are not particularly high in nutrients, but they do offer some benefits. Almonds are a good source of healthy fats, vitamin E, and magnesium. The egg provides protein and choline. While they are a treat, they are relatively simple in ingredients compared to many store-bought Halloween candies. For those with dietary restrictions, note that they contain gluten, dairy, eggs, and tree nuts.
Conclusion
Making these Crispy Witch’s Finger Cookies is less about baking and more about having a little fun. It’s a recipe that doesn’t take much effort but yields a huge payoff in terms of smiles and laughs. Whether you’re a seasoned baker or a beginner, this recipe is forgiving and delicious.
I love this recipe because it turns a stressful holiday into a creative outlet. It’s the kind of thing that brings people together. So, go ahead and make a mess. Get your hands in the dough. Press those almonds in. And don’t worry if they aren’t perfect. The charm is in the imperfection.
I’d love to see your creations! If you make these, please leave a comment below with how they turned out. Share your photos on social media and tag me. I love seeing your spooky twists. Happy Halloween!
Frequently Asked Questions
Can I make these cookies ahead of time?
Yes! You can bake them up to 5 days in advance and store them in an airtight container. They actually get crispier over time, which is ideal for these cookies.
Why did my cookies spread too much?
This usually happens if the butter was too soft when you started mixing, or if you didn’t chill the shaped cookies before baking. Make sure your butter is at the right temperature and give the dough a good chill in the fridge.
Can I use salted butter instead of unsalted?
You can, but you’ll need to reduce the salt in the recipe by half. Unsalted butter gives you more control over the final flavor and salt content.
What if I don’t have almond extract?
You can omit it, but the cookies will lack that distinct flavor. You can substitute it with vanilla extract, but the result will be more like a standard shortbread.
Are these cookies gluten-free?
Not as written. To make them gluten-free, swap the all-purpose flour for a 1:1 gluten-free flour blend. Check the almond extract label to ensure it is certified gluten-free, as some brands may contain trace gluten.
Pin This Recipe!

Crispy Witchs Finger Cookies: Easy Halloween Treat

These crispy, shortbread-style cookies are shaped like witch’s fingers with almond nails, offering a spooky yet delicious Halloween treat that is quick to make and uses simple pantry ingredients.
- Prep Time: 15 minutes
- Cook Time: 15 minutes
- Total Time: 30 minutes
- Yield: 24 cookies 1x
- Category: Dessert
- Cuisine: American
Ingredients
- 1 cup unsalted butter, softened to room temperature
- 1/2 cup granulated white sugar
- 2 cups all-purpose flour
- 1 teaspoon baking powder
- 1/2 teaspoon kosher salt
- 1 large egg, room temperature
- 1 teaspoon almond extract
- 1/2 teaspoon vanilla extract
- 24 whole raw almonds (for nails)
Instructions
- Preheat oven to 350°F (175°C) and line two baking sheets with parchment paper.
- In a medium bowl, whisk together the flour, baking powder, and salt.
- In a large bowl, beat the softened butter and sugar on medium speed until light and fluffy (2-3 minutes).
- Beat in the egg, almond extract, and vanilla extract until just combined.
- Gradually add the dry ingredients to the wet ingredients and mix on low speed until a dough forms.
- Scoop about 1 tablespoon of dough and roll into a log shape, tapering one end to resemble a fingertip (3-4 inches long).
- Press a whole almond firmly into the tapered end of each dough log.
- Use the tip of a knife to gently score 2-3 lines into the dough to create knuckles.
- Optional: Refrigerate shaped cookies for 15-20 minutes to help them hold their shape.
- Bake for 12-15 minutes until edges are lightly golden brown.
- Let cookies cool on the baking sheet for 5 minutes before transferring to a wire rack to cool completely.
Notes
Ensure butter is softened but not melted to prevent spreading. Do not overbake as cookies continue to cook on the hot pan. For a gluten-free version, use a 1:1 gluten-free flour blend. Almonds can be substituted with licorice or chocolate chips for nut-free options.
Nutrition
- Serving Size: 1 cookie
- Calories: 110
- Sugar: 6
- Sodium: 45
- Fat: 6
- Saturated Fat: 3.5
- Carbohydrates: 12
- Fiber: 0.5
- Protein: 2
Keywords: Halloween cookies, witch finger cookies, shortbread cookies, easy Halloween treats, spooky baking, almond cookies, crispy cookies


