Love this? Save it for later!
Share the inspiration with your friends
My seven-year-old nephew stared into the plastic cup with a mixture of horror and fascination. He poked the dark, crumbly topping with a gummy eyeball, waiting for something to wiggle. I laughed, shaking my head. “Nope,” I told him. “Just chocolate.”
That was the moment I knew these no-bake Halloween dirt cups were more than just a snack. They were a trick-or-treat magic trick in a cup. We had spent the afternoon making easy mini pumpkin pie cookies for Halloween treat bags, and while those were delicious, they required an oven. This recipe? It’s the hero of last-minute party planning.
The kitchen was a mess of crushed cookies and whipped cream, but the result was pure joy. Kids love the gross-out factor of dirt cups. Adults love that it tastes like dessert but takes five minutes to assemble. Honestly, it’s the perfect balance of spooky and sweet.
I’ve made these for school parties, office Halloween events, and late-night cravings. Every time, the reaction is the same. First comes the skepticism, then the first bite, and finally, the empty cup. It’s become a staple in my fall dessert rotation, right alongside best spooky witch finger cookies easy halloween treat and adorable halloween mummy sugar cookies best easy recipe.
There’s something satisfying about creating something that looks like a mess but tastes like heaven. You don’t need fancy tools or hours of prep. Just a few simple ingredients and a little imagination. Let’s face it, sometimes the best recipes are the ones that require the least amount of effort but deliver the most fun. This is one of those recipes that sticks with you because it brings people together, even if just for a few sweet bites.
Why You’ll Love This Recipe
Let’s be honest, Halloween dessert planning can be a nightmare. You want something festive, but you also don’t want to spend your entire evening standing over a hot oven. That’s where these no-bake dirt cups save the day. I’ve tested dozens of versions over the years, from using pudding mixes to making homemade custards, and this simple chocolate cream cheese mixture is the winner every single time.
- Quick & Easy: This comes together in under 15 minutes. You just mix, scoop, and garnish. It’s perfect for busy weeknights or last-minute Halloween parties where you forgot to plan dessert.
- Simple Ingredients: No fancy grocery trips needed. You likely already have chocolate cookies, cream cheese, whipped topping, and gummy worms in your kitchen. It’s pantry-friendly and stress-free.
- Perfect for Parties: Great for Halloween classrooms, office potlucks, or cozy family dinners. They are individual portions, which means no cutting slices and no arguing over who gets the biggest piece.
- Crowd-Pleaser: Always gets rave reviews from kids and adults alike. The kids love the worms, and the adults love the rich, creamy chocolate flavor that reminds them of their own childhood treats.
- Unbelievably Delicious: The texture and flavor combo is next-level comfort food. The contrast between the crunchy cookie crumbs, the smooth cream filling, and the chewy gummy worms is pure magic.
What makes this recipe different from the rest is the richness of the filling. Many versions use just whipped cream, which can be too airy. By adding cream cheese, you get a dense, cheesecake-like texture that holds up well and tastes indulgent. It’s the kind of dessert that makes you close your eyes after the first bite. It’s comfort food reimagined—spooky, fun, but with the same soul-soothing satisfaction as a warm slice of pie.
It’s perfect for impressing guests without stress, or turning a simple Halloween gathering into something memorable. Plus, you can make them ahead of time. Just keep them refrigerated until it’s time to serve. It’s the ultimate hack for any host who wants to look like a wizard in the kitchen without actually doing any magic.
What Ingredients You Will Need
This recipe uses simple, wholesome ingredients to deliver bold flavor and satisfying texture without the fuss. The beauty of dirt cups is that you can use whatever you have on hand, but some choices make a bigger difference in taste and texture. Here is what you need to get started.
For the Chocolate Dirt
- Chocolate Sandwich Cookies: About 20-25 cookies. I recommend using brands like Oreos or any chocolate sandwich cookie you like. Chocolate wafer cookies also work well if you want a finer crumb texture.
- Unsalted Butter: 2 tablespoons, melted. This helps the crumbs stick together slightly so they don’t just fall apart. It adds a rich, buttery flavor to the “dirt.”
For the Creamy Filling

- Cream Cheese: 8 ounces, full-fat, softened. This is the secret ingredient. It gives the filling structure and a tangy cheesecake flavor. Make sure it’s softened to room temperature so it mixes smoothly without lumps.
- Powdered Sugar: 1/4 cup. Adjust based on how sweet you like it. If your cookies are very sweet, you might use less. Sift it to avoid any gritty chunks in the final product.
- Vanilla Extract: 1 teaspoon. Use pure vanilla extract for the best flavor. It balances the richness of the cream cheese and chocolate.
- Whipped Topping: 8 ounces, thawed. I recommend Cool Whip or a store-bought whipped topping. It lightens the mixture and makes it fluffy. You can also use freshly whipped heavy cream if you prefer, but it takes more effort.
For the Spooky Garnish
- Gummy Worms: A handful. These are non-negotiable for the dirt cup aesthetic. You can use standard red worms or variety packs.
- Gummy Eyeballs: Optional, but highly recommended for that extra spooky factor. They add a fun visual element that kids love.
- Mini Chocolate Chips: Optional sprinkle. Adds a bit of extra crunch and chocolate flavor on top.
If you need substitutions, you can use gluten-free chocolate cookies if needed. For a dairy-free option, use coconut cream cheese and dairy-free whipped topping. The texture might be slightly different, but it will still be delicious. I also like to add a pinch of sea salt to the filling to enhance the chocolate flavor.
Equipment Needed
You don’t need much to make these dirt cups, which is part of their charm. Here is the basic equipment you will need:
- Food Processor or Blender: This is the easiest way to crush the cookies into fine crumbs. If you don’t have one, you can use a rolling pin and a heavy-duty zip-top bag. Just be prepared to do some arm work.
- Mixing Bowls: You’ll need two medium-sized bowls. One for the cookie crumbs and one for the cream cheese mixture.
- Electric Mixer: A hand mixer or stand mixer makes whipping the cream cheese and sugar smooth and fast. You can do it by hand with a whisk, but it takes more elbow grease.
- Spatula: A rubber spatula is essential for folding the whipped topping into the cream cheese mixture without deflating it. It also helps scrape the bowl clean.
- Serving Cups: Small plastic cups, glass jars, or even paper cups work great. Clear cups are best so you can see the layers. I like to use little plastic shot glasses for a party vibe.
If you are making a large batch, having multiple bowls ready will speed up the assembly process. Also, make sure your cream cheese is truly softened. If it’s too cold, it will be lumpy, and no amount of mixing will fix that.
Preparation Method
- Crush the Cookies: Place your chocolate sandwich cookies in a food processor. Pulse until they are fine crumbs. If you are doing it by hand, put them in a zip-top bag and crush them with a rolling pin until they are the consistency of sand. You want about 2 cups of crumbs. Melt the 2 tablespoons of butter and mix it into the crumbs until they look like wet sand. Set aside.
- Prepare the Filling Base: In a large mixing bowl, beat the softened cream cheese and powdered sugar together on medium speed until smooth and creamy. This should take about 2-3 minutes. Scrape down the sides of the bowl with a spatula to ensure everything is incorporated. Add the vanilla extract and mix again briefly.
- Fold in the Whipped Topping: Gently fold the thawed whipped topping into the cream cheese mixture. Use a spatula and fold slowly. You want to keep the air in the mixture so it stays light and fluffy. Do not overmix, or it will become runny. The mixture should be thick, smooth, and chocolatey.
- Assemble the Cups: Take your serving cups. Add a layer of the chocolate crumb mixture to the bottom. It should be about 1/4 inch thick. Then, add a generous layer of the cream cheese filling. You can leave it flat or create a little swirl with a spoon for a fancy look.
- Add the Toppings: Sprinkle more cookie crumbs on top of the filling to create the “dirt” effect. Make sure there is enough to cover the cream. Then, stick the gummy worms into the dirt so they look like they are crawling out of the cup. Add gummy eyeballs on top for extra spookiness.
- Chill and Serve: Place the cups in the refrigerator for at least 30 minutes before serving. This helps the layers set and makes them easier to eat. They can be made up to 24 hours in advance. Just keep them covered in the fridge.
Pro tip: If you are serving these at a party, make them just before guests arrive so they look fresh. The worms can get soggy if they sit for too long, so add them right before serving if possible.
Cooking Tips & Techniques
There are a few tricks to making the perfect dirt cup. First, don’t skip the chilling step. The cream cheese mixture needs to firm up a bit so it holds its shape. If you serve it immediately, it might be too soft and slide around in the cup.
Another tip is to use room temperature ingredients. If your cream cheese is cold, it will be difficult to mix smoothly. Take it out of the fridge at least 30 minutes before you start. If you’re in a hurry, you can microwave it in 5-second bursts, but be careful not to melt it.
When crushing the cookies, aim for a mix of fine crumbs and small chunks. Fine crumbs make the “dirt” look realistic, but small chunks add a nice crunch. I like to save a few whole cookies to crush right before serving for extra texture.
If you find the filling too sweet, reduce the powdered sugar or use less sweet cookies. If it’s too thick, add a splash of milk or cream. If it’s too thin, add a bit more powdered sugar or chill it longer. Trust your senses as you go.
Also, consider the type of whipped topping. Some brands are sweeter than others. Taste your mixture before assembling. You want it to be rich and creamy, not overly sweet. The cookies provide plenty of sugar, so the filling should be balanced.
Variations & Adaptations
One of the best things about this recipe is how easy it is to customize. Here are a few variations I’ve tried:
- Strawberry Dirt Cups: Replace the chocolate cookies with vanilla wafers or graham crackers. Use strawberry-flavored cream cheese or add strawberry jam to the filling. Top with fresh strawberries instead of worms.
- Pumpkin Spice Dirt Cups: Add pumpkin pie spice to the cream cheese mixture. Use graham crackers for the crumbs and top with whipped cream and a sprinkle of cinnamon. Perfect for Thanksgiving or late Halloween.
- Mini Cupcake Version: Make these in mini cupcake liners. Use mini chocolate cupcakes as the base, add a dollop of frosting, and top with crumbs and a worm. It’s a fun twist for kids.
- Gluten-Free Option: Use gluten-free chocolate sandwich cookies and gluten-free whipped topping. The rest of the ingredients are naturally gluten-free, so it’s an easy swap.
- Dairy-Free Option: Use coconut cream cheese and coconut whipped topping. The flavor will be slightly different, but it’s still creamy and delicious.
I also like to add a layer of peanut butter cups to the middle for a fun surprise. Just crush them up and sprinkle them between the layers. It adds a salty-sweet contrast that is amazing.
Serving & Storage Suggestions
These dirt cups are best served chilled. They taste like a frozen cheesecake bite, which is refreshing on a cold Halloween night. I like to serve them with a small spoon so guests can get all the layers.
For storage, keep them in the refrigerator in an airtight container. They will last for up to 3 days. The flavors meld together over time, so they might taste even better on day two.
If you need to freeze them, you can freeze the filling and crumbs separately. Thaw the filling in the fridge overnight before assembling. Do not freeze the assembled cups with gummy worms, as they will become mushy.
For parties, set up a DIY station with bowls of crumbs, filling, and toppings. Let guests assemble their own cups. It’s a fun activity and ensures everyone gets the ratio they prefer.
Nutritional Information & Benefits
While these are definitely a treat, they are not without some nutritional value. Cream cheese provides protein and calcium. Chocolate cookies offer a quick energy boost. However, they are high in sugar and saturated fat, so enjoy in moderation.
For a slightly healthier version, you can use low-fat cream cheese and reduce the powdered sugar. Add some fresh fruit on top for vitamins and fiber. But honestly, sometimes you just need the real thing for Halloween fun.
They are a great way to satisfy a sweet tooth without feeling too guilty, especially if you share them with friends. It’s all about balance and enjoying the moment.
Conclusion
Easy No-Bake Halloween Dirt Cups are the perfect way to add a spooky touch to your holiday celebrations. They are easy to make, delicious to eat, and fun to look at. Whether you are hosting a party or just want a treat for the family, these cups are a winner.
Feel free to customize them with your favorite flavors and toppings. The sky is the limit. I hope you enjoy making these as much as I do. Don’t forget to share your creations on social media and tag me. I’d love to see your spooky designs.
Happy Halloween, and happy eating!
FAQs
Can I make these dirt cups ahead of time?
Yes, you can make them up to 24 hours in advance. Store them in the refrigerator in an airtight container. Add the gummy worms right before serving to prevent them from getting soggy.
What can I use instead of gummy worms?
You can use any candy you like. Gummy spiders, bat-shaped candies, or even chocolate chips work well. You can also use crushed nuts for a different texture.
Can I freeze the cream cheese filling?
It’s not recommended to freeze the assembled cups with whipped topping, as the texture may change. You can freeze the cream cheese mixture separately, but it’s best to make it fresh for the best results.
How do I keep the crumbs from falling out?
Make sure the crumbs are moistened with butter. This helps them stick together. Also, pack them firmly into the bottom of the cup before adding the filling.
Are these dirt cups gluten-free?
Not unless you use gluten-free cookies. Standard chocolate sandwich cookies contain gluten. You can easily swap them for gluten-free versions to make the recipe safe for those with celiac disease.
Pin This Recipe!
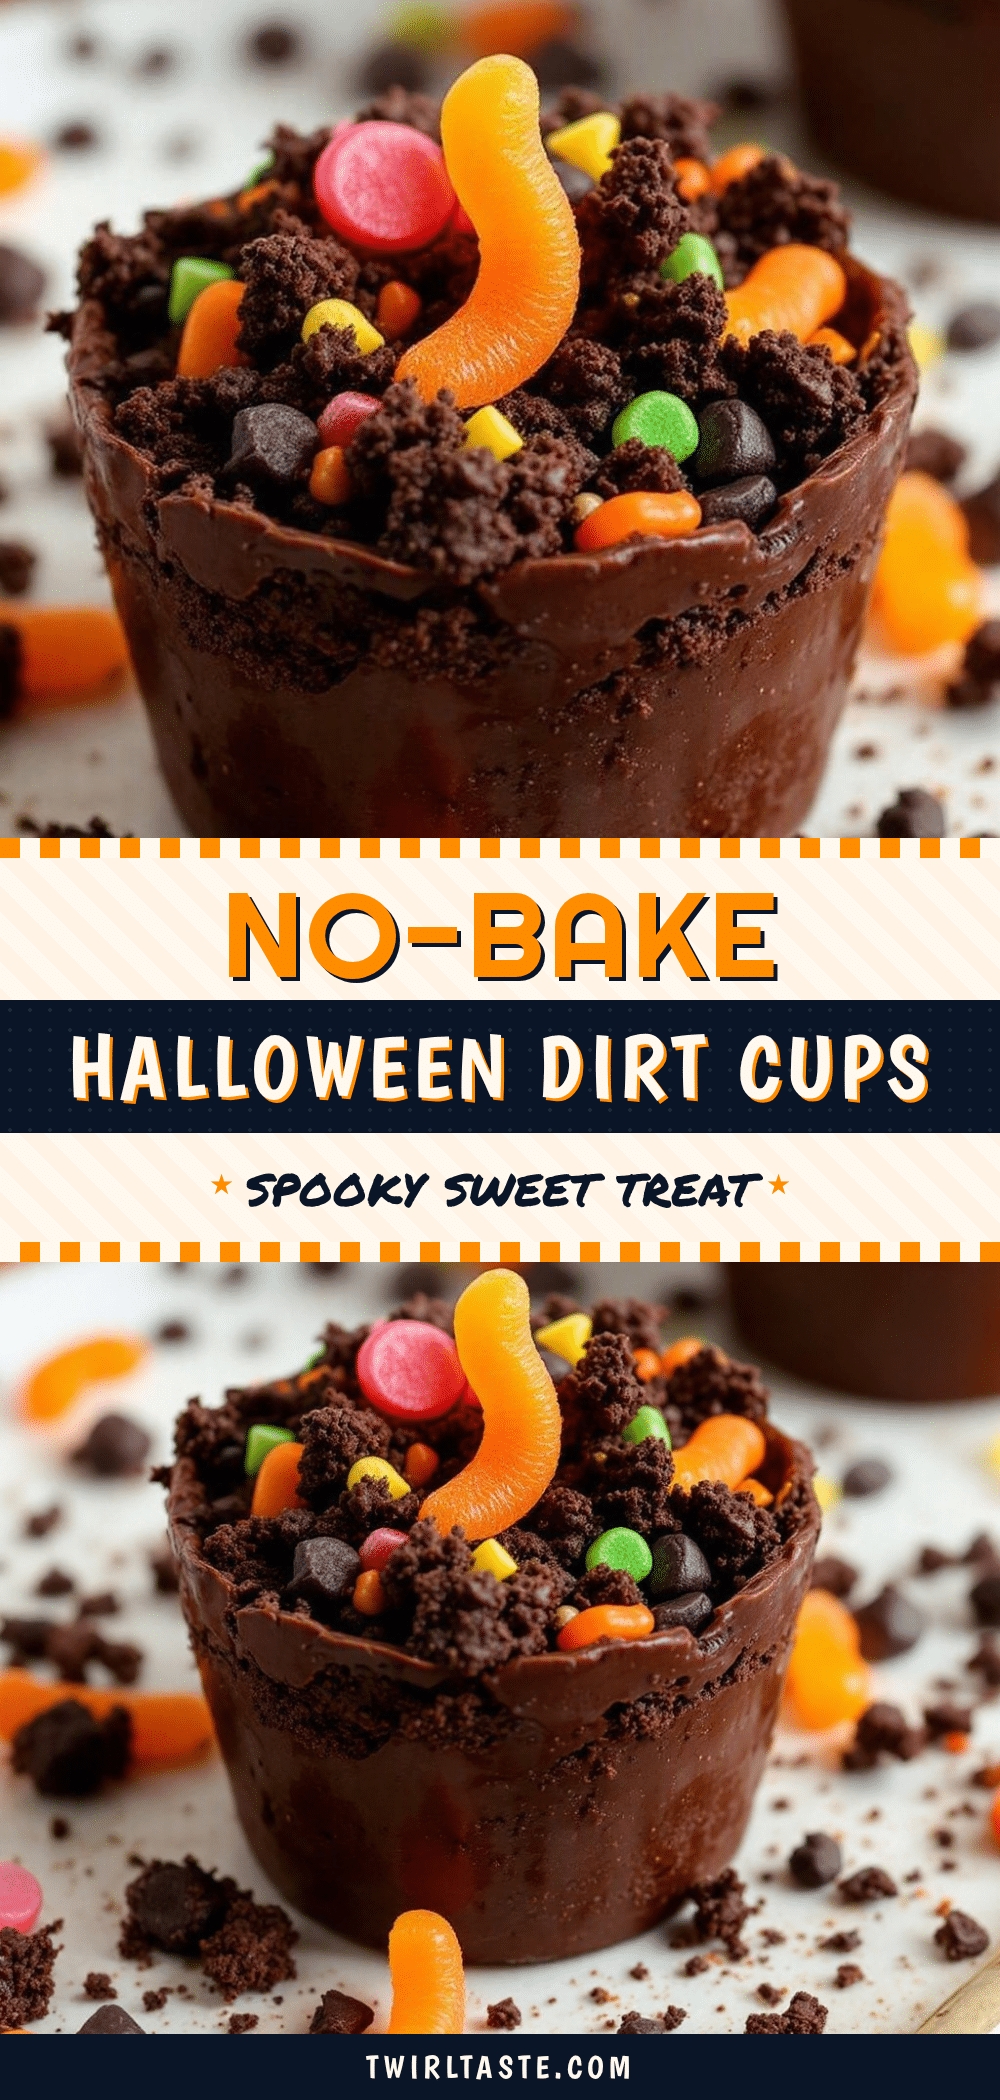
Easy No-Bake Halloween Dirt Cups: 5-Min Party Dessert

These spooky yet delicious no-bake Halloween dirt cups are the perfect last-minute party dessert. With a rich cream cheese filling, chocolate cookie ‘dirt’, and gummy worm garnish, they come together in under 15 minutes for a fun, crowd-pleasing treat.
- Prep Time: 15 minutes
- Cook Time: 0 minutes
- Total Time: 45 minutes
- Yield: 8 servings 1x
- Category: Dessert
- Cuisine: American
Ingredients
- 20–25 chocolate sandwich cookies (such as Oreos)
- 2 tablespoons unsalted butter, melted
- 8 ounces full-fat cream cheese, softened
- 1/4 cup powdered sugar
- 1 teaspoon vanilla extract
- 8 ounces whipped topping (such as Cool Whip), thawed
- Gummy worms, for garnish
- Gummy eyeballs, optional for garnish
- Mini chocolate chips, optional for garnish
Instructions
- Crush the chocolate sandwich cookies into fine crumbs using a food processor or by placing them in a zip-top bag and crushing with a rolling pin. You should have about 2 cups of crumbs.
- Melt the 2 tablespoons of butter and mix it into the cookie crumbs until they resemble wet sand. Set aside.
- In a large mixing bowl, beat the softened cream cheese and powdered sugar together on medium speed until smooth and creamy, about 2-3 minutes. Scrape down the sides of the bowl.
- Add the vanilla extract to the cream cheese mixture and mix briefly to combine.
- Gently fold the thawed whipped topping into the cream cheese mixture using a spatula. Be careful not to overmix to maintain a light and fluffy texture.
- To assemble, add a layer of the chocolate crumb mixture to the bottom of serving cups (about 1/4 inch thick).
- Add a generous layer of the cream cheese filling on top of the crumbs.
- Sprinkle more cookie crumbs over the filling to create the ‘dirt’ effect.
- Stick gummy worms into the dirt so they appear to be crawling out. Add gummy eyeballs and mini chocolate chips if desired.
- Refrigerate the cups for at least 30 minutes before serving to allow the layers to set. They can be made up to 24 hours in advance.
Notes
Ensure cream cheese is softened to room temperature to avoid lumps. For best texture, use a mix of fine crumbs and small chunks. Add gummy worms right before serving to prevent them from getting soggy. Can be stored in the refrigerator for up to 3 days.
Nutrition
- Serving Size: 1 cup
- Calories: 350
- Sugar: 28
- Sodium: 250
- Fat: 22
- Saturated Fat: 12
- Carbohydrates: 35
- Fiber: 1
- Protein: 4
Keywords: Halloween dessert, no-bake, dirt cups, easy party dessert, cream cheese filling, gummy worms, spooky treats, fall recipes


