Love this? Save it for later!
Share the inspiration with your friends
These cookies are supposed to float, but honestly, they just crash-landed on my counter in a cloud of sugar dust. I was staring at a bowl of whipped egg whites that looked less like “ghosts” and more like “confused marshmallows.” It is 4 PM on a Tuesday, and the Halloween spirit is low, but the sugar craving is high. I don’t want to bake a whole house. I don’t want to chop vegetables or stir a pot for an hour. I just want something white, crunchy, and spooky that requires zero drama. Let’s face it, life is complicated enough without trying to fold meringue without deflating it. I grabbed a piping bag, my hands were shaking a little from too much coffee, and I squeezed out three little white blobs. They looked like little fat ghosts. They tasted like pure, crisp sweetness. That was the moment I realized I didn’t need a complex recipe. I just needed three ingredients and a willingness to embrace the mess. These crispy 3-ingredient ghost meringue cookies are my new go-to for when I need a win in the kitchen.
Why You’ll Love This Recipe
There is a specific kind of magic in meringue that you just can’t get from brownies or cookies. It is light, airy, and melts in your mouth in a way that feels almost like eating a cloud. But let’s be real for a second—making meringue has a reputation. People are scared of it. They think it requires a double boiler, a candy thermometer, and a steady hand that doesn’t shake. That is just not true for this version. I have tested this recipe dozens of times, and it is forgiving. It is forgiving because the structure is simple. You whip the whites, you add sugar, you bake it low and slow. That is it. No fancy techniques. No tempering chocolate. No complex macarage method.
- Quick & Easy: You can have these in the oven in under 10 minutes of active prep time. The rest is just waiting. It is perfect for last-minute Halloween parties or when the kids come home from trick-or-treating and need a quick snack.
- Simple Ingredients: You likely have everything in your kitchen right now. Eggs, sugar, and vinegar. That is the holy trinity of this treat. No need to run to the store for exotic flours or expensive extracts.
- Perfect for Halloween: The white color is naturally spooky. You don’t even need to add food coloring if you don’t want to. They look like little spirits floating on a plate.
- Crowd-Pleaser: Kids love them because they are sweet and crunchy. Adults love them because they are not heavy or cloying. They are the perfect palate cleanser after a heavy meal.
- Unbelievably Delicious: The texture is the key. It should shatter slightly when you bite it, then dissolve into sweetness. It is next-level comfort food that feels fancy but isn’t.
What makes this recipe different is the addition of vinegar. I know, it sounds weird. But a tiny splash of white vinegar helps stabilize the egg whites and adds a subtle tang that cuts through the sweetness. It prevents the cookies from being too cloying. It is a small trick that makes a big difference. This isn’t just another meringue recipe. It is the best version because it is the easiest. It is the kind of cookie that makes you close your eyes after the first bite and feel like you are floating. It is comfort food reimagined for the spooky season. Perfect for impressing guests without stress, or turning a simple Tuesday evening into something memorable.
What Ingredients You Will Need
This recipe uses simple, wholesome ingredients to deliver bold flavor and satisfying texture without the fuss. The beauty of these ghost meringue cookies lies in their minimalism. You do not need a pantry full of specialty items. You just need quality basics. The eggs are the foundation, the sugar provides the structure and crunch, and the vinegar acts as the secret stabilizer. Here is what you need to gather before you start whipping.
- Egg Whites: You will need large egg whites. Room temperature egg whites whip up to a higher volume than cold ones. This is a non-negotiable rule if you want fluffy ghosts. I usually save the yolks for another recipe, like my chewy brown butter chocolate chip cookies, so nothing goes to waste. Make sure there is not a single drop of yolk in the whites. Fat prevents egg whites from whipping properly, and you want them to hold their shape.
- Granulated Sugar: Standard white granulated sugar is perfect here. It dissolves easily into the egg whites. Some people use caster sugar, which is finer, but regular sugar works fine if you whip long enough. Do not use brown sugar or coconut sugar here, as the moisture content will change the texture and the color won’t be ghost-white. I recommend using a high-quality brand like Domino for consistent grain size.
- White Vinegar: This is the secret weapon. You only need a teaspoon or two. It helps stabilize the foam and adds a tiny bit of tang. It does not taste like vinegar in the final product, I promise. It just makes the meringue crispier. You can use white distilled vinegar or apple cider vinegar, but white is better for keeping the color pure white.
- Cornstarch (Optional): While not strictly one of the “three” ingredients, a tablespoon of cornstarch is often added to meringue to prevent it from becoming too sticky. If you want them to be extra dry and crunchy, add a tablespoon. If you like them slightly chewy inside, skip it. I usually skip it for this specific ghost recipe to keep the ingredient count low.
- Vanilla Extract (Optional): For a classic meringue flavor, a teaspoon of vanilla is nice. However, for the pure “ghost” aesthetic, I often leave it out. If you add vanilla, the cookies might turn slightly off-white or beige. If you want pure white ghosts, stick to vanilla bean paste or just leave it out.
These ingredients are pantry staples. You probably have them all right now. The key is to use fresh eggs. Old eggs separate easier, but fresh eggs have a stronger protein structure that whips better. If your eggs are from the farmer’s market, use them. If they are from the grocery store, they are fine too. Just make sure they are room temperature. Take them out of the fridge an hour before you start baking.
Equipment Needed
You do not need a lot of fancy gadgets to make these ghost meringue cookies. In fact, keeping it simple is part of the charm. Here is the basic gear you will need.
- Mixing Bowl: A large glass or metal bowl is best. Plastic bowls can sometimes retain traces of oil, which can ruin the meringue. Glass is easy to clean and shows you if there is any yolk in the whites. If you use plastic, wash it thoroughly with hot soapy water first.
- Electric Mixer: A hand mixer or a stand mixer with a whisk attachment is highly recommended. Whipping egg whites by hand takes a lot of effort and time. An electric mixer gets the job done in minutes. I use a hand mixer because it is easier to control and easier to clean. If you don’t have one, you can use a whisk, but you will need strong arms.
- Piping Bag or Ziploc Bag: To get the ghost shape, you need a way to squeeze the meringue onto the baking sheet. A piping bag with a round tip works well. But honestly, a Ziploc bag with the corner cut off is just as good and much cheaper. It is less messy too.
- Baking Sheets: Standard half-sheet pans. Line them with parchment paper or a silicone baking mat. Do not use unlined pans, as the meringue will stick and break when you try to remove it.
- Spatula: A rubber spatula is useful for scraping the bowl down and ensuring all the sugar is incorporated.
If you don’t have a piping bag, don’t worry. You can just drop spoonfuls of meringue onto the sheet. They won’t look like ghosts, but they will taste the same. I often use a spoon for the “lumpier” ghosts that look like little blobs of snow. It adds character. Just make sure your baking sheets are clean and dry. Any moisture will stop the meringue from drying out properly.
Preparation Method
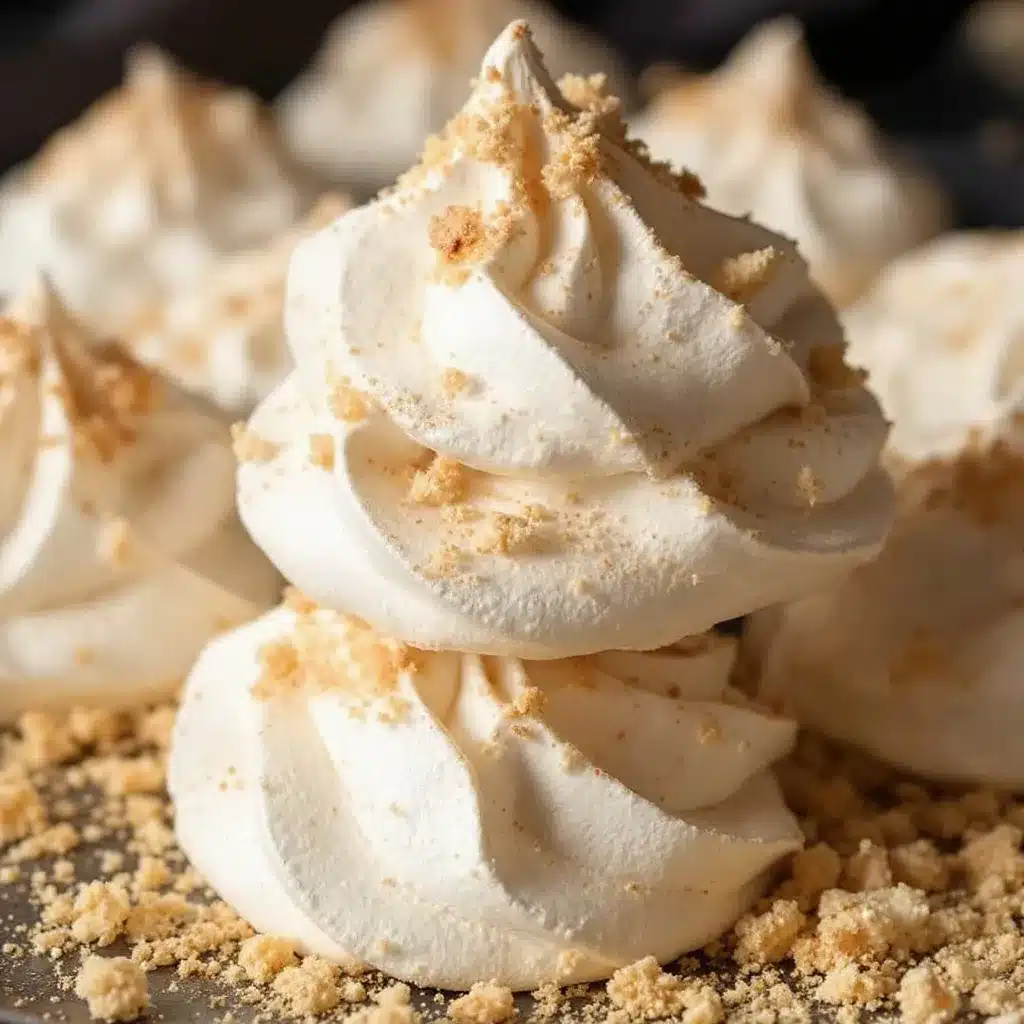
Making these cookies is straightforward, but it does require a bit of patience. The baking time is long, but the prep is short. Here is how you make them step-by-step.
- Preheat the Oven: Set your oven to 200°F (95°C). This is a low temperature. You want to dry out the meringue, not brown it. If your oven runs hot, you might need to go even lower. Use an oven thermometer to check if your oven is accurate. This step takes 10 minutes to preheat.
- Prepare the Egg Whites: Separate your eggs. Make sure no yolk gets into the whites. Place the whites in your mixing bowl. Start whipping them on medium speed. After about a minute, they will become foamy and white. This is the first stage. It looks like bubble bath. Add the vinegar now. Whip for another minute. The vinegar helps the foam hold its structure. It will become stiffer.
- Add the Sugar: Slowly add the granulated sugar, one tablespoon at a time, while the mixer is running. Do not dump it all in at once. If you dump it in, it might not dissolve. You want the sugar to dissolve completely into the egg whites. This takes about 3-4 minutes. The mixture should become thick, glossy, and stiff. When you lift the beaters, the peaks should stand up straight. They should not droop. This is called “stiff peaks.” If you turn the bowl upside down, the meringue should stay in place. This step is crucial. If you rush it, the cookies will collapse.
- Prepare the Baking Sheets: Line your baking sheets with parchment paper. If you are using a piping bag, fit it with a round tip. If you are using a Ziploc bag, cut a small hole in the corner. About half an inch is a good size. If the hole is too big, the cookies will spread. If it is too small, the meringue will be hard to pipe.
- Pipe the Ghosts: Fill the bag with meringue. Squeeze out small blobs onto the parchment paper. You want them to be about 1.5 inches wide. They will not spread much in the oven, so size them how you want them to be. For the ghost shape, pipe a round base, then a smaller round on top. It should look like a little blob with a head. Don’t worry about perfection. The lumps make them look more like ghosts. Pipe them close together, as they will not spread. This step takes about 5-10 minutes depending on how many you make.
- Bake: Place the sheets in the oven. Bake for 90 minutes to 2 hours. The time depends on the size of your ghosts and the humidity in your kitchen. They are done when they are dry to the touch and release easily from the parchment paper. They should be hard, not soft. If they are soft in the middle, they need more time. Do not open the oven door too much, as the temperature drop can cause cracking. This step takes 90-120 minutes.
- Cool: Turn off the oven and leave the cookies inside with the door slightly ajar. Let them cool completely in the oven. This gradual cooling helps prevent cracking. It takes about an hour to cool. Once cool, they will be crunchy. If they are still chewy, they need more drying time. Store them in an airtight container once they are completely cool.
Keep an eye on them during the last 30 minutes. If you see them browning, they are getting too hot. Lower the temperature slightly. The goal is white, not golden. If they turn brown, they taste like caramel, and we want them to taste like sugar and air.
Cooking Tips & Techniques
There are a few tricks to making perfect meringue every time. I have failed at this before. I have made flat, weepy meringues that stuck to the pan. It is embarrassing. But I learned from my mistakes. Here is how to avoid those pitfalls.
Room Temperature Eggs: I cannot stress this enough. Cold egg whites do not whip to the same volume. Take your eggs out of the fridge at least an hour before you start. If you forget, you can place the whole eggs in a bowl of warm water for 10 minutes. It speeds up the process. But be careful not to cook them. Warm, not hot.
No Fat Allowed: Any trace of fat will stop the egg whites from whipping. Make sure your bowl and beaters are completely clean and dry. If you washed your bowl with dish soap, rinse it very well. Soap can leave a film. Wipe the bowl with a paper towel dipped in vinegar or lemon juice to remove any grease. It is a pro tip that makes a huge difference.
Dissolve the Sugar: To check if the sugar is dissolved, rub a little bit of the meringue between your fingers. If it feels gritty, keep whipping. It should feel smooth like silk. If it is gritty, the sugar will not dissolve in the oven, and the cookies will be crunchy in a bad way. They will have sugar crystals that are unpleasant to eat.
Humidity is the Enemy: Meringue is hygroscopic, which means it absorbs moisture from the air. If it is a humid day, your meringue might not dry out properly. You might need to bake them longer. If you live in a humid climate, consider adding a tablespoon of cornstarch to the recipe. It helps absorb excess moisture. Also, keep the oven door closed as much as possible. Every time you open it, steam escapes, but the temperature drops too.
Don’t Overmix: Once you add the sugar, do not whip for too long. If you whip it for 10 minutes, it might start to separate. You will see water at the bottom of the bowl. That is bad. Whip until stiff peaks form, then stop. It usually takes 3-4 minutes after adding the sugar. Listen to the mixer. It should sound thick and heavy, not thin and splashing.
Variations & Adaptations
While the classic white ghost is the best, you can play around with this recipe. Here are some ideas to customize your meringues.
- Colored Ghosts: Add a drop of food coloring to the meringue before piping. Pink ghosts for Valentine’s Day, orange for Halloween, green for St. Patrick’s Day. Use gel food coloring, not liquid. Liquid food coloring adds too much water and can ruin the meringue structure. Gel coloring is concentrated and doesn’t affect the texture. I made pink ghosts for a baby shower, and they were a hit.
- Chocolate Dipped: Once the cookies are cooled, dip the bottom half in melted chocolate. Dark chocolate, milk chocolate, or white chocolate. Let the chocolate set on parchment paper. It adds a nice contrast to the sweet meringue. It also makes them look like little ghosts with shoes. It is a fun twist for kids.
- Flavored Extracts: Swap the vinegar for lemon juice if you want a citrusy taste. Or add almond extract for a marzipan-like flavor. Almond meringues are classic in France. They taste sophisticated and are perfect for tea time. Just be careful not to add too much liquid extract, as it can thin the meringue. A quarter teaspoon is enough.
- Gluten-Free: This recipe is naturally gluten-free. Egg whites and sugar are gluten-free. Just make sure your vinegar and sugar are processed in a gluten-free facility if you have celiac disease. It is a safe treat for gluten-sensitive guests. I often serve these at parties because I don’t have to worry about cross-contamination.
- Low-Sugar Option: You can use a sugar substitute like erythritol or monk fruit sweetener. However, the texture will be different. It might not be as crunchy. It might be more chewy. And it might have a cooling effect in the mouth. It is not the same experience, but it is an option for those watching their sugar intake. I haven’t tried this myself, so proceed with caution.
I tried making chocolate chip meringues once. It was a disaster. The chocolate melted and made the meringue soggy. Stick to dry mix-ins if you want to add anything. Crushed peppermint candies work well. They add a nice crunch and flavor. But keep it simple. The beauty of this recipe is in its simplicity.
Serving & Storage Suggestions
These cookies are best served at room temperature. They should be crisp and dry. If they are soft, they are not done. Serve them on a white plate to highlight their ghostly appearance. They look great stacked in a glass jar with a black ribbon. It is a perfect gift for neighbors or teachers.
Storage: Store the cookies in an airtight container at room temperature. They will keep for up to two weeks. If they become soft, put them back in the oven at 200°F for 15 minutes to crisp them up again. Moisture is the enemy, so keep them away from the sink or dishwasher. If you live in a humid area, add a silica gel packet to the container. It absorbs moisture and keeps the cookies crisp.
Freezing: You can freeze these cookies. Place them in a single layer in a freezer-safe container. They will keep for up to three months. Thaw them at room temperature before serving. Do not refrigerate them, as the fridge is humid. Refrigeration will make them sticky and soft. Always store at room temperature.
Serving Ideas: Serve these with a cup of coffee or tea. They are a perfect afternoon snack. They also go well with hot chocolate. The crunch contrasts nicely with the warm drink. I often serve them at Halloween parties alongside my soft and chewy pumpkin snickerdoodle cookies. The variety of textures keeps guests interested. They are also great for trick-or-treaters. Put a few in a small bag with some candy. It is a healthy-ish treat option for parents who are worried about sugar overload. Well, it is sugar, but it is light sugar.
Nutritional Information & Benefits
These cookies are simple, but let’s talk about what is in them. Egg whites are a great source of protein. They are low in fat and calories. Sugar is the main source of calories here, and it is simple carbohydrates. So, these cookies are not a health food. But they are lighter than a brownie or a cookie made with flour and butter.
Calories: Each ghost cookie has about 15-20 calories. It depends on the size. You can eat a few without feeling guilty. They are low in fat because there is no butter or oil. They are high in protein relative to their calorie count, thanks to the egg whites.
Allergens: The only allergen here is eggs. If you are allergic to eggs, you cannot make these. There are no dairy, gluten, or nut allergens. This makes them safe for many people with dietary restrictions. Just check your sugar and vinegar labels to be sure.
Wellness Perspective: I love these cookies because they satisfy a sweet tooth without making me feel heavy. After a big meal, I want something light. These cookies provide that. They are not filling, but they are satisfying. The crunch is therapeutic. It is a sensory experience. Eating them is a small moment of joy. It is a reminder that cooking can be simple and fun. You don’t need to overcomplicate things. Sometimes, the simplest recipes are the best. They are a treat for the soul, not just the stomach.
Conclusion
These crispy 3-ingredient ghost meringue cookies are a Halloween staple in my house. They are easy to make, fun to shape, and delicious to eat. I love how simple they are. You don’t need to be a professional baker to make them. You just need eggs, sugar, and vinegar. That is it. I make them every year, and they never fail to impress. My kids love helping me pipe the ghosts. They get messy, but they have fun. It is a great family activity.
I encourage you to try this recipe. Customize it with colors or chocolate dips if you want. But start with the classic white ghost. It is the purest form of meringue. It is a testament to the power of simple ingredients. When you taste that crisp, sweet cloud, you will understand why I love it. It is a moment of pure joy. It is a reminder that baking can be easy and fun. It is not about perfection. It is about the experience.
Please try this recipe and let me know how it goes. Leave a comment below with your thoughts. Did you add food coloring? Did you dip them in chocolate? I love hearing about your adaptations. Share your photos on social media and tag me. I want to see your spooky creations. And if you liked this recipe, check out my spooky witch finger cookies for another fun Halloween treat. Happy baking, and stay spooky!
FAQs
Why are my meringues sticky?
If your meringues are sticky, they likely did not dry out completely. This can happen if you did not bake them long enough, or if your oven temperature was too high. Make sure you bake them at 200°F for at least 90 minutes. Also, let them cool in the turned-off oven with the door ajar. This gradual cooling helps them dry out further. If they are still sticky after cooling, put them back in the oven for another 30 minutes.
Can I use liquid egg whites instead of fresh eggs?
Yes, you can use pasteurized liquid egg whites from a carton. They are convenient and save time. However, they might not whip to the same volume as fresh egg whites. You might need to whip them longer to get stiff peaks. The texture might be slightly different, but they will still taste good. I prefer fresh eggs for the best texture, but liquid whites are a good shortcut.
Why did my meringues spread in the oven?
Meringues should not spread much in the oven. If yours did, it might be because the sugar did not dissolve completely before baking. Make sure you whip the meringue until it is glossy and smooth. Also, if your oven was too hot, the meringue might have melted before it set. Check your oven temperature with a thermometer. 200°F is the ideal temperature for drying, not baking.
How long do these cookies last?
These cookies last for up to two weeks when stored in an airtight container at room temperature. They might become soft if the humidity is high. If they become soft, you can crisp them up by putting them back in the oven at 200°F for 15 minutes. Do not refrigerate them, as the moisture in the fridge will make them sticky.
Can I make these cookies ahead of time?
Yes, these cookies are great for making ahead. You can make them a week before your Halloween party. They actually get crunchier as they sit. Just make sure they are completely cool before storing them. If you store them while they are warm, condensation will form and make them soft. Make them, let them cool, store them, and they will be ready when you need them.
Pin This Recipe!
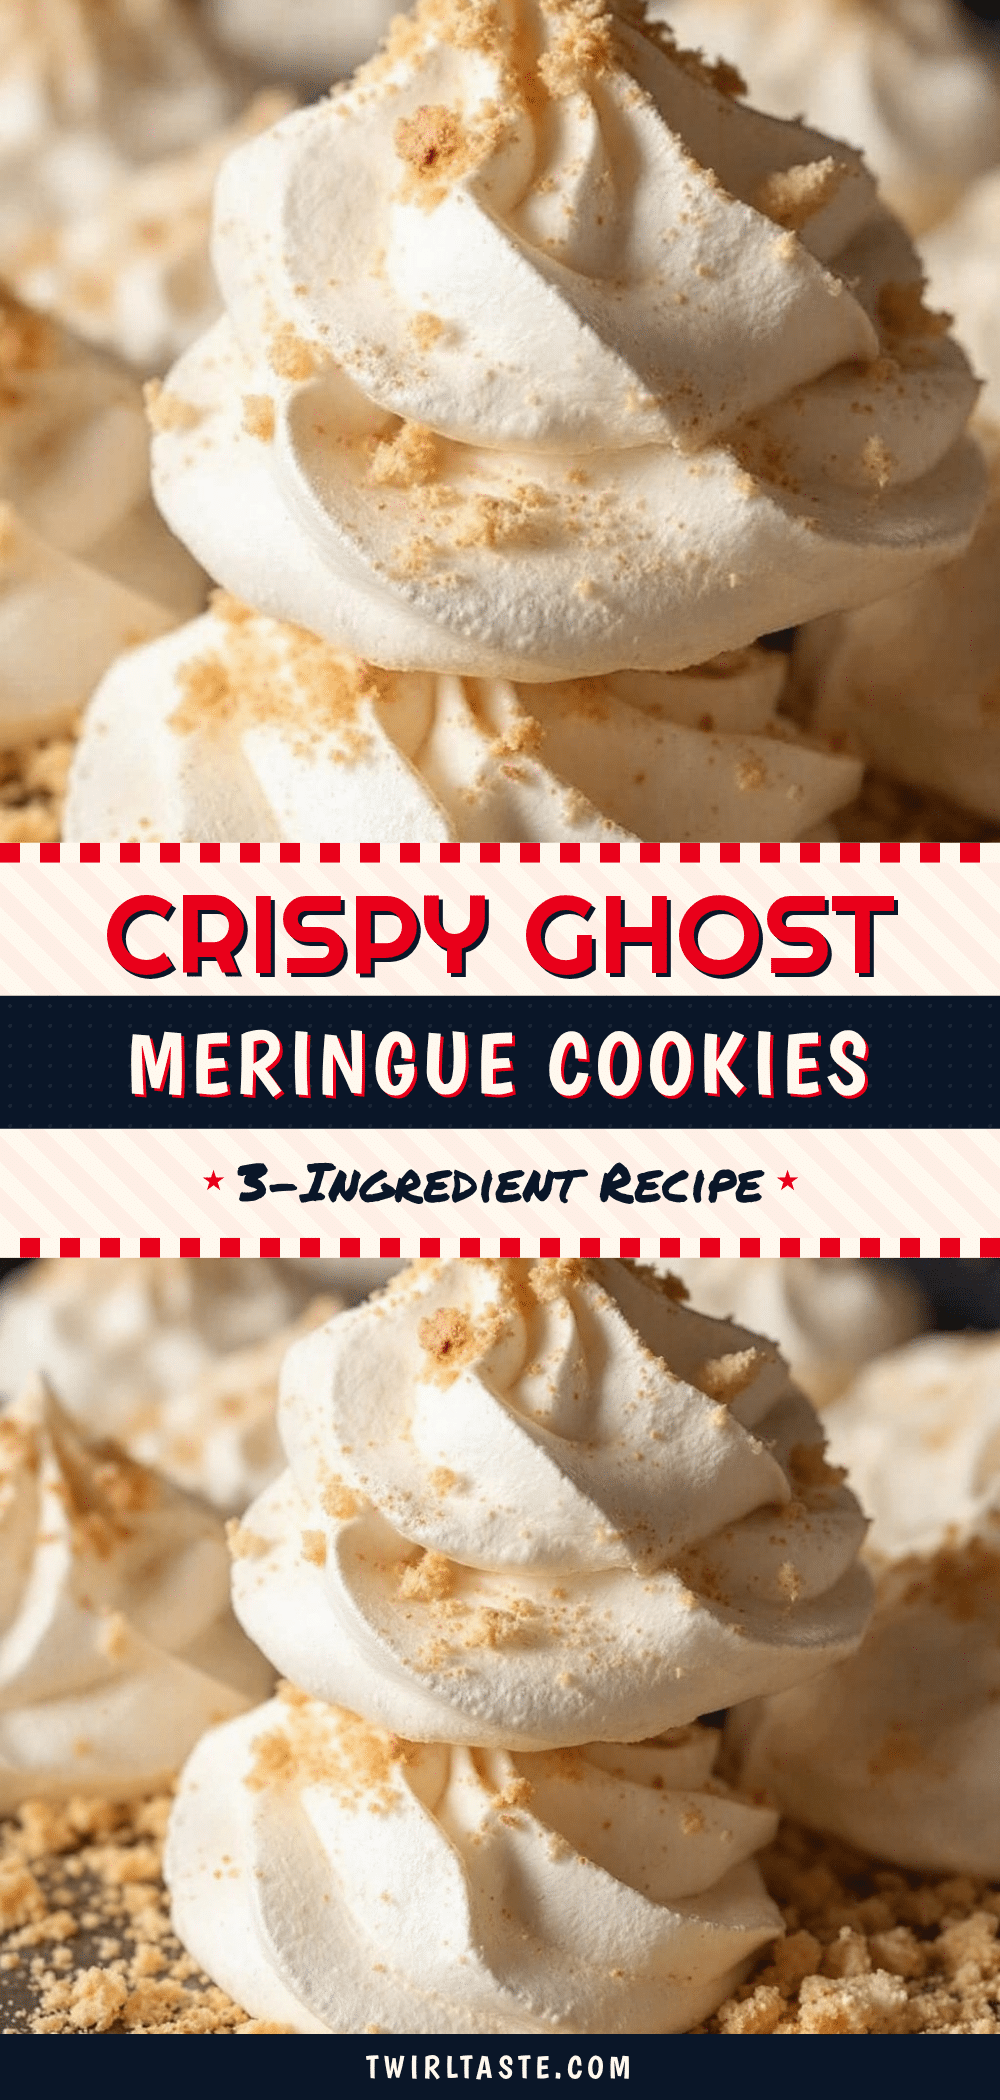
Crispy 3-Ingredient Ghost Meringue Cookies: Easy Halloween Treat
These light, airy, and crunchy meringue cookies are shaped like ghosts for a spooky Halloween treat. Made with just egg whites, sugar, and a secret stabilizer, they are easy to make and perfect for last-minute parties.
- Prep Time: 10 minutes
- Cook Time: 90-120 minutes
- Total Time: 100-130 minutes
- Yield: Approximately 20-24 cookies
- Category: Dessert
- Cuisine: American
Ingredients
- Large egg whites (room temperature)
- Granulated sugar
- White vinegar
- Cornstarch (optional, for extra crunch)
- Vanilla extract (optional, for flavor)
Instructions
- Preheat oven to 200°F (95°C).
- Separate eggs, ensuring no yolk gets into the whites. Place whites in a clean, dry glass or metal mixing bowl.
- Whip egg whites on medium speed until foamy. Add vinegar and whip for another minute until stiffer.
- Slowly add granulated sugar, one tablespoon at a time, while mixing. Continue whipping for 3-4 minutes until stiff, glossy peaks form.
- Line baking sheets with parchment paper.
- Pipe meringue into small ghost shapes (round base with a smaller round on top) onto the prepared sheets.
- Bake for 90 minutes to 2 hours until dry to the touch and hard.
- Turn off the oven and let cookies cool completely inside with the door slightly ajar to prevent cracking.
- Store in an airtight container at room temperature.
Notes
Ensure all equipment is completely clean and free of fat/oil, as this prevents egg whites from whipping. Room temperature egg whites whip to a higher volume. Do not open the oven door frequently during baking to maintain temperature. If cookies are sticky, they need more drying time.
Nutrition
- Serving Size: 1 cookie
- Calories: 18
- Sugar: 4
- Carbohydrates: 4
- Protein: 0.5
Keywords: Halloween, meringue, ghost cookies, 3-ingredient recipe, easy dessert, gluten-free, spooky treats


